Using and Managing Modules
Modules are the building blocks of your Course, containing the core learning content. Think of a Module as an individual lesson. Whether it's watching a video, reading a PDF, answering an assignment question, or taking a quiz, Modules come together to form your course curriculum. There are different types of modules available, each designed to meet specific content needs. Simply select the module type that aligns best with your lesson objectives.
This guide provides an overview of Module types, creating Modules, adding them to a Course, and managing Modules. For detailed instructions on specific Module types, follow the links included in their descriptions.
Note: Learners can only access a Module if it has been added to a Course they are enrolled in. The exception is when using a Membership Plan, which can provide access to Modules independently of course enrollment. Learn more about Membership Plans here.
Types of Modules
There are ten different types of Modules available for you to use. Let's take a quick look at each of them.
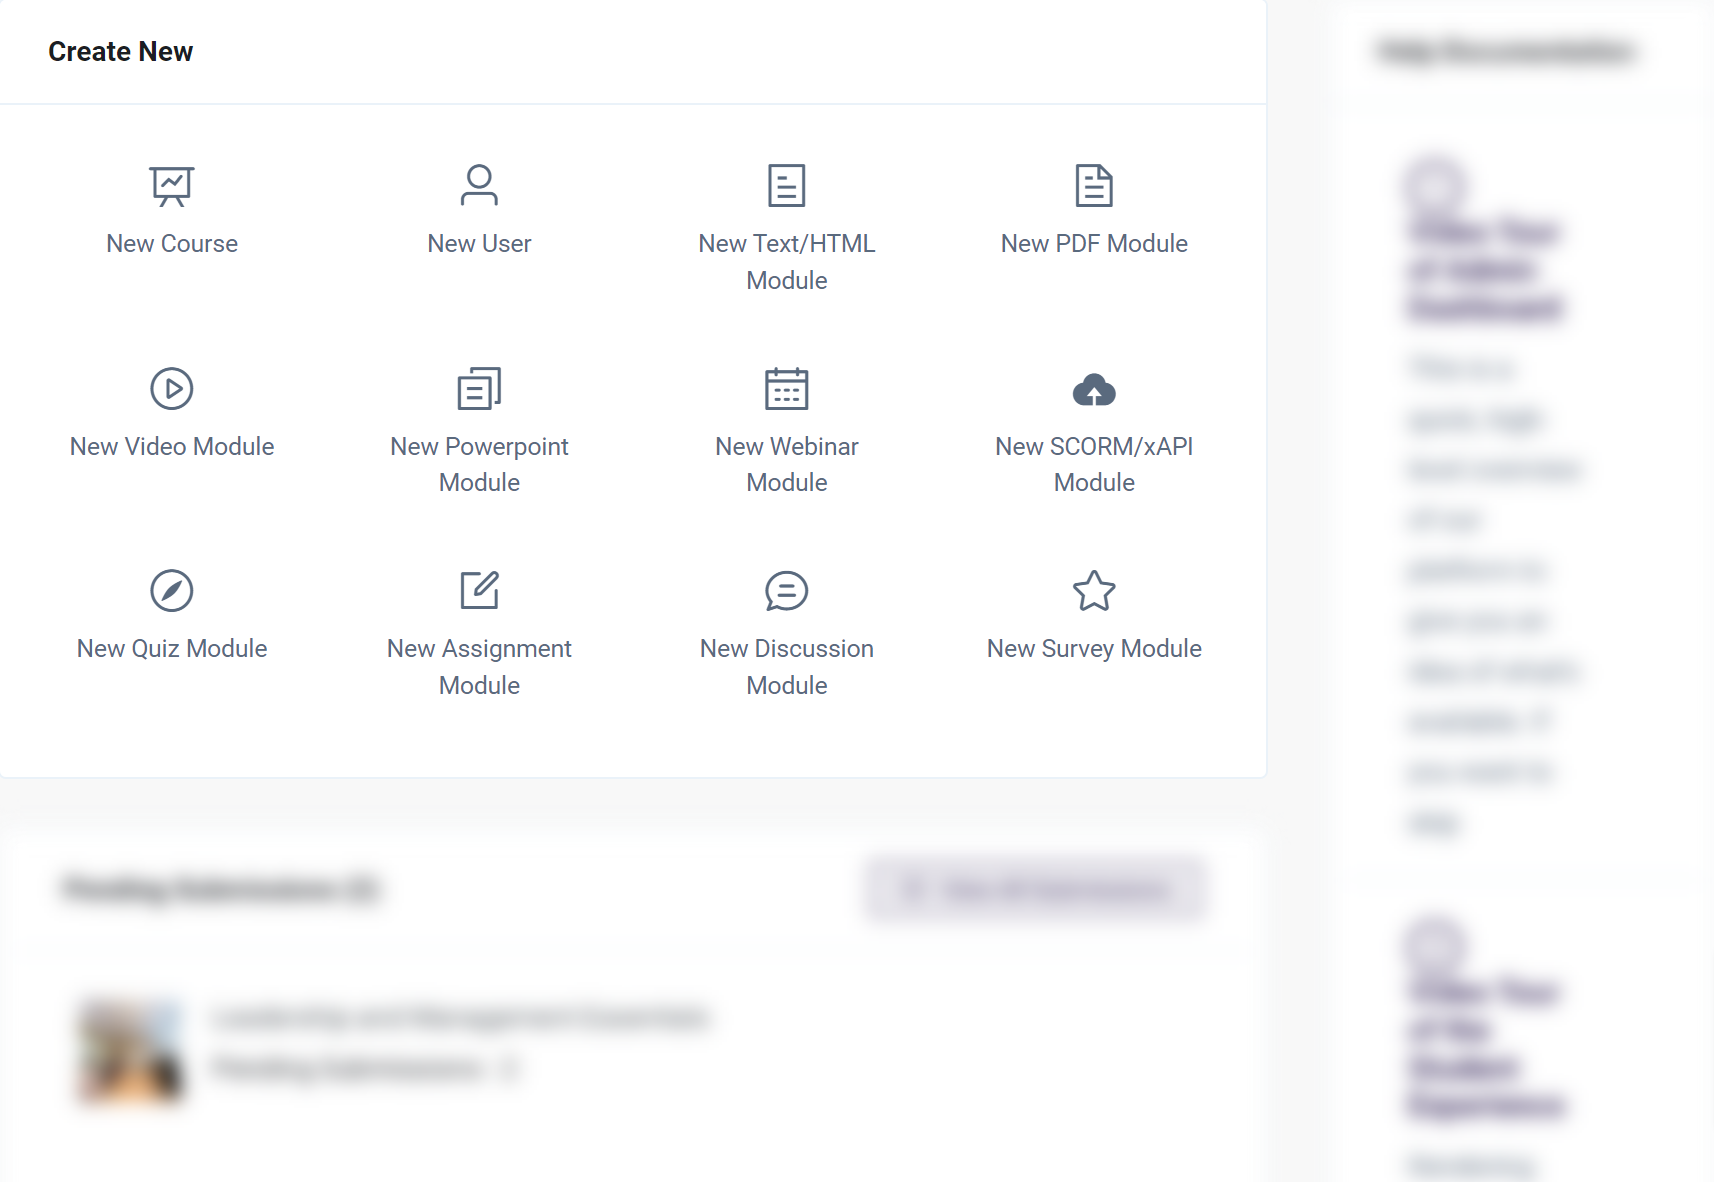
- Text/HTML Modules: A blank canvas to add any content, similar to building a webpage for a lesson. Learn more about Text/HTML Modules here.
- PDF Modules: PDF Modules are custom-built to display your PDF files in an easy-to-read format with controls for easy navigation. Learn more about PDF Modules here.
- Video Modules: Allows you to easily share video content with your learners. You can display YouTube or Vimeo videos, or upload your video file directly. Learn more about Video Modules here.
- PowerPoint Modules: Allow learners to view PowerPoint presentations directly within the course. Learn more about PowerPoint Modules here.
- Webinar Modules: Host live webinars using MS Teams, Zoom, GoToTraining, GoTo Webinar, or Vimeo Live from inside your course. Learn more about Webinar Modules here.
- SCORM Modules: SCORM files are LMS files created outside the Academy of Mine using the SCORM standard. If you already have SCORM files made, you can add them to your course this way. Learn about SCORM here and more about SCORM Modules here.
- Quiz Modules: Create customizable quizzes with randomization and grading options. Learn more about QUiz Modules here.
- Assignment Modules: Provide a prompt for learners to respond to via text or uploaded files for grading. Learn more about Assignment Modules here.
- Discussion Modules: Facilitate interactive discussions where learners can comment and reply. Learn more about Discussion Modules here.
- Survey Modules: Collect feedback from learners through customizable surveys. Learn more about Survey Modules here.
- Flash Card Modules: Present course content in an engaging flip-card format with text or images. Learn more about Flash Card Modules here.
Creating a Module & Adding to a Course
Modules must be part of a Course for learners to access them. If you’re using Membership Plans, you can assign categories to modules.
Steps to Create a Module
-
From the Owner Dashboard, navigate to Courses > Modules.
-
Select the Module type you want to create.
Alternatively, you can choose to add any Module you'd like from the Quick Add menu, found in the top right corner of the owner dashboard.
-
Complete the setup steps for your Module and click Save.
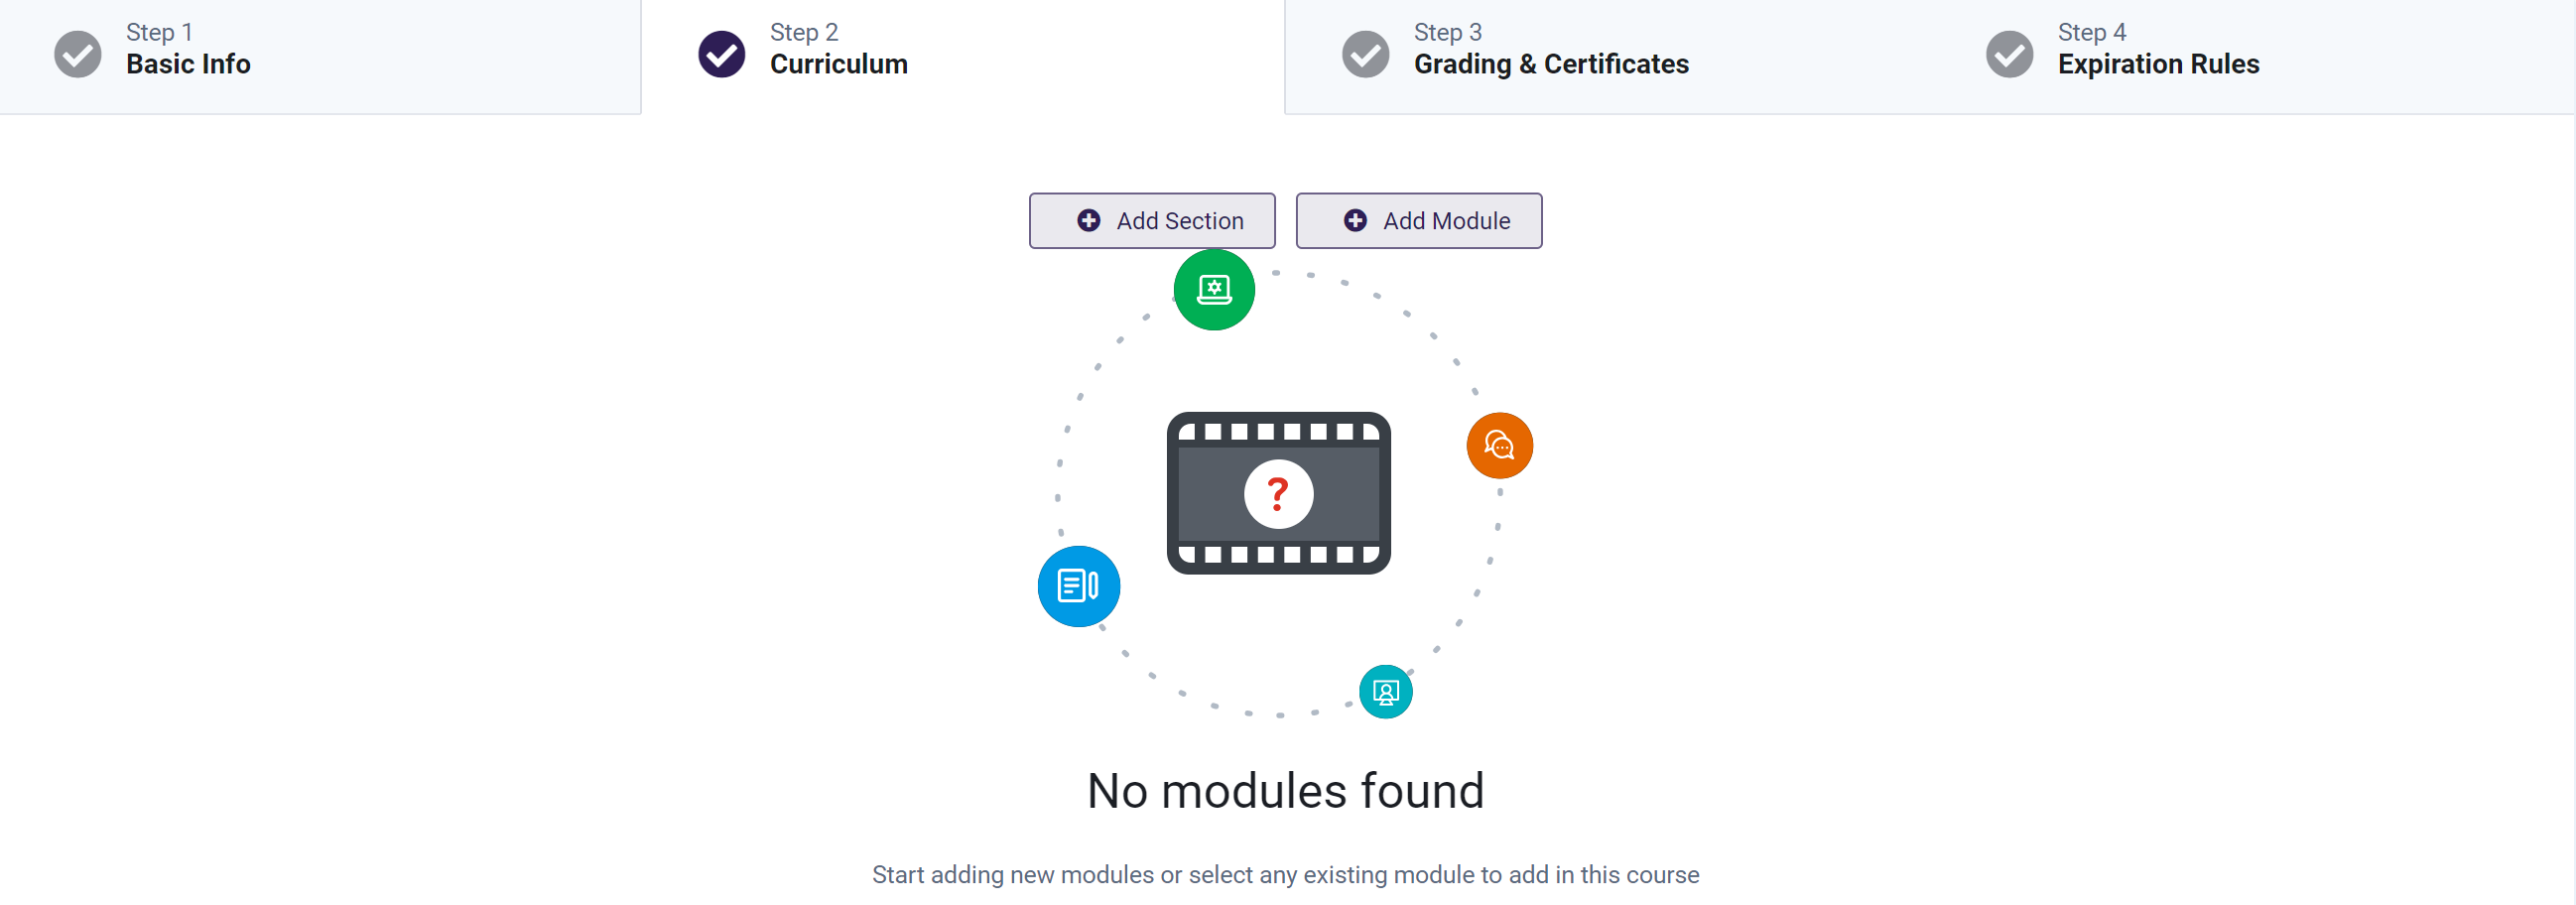
Adding a Module to a Course
To add the modules to your courses, go to the Create/Edit Page of the Course and switch to the Curriculum tab. Here you can drag and drop Modules to rearrange their order.
You can apply the following settings to each module:
- Lock Modules: Prevent learners from skipping Modules without completing them.
- Set Availability: Make Modules available immediately or on a scheduled date.
- Set Timers: Enforce a minimum time learners must spend on the Module.
You can learn more about adding modules to the course here.
Creating Module Categories
Module categories help organize content and assign Modules to specific Membership Plans. Here is how you can add categories to modules
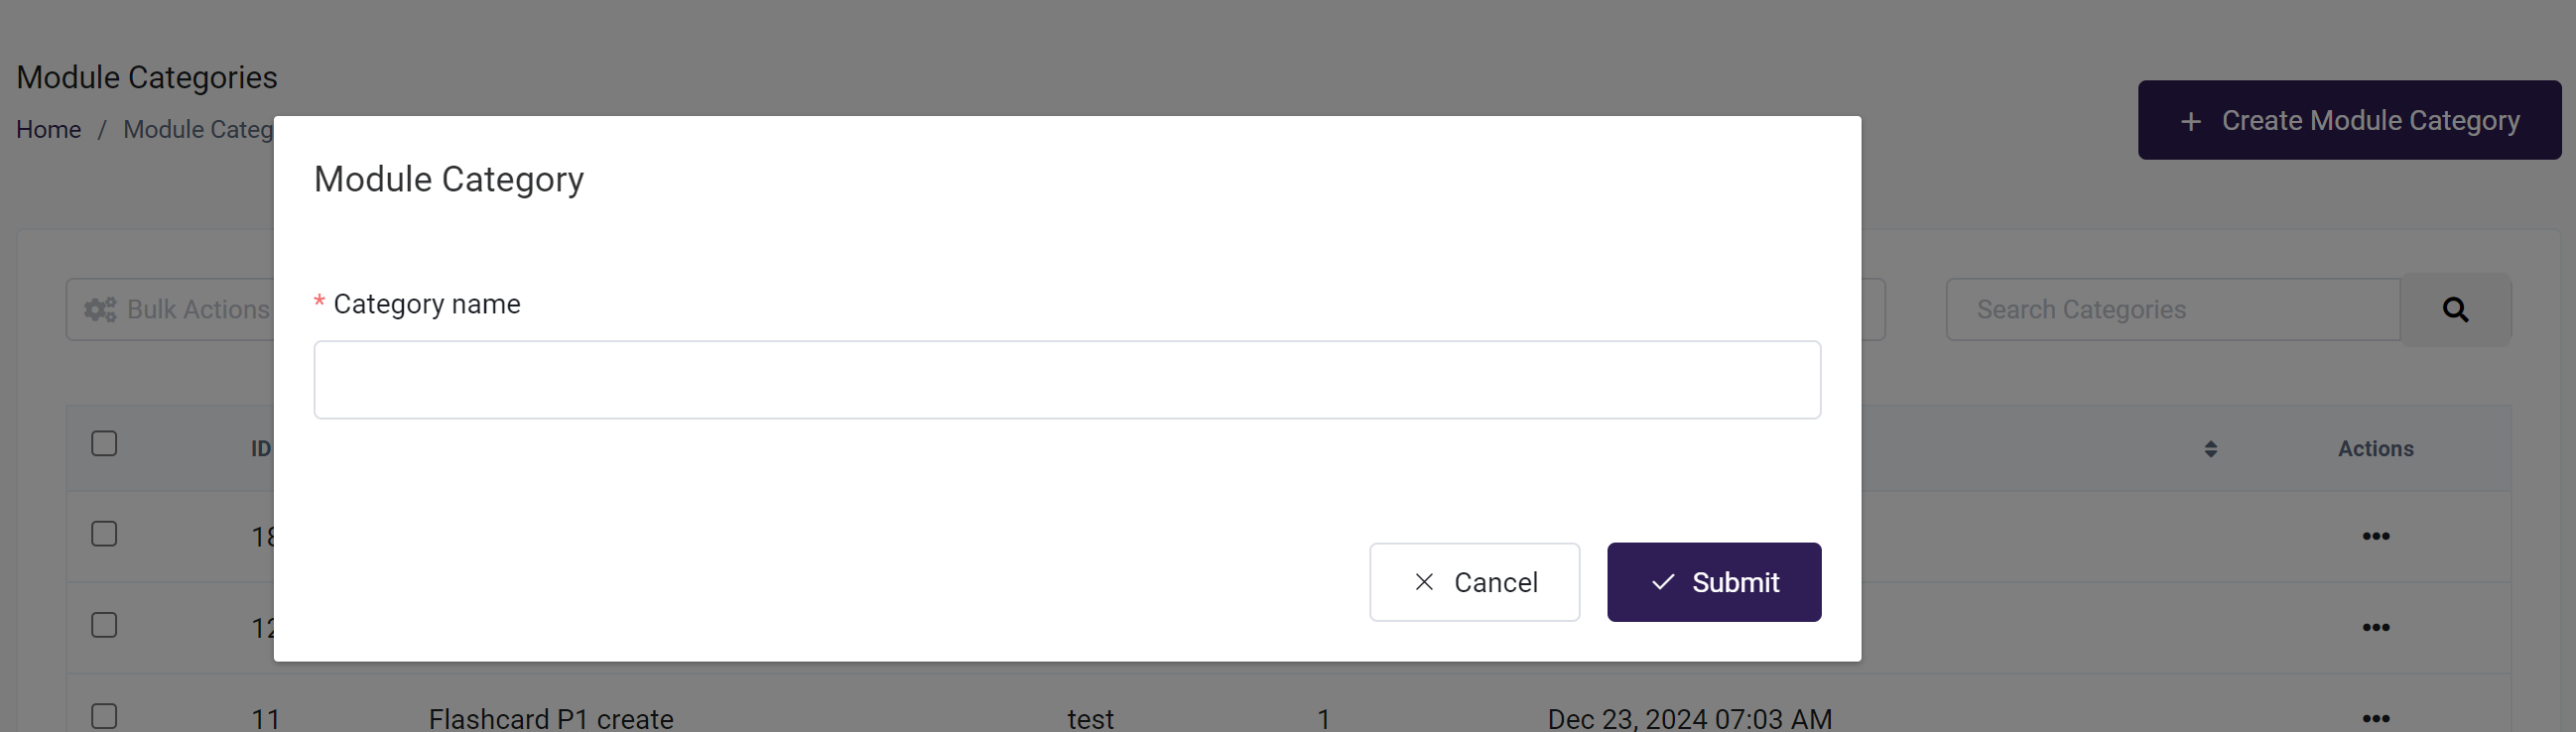
-
From the Owner Dashboard, navigate to Courses > Module Categories
-
Click Create Module Category
-
Enter the name of the category and click Submit
-
To add a Module to a category, click on the Module type from the Courses tab
-
Select the Module you want to add to the category
-
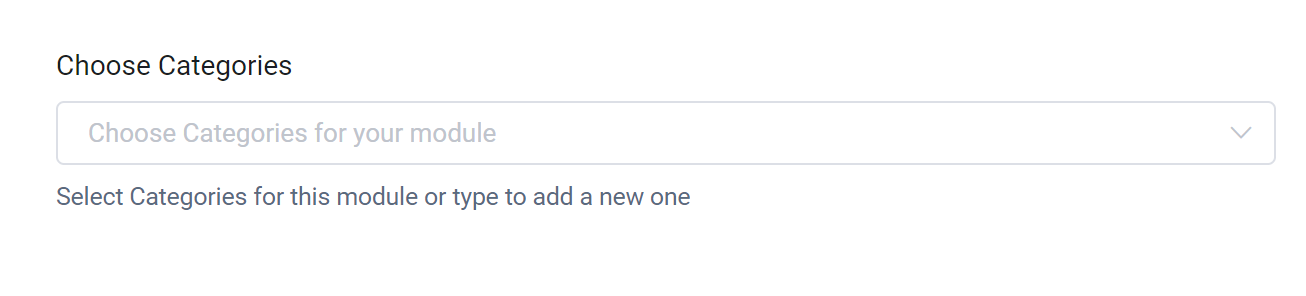
Under the Choose Categories option, select the appropriate category
-
Click Update Module to save your changes.
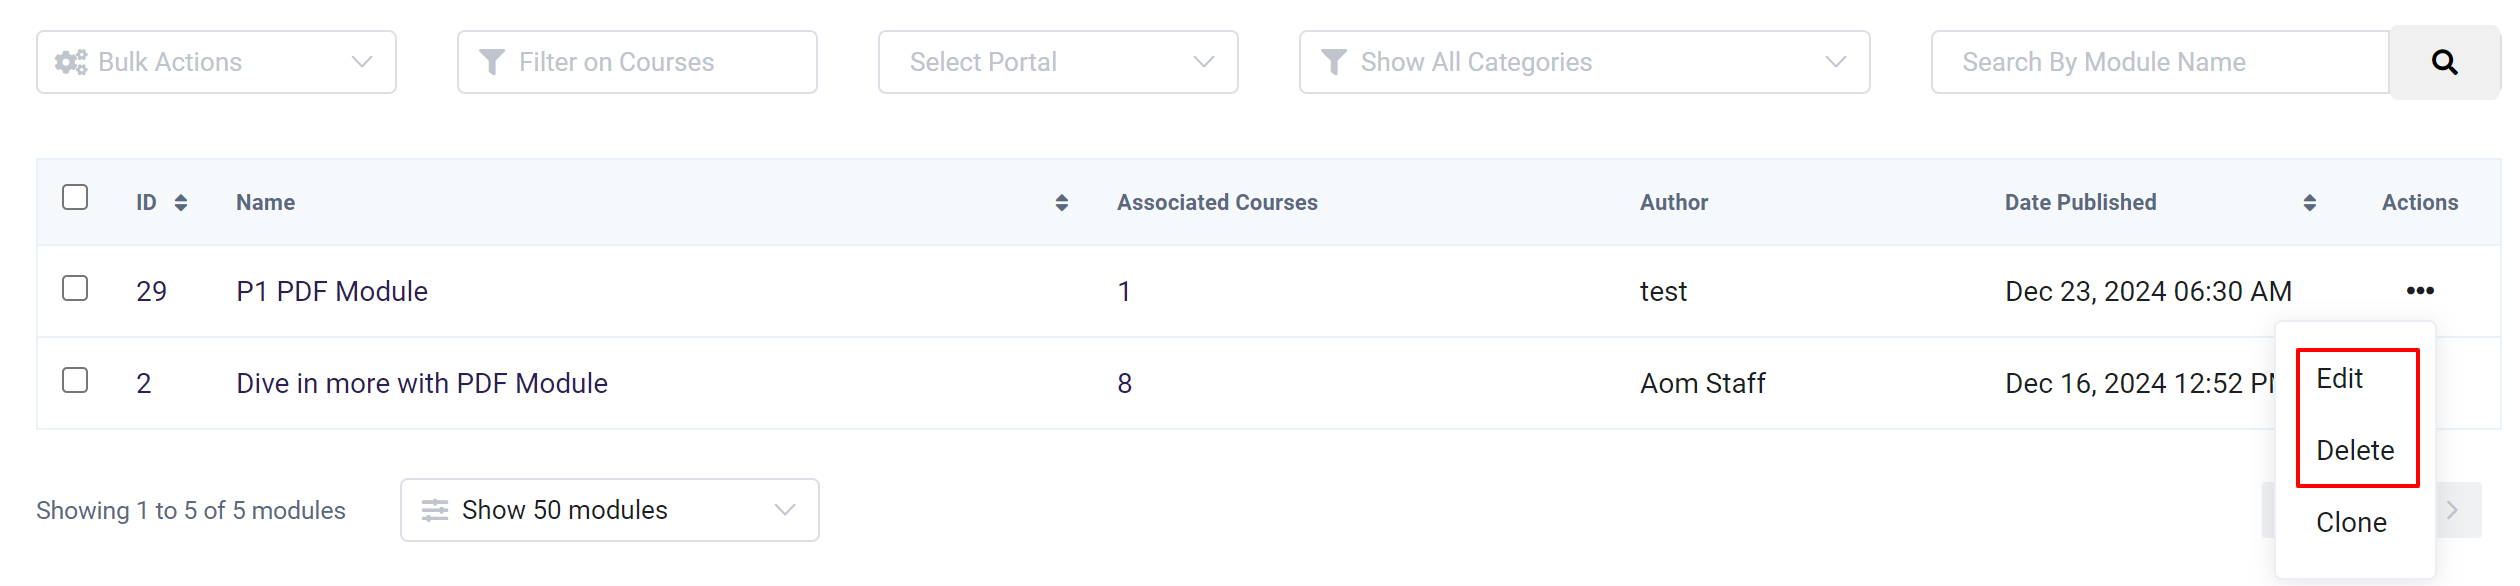
Viewing, Editing or Deleting Modules
All Modules you create will be stored in the Admin dashboard by Module type. This is where you can view, edit, and delete them by using the steps below.
-
From the owner dashboard, choose Courses, and then select the type of Module you want to view, edit, or delete. For example, you can find all your PDF Modules by navigating to Courses > PDF Modules. This will show you a list of all Modules of that type.
-
Click the three-dot action menu to the right of the Module you'd like to Edit or Delete
-
To delete, click Delete and Confirm the deletion
-
To edit, choose Edit. Make any necessary changes to the Module, and then click Update Module
-
For certain kinds of Modules, you'll also be able to Preview what it will look like
-
You may edit the slug for your modules once they are saved. The slug is the unique URL address where the module can be found. The Slug is auto-generated from the Name you give your module, but you do have the option to edit and change it if you wish.

-
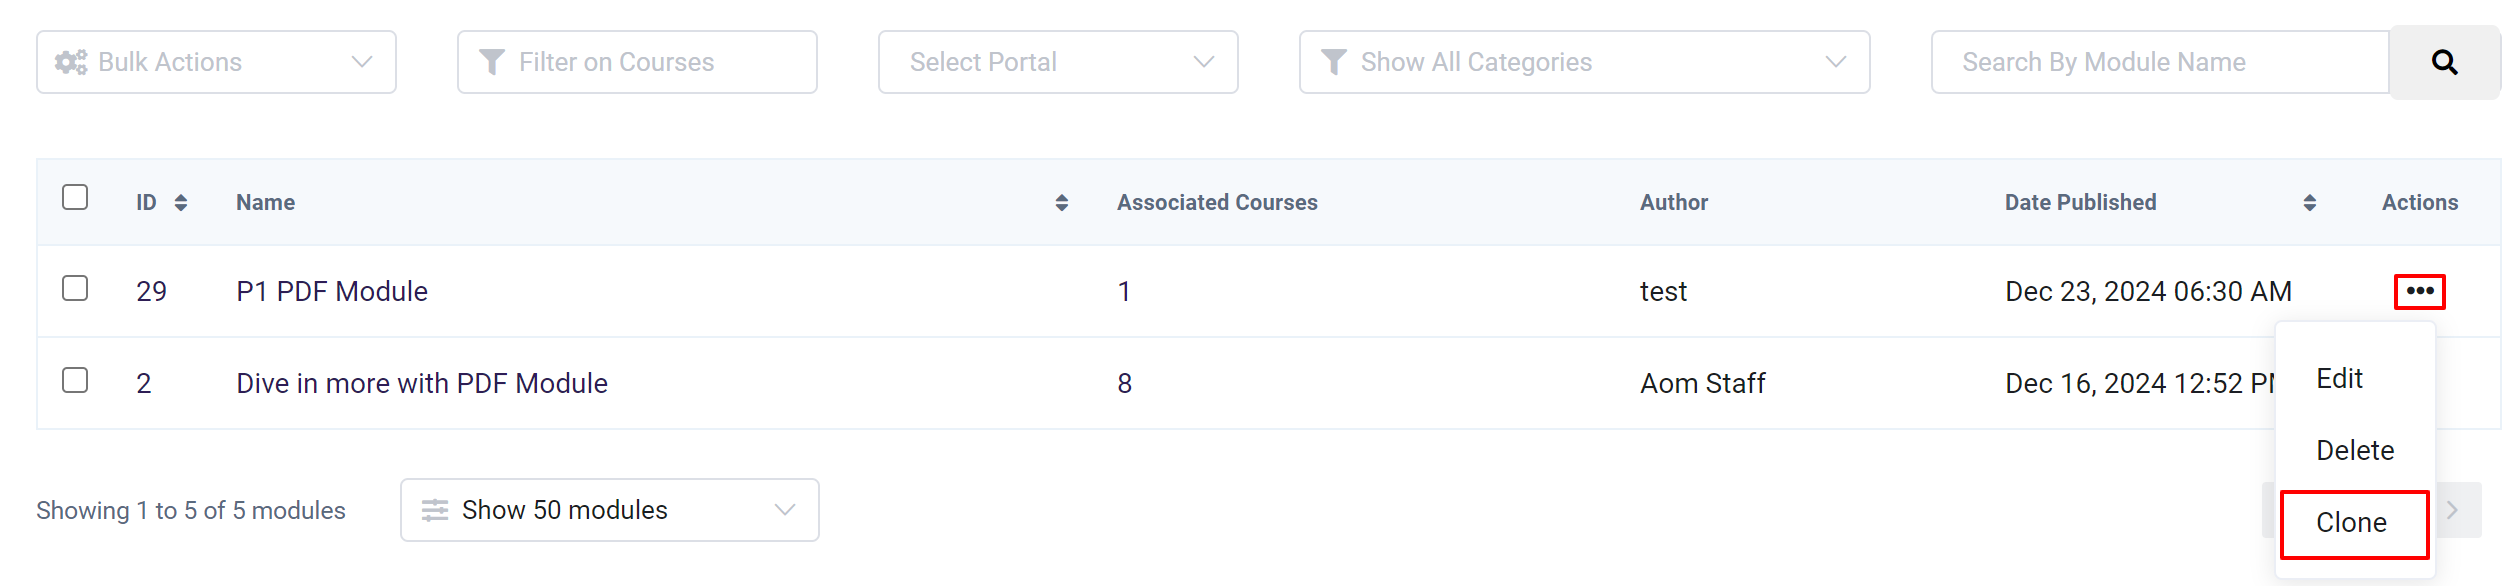
Cloning Modules
Cloning Modules are useful for reusing or modifying content for different courses. All module types can be cloned.
To clone a module,
-
From the owner dashboard, navigate to Courses > Modules and select the Module type.
-
Use the three-dot action menu and click Clone.
-
For Quizzes:
- In the confirmation box, choose whether to clone only the Quiz Module or include its questions.
- Note: Editing cloned questions will not affect the original questions if new copies are created.
-
A new Module will be created with the suffix "_copy" and will include all original content.