Exporting SCORM Packages for Academy of Mine
Once you have selected a SCORM authoring tool and created the content there, you'll need to export your files correctly to create SCORM packages for use in Academy of Mine. This guide will help you configure your settings to optimize your experience with your SCORM packages. We will go through the basics of exporting a SCORM package, and how to export it with tracking enabled (so you track student course activity in AOM). We'll dive into how to export with iSpring, Articulate 360 (Storyline 360 and Rise 360), and Adobe Captivate authoring tools.
Be sure to review our related guides to working with SCORM packages:
- What is SCORM & Integrating SCORM Packages into Academy of Mine
- What is SCORM?
- Using SCORM Authoring Tools
- Adding a SCORM Module to Your Course
In this article
- Basics of Exporting a SCORM Package
- Export SCORM Package with Tracking Enabled
- Exporting with iSpring
- Exporting with Articulate 360
- Exporting with Storyline 360
- Exporting with Rise 360
- Exporting with Adobe Captivate
- Next Step
Basics of Exporting a SCORM Package
Before covering authoring tool-specific export instructions, let’s first take a look at some basics of exporting a SCORM package:
- Upon publishing and/or exporting a SCORM package, most authoring tools will have an LMS tab under which SCORM options are located
- The SCORM version of your course will be selected while setting up the export
- Student progress course tracking options are also enabled and customized when setting up the SCORM export
Please see below for instructions specific to each authoring tool on how to export a SCORM course with tracking enabled.
Exporting SCORM Package with Tracking Enabled
Student course activity can be tracked within your LMS by enabling tracking when you export SCORM courses.
Warning: While tracking is optional, if you wish to track student activity within any course you must enable tracking before exporting the SCORM package from your authoring tool.
Depending on the specific authoring tool used to create a SCORM course, student progress tracking can be reported along several lines:
- Report on Incomplete, Complete or Passed/Failed statuses
- Report on User Access to the course
- Determine a Complete status by a percentage of slides viewed or a specific number of slides
- Determine a Complete status by quiz/exam scores
- Report on interaction data
Exporting with iSpring
The official iSpring SCORM export tutorial can be found here.
Please view this video for instructions on how to export a SCORM package from iSpring:
Enable Reporting for iSpring SCORM Packages
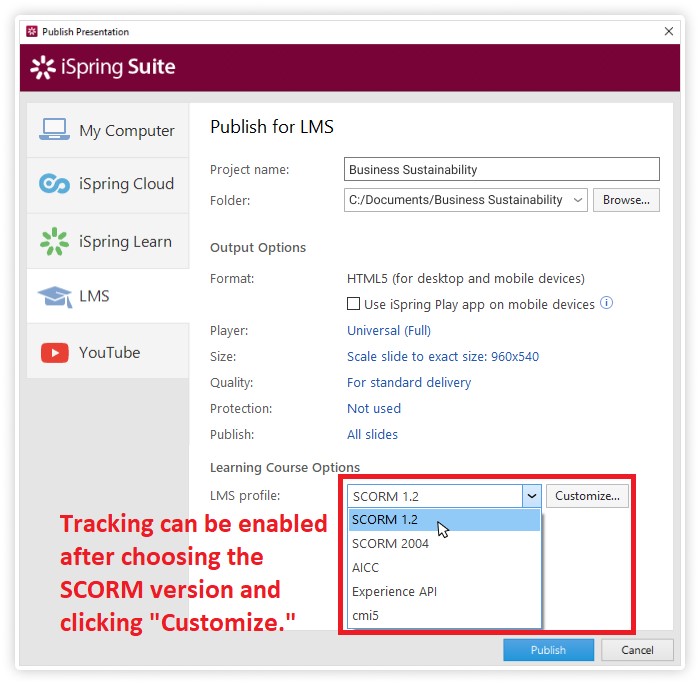
Reporting is enabled on export for iSpring SCORM packages. Once you select the SCORM version under LMS Profile, you may click Customize to enable and customize reporting options.
 Please read below for how to enable reporting and create a manifest file for your iSpring SCORM packages.
To set up the project-level global reporting options:
- With your project already opened, click Edit > Preferences.
- In the Preferences dialog box, choose Reporting on the left panel.
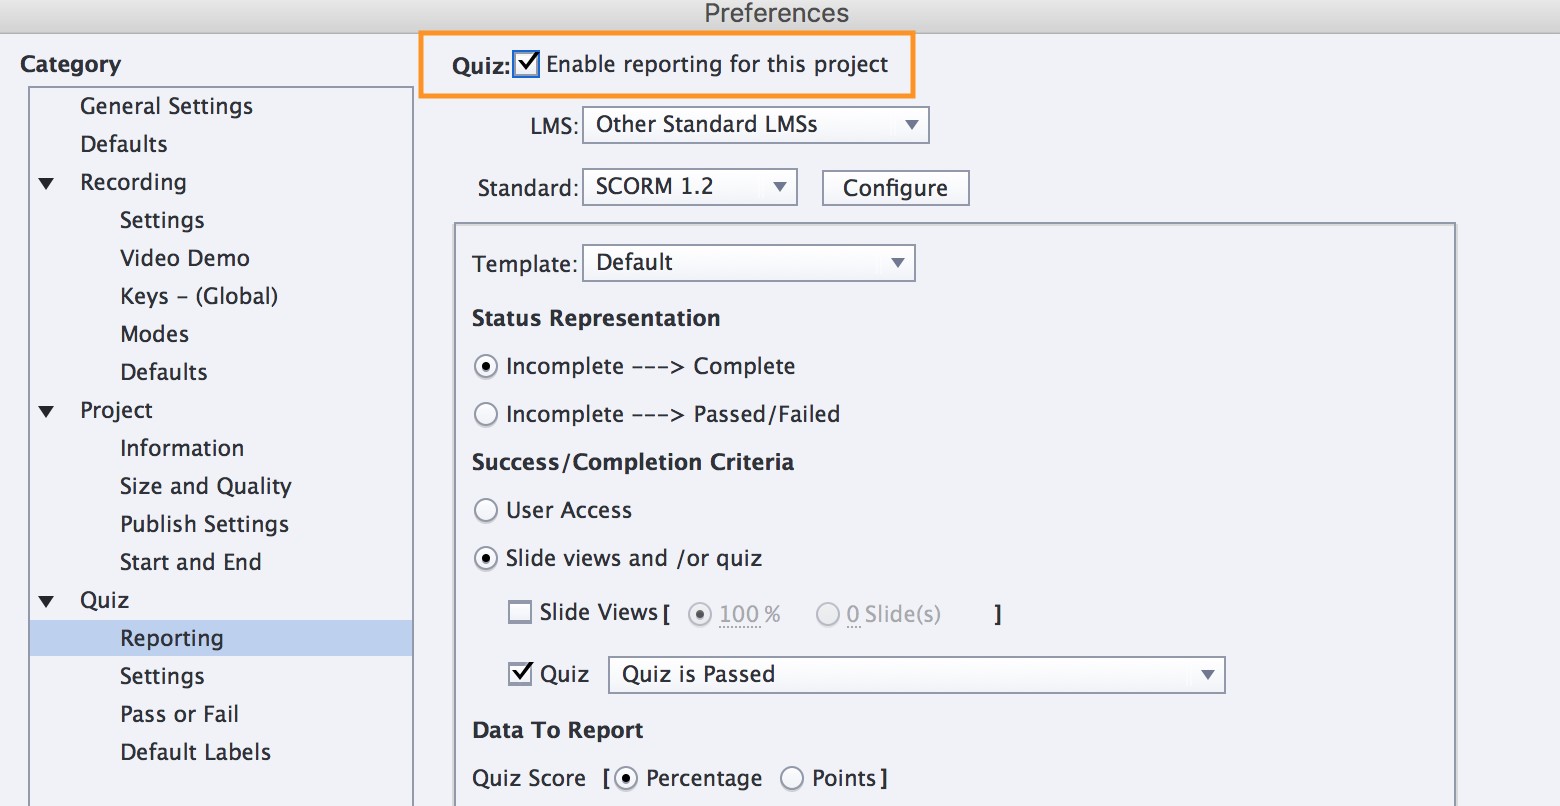
- Enable the option Enable reporting for this project.
- From the LMS drop-down list, choose Other Standard LMSs.
- From the Standard drop-down list, choose the appropriate standard. For example, choose SCORM 1.2.
- Configure the reporting options. If there is a quiz in your project, you can set up the status to be either Incomplete ---> Completeor Incomplete ---> Passed/Failed. The options depend on the type of project and your LMS must be equipped to handle both representations of the status.
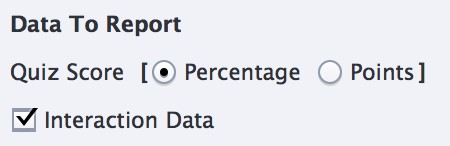
- In the Data to Report section, choose to report Quiz Score as Percentage.
- Ensure that the option Interaction Data is enabled.
Create a Manifest File for iSpring SCORM Packages
Note: iSpring by default does not create a Manifest file for you. You must create a Manifest file for your iSpring SCORM package to work properly.
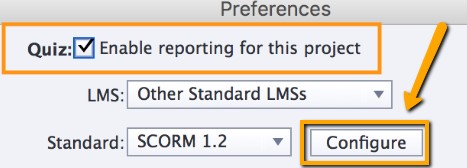
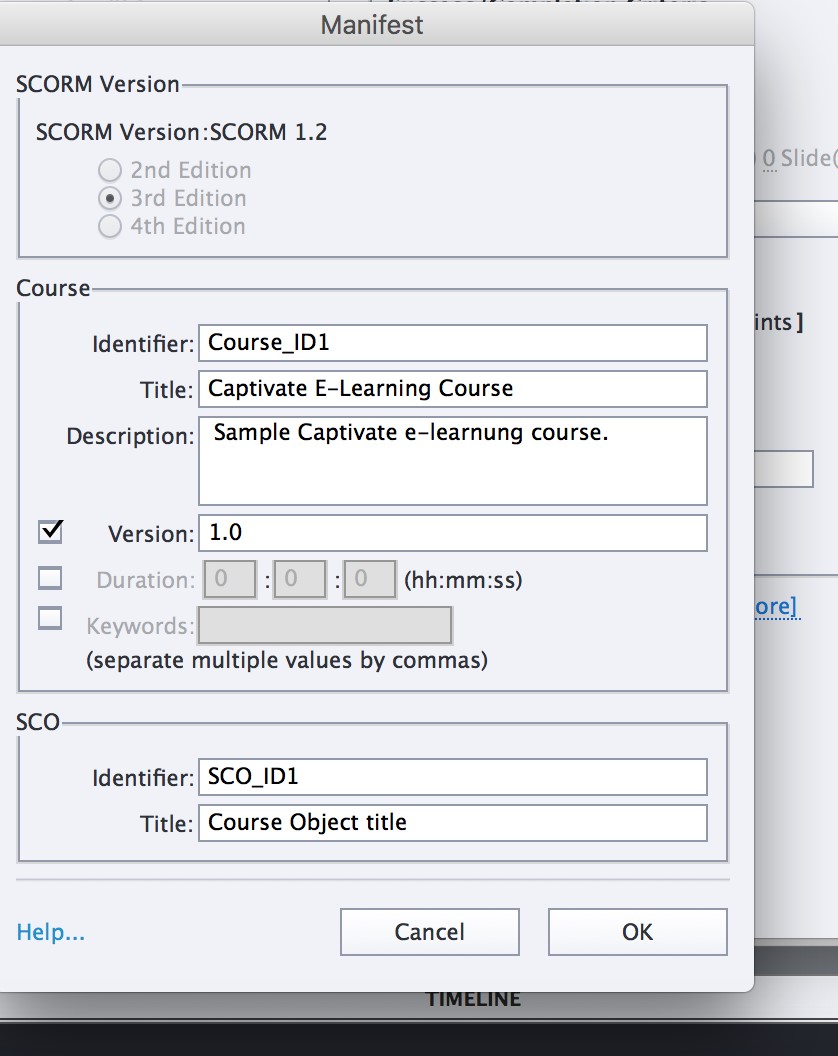
- In the Preferences dialog box, click Configure.
- In the Manifest, enter the course identifier, title, and description that the LMS will use for reporting. Make sure that the course identifier does not contain any spaces.
- To save the changes, click OK.
Exporting with Articulate 360
Articulate 360 allows you to import/publish SCORM courses with both Storyline 360 and Rise 360.
Exporting with Storyline 360
The official Storyline 360 SCORM export tutorial can be found here.
Choose to Publish a Slide, a Scene, or the Entire Course
By default, Storyline will publish your entire course. However, you can now choose to publish a specific scene from your course or even just a single slide. This is helpful when you want to publish multiple courses from the same project file.
Just click the Publish property, then choose the entire project, a single scene, or a single slide.
Choose Reporting and Tracking Options
Click the Reporting and Tracking button to open the following window, where you can choose how your LMS reports and tracks learners' progress.
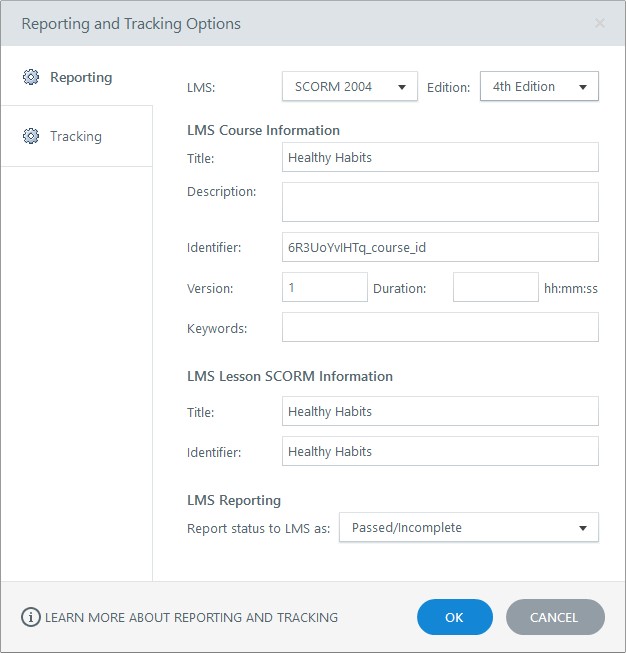
Click the Reporting tab in the upper left corner, then choose a standard from the LMS drop-down.
- Complete the fields in the section called LMS Course Information. If you're publishing for SCORM, also complete the section called LMS Lesson SCORM Information.
- For SCORM, choose your LMS Reporting option. This is the wording you want your LMS to display for learners' statuses in reports
- Click the Tracking tab on the left side of the window and choose one of the following options:
- Track using a number of slides viewed: Mark this option to trigger course completion when learners view a specific number of slides.
- Track using quiz results: Mark this option to track learners based on their quiz results. If your course has multiple quizzes, choose the one you want to track. (This option will be grayed out if your course doesn’t have any result slides.)
- Track using complete course trigger: Mark this option to track learners based on course completion triggers you added to your course. (This option is grayed out if your course doesn't have any completion triggers.)
- Click OK to save your changes.
Export your SCORM course
When you're finished making selections, click the Publish button. When the publishing process is complete, you’ll see the Publish Successful window with several follow-up options. Choose the Zip option.
Exporting with Rise 360
The official Rise 360 SCORM export tutorial can be found here.
The official Rise 360 SCORM reporting tutorial can be found here.
To export with Rise 360, follow these steps:
- Open the course from your Rise 360 dashboard and click Export in the upper right corner of the screen.
- Choose LMS from the Export Type drop-down list.
- Choose an LMS standard: SCORM 2004 or 1.2
- Select a Tracking option (completion percentage, quiz result, or Storyline block) and decide if you want to display an Exit Course Link for learners. (If you're tracking a quiz result and exporting SCORM, you also get to choose a reporting option.)
- Click Export in the upper right corner again to generate the SCORM package. (If there are any errors in your course, such as a blank lesson, Rise 360 will ask if you want to edit the course or continue with the export.)
- When your export file is ready you will receive an email notification with a download link. For a small course, you may immediately be prompted to download the zip file.
- Click the download link in the notification email, then click Download Course on the web page that opens. Choose a location on your computer and click Save.
- Upload the zip package to your LMS.
- Your SCORM package’s Entry File is indexapi.html.
Exporting with Adobe Captivate
The official Adobe Captivate SCORM export tutorial can be found here.
Please view this video for instructions on how to export a SCORM package from Adobe Captivate:
Next Step
Now that you have the SCORM package, you can now upload that to AOM and create a SCORM module to add to your course. See this article for all the details: Using SCORM in a Course