Create/Update a Course (legacy)
This is a legacy document. Please refer to the Create/Update a Course (Hybrid Course) guide for the latest documentation.
Creating your course is the most important aspect of using an LMS. AOM offers both Self-paced and Instructor-Led courses. For Self Paced courses, you'll create a course curriculum that learners can access and take online, without being in a class led by an instructor. Depending on your plan, Instructor Led courses may also be available. Instructor Led Courses are made up of classes instead of modules. The classes each have a date, time, and location that they are offered and the learner will attend the classes either in person or virtually.
This guide will review the difference between Self Paced and Instructor Led courses, show both Admins and Instructors how to create a course, add sections and modules for Self Paced courses, as well as set grading criteria and access rules. We'll also review how to create an Instructor Led course, made out of classes.
Before getting started, be sure to review our overview of Courses: Introduction to Courses to understand the terminology and the ways to organize your modules in the curriculum.
Note that if you're a Staff/Instructor, and not an Owner, it's possible you'll run into permission errors. Permission levels are customizable by the owner of the account, so if you aren't seeing some of the options, reach out to them to confirm. Not all staff will be able to create or update courses.
Self Paced vs Instructor-Led Courses
First, let's review the differences between Self-paced and Instructor-Led courses. As the course material is presented to the learner in different ways, therefore each type is built in a different way.
- Self-paced courses are made up of modules containing various types of content--PDFs, videos, text, quizzes, etc for a course that the learner can take on their own, without being in a class led by an instructor.
- Instructor-led courses are made up of classes instead of modules. The classes each have a date, time, and location that they are offered and the learner will attend the classes. The location can be both in-person or virtual. Instructor Led courses have the ability for you to track attendance: you can mark a learner as registered, attended, a no-show, or canceled.
Note that instructor-led courses may not be available to legacy users. Please contact support if you have questions about the availability of this feature and adding it to your platform!
Creating a New Self-Paced Course
Now that you're familiar with the related terms, let's start building a Self-paced course! There are four steps in creating a Course, and you can see a tab for each step at the top of the screen as you work through the process. We'll look at each of these tabs in detail below.
Step 1: Basic Info
In this section, you'll enter the basic information required for the Course. The more complete this section is, the better the Course foundation. This translates to better organization for those on the Admin side, and more clarity for learners.
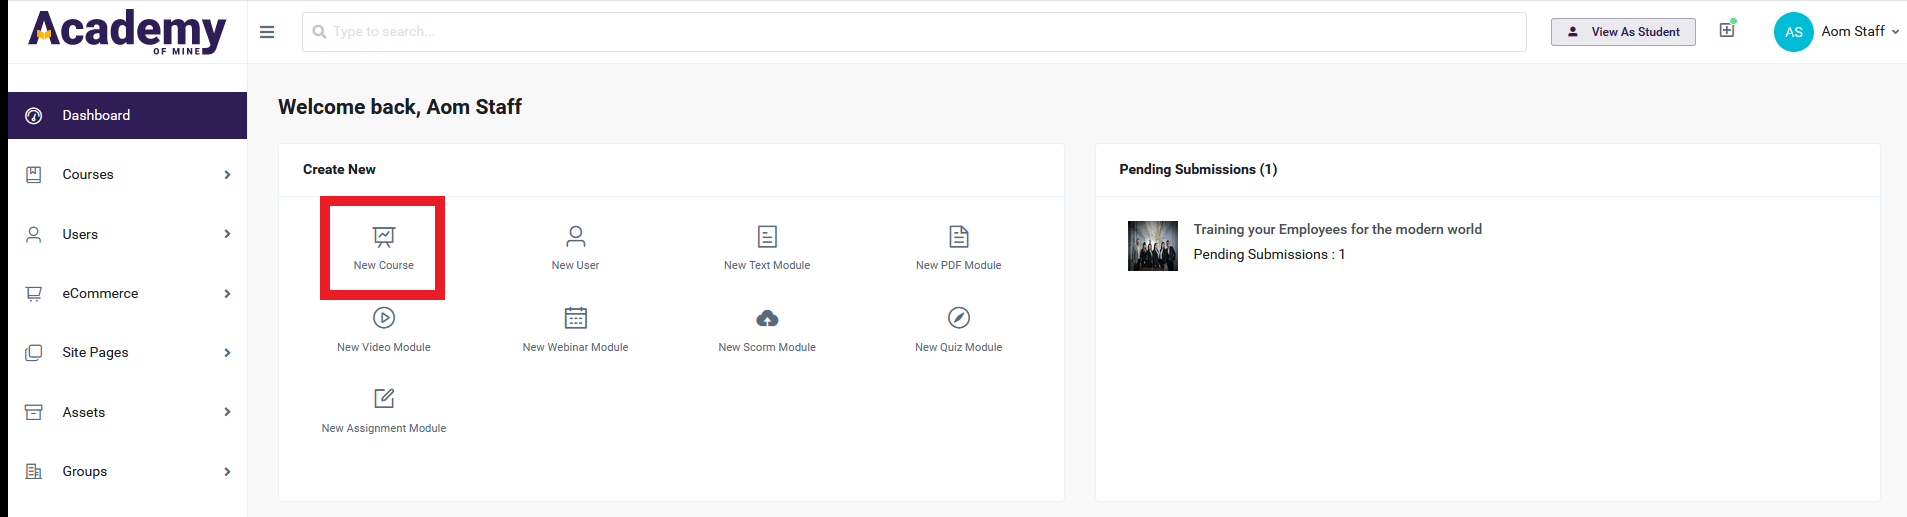
- The most direct way to create a new course is via the Admin or Instructor Dashboard, under the "Create New" area. Select "New Course".
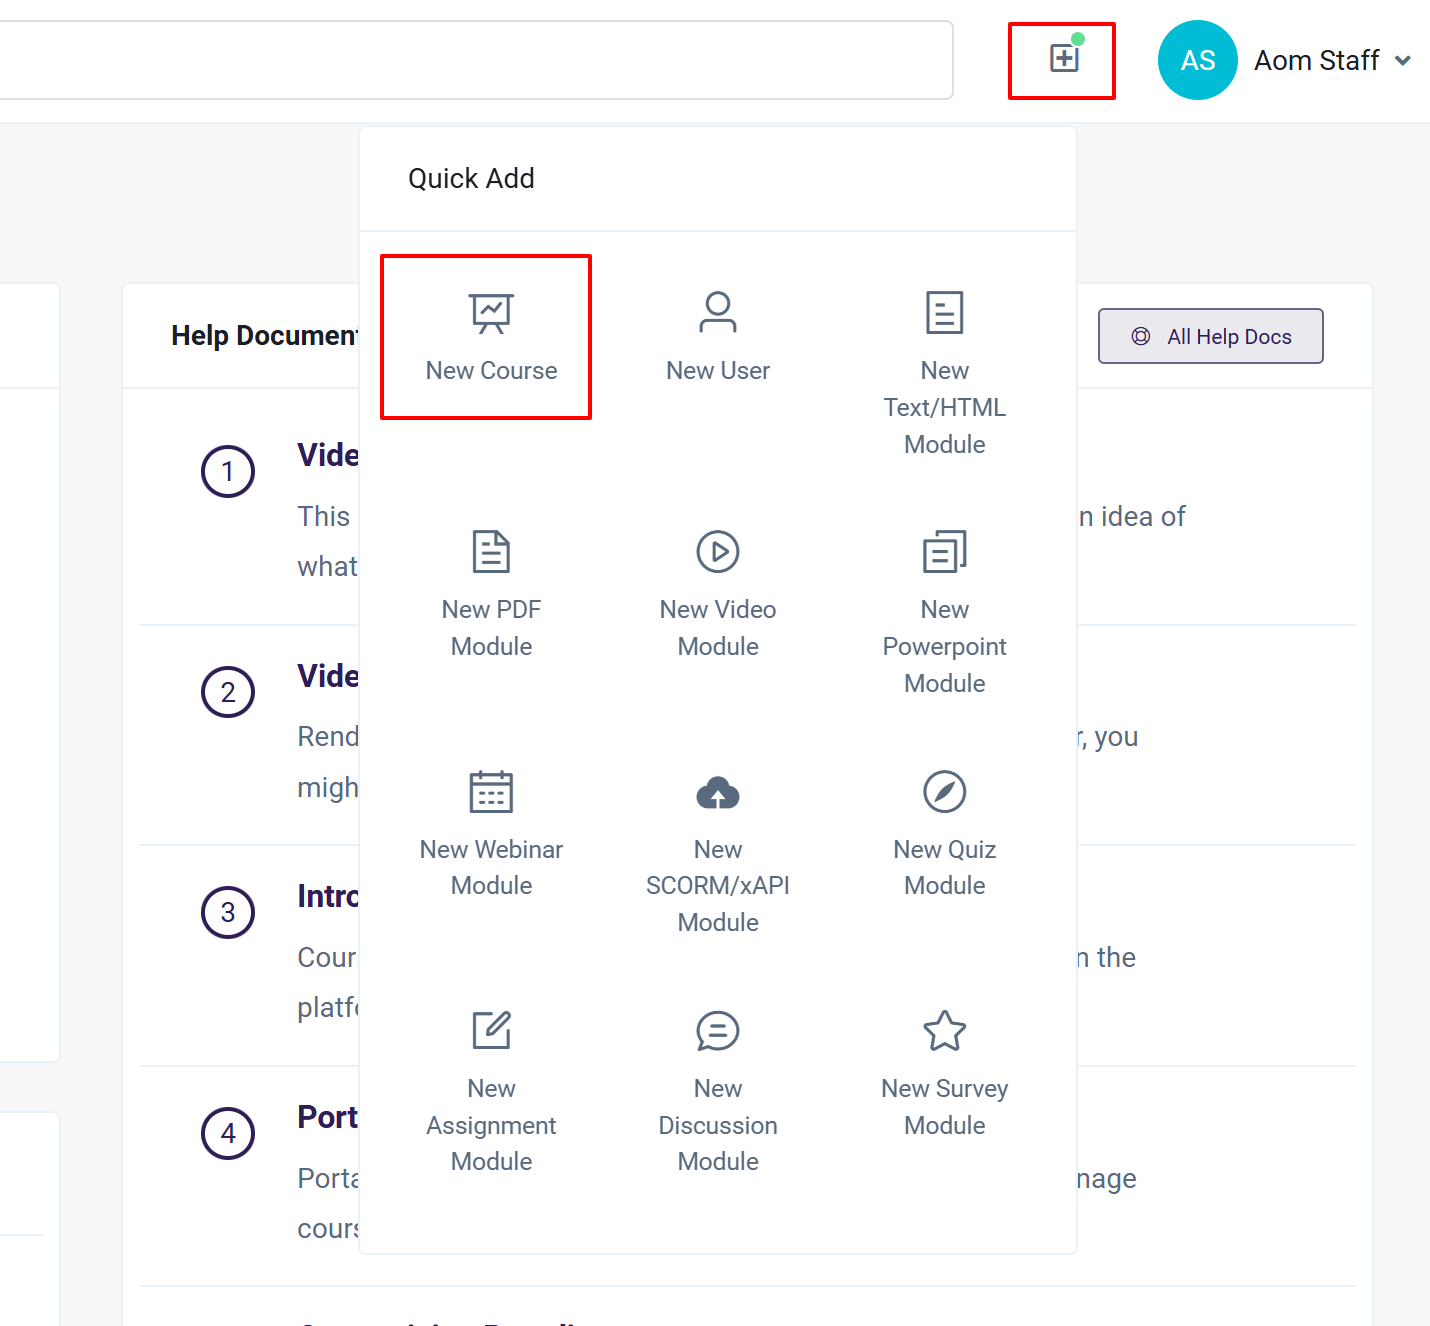
- Alternatively, you can create a new course by using the "Quick Add" menu. Select the "+" icon in the upper-right part of the screen and select "New Course".
- You may also create a new Course by clicking Courses on the Admin or Instructor Dashboard, then All Courses. Then select "Create Course"
Admin view:
Instructor view:
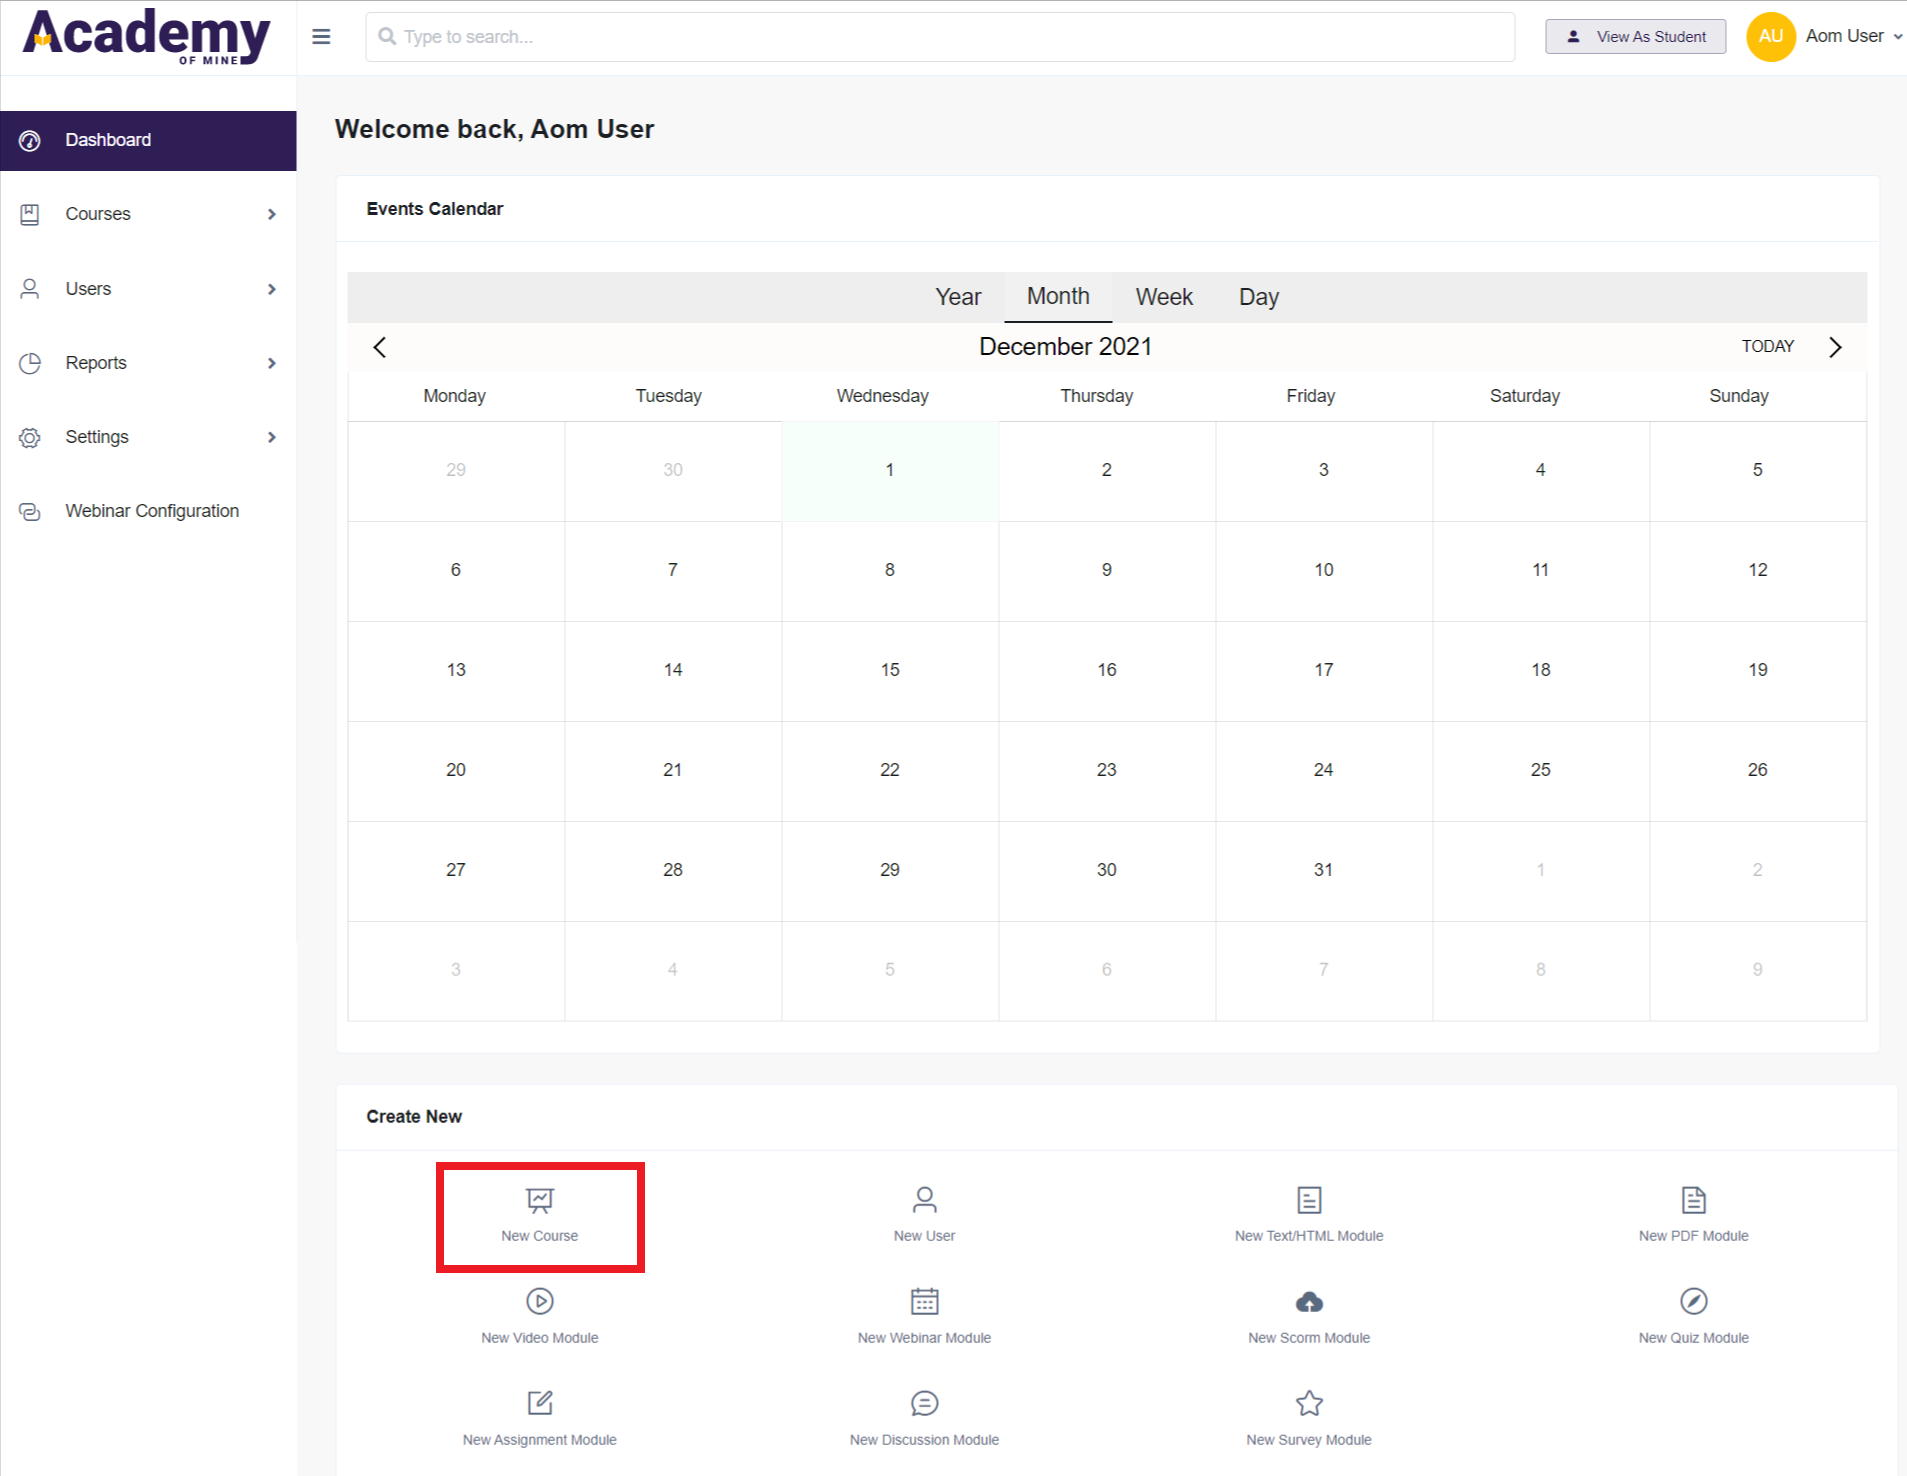
-
Once you're on the Course creation page, you can enter the Basic Info. First, enter the Course Name. This is the most important identifier, and will be displayed on the Course Catalog page, Products page, and many admin pages inside the account. Learners will see the course name when they are logged in, and it will be displayed at the top of every Module in every Course. The course name will be printed on the certificates you award.
- Choose "Self-Paced" as the Study Method if you have the option for both Self Paced and Instructor Led.
- Save your course often to preserve your data. You are required to at least enter the course name before saving it, and then click Update Course as you add more information to avoid data loss.
-
Now, add the Course Instructions so learners know exactly what to expect. Learners will see the instructions displayed once they launch the Course, right before they launch into the Modules. Suggested information includes a quick description of the course, how many modules and what types to expect, the estimated time to complete, and any other details you'd like to include.
-
Add a Featured Image to your Course to help give the learner a custom visual reference to associate with the Course. Select "Browse Media", you will then see the Media Library, where you can upload the image. When a file has been uploaded successfully, it will be listed in the Media Library. Now you can select it to use in your course by clicking on "Choose / Select". You may also select a previously uploaded image for your Featured Image.
If you're a Staff, clicking on "Browse Media" may redirect you to the permission error page as shown below. If this happens, reach out to your administrator and ask for media permission. After your administrator grants you this permission, you'll be redirected to the Upload Media page by clicking on "Browse Media".
- Keep in mind, Featured Images are not required. If you choose not to upload an image, a sample image will be displayed instead. This sample image will be the same for all Courses that do not use a custom feature image. !
- If you wish to remove the featured image after uploading it, you may delete it by clicking on the trashcan icon displayed at the top right corner above the featured image. If you delete it, the sample image will be displayed instead
- The Featured Image is in a 3:2 aspect ratio, with the width being 1.5 times the size of the height. We recommend image dimensions of 300 px by 200 px for the best performance and visibility. Larger images can cause issues with page size and performance. Smaller images can cause formatting issues. The key is that all Featured Images should be the same size, so they look uniform in the learner view and course catalog.
- When not in the process of creating a course, you can upload and view files in the Media Library by selecting "Assets" and then "Media Library" on the Sidebar.
-
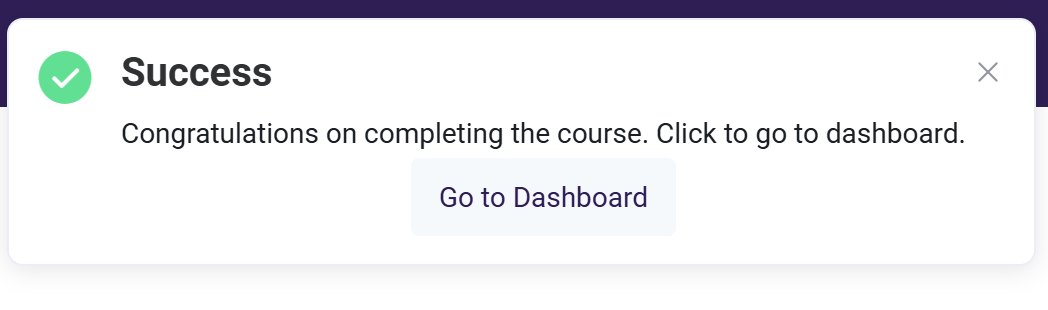
You can enter a Course Completion Redirect URL if you want learners to be directed to a specific page upon completing the course. Alternatively, you can leave this field blank to redirect them to the dashboard by default. After completing the course, learners will see a pop-up with a button allowing them to either navigate to the specified URL or remain in the course.
-
Choose Course Categories--these are helpful in quickly bundling courses, or if you're using Membership Plans. If you have already created Course Categories, you can apply them to your course here. If you haven't, you can create one at this step. If you would like to add a category to the course, simply enter the name you would like to use for your new Category in the "Choose Categories" field, and the Category is created.
- For more information on using Categories, see the Course Categories help document.
-
Add Course Credits--if you are awarding credits to your Learners you can add them here. Course credits can be used to track continuing education completion, or if the course is a part of a larger curriculum. The number of credits can appear on the Course certificate if you choose.
-
Enable Course Ratings? - When creating a course, you will see a toggle option labeled "Enable Course Ratings?". For more information see the Courses Ratings help document.
Once you have saved the Course, remember to use the "Update Course" button in the top right corner to save your progress as you create your Course. You must update before leaving the page to avoid losing any changes.
Also, note that a new Course will have the Course Status "Draft" in the first instance. This will prevent you from making the Course publicly available until you are ready. Courses with "Draft" status cannot be used or viewed by anyone. These cannot be assigned to learners or added to a Product. Once you have created the complete course, switch the Course Status to "Publish" for testing, add it to a Product, or assign it to a learner.

Step 2: Curriculum
The Curriculum tab is where you will put your Course together. A Course is built of Sections and Modules, and this tab is where you add and arrange them. Your curriculum may consist of various Sections and Modules or it could simply be a single Module.
Sections are an effective way to organize the Modules within a Course. For example, you may have an introductory Explainer Video and a Text Module that the learners need to review as they start the Course. There may be a PDF Module and a Quiz Module that form the main body of the curriculum. They may be followed by a Survey Module to collect learner's feedback on the course. These 6 Modules could be contained within 3 Sections, and for this example, you could choose to call the Sections "Introduction", "Jumping in", and "Wrapping Up".
Note: If you are creating a Course that contains Modules not included in sections, but also Modules that are included in Sections, the stand-alone Modules need to come before the Sections. Otherwise, the stand-alone modules will be added to the section under which they are defined.
- From the Basic Info page, select Step 2: Curriculum from the tabs across the top, or choose "Next Step".
- If you want to add a section (which will group modules) select Add Section. You will now see a blank Section. Click on "Blank Section" which is the default name, to change the name. Add however many sections you'll need for your course.
- Now that the sections have been added, we can add the Modules. Modules can be added in two ways: creating a new module directly in the Course Curriculum or selecting a module that has already been created. This Using Modules article will give you some background on the different Module types and their applications.
- To create a new Module, select the "Add Module" button, and then select the type of module, and a name for the new module, and hit Enter.
Note: Hitting Enter is required for the module to appear, so simply hit it after entering the name
- Your module will appear in the curriculum for that course. Set the "Minimum Time" and "Availability" settings if applicable. To add the content to your new Module, select the Edit tool.
- Add the content and click Update Module to save those changes. Learn more about creating Modules [here](/article/110-modules).
-
To add a Module that has already been created, click "Add Module" and then opt to "Select an existing module from the list"
-
Search the drop-down menu for your Module name by starting to type, and select it.
- Once the Module is added to the bottom of your course list, you have the option of entering the Edit Module page to make changes to its content or removing the module from the course.
-
Click and drag the modules to rearrange them in the order they should be presented in the course. This involves placing the modules in a suitable order along with the sections if used.
-
The image below shows how the example course looks like when it has been assigned to a learner. Modules have been created and dragged to their correct places within each section. Texts have been added in red to show how sections and modules appear at the learner's end. The course view shows an expanded view of all the sections and the modules within them by default.
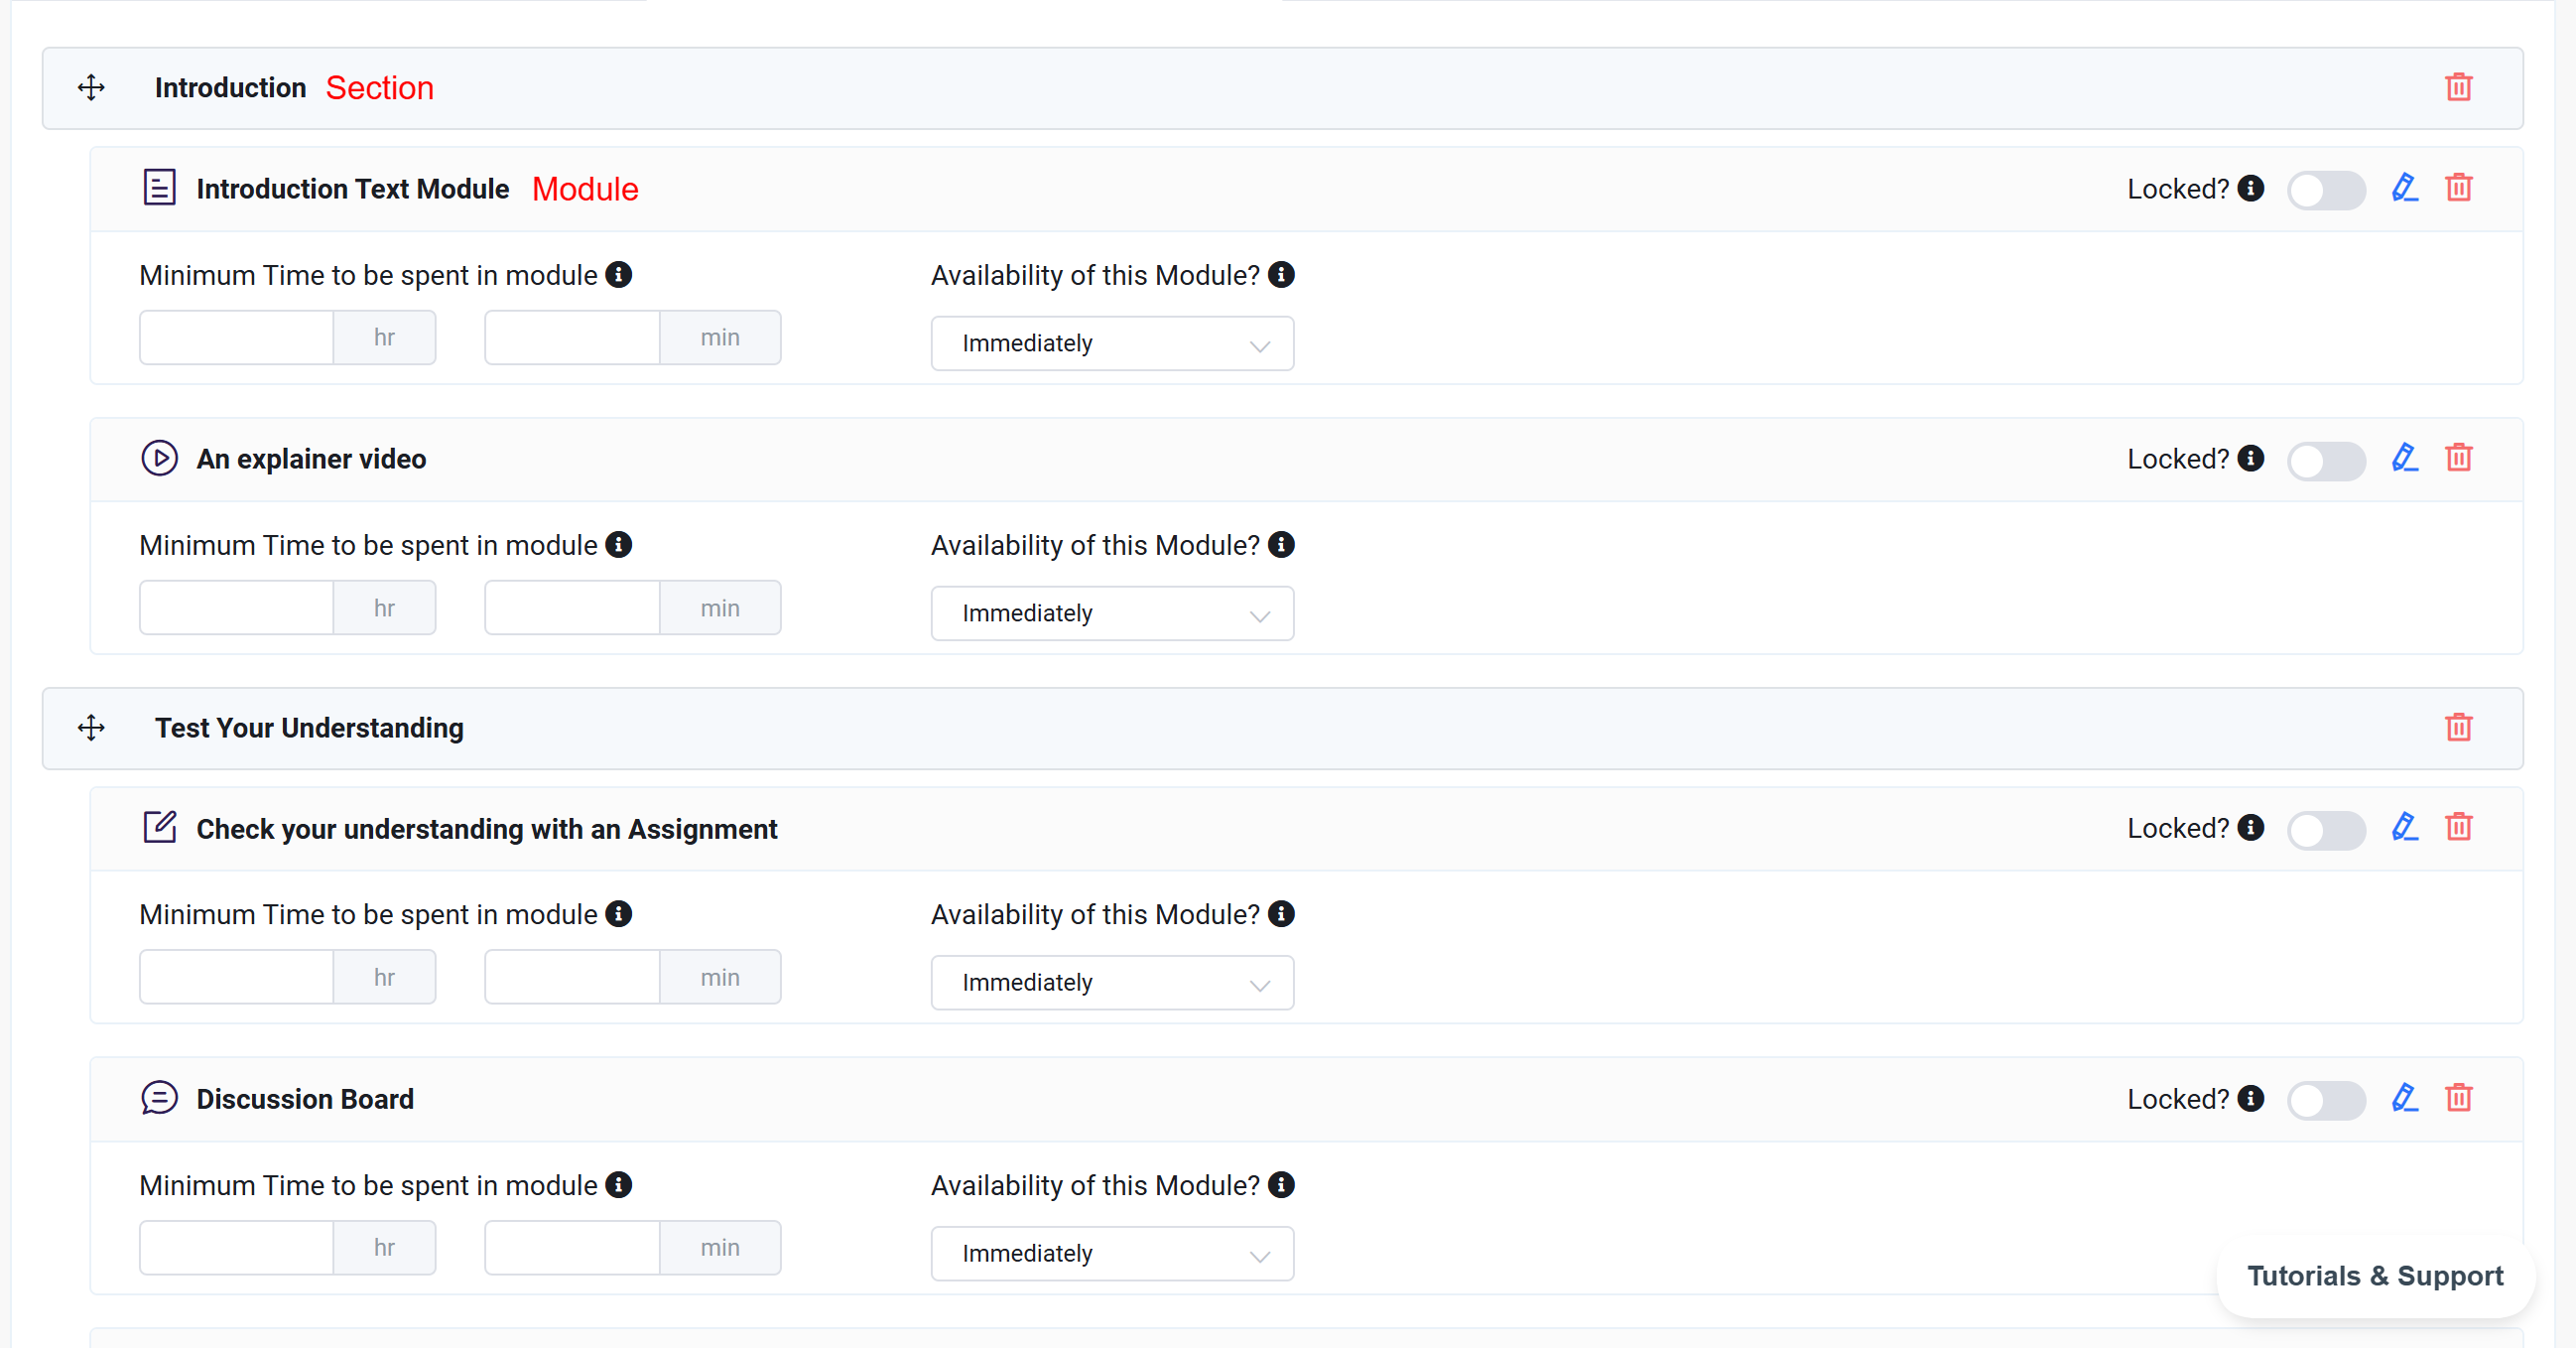
-
Locking a module forces a learner to complete it before being able to move on to the next module in the course. You can lock one or more modules to create a path where the learner cannot begin a module until a previous Module or Modules have been completed. For example, if your course content builds on previous modules or uses Quiz modules to test the knowledge of specific modules throughout the course, you may desire to lock some or all of the modules.

-
Setting the availability of the module allows you to set a date when the module will be available to a learner. This gives an Admin or Instructor the control to make modules available to learners over time or to restrict a learner from completing the course too quickly. The options are:
- Immediately - The module will be available for the learner to start on right after saving/updating the course.
- On a Fixed Date - The module will only be available after a certain calendar date.
-
You can also set a minimum amount of time to be spent in the module that the learner must abide by in the Module before being allowed to move on to the next module. This can keep learners from advancing too quickly through the modules.
- Note: If the learner returns to the launch course page without adhering to the time minimum, the module will still show "In Progress" status even though it is 100% complete. The learner must return to the module and spend the minimum amount of time required to complete it.
-
Save your course changes by clicking Update Course in the upper right corner. If you get distracted or navigate to another section of the platform, changes may not be saved if you do not update before leaving a page you have made changes to.
Step 3: Grading & Certificates
Certificates of completion are an important tool for any learner taking your course. They authenticate the learner's new skillset and confer credibility to obtained credentials. We have a few grading criteria you can choose from, and you can add your own certificates.
To set up the grading and certificates:
-
From the Course Curriculum page, select Step 3: Grading & Certificates from the tabs across the top, or choose "Next Step"
-
Select what grading criteria you want the certificate awarded based on:
- Have the certificate awarded upon completion of all the modules by choosing No Grading. The Course will not be graded, but the certificate will be awarded once all the modules have been completed.
- Set the grading settings to award the certificate based on the scores earned across an average of all individual Quiz, Assignment, Discussion, and SCORM Modules. The scores from the grading of all individual Quiz, Assignment, Discussion, and SCORM modules included in the course will be averaged together for a final course grade. You don't need to have each of these module types to use this option. If your Course only includes a Video Module, a Text Module, and two Quiz Modules, the grading criteria will be based on the average score of these two quizzes.
- Set the grading settings to award the certificate using an average of specific individual Quiz, Assignment, Discussion, and SCORM Modules. The scores from grading set in the selected number of individual modules chosen by the Instructor will be averaged together for a final course grade. If you select this option, you can select the module or modules that will determine the grading criteria. For example, if you have a course that contains a Video module, a Text module, a SCORM module, a Discussion, and two Quiz modules, you can select the two quizzes and the grading will be based on an average score of these two Quiz modules.
-
You'll be required to set the required "Minimum Passing Percentage" if you chose the second or third option on the grading criteria dropdown
-
Then, select your Certificate Template
- If you have already created a certificate, you can attach it to your course here.
- If you have not created a certificate, you cannot create a certificate while creating a Course and will need to create one before attaching it to the course. You can finish creating the Course, make sure to select the "Update Course" button to save all progress, create the certificate, and circle back to edit the Course and add the certificate, keeping in mind you will need to select the "Update Course" button again when you are done. For information on creating a certificate, take a look at the Create a New Certificate help document.
- You may also select an Accredible Group if you're using that integration.
-
Save your course changes by clicking Update Course in the upper right corner. If you get distracted or navigate to another section of the platform, changes may not be saved if you do not update before leaving a page you have made changes to.
When a learner selects "My Certificates" on their dashboard, they will have quick and easy access to the certificates they have earned. Certificates for each completed course can be downloaded and saved or printed.

Step 4: Expiration Rules
When a learner is enrolled in a course, you can control how long they have access to the course before that access is revoked. To set up the expiration rules:
-
From the course creation page, select Step 4: Expiration Rules from the tabs across the top, or choose "Next Step"
-
Choose the Course Access Duration. There are four options:
- Unlimited - The learner will always be able to access the course and the content of the modules inside.
- Till Specific Date - The learner will be able to access the course till the date specified in this field. For example, if "Till Specific Date" is selected for 31 March 2022, the last day the course is available is 31 March 2025 and, when the date, 01-Apr-2025 is reached, the course will not be available.
- Till X day(s) after a learner starts the course - You can set a time for the learner to complete the course after they start it. You can adjust this window to any number of days you wish. Once a module is launched, its status will change to "In Progress", and launching the course the next day will show you the number of days left for course expiration to be a day less.
- Until X day(s) after a learner registers in the course - You can set a time for the learner to complete the course after they are enrolled in it. The functionality of this selection is similar to the "Till X day(s) after a learner starts the course", but this selection tracks the days after registration in the course, not the days after starting the course.
-
Save your course changes by clicking Update Course in the upper right corner. If you get distracted or navigate to another section of the platform, changes may not be saved if you do not update before leaving a page you have made changes to. Also, remember to switch the status from "Draft" to "Publish".
Note: Modules that have availability on fixed dates, or at fixed intervals, and all course expiration options (except unlimited) use the time zone that is selected in the General Site Settings. This can affect learners that are in a different time zone than the one selected by the Admin. Even though a learner may be within the time restrictions in their location, they still may not have access due to being in a different time zone. This is true for all the platform functionalities related to time.

Creating a New Instructor Led Course
If you would like to create an Instructor Led course, follow these steps below. Again, please note Instructor Led courses may not be available to legacy users or on all plans, so please contact support if you have questions about the availability of this feature and adding it to your platform!
Add Location
Before you create the course, you'll first need to add the location of your course if you are doing in-person offerings and haven't yet added the location to your account. To do so:
- From the Admin Dashboard, select Courses, then Location
- Click Create Location
- Add the Location Name, and Address Information. You can also add a map URL if you'd like
- Click Submit to Save. Now you can move on to create the course itself
Step 1: Basic Info
In this section, you'll enter the basic information required for the Course. The more complete this section is, the better the Course foundation. This translates to better organization for those on the Admin side, and more clarity for Learners.
- The most direct way to create a new course is via the Admin or Instructor Dashboard, under the "Create New" area. Select "New Course"
- Alternatively, you can create a new course by using the "Quick Add" menu. Select the "+" icon in the upper-right part of the screen and select "New Course".
- You can also create a new Course by clicking Courses on the Admin or Instructor Dashboard, then All Courses. Then select "Create Course".
Admin view:
Instructor view:
- Once you're on the Course creation page, you can enter the Basic Info. First, enter the Course Name. This is the most important identifier, and will be displayed on the Course Catalog page, Products page, and many admin pages inside the account. Learners will see the course name when they are logged in, and the course name will be printed on the certificates you award.
Save your course often to preserve your data. You are required to at least enter the course name before saving it, and then click Update Course as you add more information to avoid data loss.
- Now, select the Study Method: you can choose Self Paced or Instructor Led. Choose Instructor Led for this tutorial
- Now, add the Course Instructions so learners know exactly what to expect. Suggested information includes a quick description of the course and any other details you'd like to include.
- Add a Featured Image to your Course to help give learners a custom visual reference to associate with the Course. Select "Browse Media", you will then see the Media Library, where you can upload the image. When a file has been uploaded successfully, it will be listed in the Media Library. Now you can select it to use in your course by clicking on "Choose / Select". You may also select a previously uploaded image for your Featured Image.
Note that if you're an Instructor, clicking on "Browse Media" may redirect you to the permission error page as shown below. If this happens, reach out to your administrator and ask for the Media permissions. After your administrator grants you this permission, you'll be redirected to the Upload Media page by clicking on "Browse Media".
- Keep in mind, Featured Images are not required. If you choose not to upload an image, a sample image will be displayed instead. This sample image will be the same for all Courses that do not use a custom Featured Image.

- If you wish to remove the featured image after uploading it, you may delete it by clicking on the trashcan icon displayed at the top right corner above the featured image. If you delete it, the sample image will be displayed instead
- The Featured Image is in a 3:2 aspect ratio, with the width being 1.5 times the size of the height. We recommend image dimensions of 300 px by 200 px for the best performance and visibility. Larger images can cause issues with page size and performance. Smaller images can cause formatting issues. The key is that all Featured Images should be the same size, so they look uniform in the learner view and course catalog.
- When not in the process of creating a course, you can upload and view files in the Media Library by selecting "Assets" and then "Media Library" on the Sidebar.
- Add Course Credits--if you are awarding credits to your Learners you can add them here. Course credits can be used to track continuing education completion, or if the course is a part of a larger curriculum. The number of credits can appear on the Course certificate if you choose.
- Enable Course Ratings? - When creating a course, you will see a toggle option labeled "Enable Course Ratings?". For more information see the Courses Ratings help document.
After saving the course, be sure to click the Update Course button in the top-right corner to save your progress as you build your course. It’s essential to update before leaving the page to ensure no changes are lost. Also, note that a new Course will have the Course Status "Draft" in the first instance. This will prevent you from making the Course publicly available until you are ready. Courses with "Draft" status cannot be used or viewed by anyone. These cannot be assigned to learners or added to a Product. Once you have created the complete course, switch the Course Status to "Publish" for testing, add it to a Product, or assign it to a learner.
Step 2: Classes
Now, click to Step 2: Classes across the top, or click Next Step. Classes are what make up the Instructor Led course, and classes each have a date, time, and location that they are offered and the learner will attend the classes. The location can be both in-person, or virtual.
-
If you haven't already, click Save Course.
-
Click + Add Class
-
Choose if it will be one time, or a recurring class
- For a one time class, enter the class start and end date and time.
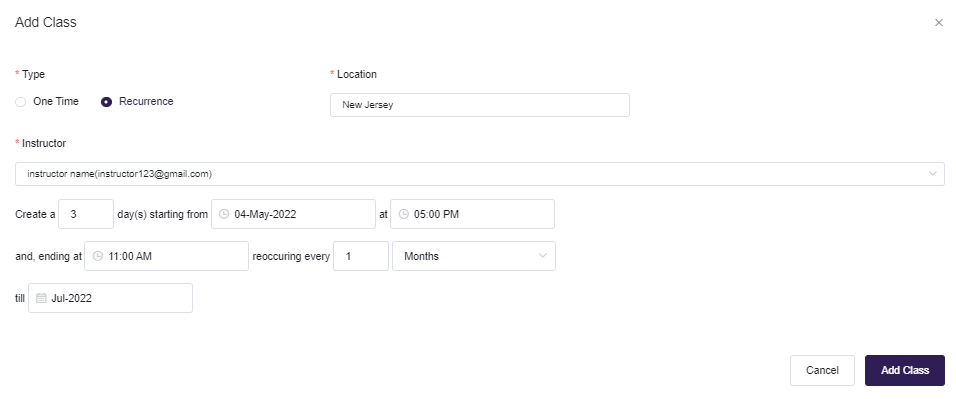
- For a recurring class, click Recurrence. Choose how many days the class will go on for, and then enter the start date/time, how often it will reoccur and when it will recur til
For example, if you wanted to create a 3 day class starting from May 4, 2022 at 10 AM and, ending at 5 PM reoccurring every 1 month till July 2022 will result in creating the following classes:

and would be set up like so:
-
Select an instructor from the dropdown menu
-
Choose a location from the dropdown menu
- If you are doing a virtual class, you will need to select the webinar provider. If you have not yet set up the integration with the chosen webinar provider, please see this document for more details on setting that up: Setting Up Webinar Integrations
-
Click Add Class when you are done adding all the information
-
If you would like to add Study Materials to the class for the learner to download, after you have saved the class, click the Edit button
-
Then under the Study Materials heading, click Browse Media
-
Upload the study materials if they have not already been added to the Media Library, or select the materials from the Media Library shown by clicking "Choose/Select"
-
You can also click Add Section if you would like to group different study materials under different sections to organize them for learners. The sections and study materials can be drag and dropped to move them around as needed.
-
Click Update Class to Save the study materials to the class
Step 3: Grading & Certificates
Certificates of completion are an important tool for any learner taking your course. They authenticate learners' new skillset and confer credibility to obtained credentials. We have a few grading criteria you can choose from, and you can add your own certificates.
To set up the grading and certificates:
-
From the Course Curriculum page, select Step 3: Grading & Certificates from the tabs across the top, or choose "Next Step"
-
Select your Certificate Template
- If you have already created a certificate, you can attach it to your course here.
- If you have not created a certificate, you cannot create a certificate while creating a Course and will need to create one before attaching it to the course. You can finish creating the Course, make sure to select the "Update Course" button to save all progress, create the certificate, and circle back to edit the Course and add the certificate, keeping in mind you will need to select the "Update Course" button again when you are done. For information on creating a certificate, take a look at the Create a New Certificate help document.
-
Choose if the certificate will expire
-
Save your course changes by clicking Update Course in the upper right corner. If you get distracted or navigate to another section of the platform, changes may not be saved if you do not update before leaving a page you have made changes to.
When a learner selects "My Certificates" on their dashboard, they will have quick and easy access to the certificates they have earned. Certificates for each completed course can be downloaded and saved or printed.
Updating or Editing a Course
If you need to change anything for a course, such as editing the description, adding a module to a Self Paced course or adding classes to an Instructor Led course, the process for updating or editing a course is very similar to creating a course:
-
Select "Courses" from the sidebar on the left and then "All Courses".
-
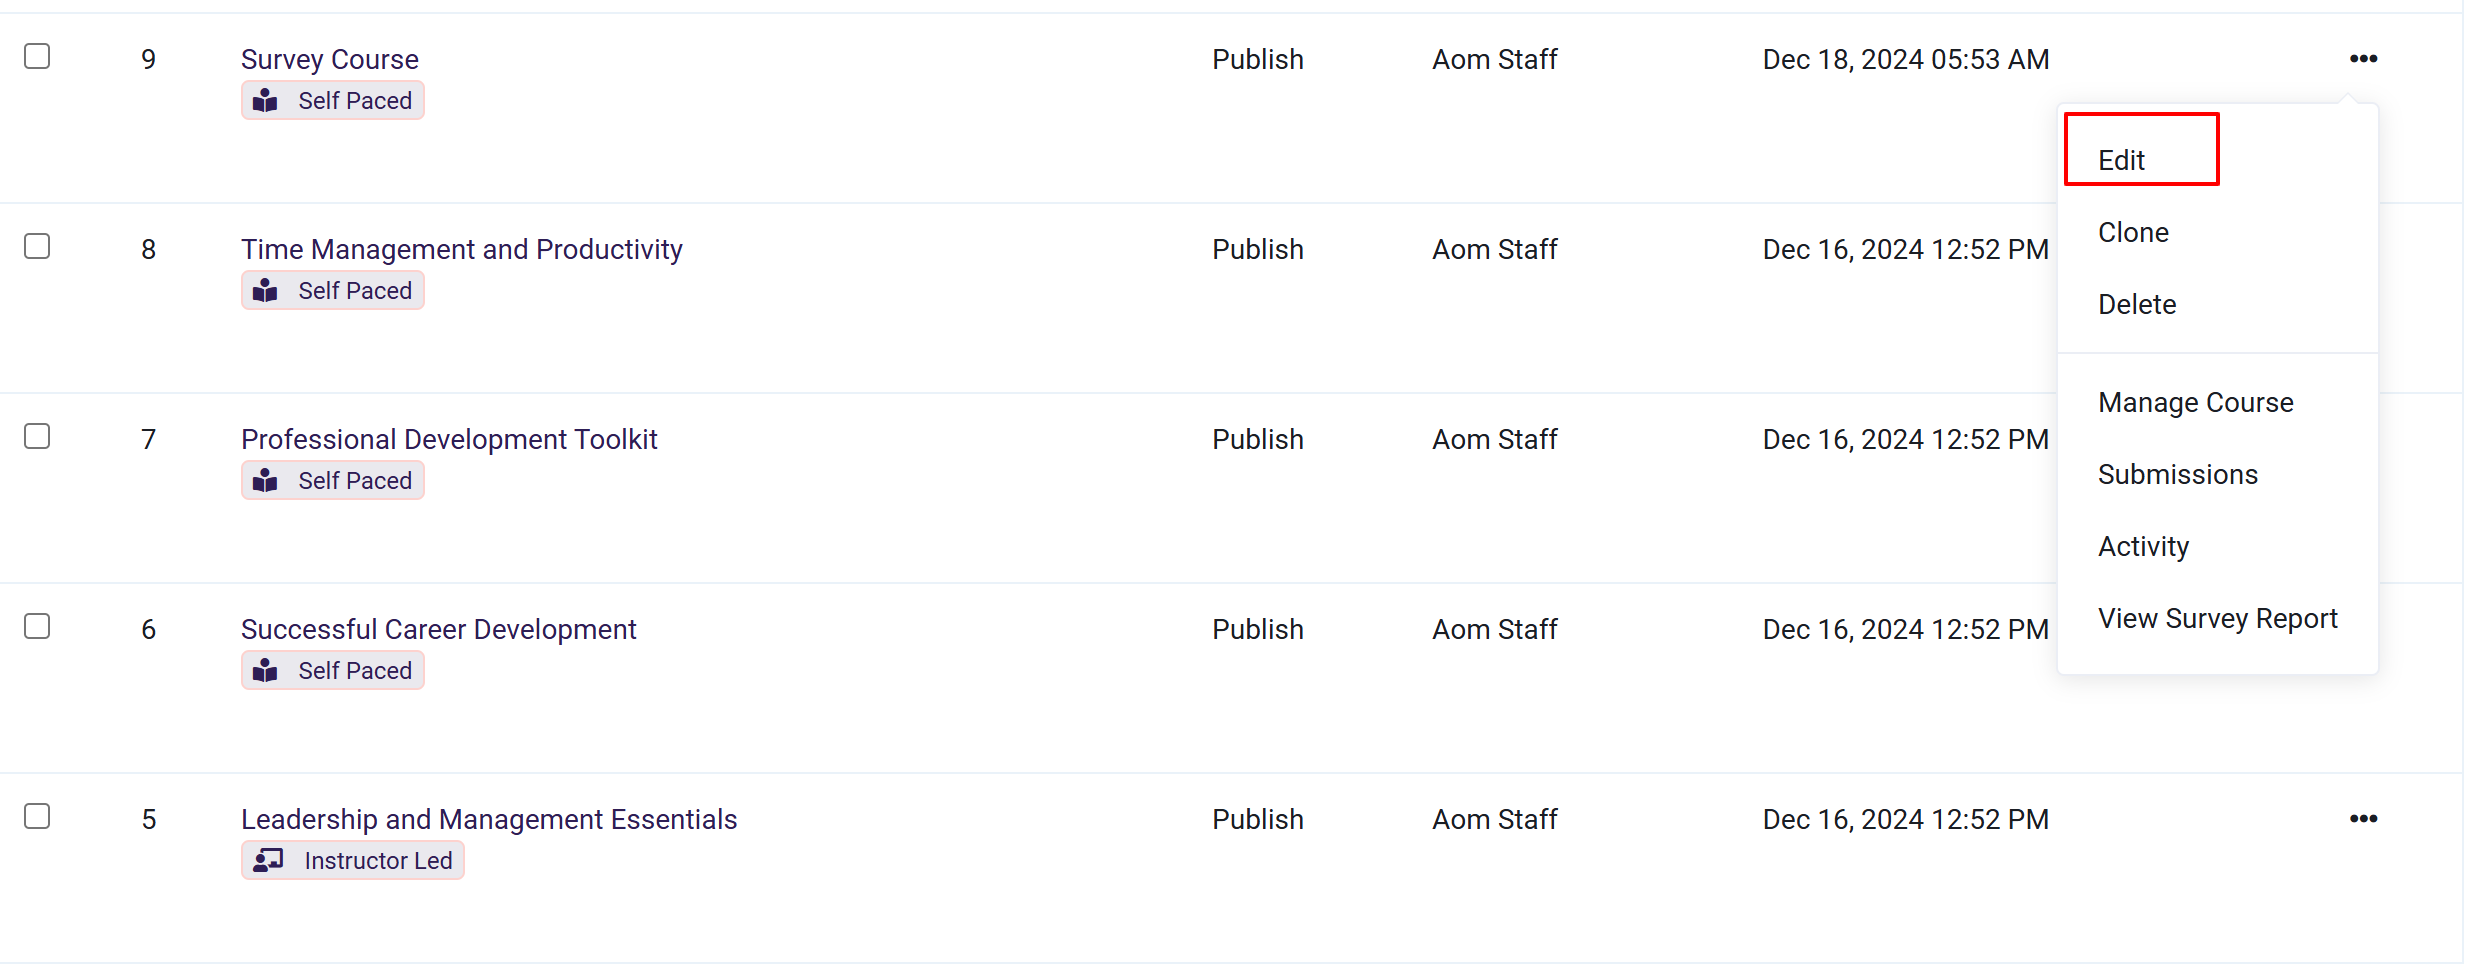
Locate the course you need to update or edit.
-
Use the "Actions" menu on the right to select the "Edit" option.
-
Or simply click on the course name or the "Edit" option appearing on the left for that course. Either of these actions will open the "Edit Course" page.
-
Once you are on the "Edit Course" page, you will recognize the steps that were taken when the course was created.
For a Self Paced Course, this will be Basic Info, Curriculum, Grading & Certification, and Expiration Rules.
For an Instructor Led course, this will be Basic Info, Classes, and Grading & Certificates for Instructor Led courses.

- From here, you'll use the same steps you did when creating a course to update or edit the Course. Select the tab for the information you need to change and edit the content as needed. If you need a refresher on each tab, see the appropriate tutorial above.
- Once your update is complete, make sure you select "Update Course" at the top right to save your progress.
If you make changes to a Self-paced course that has learners enrolled who have started but haven't completed the course, this may cause issues for the learner. Depending on the types of updates that have been made, this is especially true in cases where the Modules are locked. If a new Module is added and it is located earlier in the Course, users will need to return and complete that new Module before continuing with the rest of the Course.
For example, let's say a learner is in progress on a course. There are 6 locked Modules, and the learner has completed the first four. At this point, if you edit the Course to add a new locked Module that comes between the first and second Modules, the learner will not be able to progress to the final two modules until the new module is viewed that has been inserted near the beginning of the course. If the learner is in progress on a Module that comes after this new locked Module, the learner will be required to complete the new Module before returning to complete the "In Progress" Module. Additionally, the learner will need to complete this new Module before returning to "Completed" modules later in the Course.
If the Modules in this scenario are not locked, the learner will simply see a new Module showing "Not Started" earlier in the course, and progress can continue as the learner chooses.
Next Steps
There are several ways to use the courses in your account. The next article will teach you about managing your courses: