Course Management
Once your Course has been created, you'll need to manage everything that happens within. This includes various Course actions, enrolling learners, viewing Course and learner activity, evaluating Learner assignments/discussions for Self-paced courses, granting/revoking learner access, cloning or copying a course, and more. In this article, we'll go over all those functions available to you when managing a Course. We will also cover the differences in managing Self Paced Courses and Instructor-Led courses. For more information on these two types of courses, see this article.
If you haven't already, be sure to review our overview of Courses: Introduction to Courses
Using the Courses Page
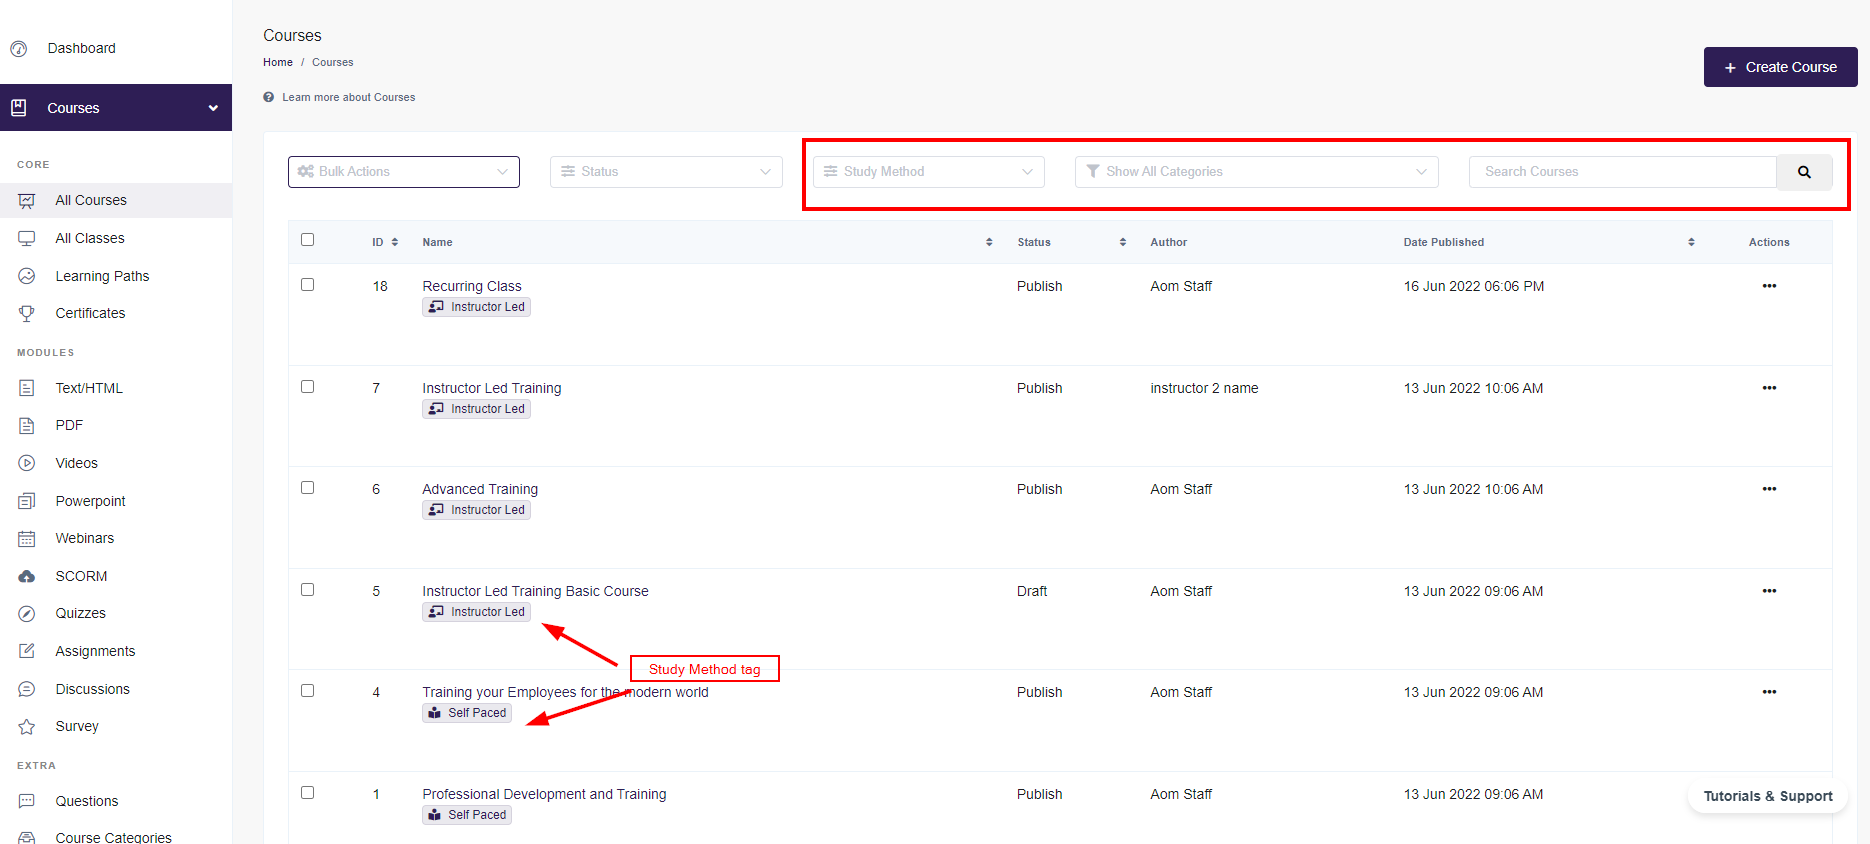
Let's first go over the Courses Page. This page lists all Courses in your account and can be accessed through the dashboard by clicking Courses > All Courses. This will show both Self-paced and Instructor-led courses, which will have a tag to distinguish what the study method is. Note that instructor-led courses may not be available to legacy users--please contact support if you have questions about the accessibility of this feature!
Fields at the top allow you to filter by status (Draft or Publish), Category, and Study Method, or you can search for a particular course by its name/title.
From this page, you can access the Course Action menu as well as make Bulk Course edits. We'll go over each of these options and the action items included.
Actions Menu
The Actions Menu for an individual Course allows you to change multiple settings and access Course data. This can be accessed via the three-dot actions menu. Additionally, when your mouse hovers over the Course title, the Manage and Edit Course options will be available.
 The Action Menu items are:
- Edit - will open the Edit Course page, so an admin can make any needed revisions. For more information on editing a course, see the Creating and Updating a Course article.
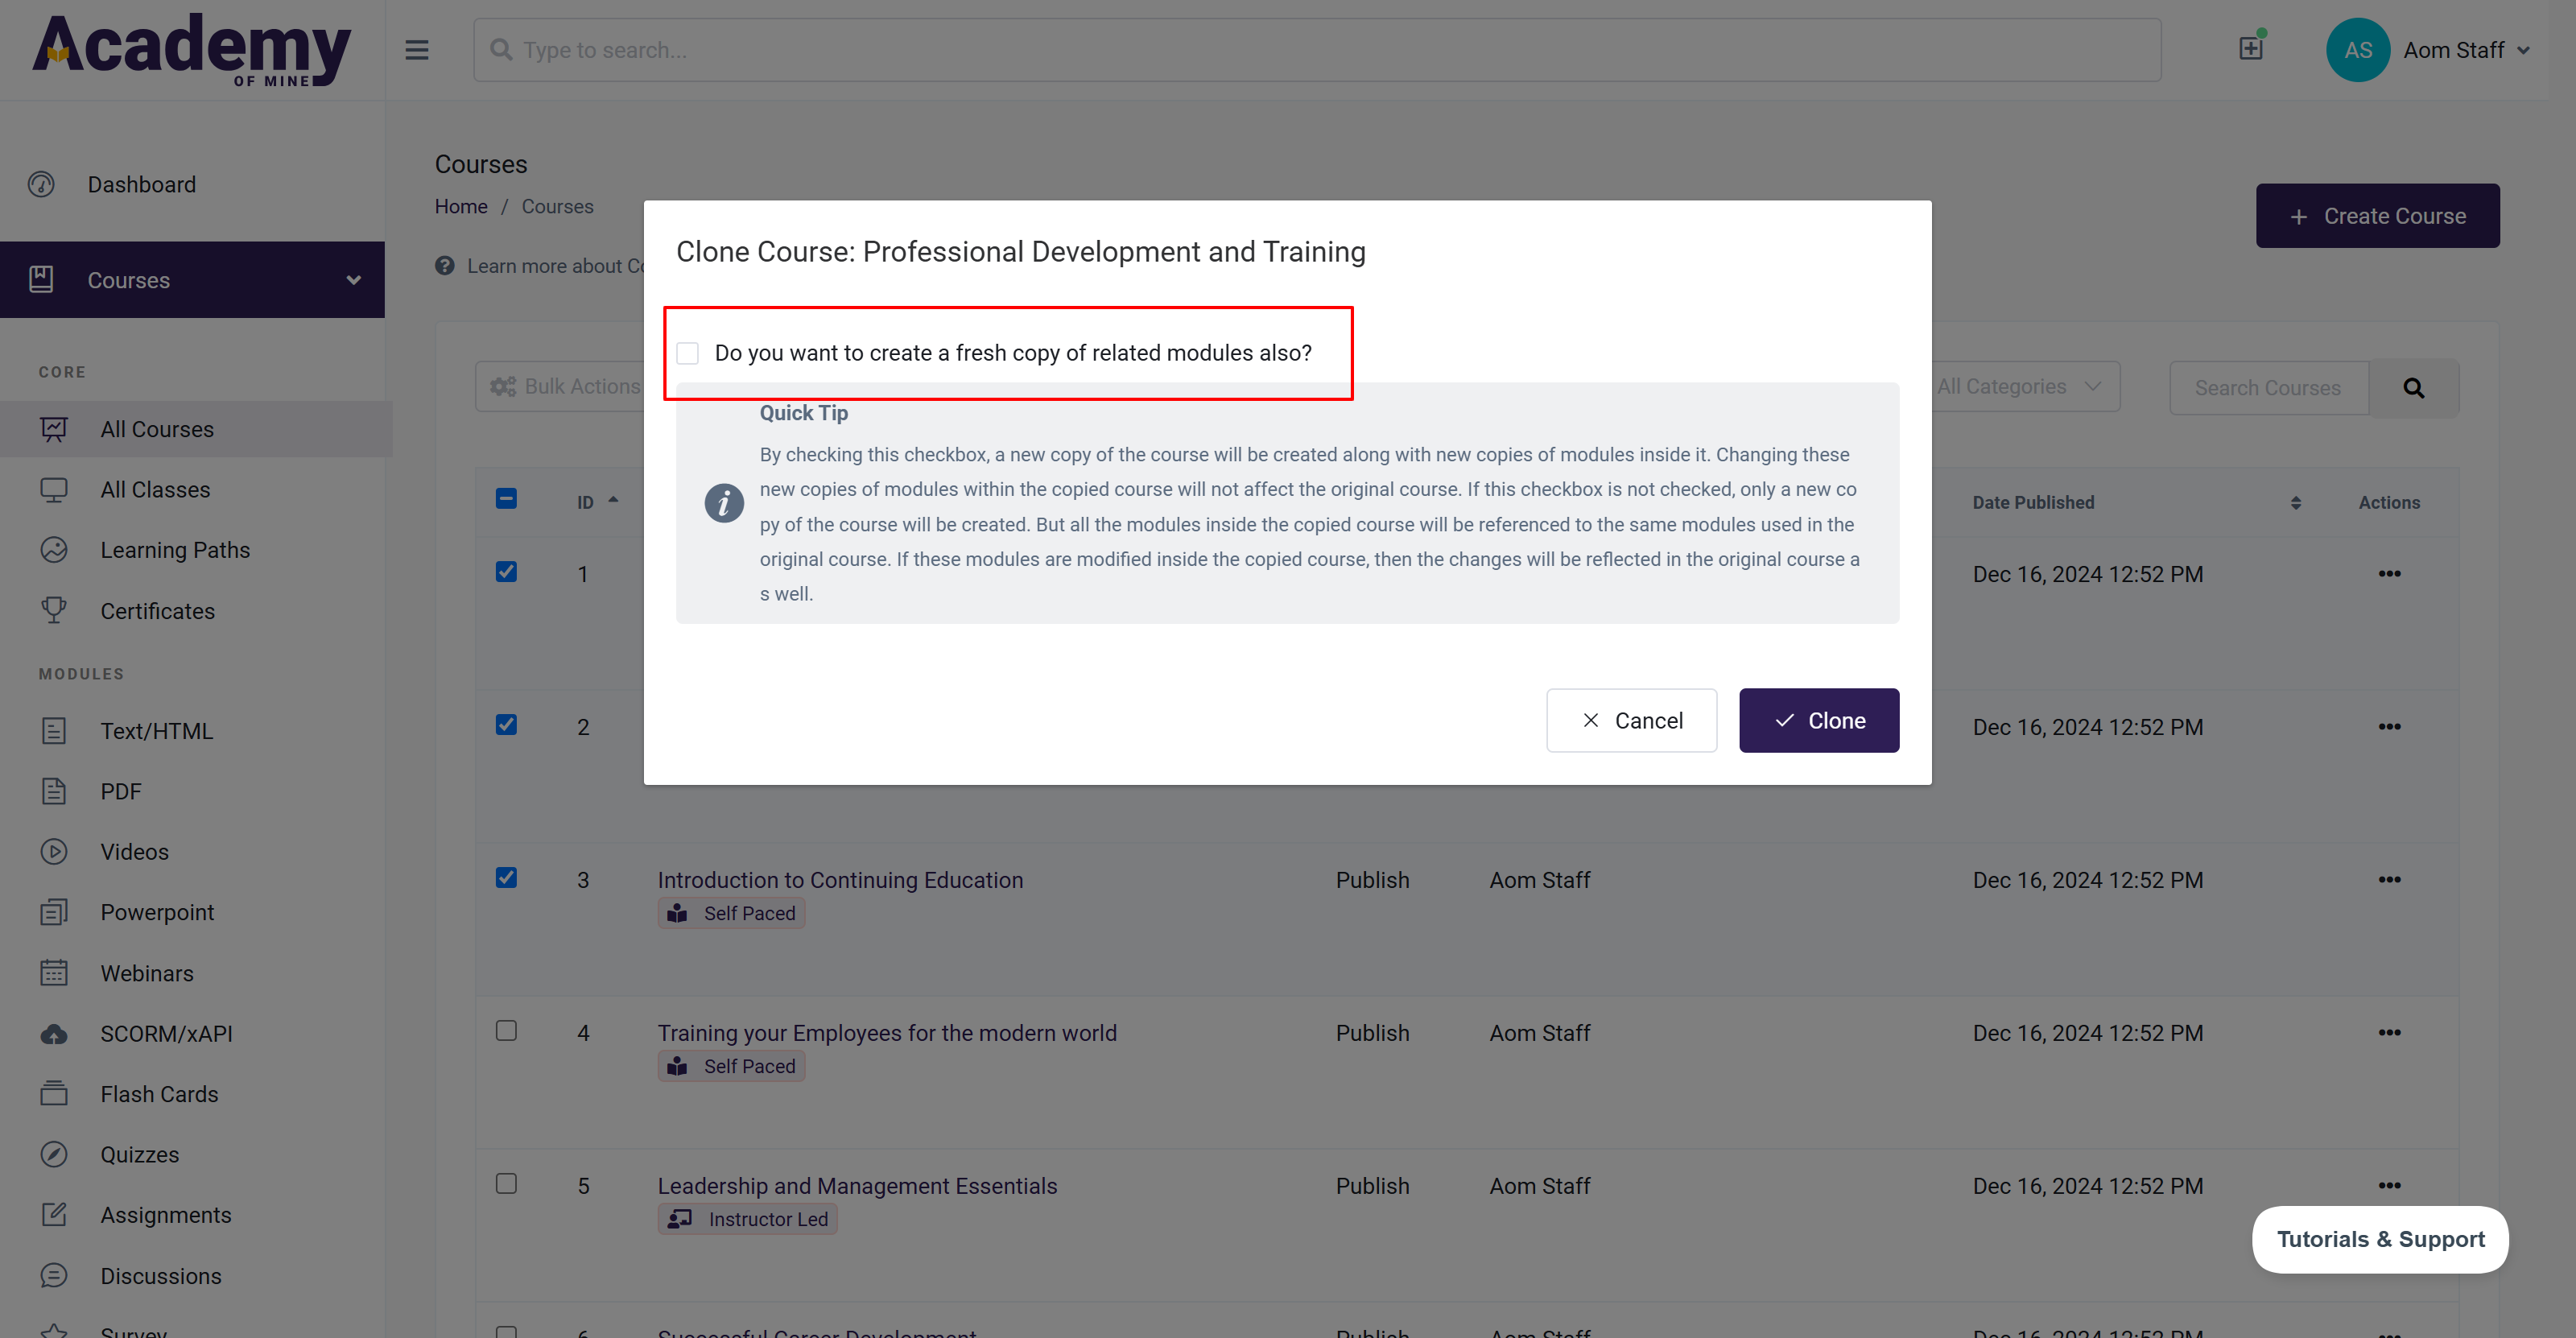
- Clone (For Self-Paced courses only)- This will create a copy of the course modules, though there are two options, take care to select the one that you need:
- Clone without creating a fresh copy of existing modules - this will allow the Admin to create a duplicate of a course. This is ideal for saving time when you need a similar course. If Course A has 6 modules in it and you want to create a similar Course that only includes 4 of the Modules, you can clone Course A, so you have Courses A and B. You can now remove the 2 unwanted Modules from Course B and your new Course is ready to go.
- Clone creating a fresh copy of modules - the option to clone a Course and create a fresh copy of the Course Modules allows you to make changes to a Module or Modules that will not reflect in other courses containing the same Modules.
Warning: Care needs to be taken if you clone a course using the first option. If you edit any module in the new course, the edits will also show up as edits in the original course. The edits will also show up in any other courses where that module is used. To be clear, be careful any time you clone a course, but choose NOT to create a fresh copy of related modules as well.
- Delete - will permanently remove the Course from your account. Remember, anything that gets deleted can not be recovered
- Manage Course - will open the Manage Course page. A more direct way to access the Manage Course options is to simply hover your mouse over the course title, and one of the options you will see is Manage Course. More details on this page are in the next section of this article
- Submissions (For Self Paced courses only)- will open the Course Submissions page, so the Admin can review and respond to any feedback submitted by learners for Assignment Modules, or Discussion Modules. For more information, see the Instructor Experience Evaluating Assignments section of the Creating an Assignment article.
- Activity- will open the Course Activities page to see every action related to the Course
- View Survey Report (for Self-Paced courses only)-will bring you to the Survey Report for that Course
Bulk Actions Menu
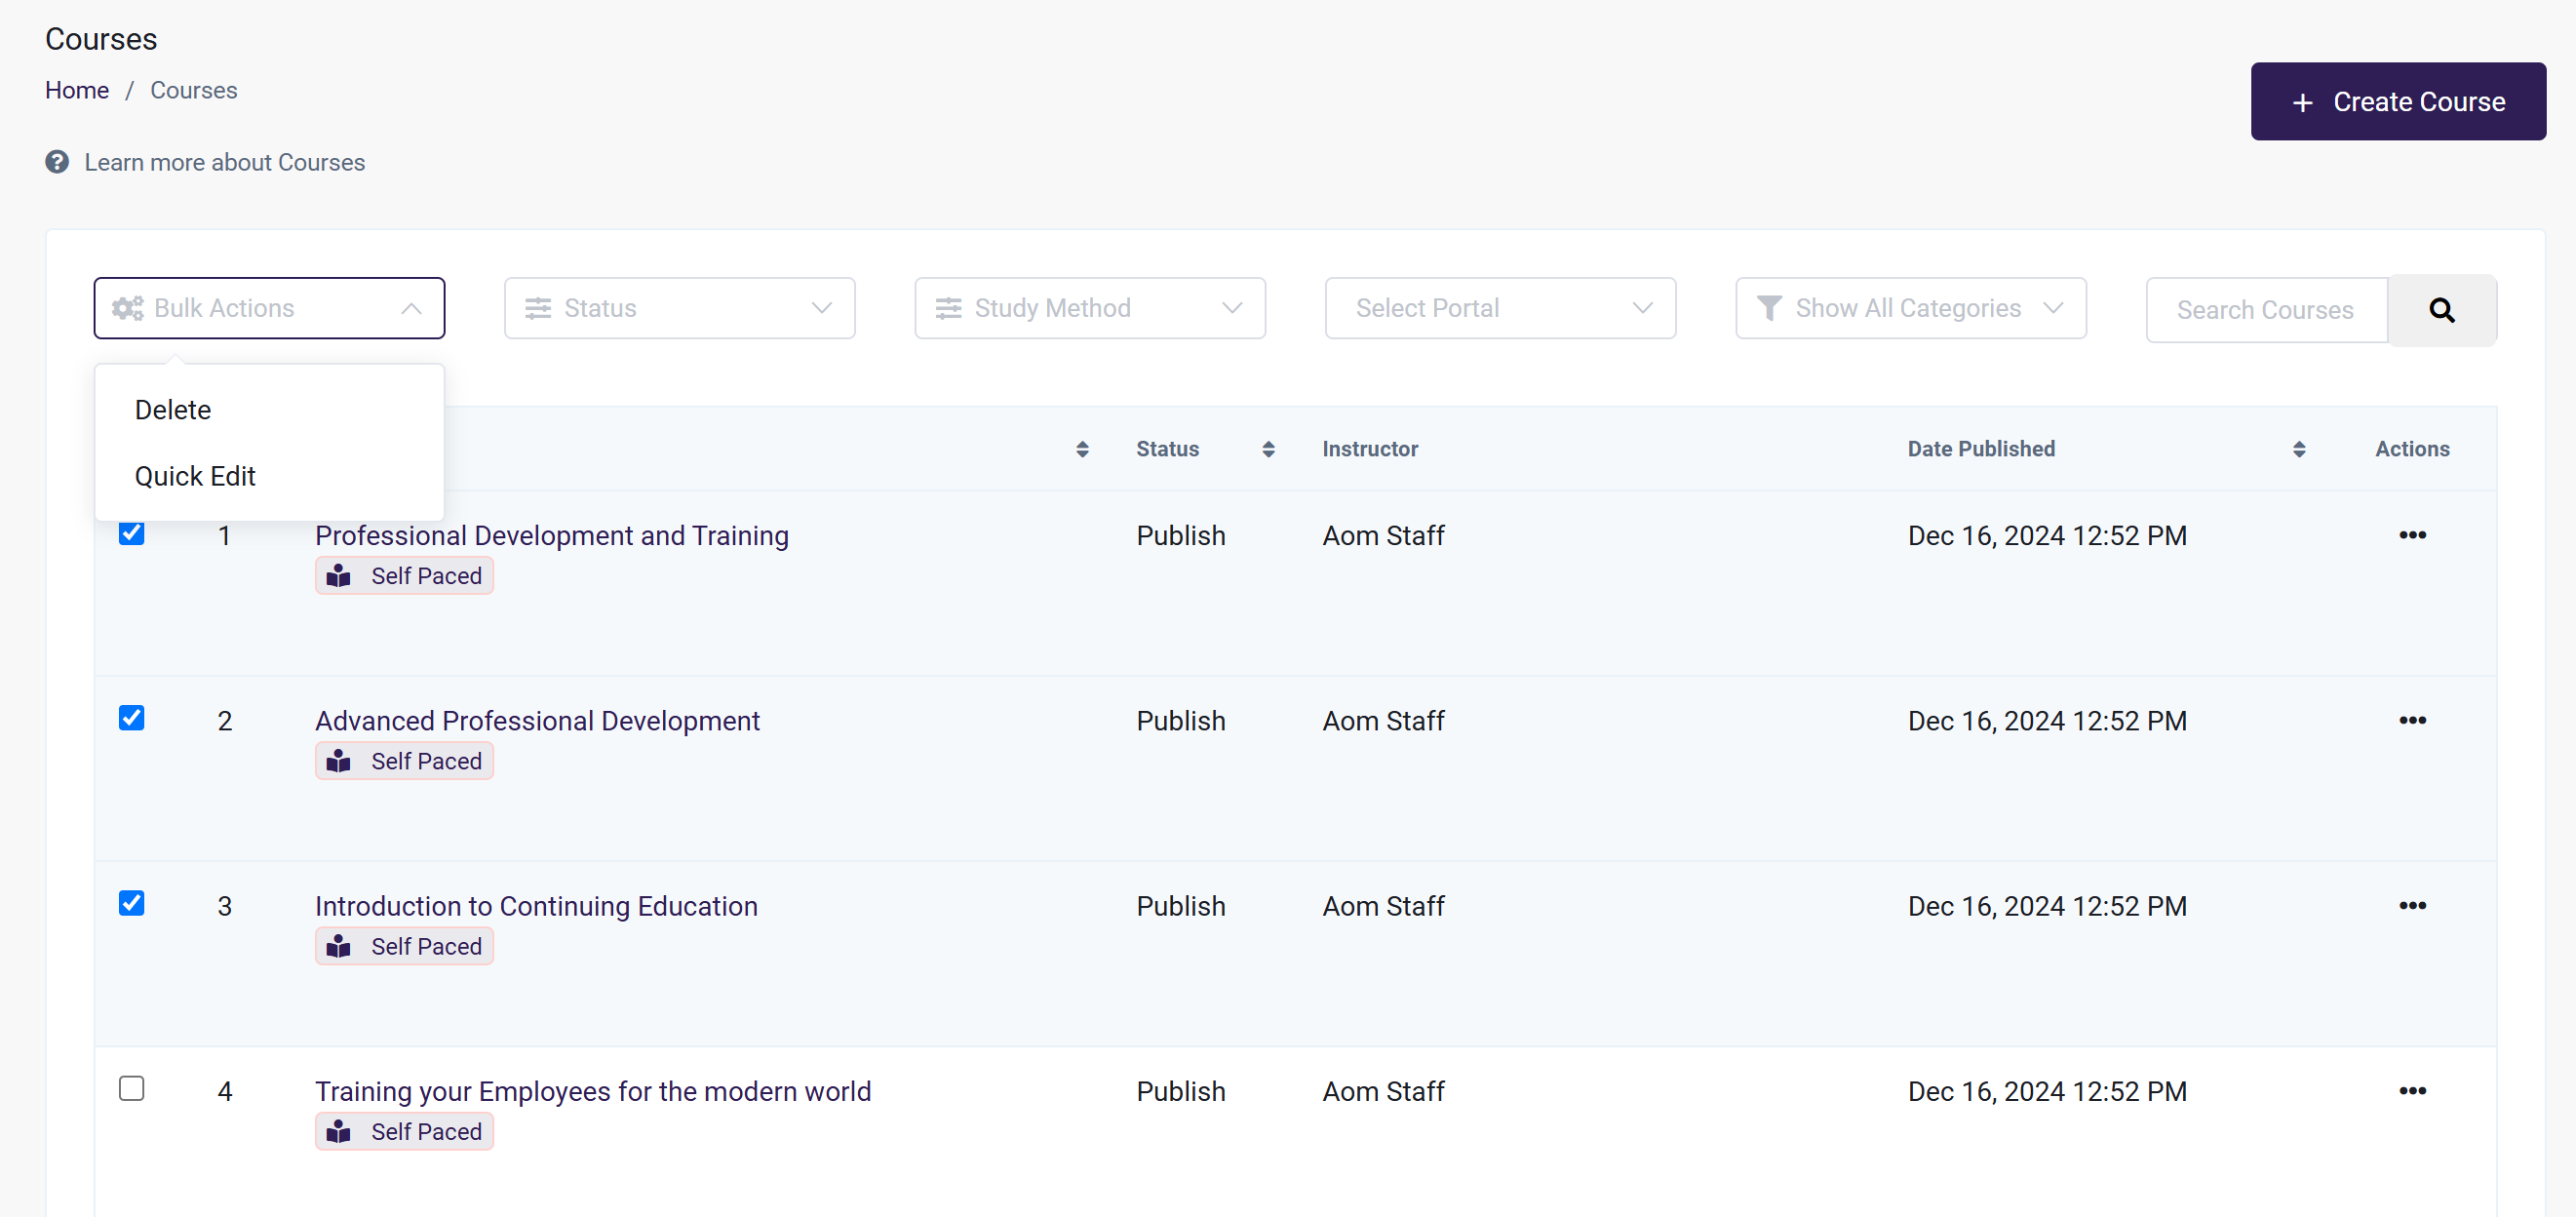
The Bulk Actions menu allows you to make changes to multiple Courses at once. Check the boxes next to Course names before starting a bulk action, or click on the box at the top to select all courses on the page. Click on "Bulk Actions" once you have selected the courses.
These options include:
- Delete - this will permanently remove Courses from your account. Care must be used when using the Bulk Delete option, as this action is permanent.
Warning: Once a Course or a number of courses have been deleted, they can not be retrieved. Additionally, keep in mind that when using the "Select All on Page" box, only the courses showing on that page will be selected. Depending on how many Courses you have, they may not all be showing. In the image below, only 4 courses have been created. But imagine there are 14 courses and you want to delete all of them. If the page is set to show 10 Courses per page, using the Bulk Delete option will only delete 10 Courses. To delete all 14 of them, you will either need to adjust the setting to show 25 courses per page or you will need to use Bulk Delete more than once
- Quick Edit - this gives options to reassign the Instructor of the Courses to another Admin and add a Course Category to the Self-Paced Courses. When this function is used, the drop-down menus will allow the Admin to select Categories or Instructors already in the system. You can not create a new Category or Instructor from this page. To use Quick Edit, the options for Categories and Instructor will need to be created first. The instructor in this case will be the Administrator who will be receiving submission emails and other communications.
Managing Self-Paced Courses
The Manage Course page for Self Paced courses will allow you to access all activity and data for the course, and all details of the learners taking the Course. This page can be accessed by clicking Actions Menu > Manage Course, or by hovering over the Self-Paced Course title and then selecting Manage. There is a lot of information available on the Manage Course page including:
- Course Statistics
- Enrolling Learners
- Manage Courses Page Actions Menu (to view progress, activity, access, and more for a student)
- Make Bulk Action changes
- View Learner Course Activity
- View Learner Submissions
Now, let's go into each part.
Course Statistics
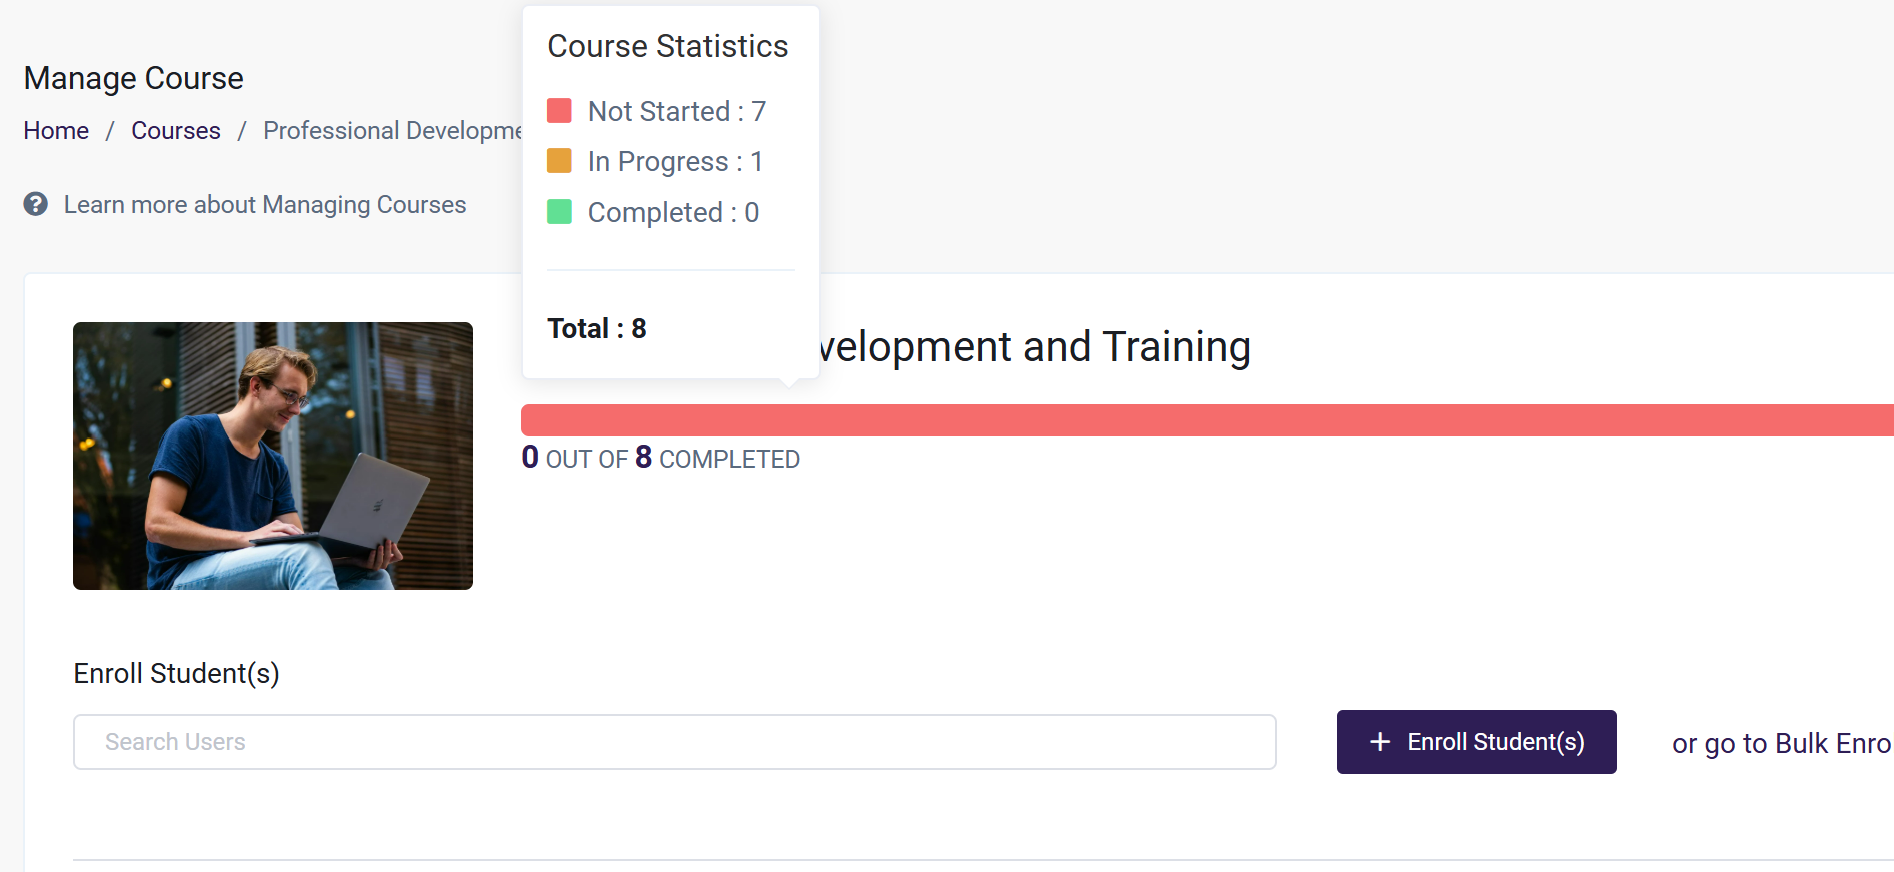
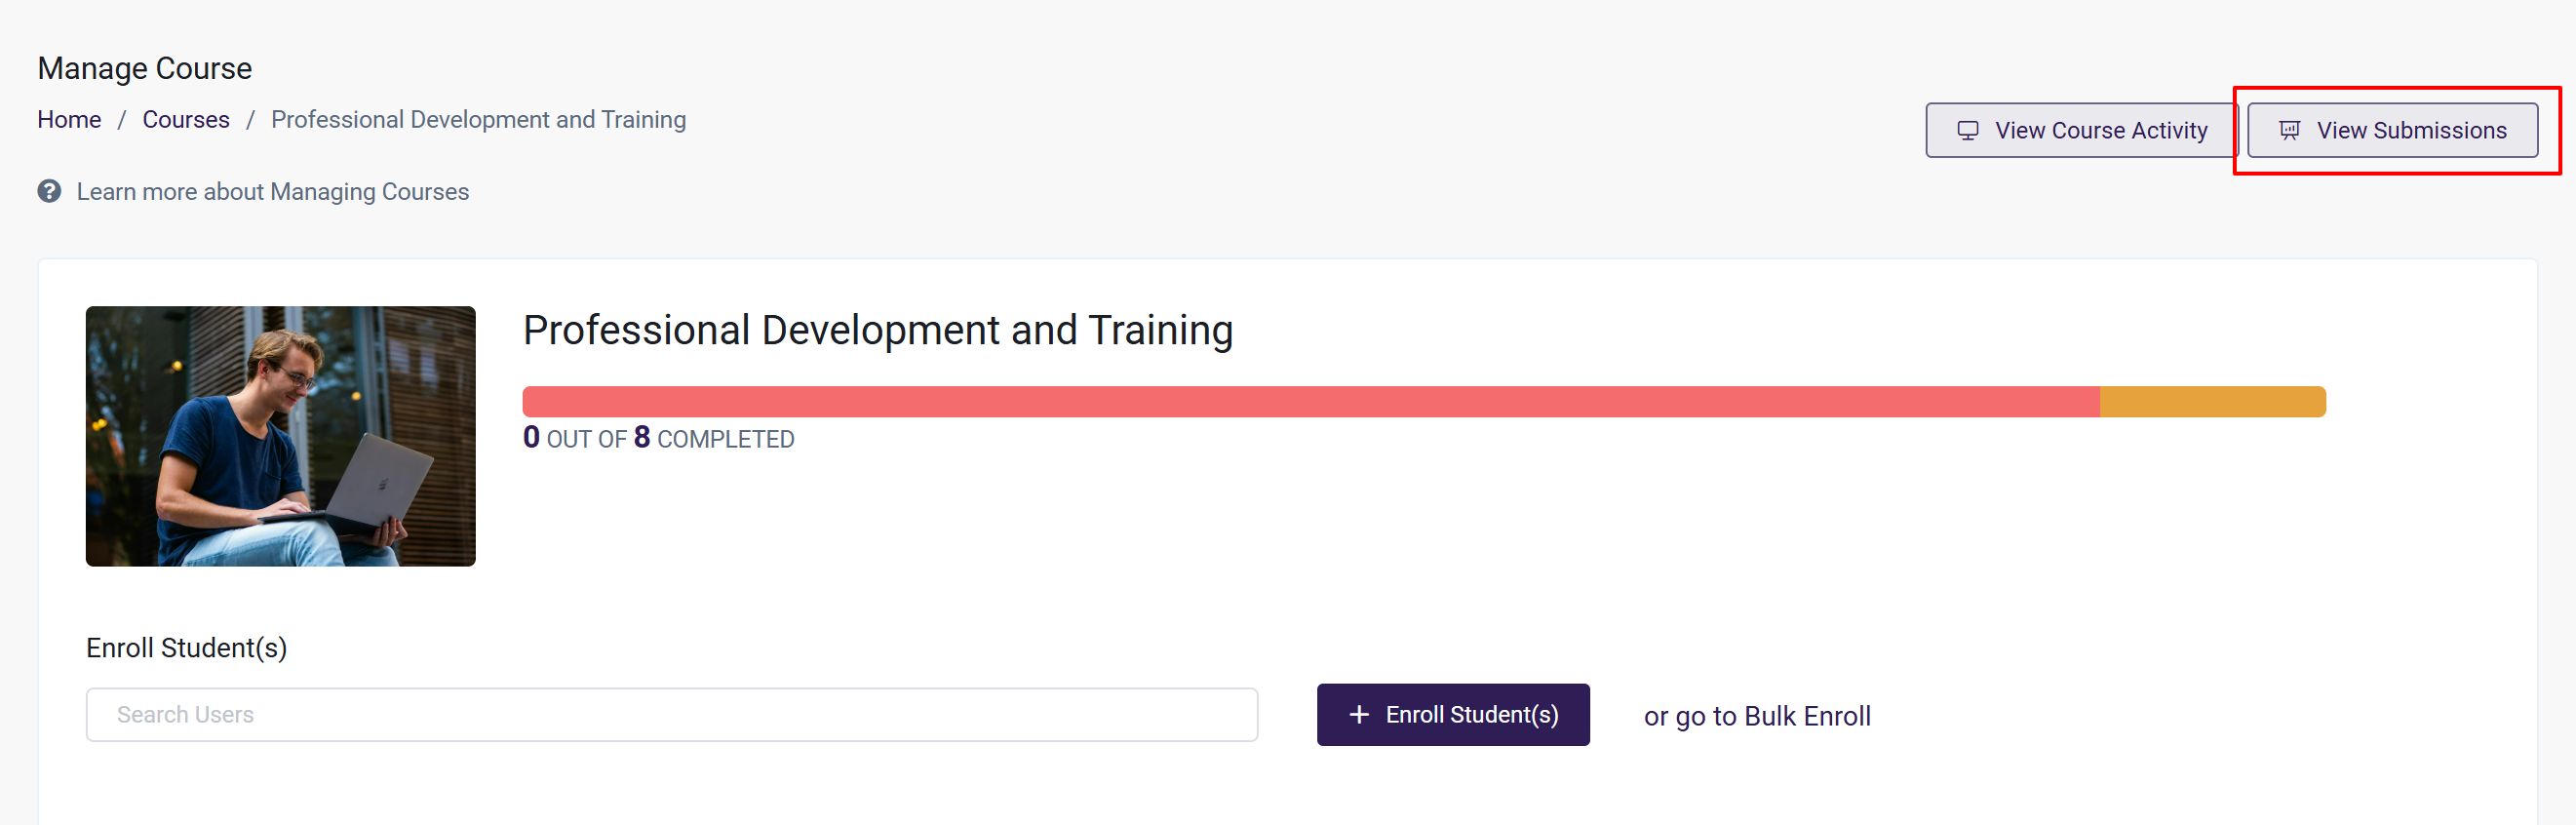
At the top of the Manage Course page is a Course Statistics bar, which displays Learner progress at a glance. When you hover your mouse over the bar, you'll be able to quickly see the number of learners who have not started, are in progress, or have completed this Course.
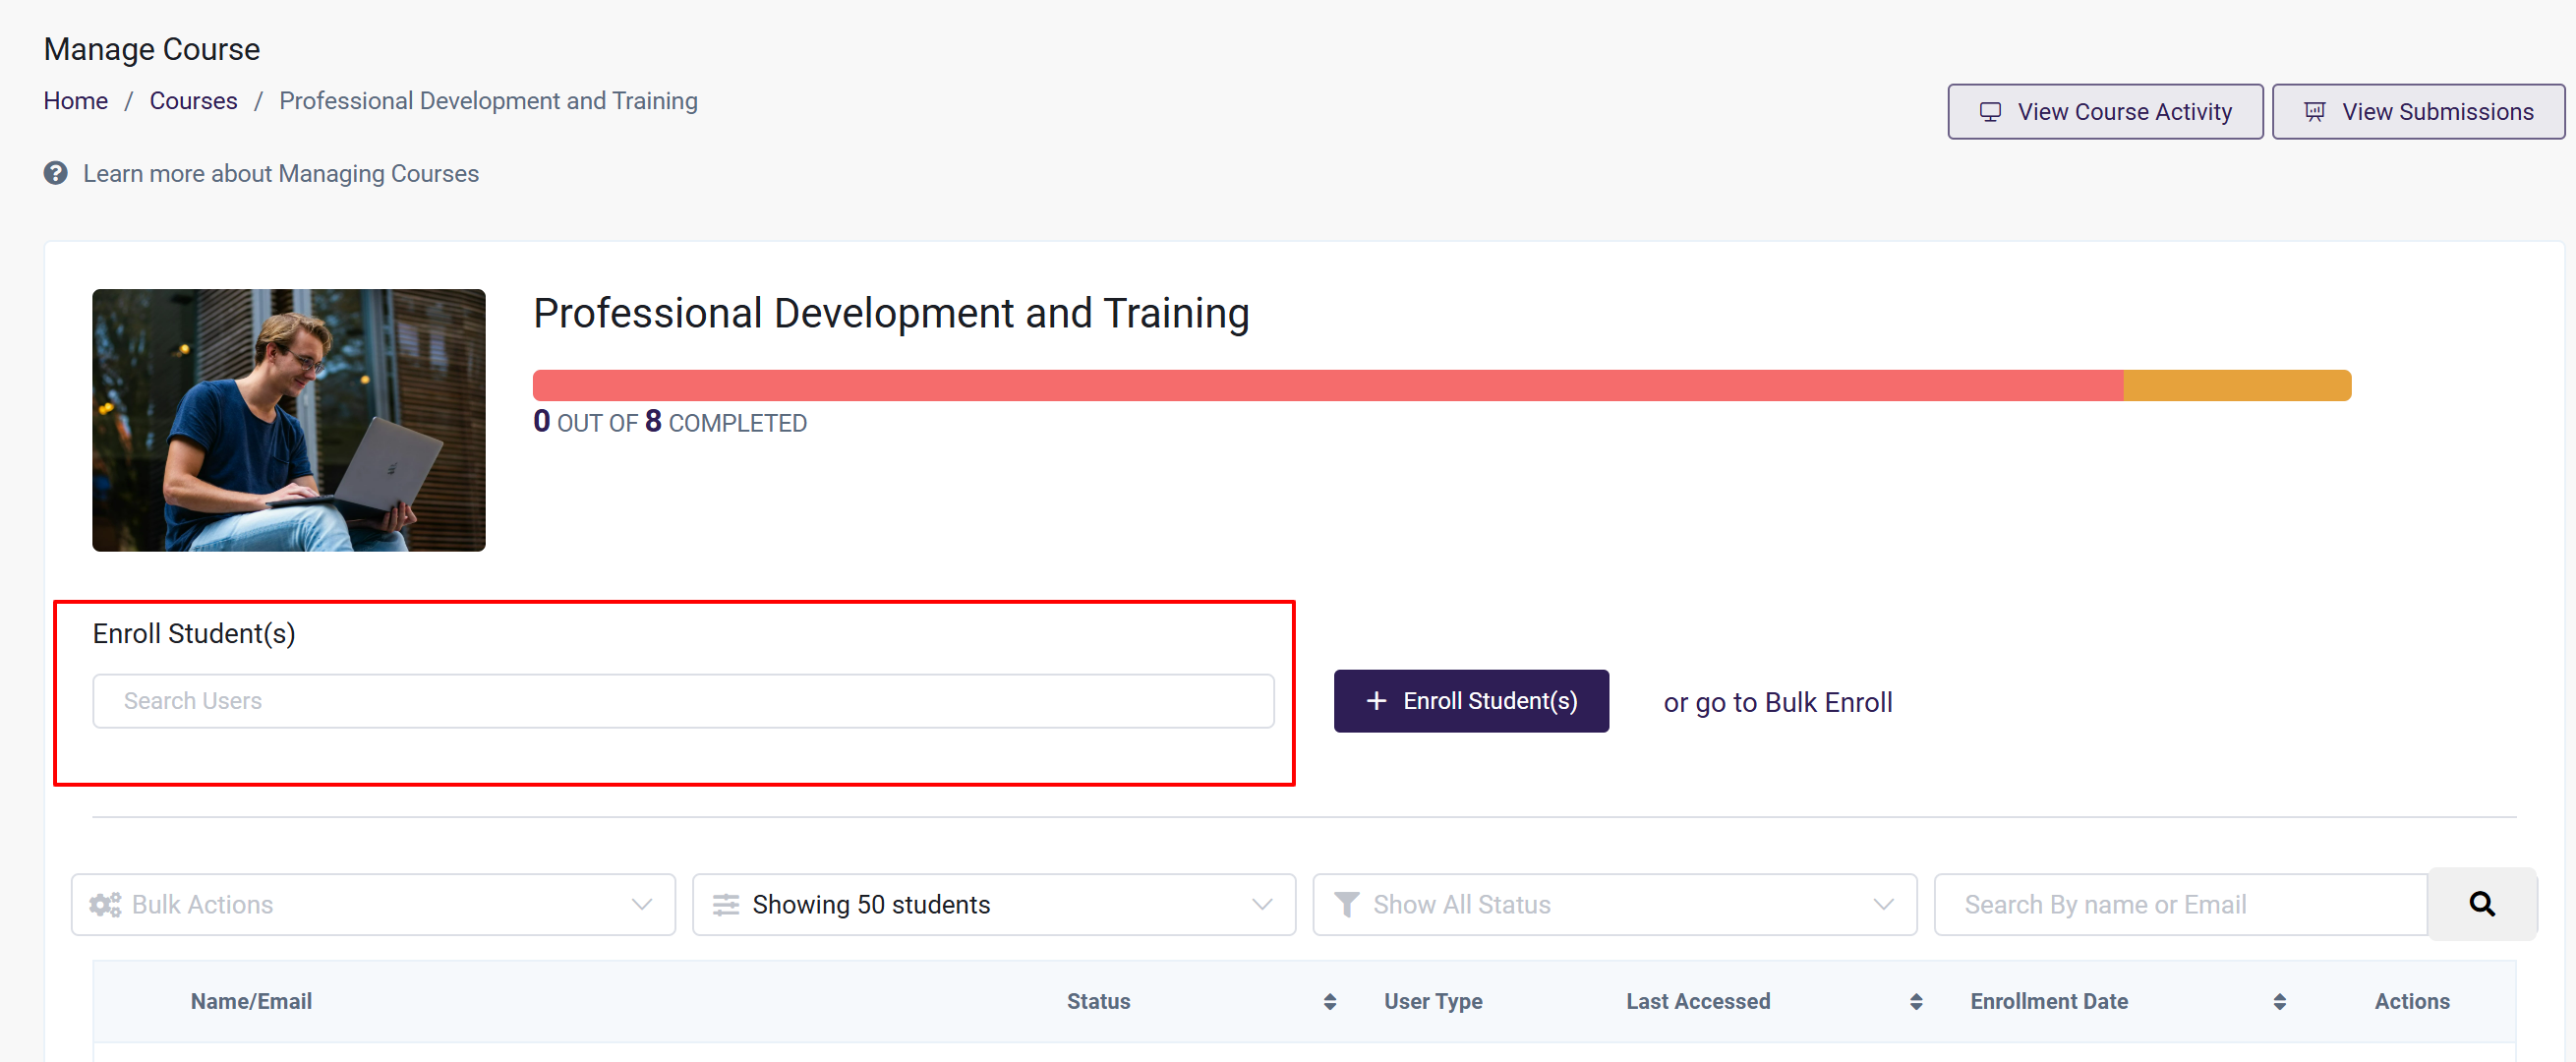
Enrolling Learners
If a user profile already exists for a learner, you can search for them by name and add them to the Course by clicking the "Enroll Student" button. This can be done with more than one user at a time.
Bulk Enrolling Learners: If you would like to bulk enroll a large number of learners, you can use the Bulk Upload option. If someone does not yet have a user profile, the bulk upload process will create one for them.
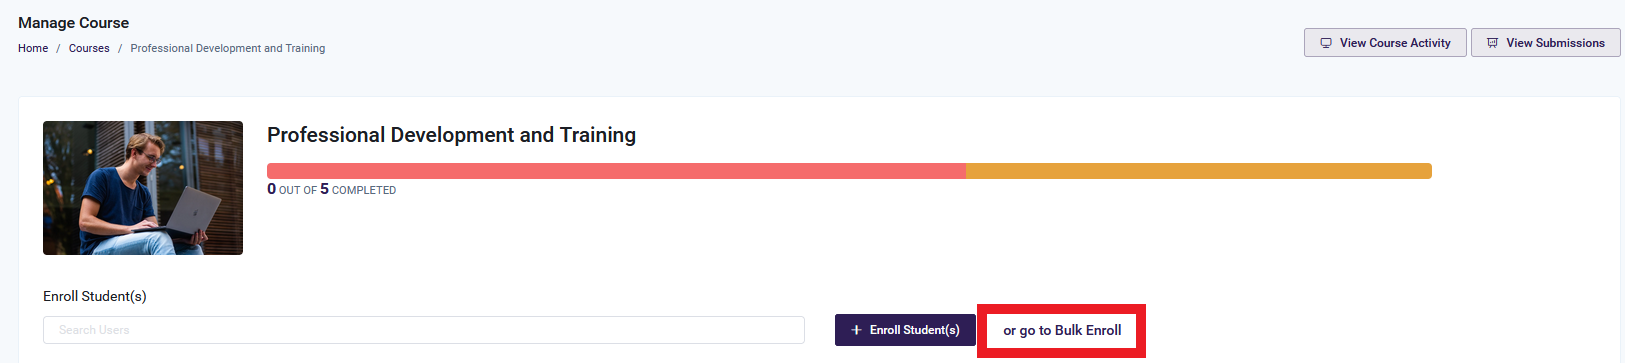
Clicking "Go to Bulk Enroll" will bring you to the Bulk Enroll page. For more information, see the Bulk Enrolling Students section of the Enrolling Students article.
Manage Courses Page Actions Menu
The Action Menu for managing an individual Course allows you to change multiple settings and access learner data such as viewing the progress and activity of a learner. Access this menu by clicking on the 3 dots to the far right of the learner's name. We'll go through what each action is below.
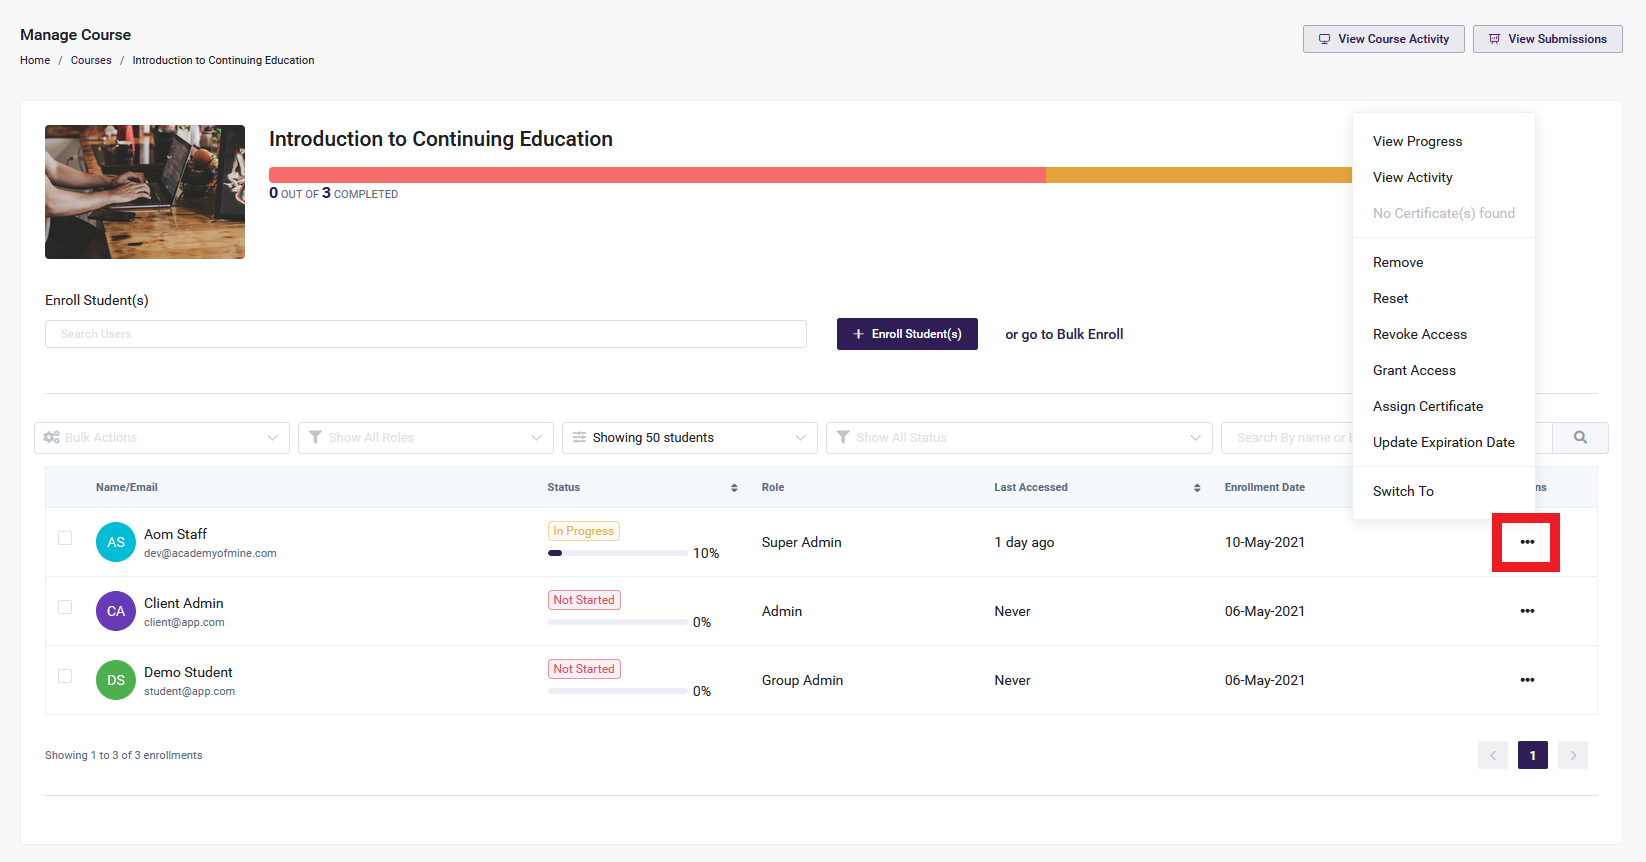
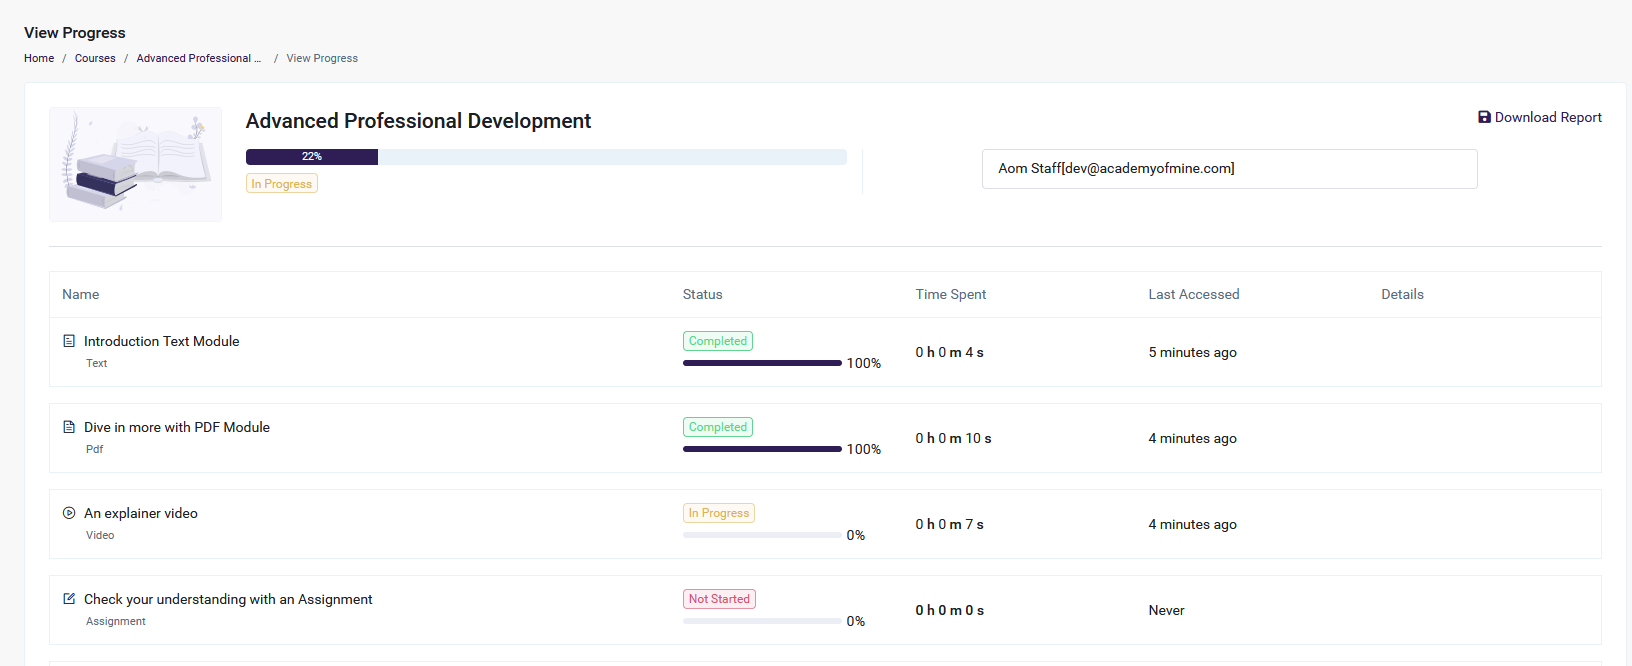
- View Progress: This is also known as the Learner Grade Book. Here you can view the Course progress of this learner, showing the percentage of Course completion, along with specific information about the completion status of each Module, how much time was spent in each Module, and when each Module was last accessed
- View Activity: Here you can view the Course Activities page of this learner. These activities include when the learner was enrolled in a Course, accessed a Course, started and completed Modules, or had access to the Course revoked or granted. For more details, see this section below.
- Download Certificate: If the learner has completed the course, you can download a copy of the certificate received.
- Remove: This will remove the learner from the Course. This is a permanent action and Course progress can not be restored.
- Reset: This removes all progress made by a learner in the Course and resets it for them.
Warning: Once Reset has been selected, all progress the learner has made in the Course will be lost. Each Module will show as "Not Started" and the learner will start over. This action cannot be reversed, and progress cannot be restored. Much like deleting Courses, this action must be taken with care, as it can't be reversed.
-
Revoke: This removes a learner's ability to access the Course. This will be used in cases where the Admin wants to remove the learner's access to the course, but not delete the learner's progress in the course. This will temporarily lock the learner out of the course. The learner and their progress will still show on the Manage Course page, but access will be blocked until the Grant Access function is used.

-
Grant Access: This will restore access to a learner who has had their access revoked. An admin will not use Grant Access without first having used Revoke Access. Again, when access is granted, no progress in the course has been lost.
-
Assign Certificate: If a certificate has been attached to a course, it will automatically be assigned to the learner either upon Course completion or when the learner meets or surpasses the grading criteria. There may be times when an Admin may want to award a certificate to a learner separately from course completion or grading criteria success. Examples may include situations where the course was created without a certificate attached, or if the wrong certificate was attached. When the situations in these examples have been corrected, the admin can use this function to assign a certificate immediately to the learner.
-
Update Expiration Date: The admin can change the date when a learner can no longer access the Course. An example of this would be If the learner notices that access to a course is expiring, the learner may reach out to the Admin to request an extension. While this function can be used to update the expiration date to earlier or later, it is usually used to extend the expiration date.
-
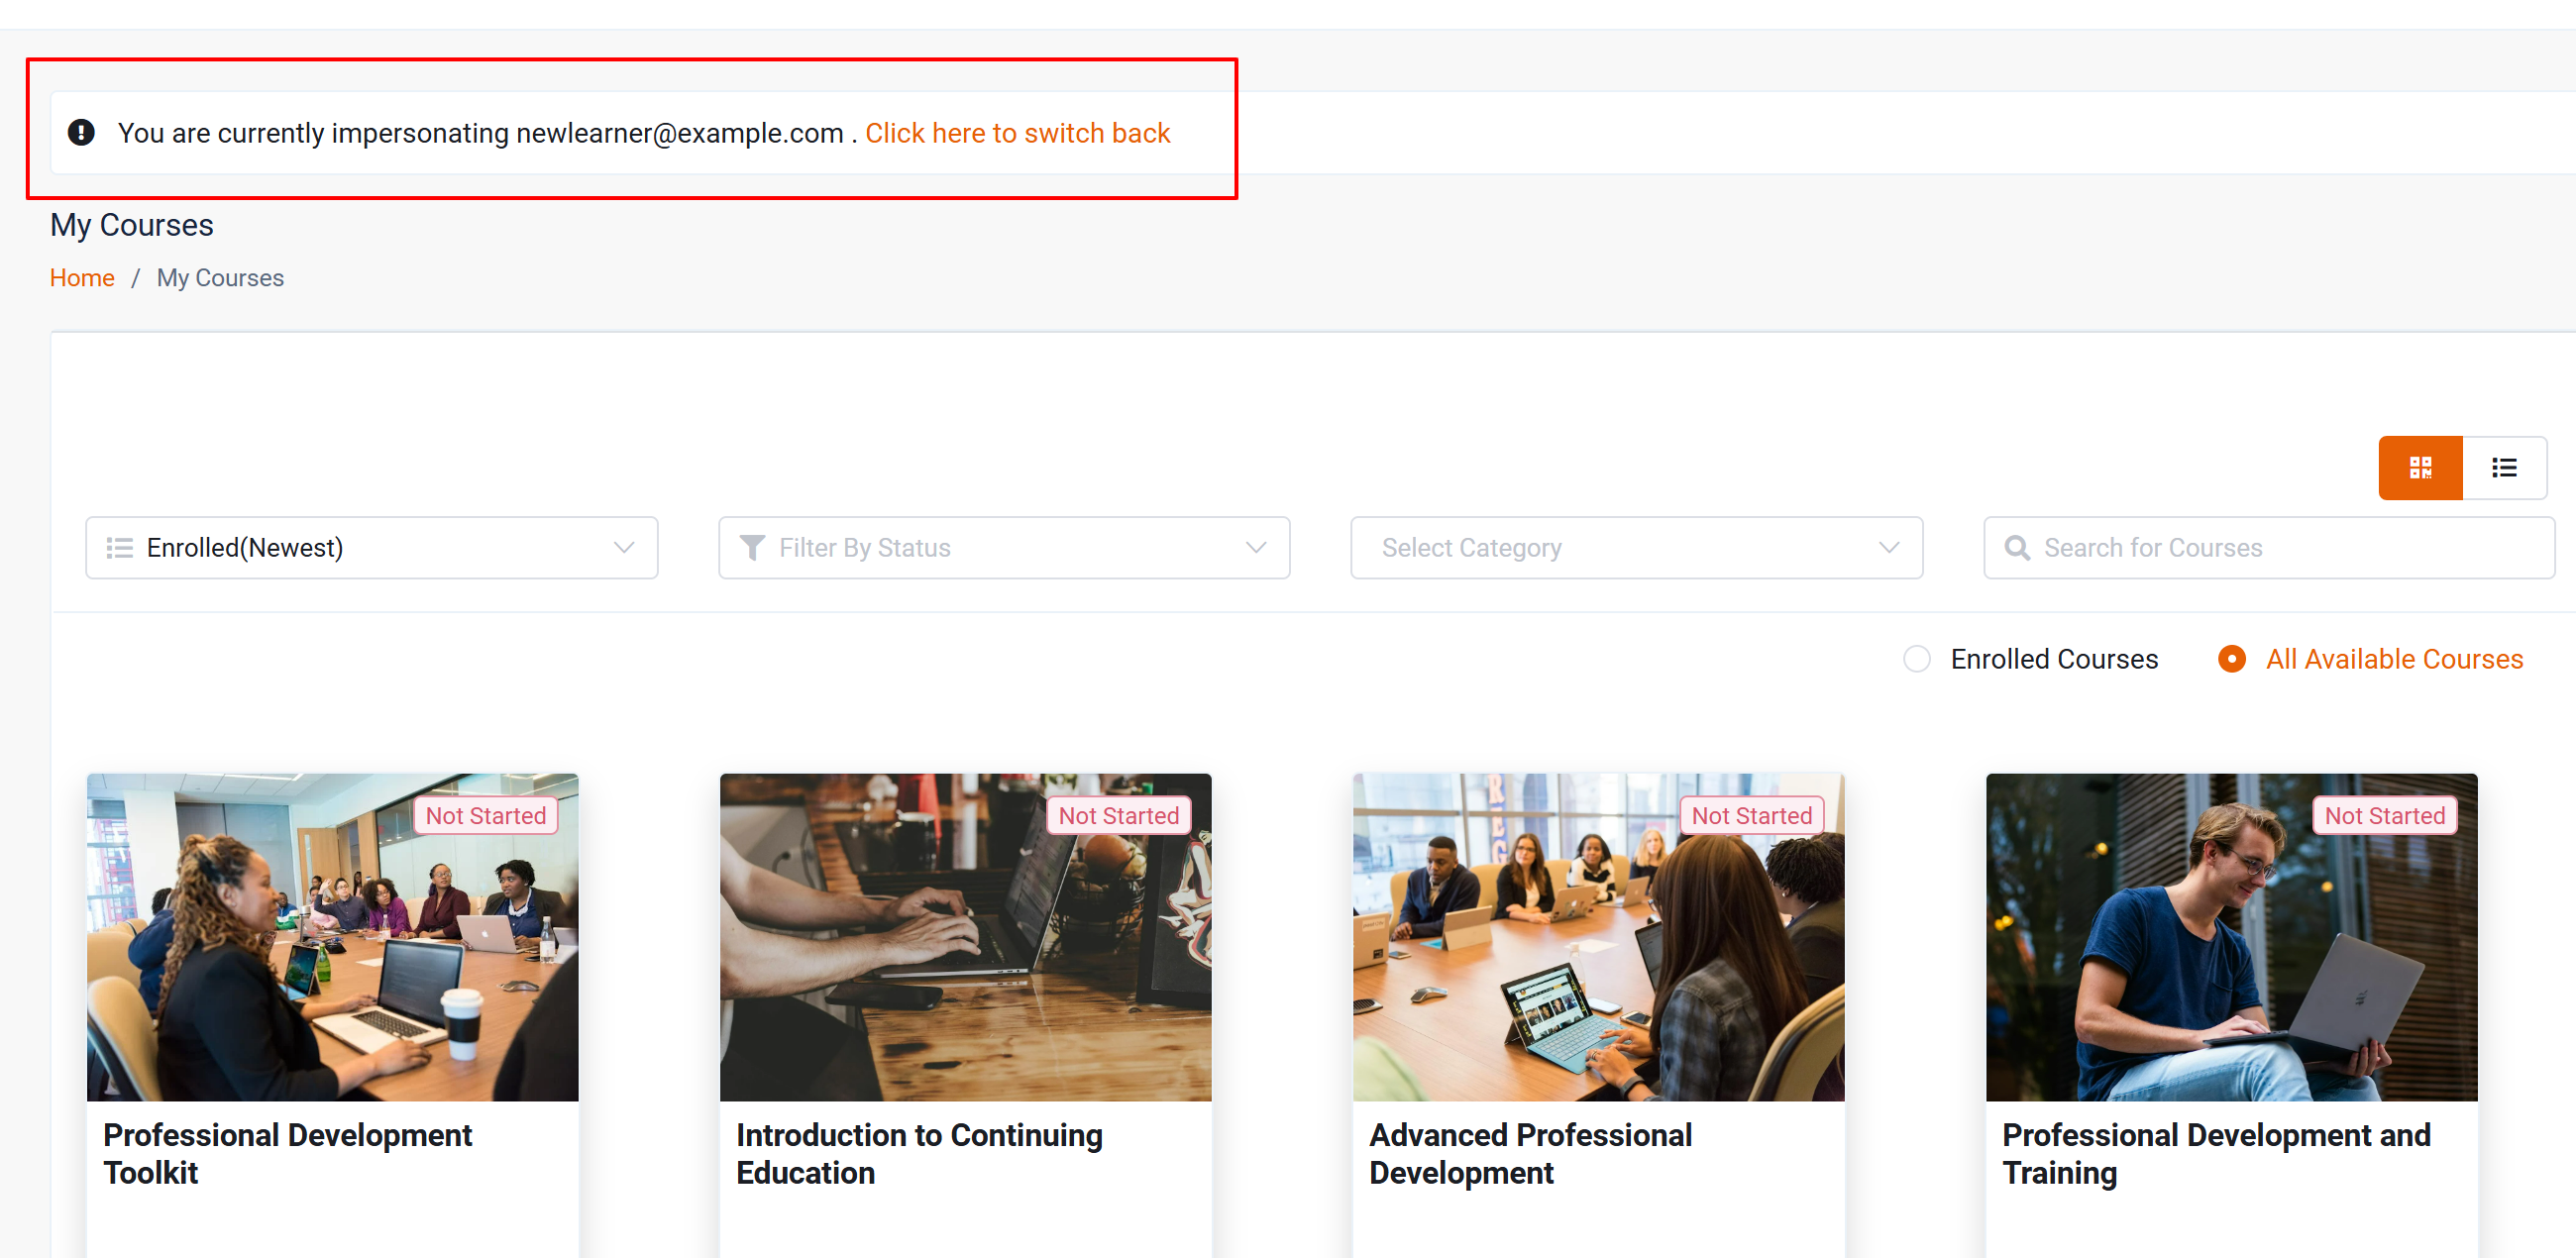
Switch To (available to Admins only): This function can be accessed from multiple places on the platform and will allow an Admin to view a learner's account from the learner's point of view. This is helpful if troubleshooting is needed on the learner's profile or to quickly review progress on Courses assigned to the learner. For more information, see the Enrolling Learners and Managing Your Portal (for Portal Administrators) article.
Manage Courses Page Bulk Actions Menu
The Bulk Actions menu allows you to change settings for multiple learners at once. Check the boxes next to learner names before starting a bulk action, or use the Actions menu.
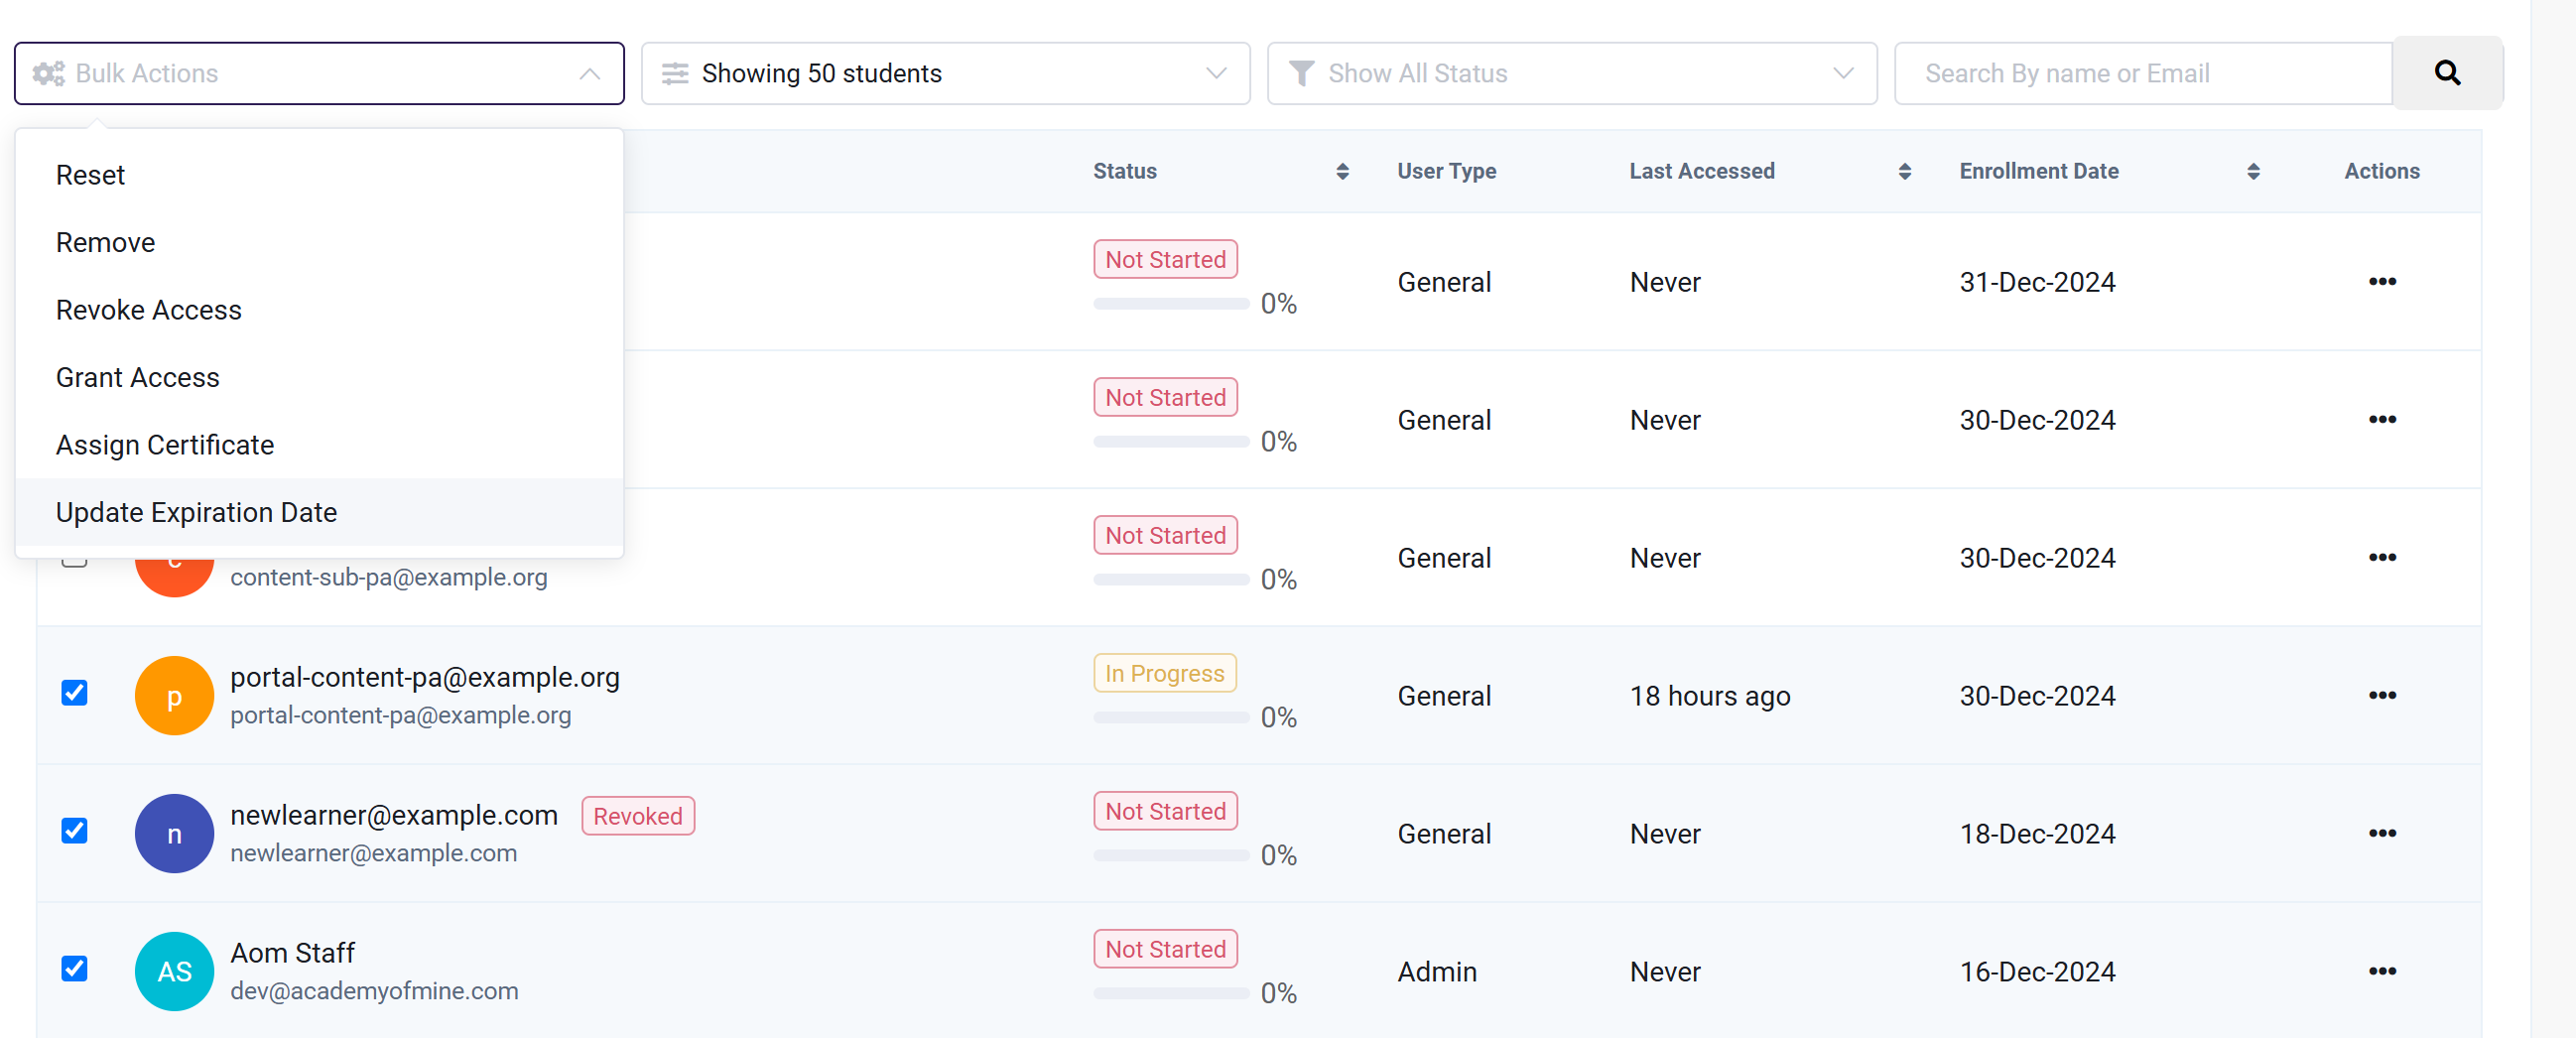
Now, let's go over the bulk action items available. As you can see, there is overlap in what you can do compared to the individual action menu:
- Remove: This will remove the learners selected from the Course. This is a permanent action and Course progress can not be restored.
- Reset: This removes all progress made by selected learners in the Course and resets it for them.
Warning: Once Reset has been selected, all progress the learner has made in the Course will be lost. Each Module will show as "Not Started" and the learner will start over. This action cannot be reversed, and progress cannot be restored. Much like deleting Courses, this action must be taken with care, as it can't be reversed.
- Revoke: This removes selected learners from the ability to access the Course. This will be used in cases where the Admin wants to remove the learner's access to the course, but not delete the learner's progress in the course. This will temporarily lock the learner out of the course. The learner and their progress will still show on the Manage Course page, but access will be blocked until the Grant Access function is used.
- Grant Access: This will restore access to the selected learners who have had their access revoked. An admin will not use Grant Access without first having used Revoke Access. Again, when access is granted, no progress in the course has been lost.
- Assign Certificate: If a certificate has been attached to a course, it will automatically be assigned to the learners either upon Course completion or when the learner meets or surpasses the grading criteria.
- Update Expiration Date: The admin can change the date when the selected learners can no longer access the Course.
View Learner Course Activity
The View Course Activity button is found at the top of the Manage Course page, on the right side.� The Course Activities page will give you a bird's eye view of all learner activities with this Course.
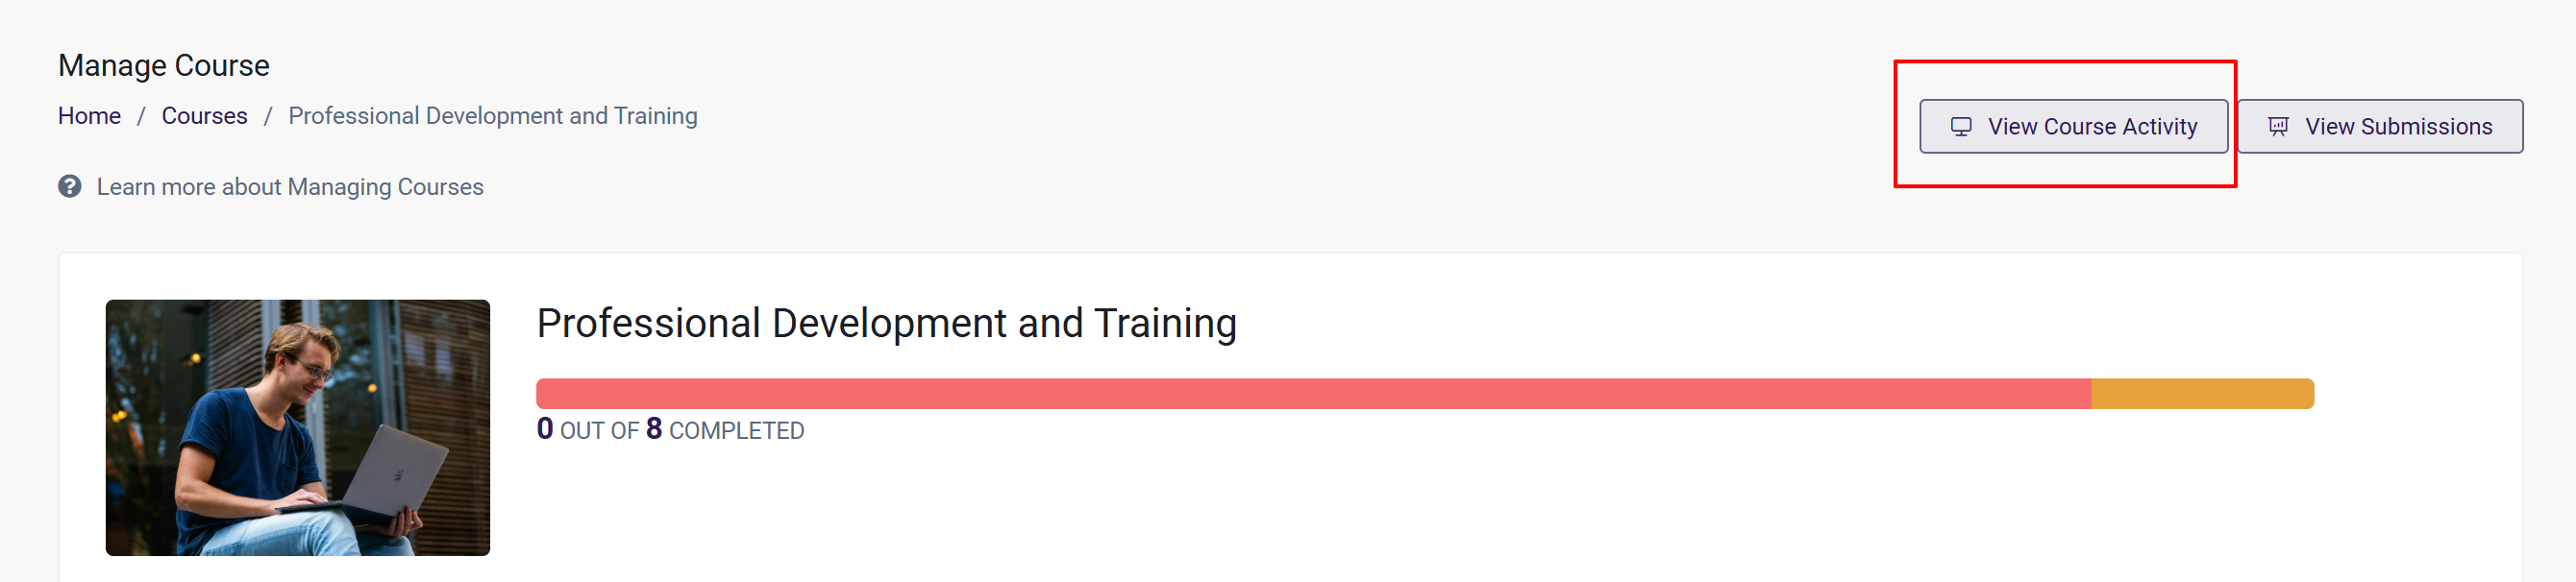
From here, you'll be able to see a timestamped event for every step students have taken within the Course.
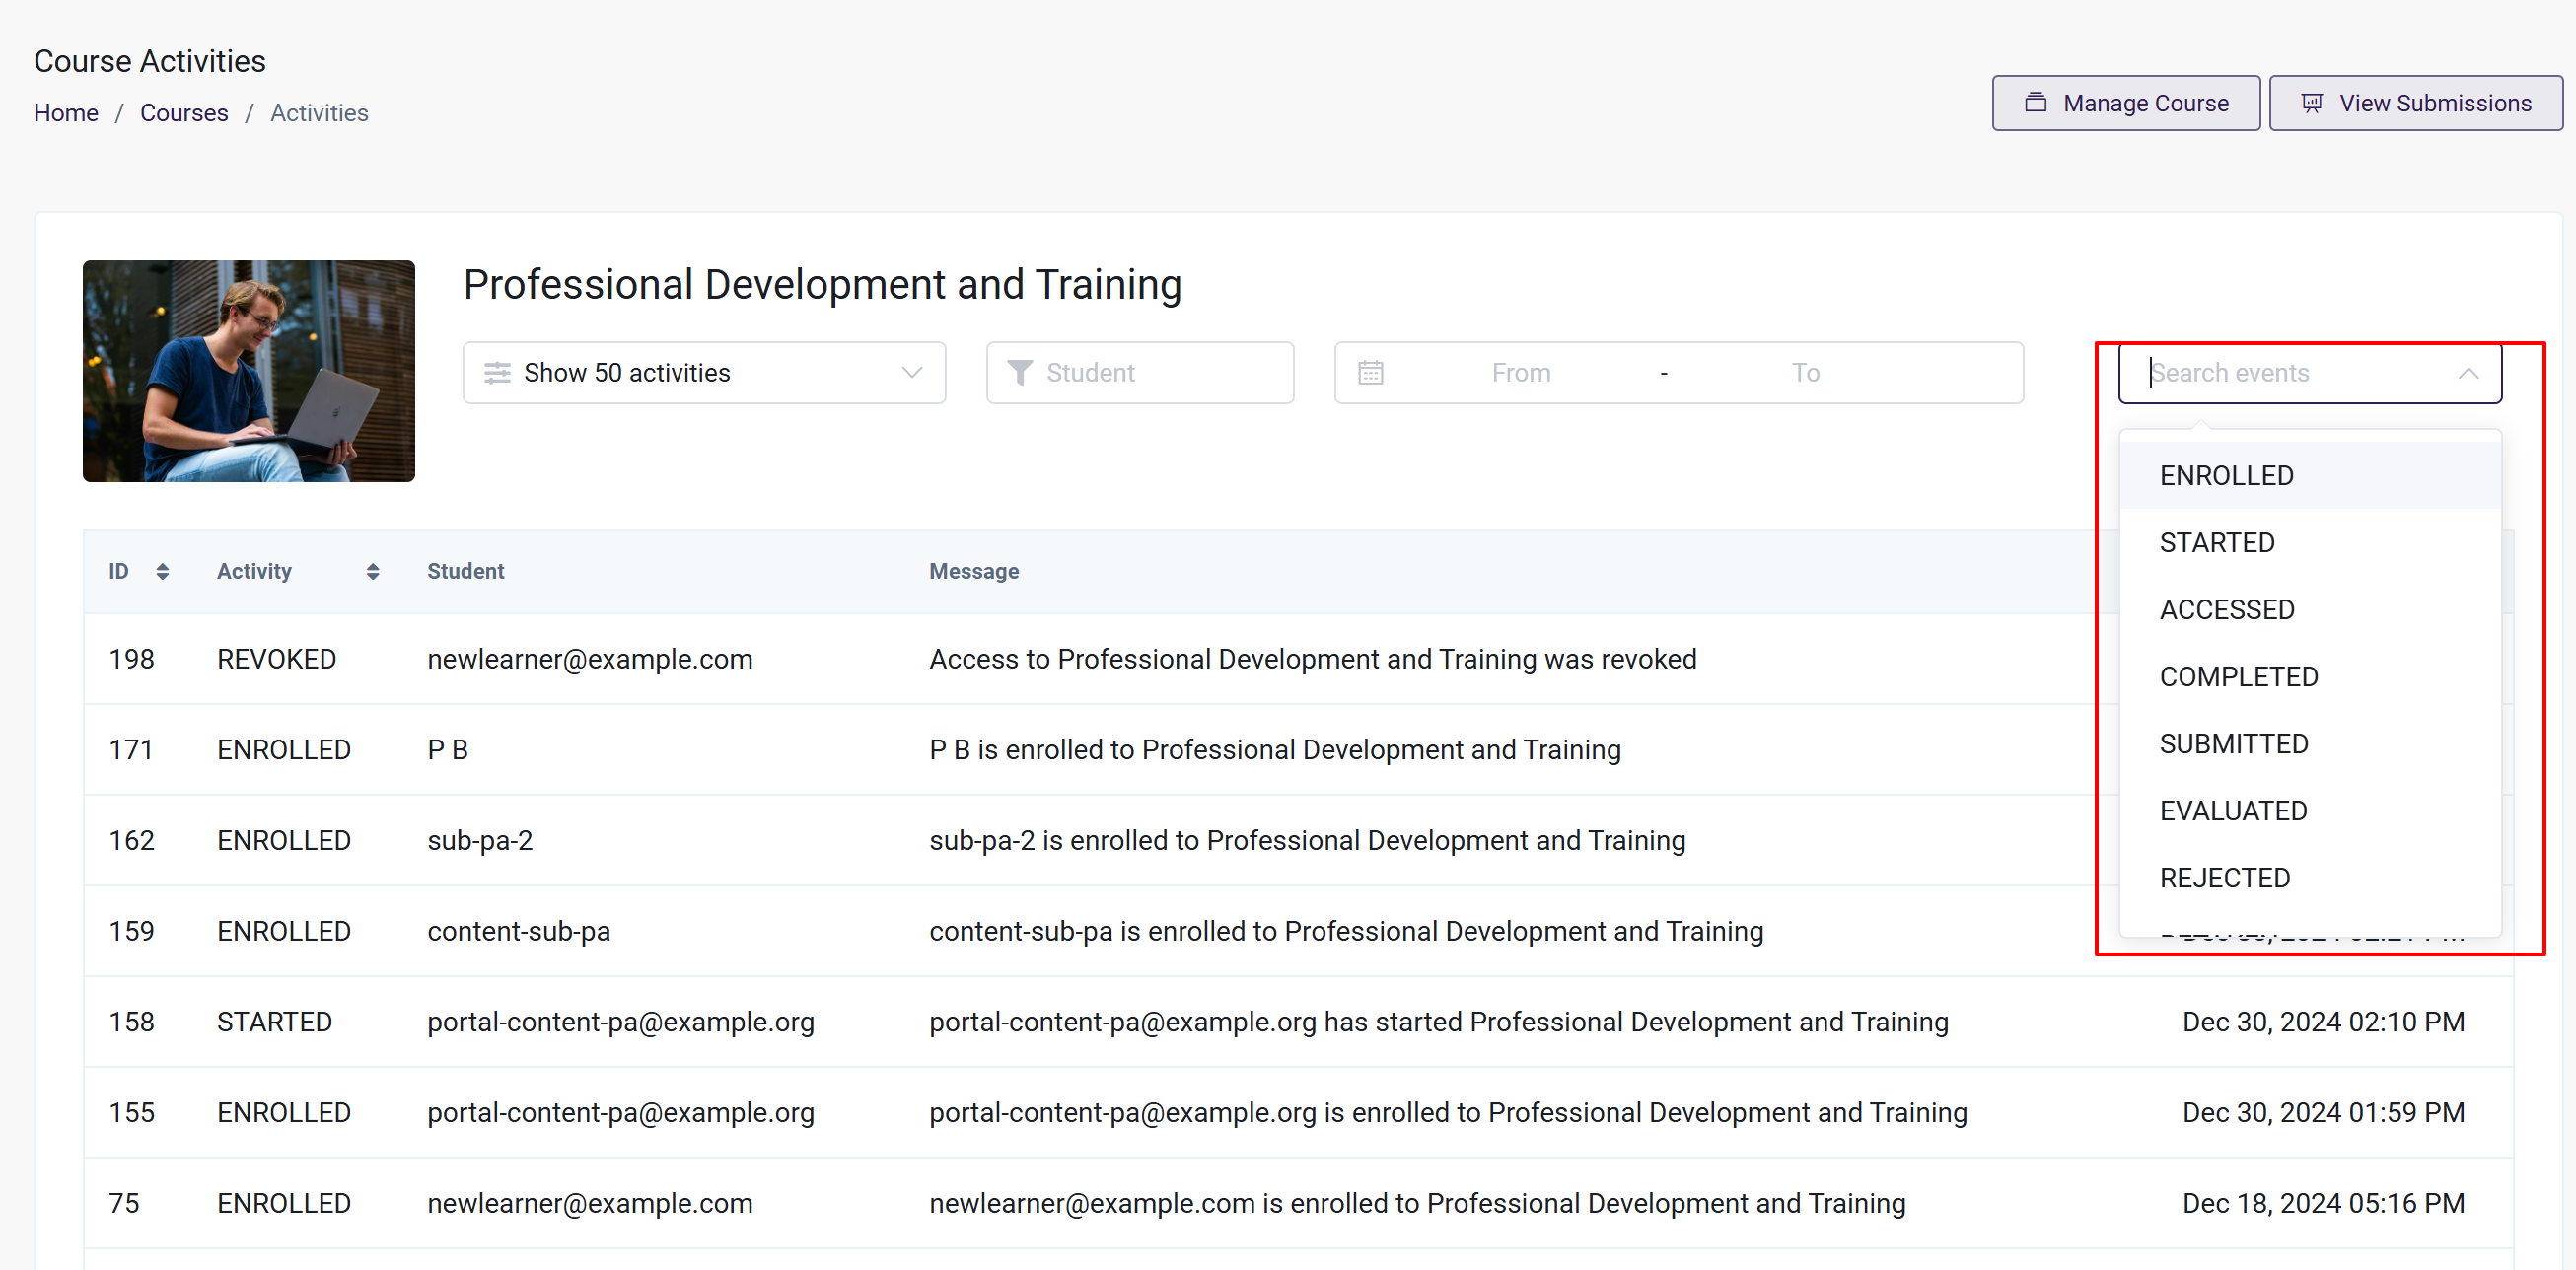
You can search the activity log by the following events:
- Enrolled
- Started
- Accessed
- Completed
- Submitted
- Evaluated
- Rejected
- Retaken
- Achieved Certificate
- Reset
- Removed
- Revoked
- Granted
- Updated Expiry Date
View Learner Submissions
If a learner has submitted a response to an Assignment or Discussion Module for grading, it can be found on the Course Submissions page. The View Submissions button is found at the top of the Manage Course page, next to the View Course Activity button.
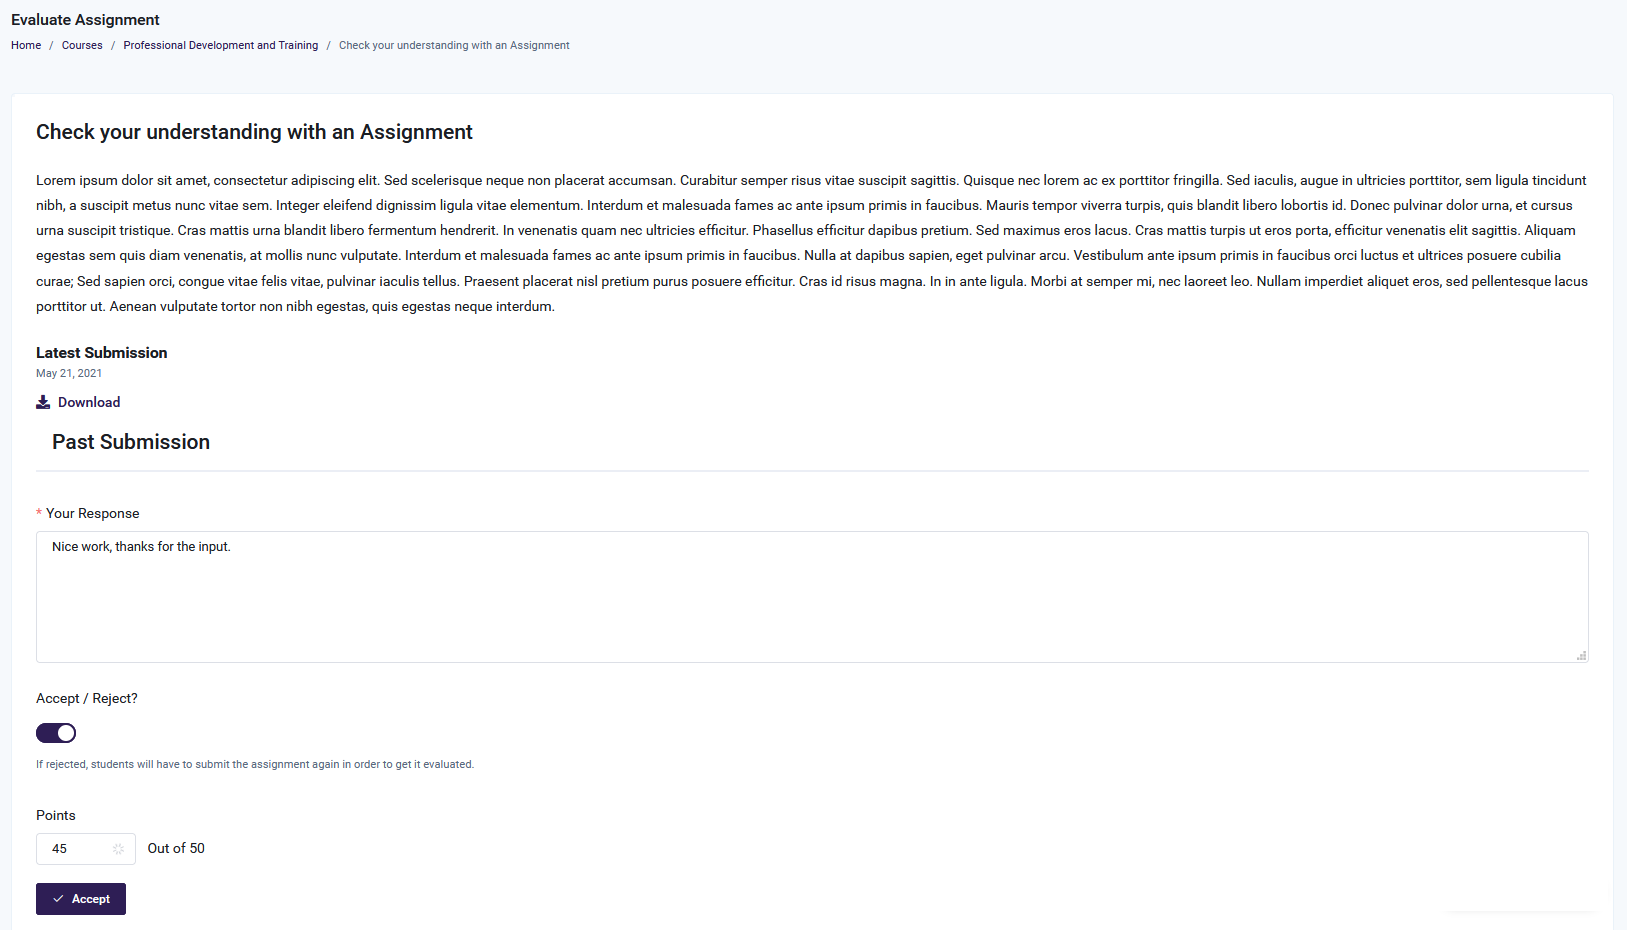
Here we can see the Course Submissions, with the option to Evaluate:
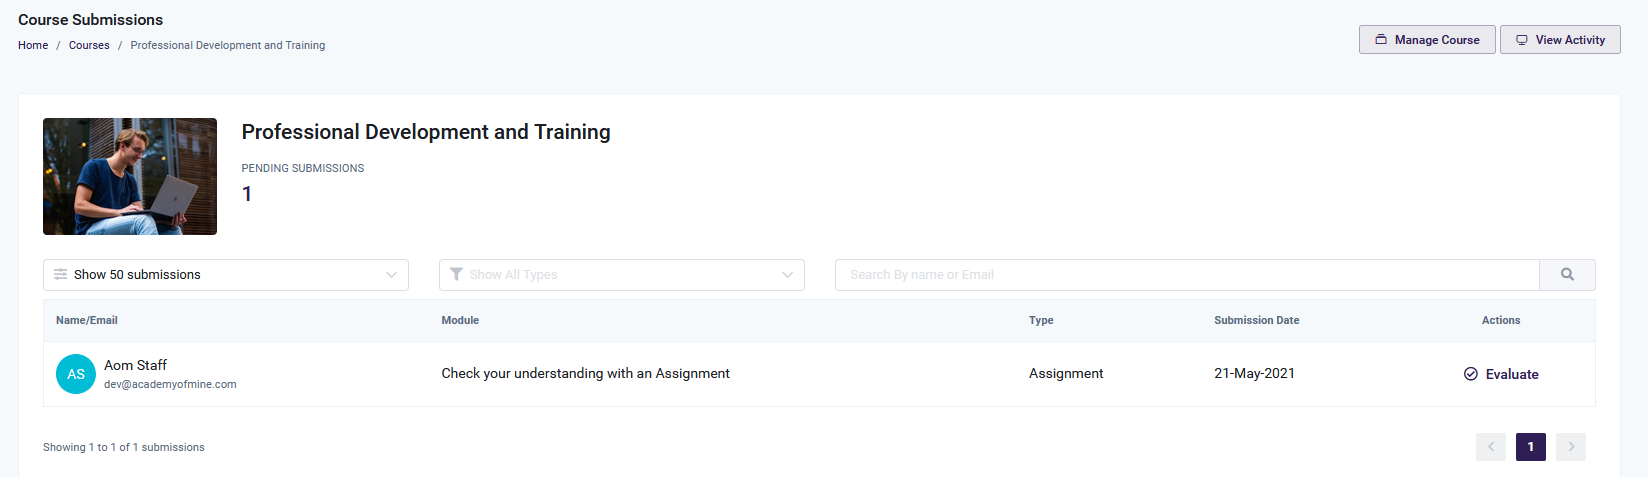
Clicking Evaluate will take the Instructor to a page to review the learner's work and assign a grade.
Managing Instructor-Led Courses
If you have the Instructor-Led course option on your platform, you can manage the course as well as the roster for a specific class to view and manage the roster. On the roster, you will be able to enroll a learner(s), mark a learner's attendance status, assign a certificate, and remove them from the class. Let's go into each function.
Note that instructor-led courses may not be available to legacy users--please contact support if you have questions about the accessibility of this feature!
Instructor Led Course Page
To view the overview for an Instructor Led Course (to see the classes that are a part of the course, and then manage the roster for each), click Courses>All Courses. Hover over the Instructor Led course you wish to view, and choose Manage.
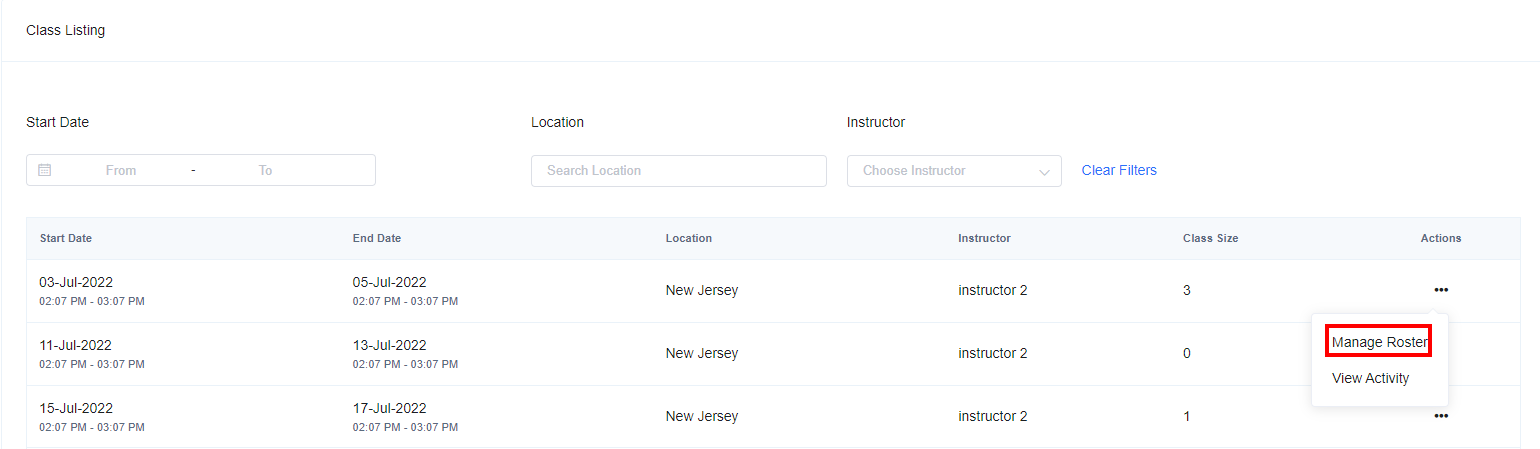
This will show you a list of the classes that are a part of this course. You can filter by location, instructor, and time:
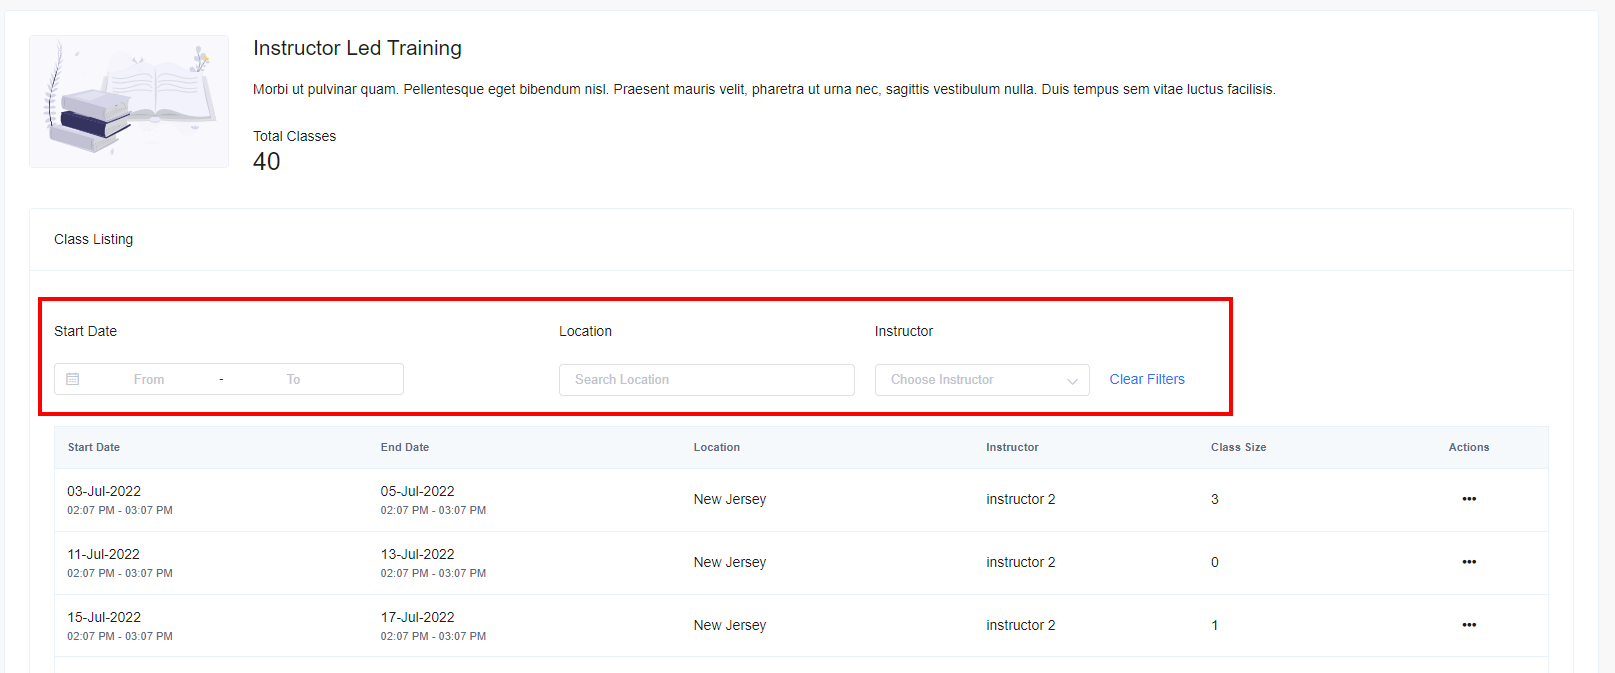 To dive more into each class, you'll need to manage the roster for a specific class--see below.
Managing the Roster
On the Manage Roster page, Admins and Instructors can:
- View the class roster
- Adjust attendance status
- Assign certificates
- Enroll students in a class
They can also remove a student from the course, or log in as them to see what they see. We'll go through how to perform all those actions below. On this main roster page, Admins will see an overview of the class--how many total students are enrolled, how many of each attendance status there are, and the date/time of the class.
-
From the Admin Dashboard, select Courses, then All Courses
-
Hover over the course you want to view classes for, and choose Manage, or click the three-dot action menu and choose Manage Course
-
Find the class you wish to view or manage the roster and click the three-dot action menu--select Manage Roster
-
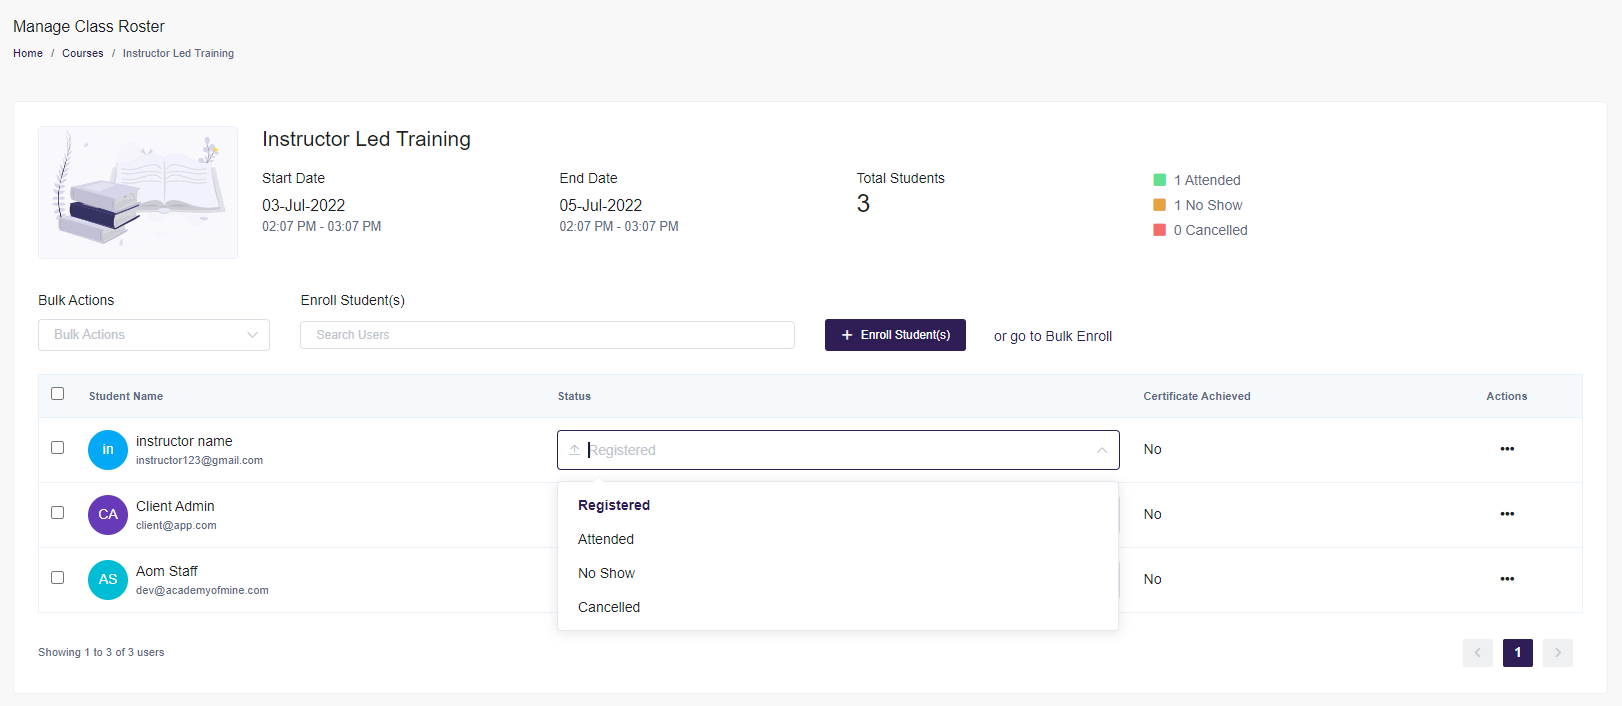
This will open the roster for that class. It will show the start date/end date, how many total students are enrolled, and the status of the students enrolled.
-
To enroll an existing student, search for them by name and add them to the class by clicking the "Enroll Student" button. This can be done with more than one user at a time.
Bulk Enrolling Students: If you would like to bulk enroll a large number of students, you can use the Bulk Upload option. If someone does not yet have a user profile, the bulk upload process will create one for them. Clicking "Go to Bulk Enroll" will bring you to the Bulk Enroll page. For more information, see the Bulk Enrolling Students section of the Enrolling Students article.
- To adjust a student's attendance status from Registered to Attended, No Show or Cancelled, click the dropdown menu to the right of the student and choose their status:
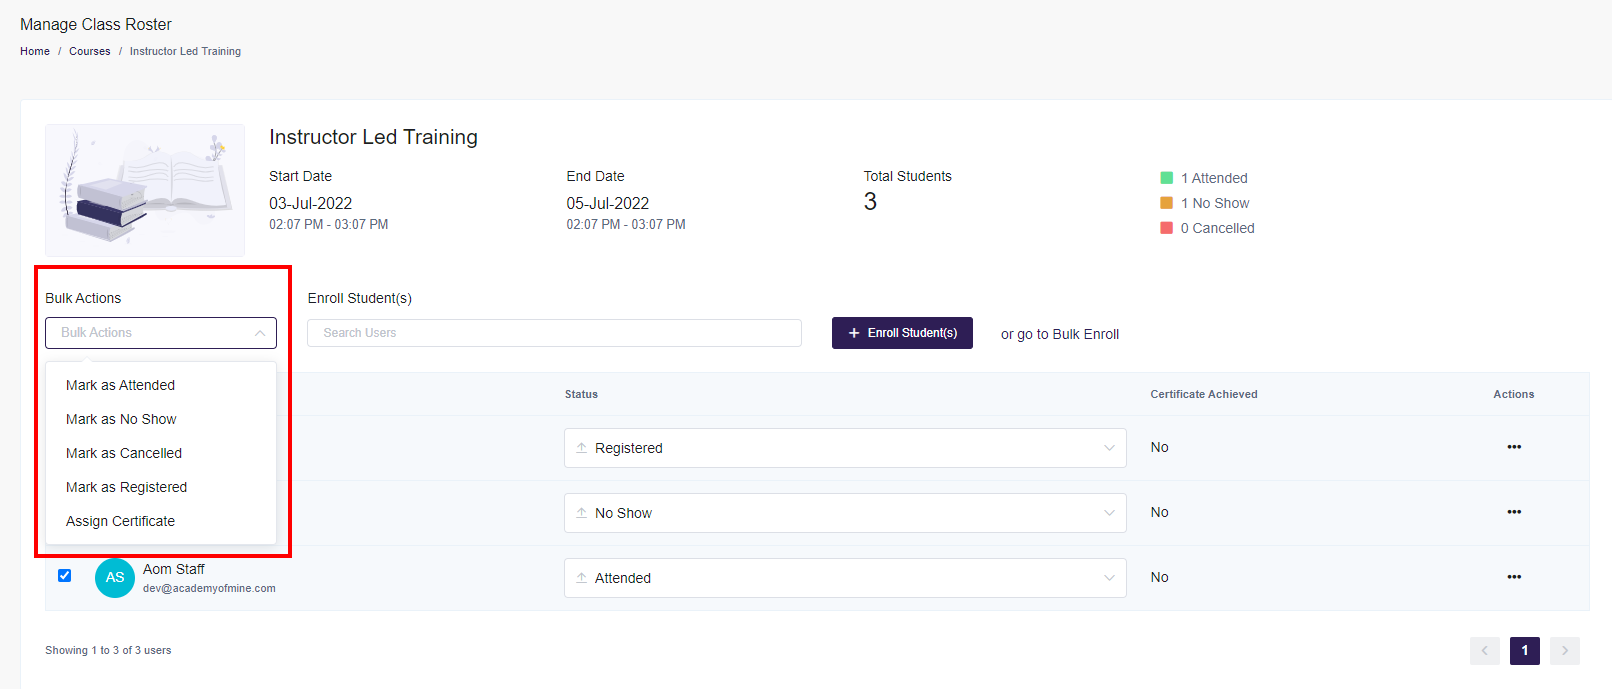
- You can also use the Bulk Edit feature to select multiple students at once, and adjust their attendance status or assign a certificate en masse
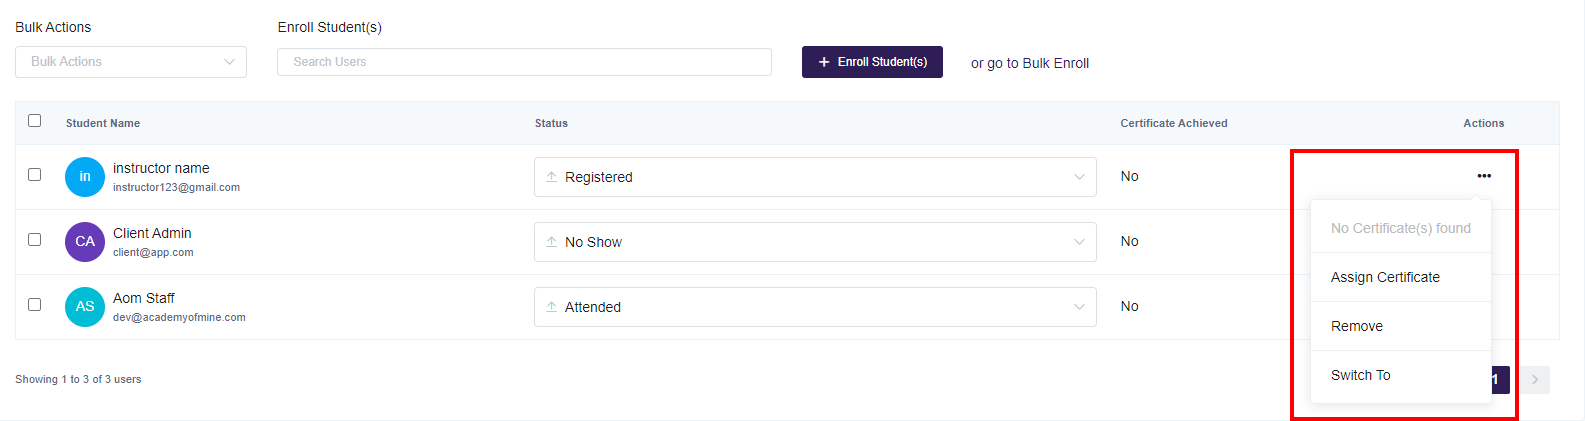
- To assign a certificate to an individual student, click the three-dot action menu next to their name and click Assign Certificate. You can also use that three-dot action menu to remove a student from the class, or switch to their login to view things from their perspective. This is helpful with troubleshooting with a student.
Viewing Course Activity
From the Manage Course page, you'll be able to opt to view the activity for a certain class. This will show when students were enrolled, when their status was updated, and to what.
- From the Admin Dashboard, select Courses, then All Courses
- Hover over the Course and select Manage
- Click the three-dot action menu to the right of the course you want to view, and click View Activity
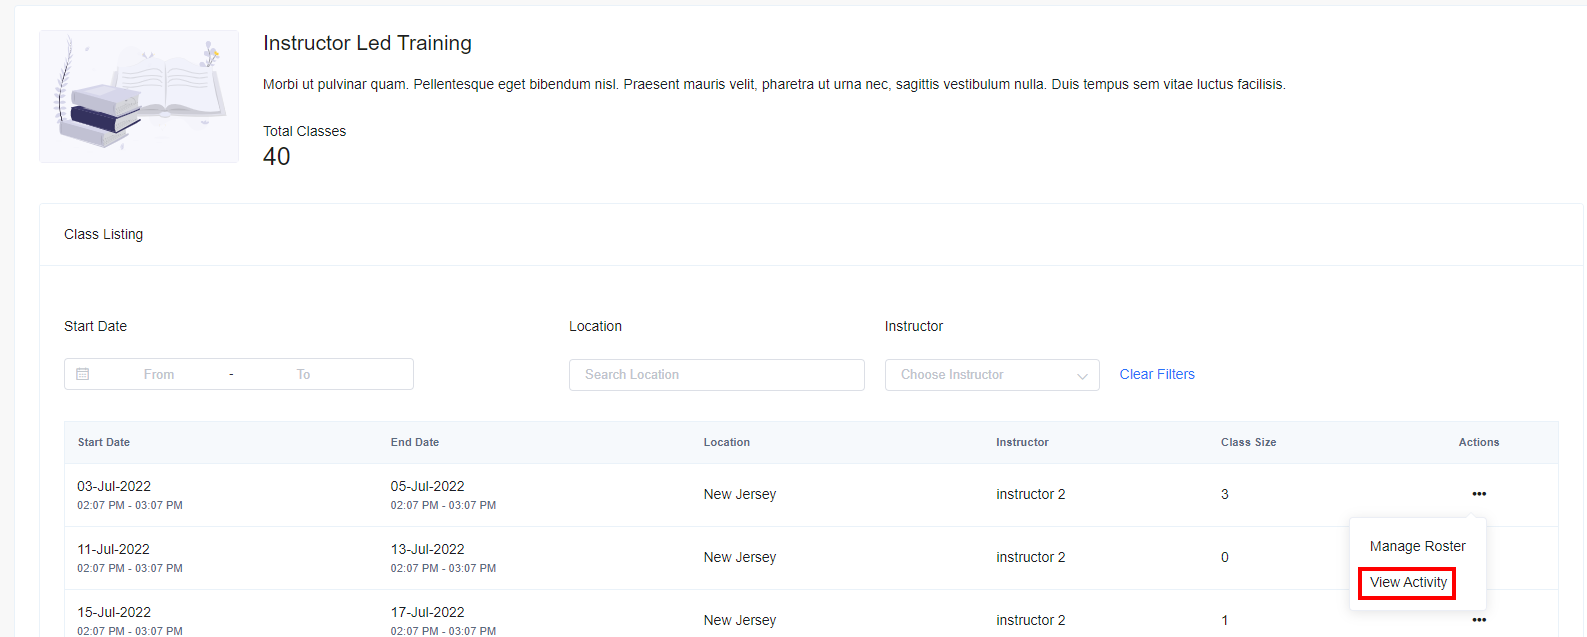
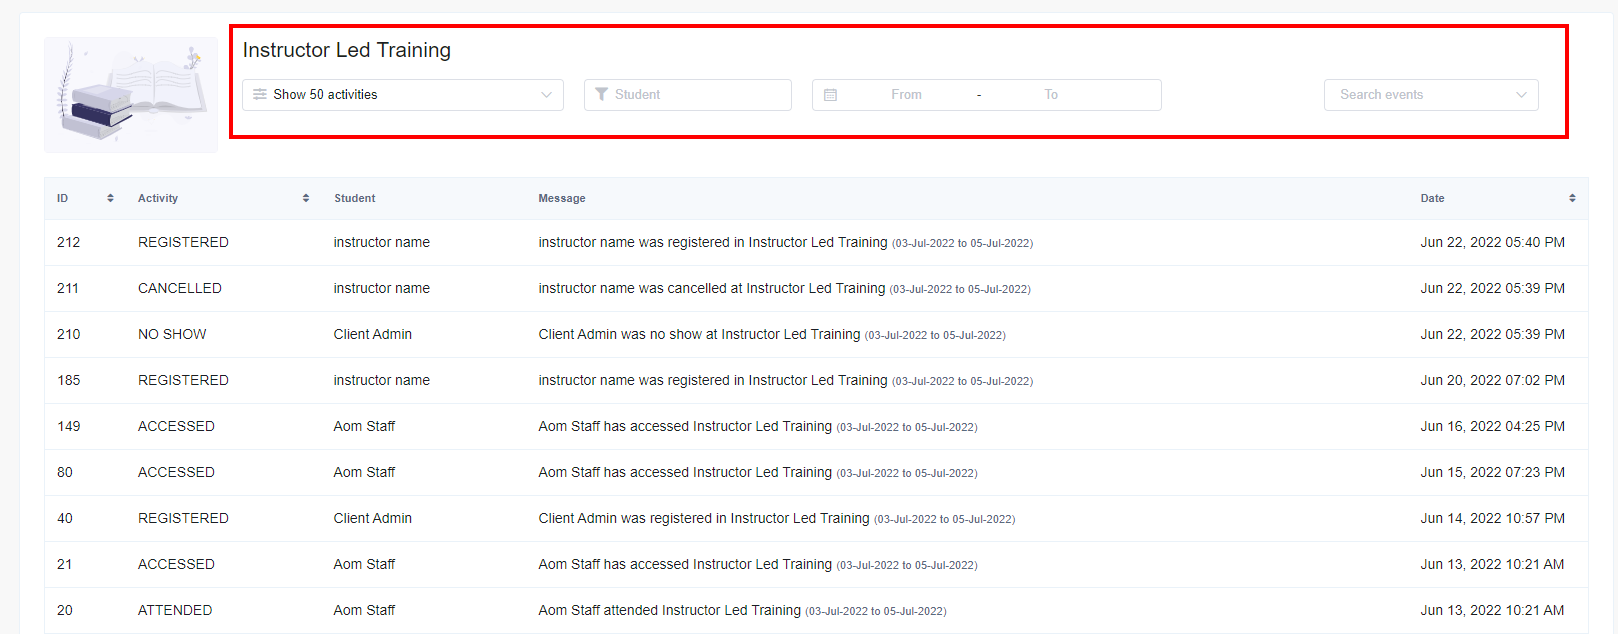
- This will show you a log of events related to this class. You can filter by student, date and event type.
Next Step
Now that you understand managing your Course, you'll want to add your Course to a Product so people can purchase and enroll in it. This guide will help you with those steps: