Using Text and HTML in a Course
A Text/HTML Module serves as a blank canvas, allowing you to create and customize content for your course. Similar to a Site Page, this module offers the flexibility to include almost anything you can add to a webpage.
With a Text/HTML Module, you can seamlessly add elements like tables or images directly into the content area. Additionally, leveraging custom HTML opens the door to even more creative possibilities.
In this guide, we'll go over the content structure of a Text/HTML Module and provide step-by-step instructions for creating one.
Content Structure of a Text/HTML Module
Before creating a Text/HTML Module, it’s important to understand how its content is organized using sections, rows, and blocks.
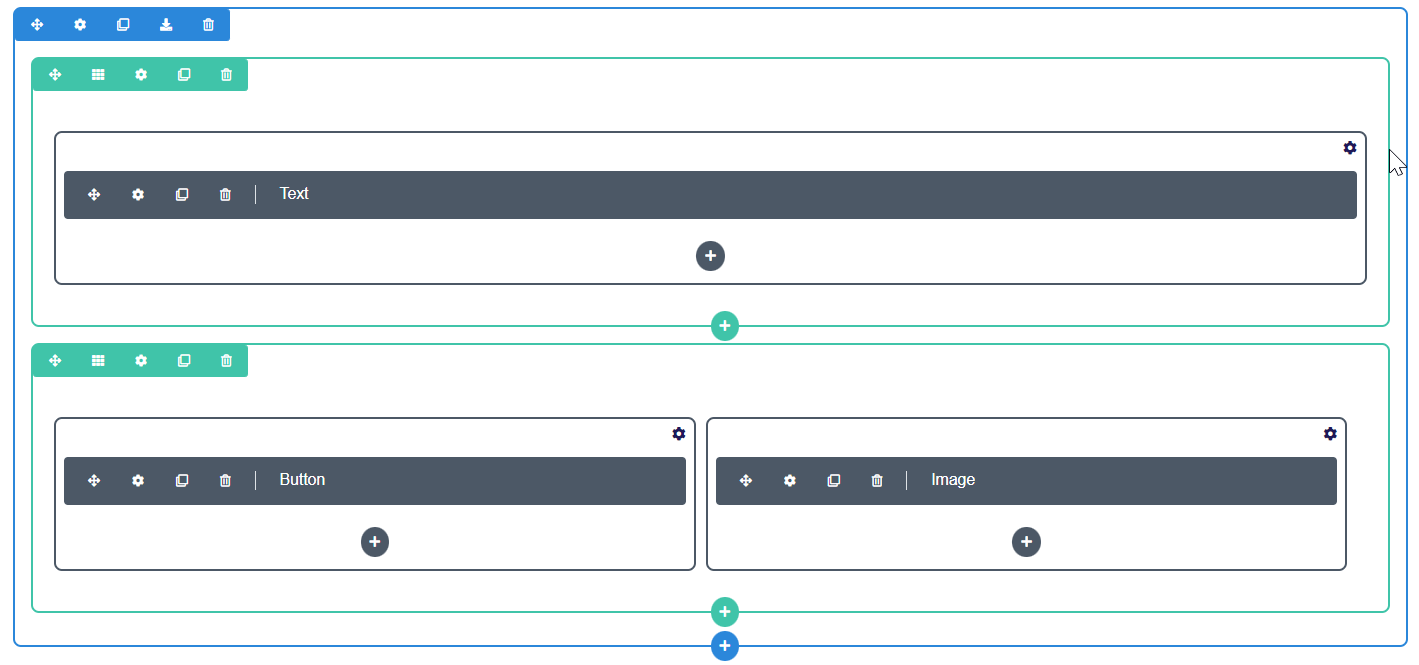
- Sections are the main containers that hold your rows and blocks. Each module will have at least one section, and each section serves a specific purpose. Consider how you’d like to divide your content into meaningful sections to keep everything organized.
- Rows are used to organize content within a section. Unlike sections, rows can be divided into columns, and you can choose from various layouts to suit your needs. Each section can include multiple rows, allowing for flexible content arrangements.
- Blocks are the actual content elements you add to the page. These include options like Text/HTML, Image, Video, PDF, Button, and Code. Blocks sit within rows and allow you to add all the visual and functional components of your module.
Together, sections, rows, and blocks make up the structure of your module. For example, you might have a module with one section that contains two rows—one with a single column holding a Text block and another divided into two columns with a Button block and an Image block. This structure ensures your content is both organized and visually engaging.
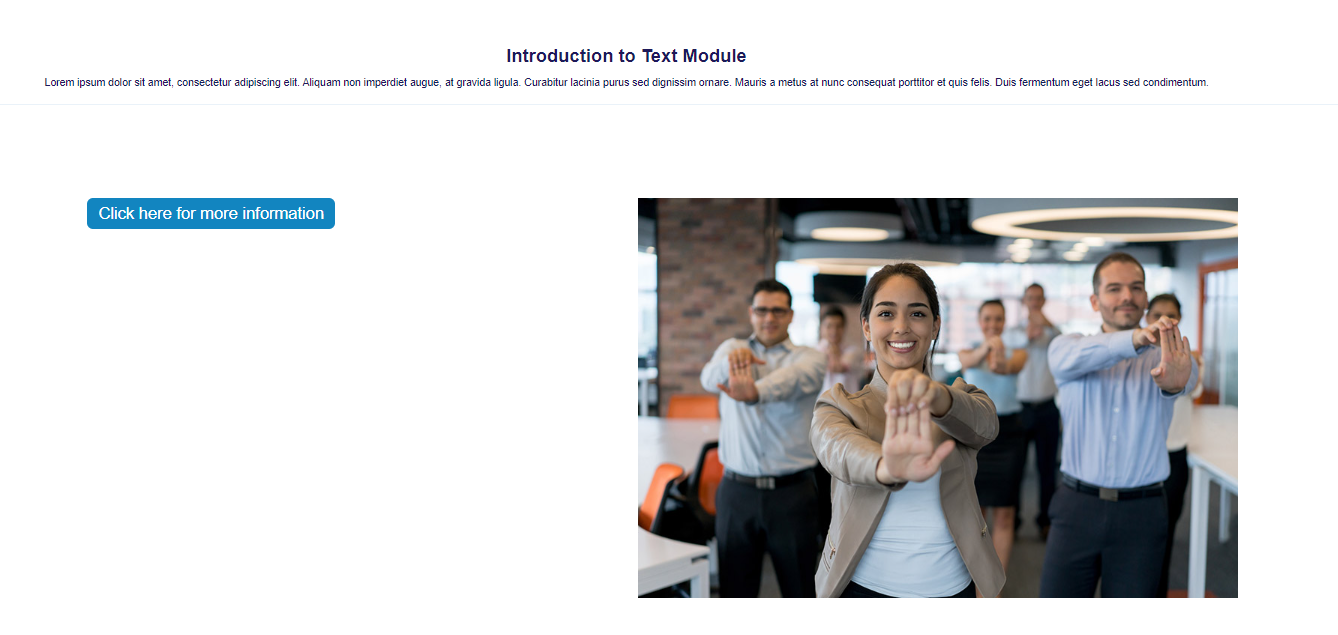
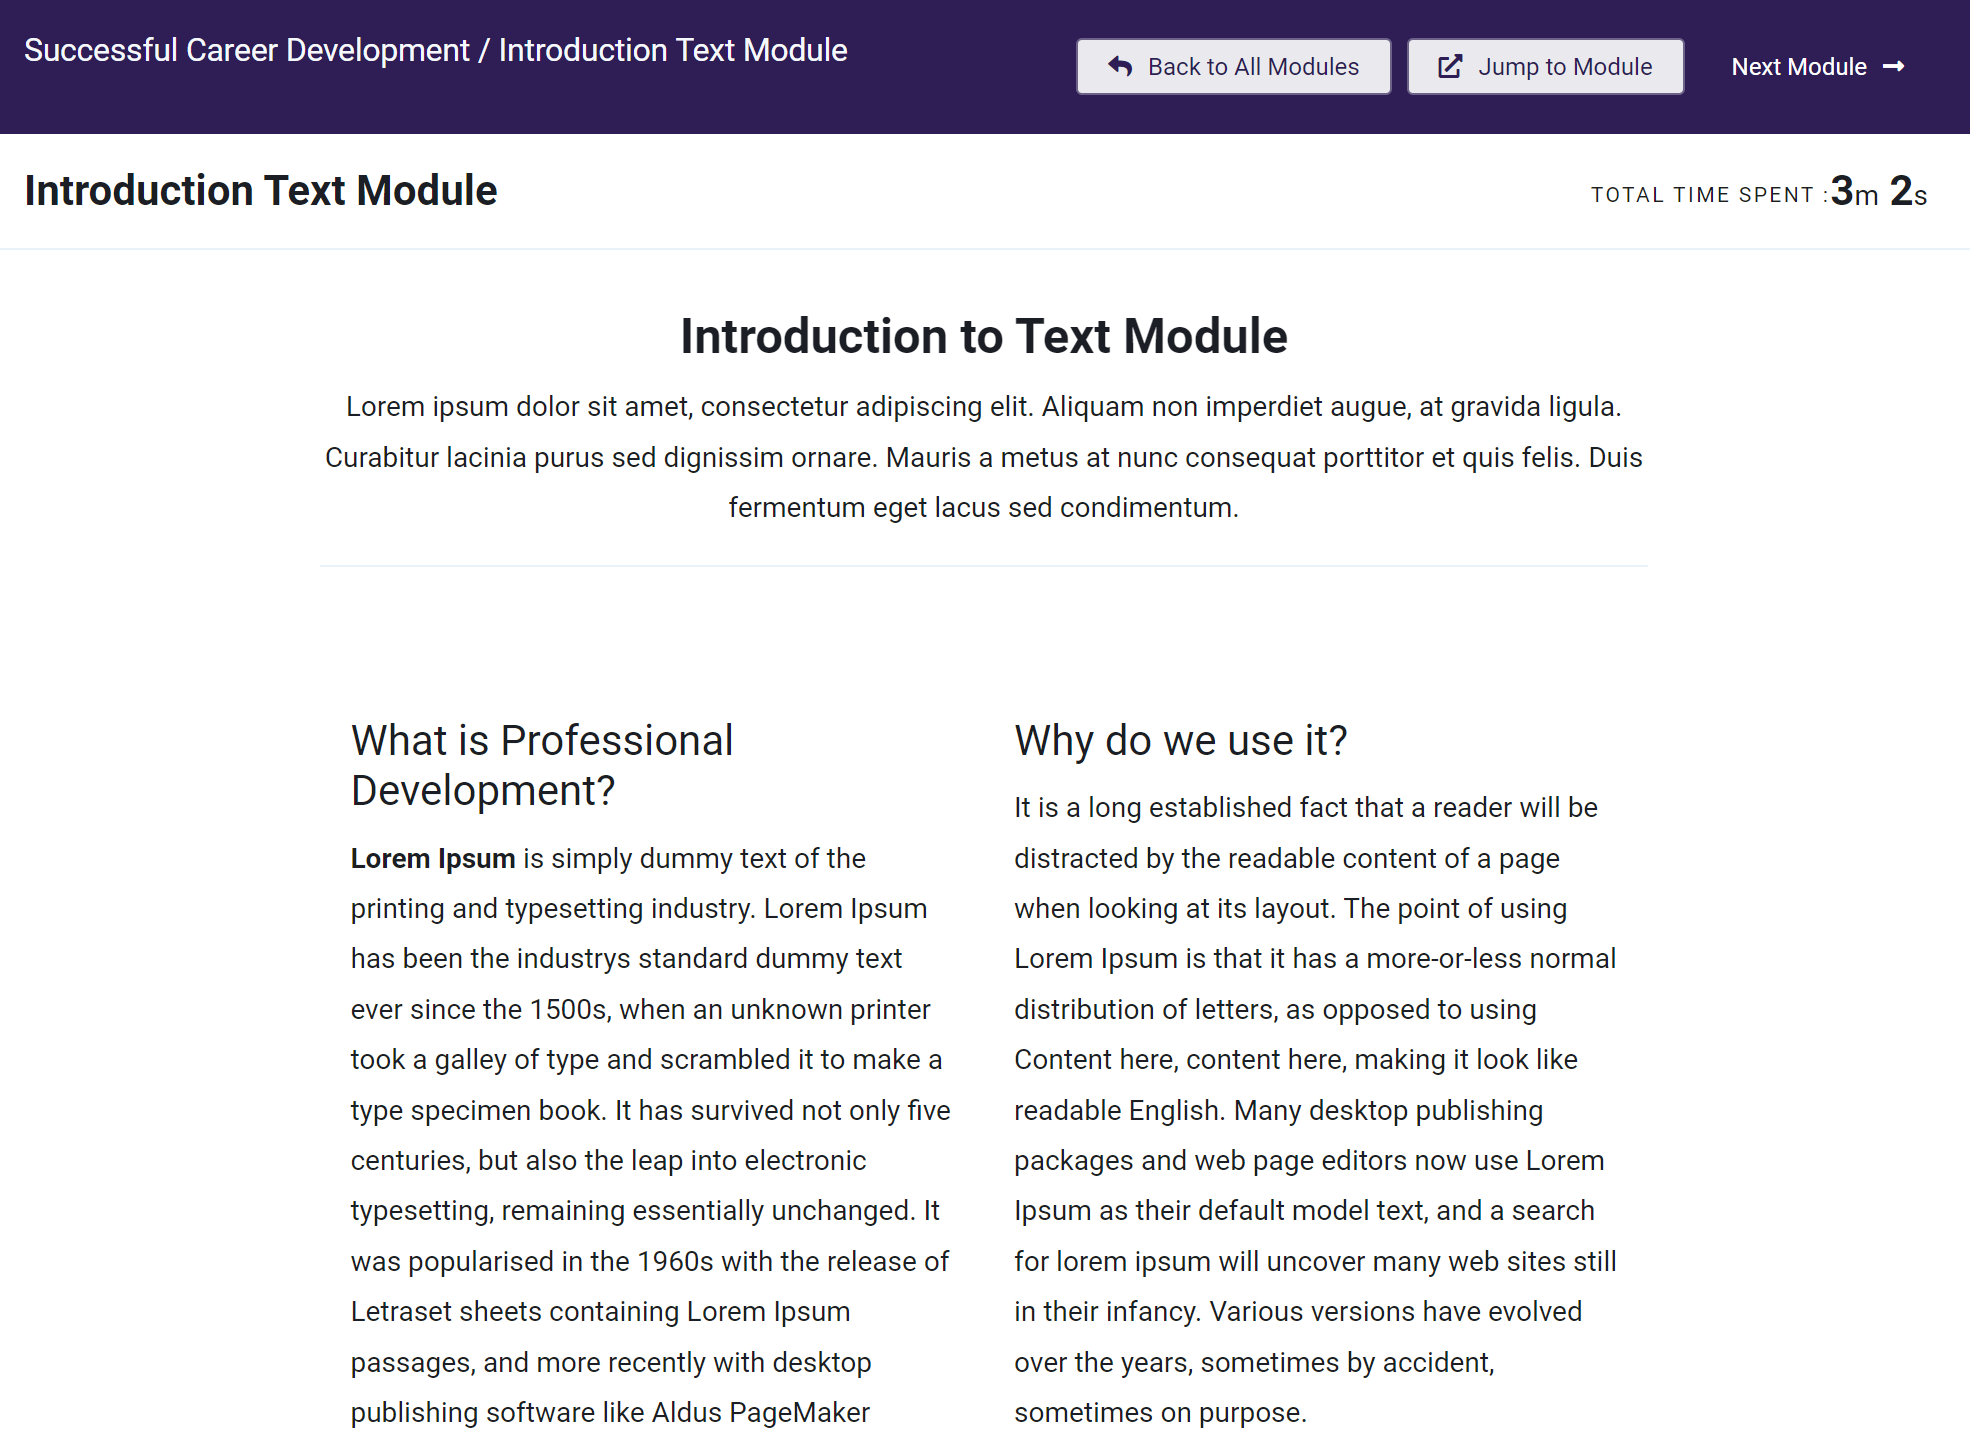
This is what it will look like to the Student, and you can see the corresponding content:
Creating Text/HTML Modules
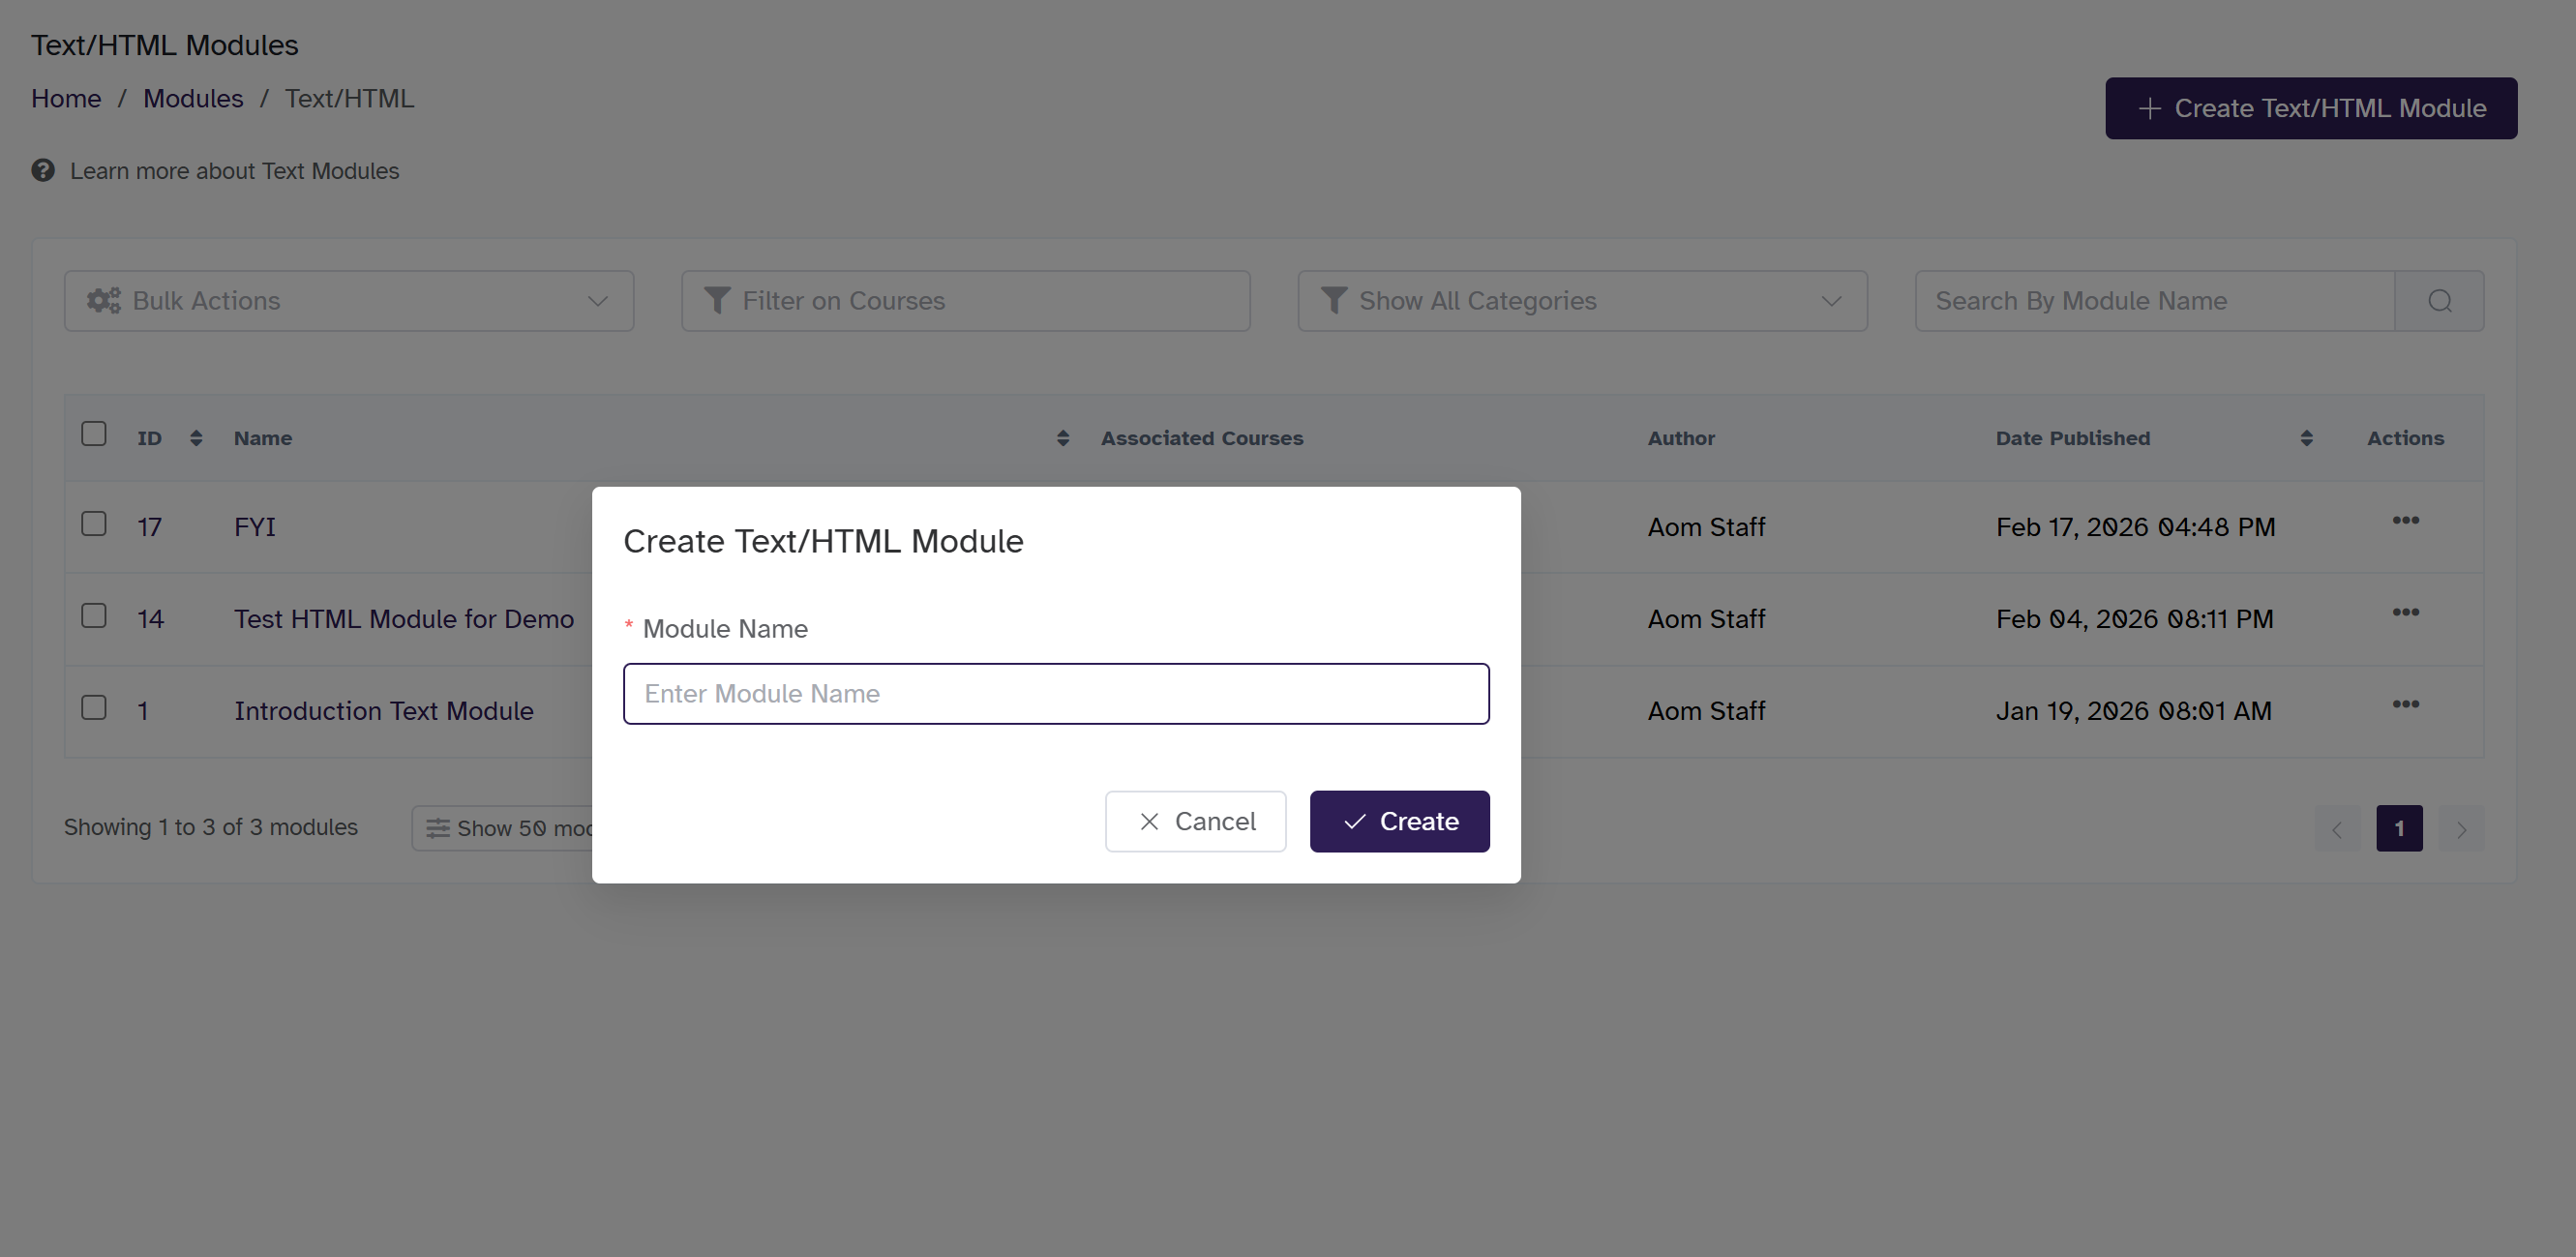
- From the Owner/Staff Dashboard, select Courses, then choose Text/HTML under the Modules header
- Any existing Text/HTML modules will be listed here.
- Click Create Text/HTML Module in the upper right corner. A pop-up window will appear. Enter the Module Name, then click Create to add the module.
Edit Text/HTML Modules
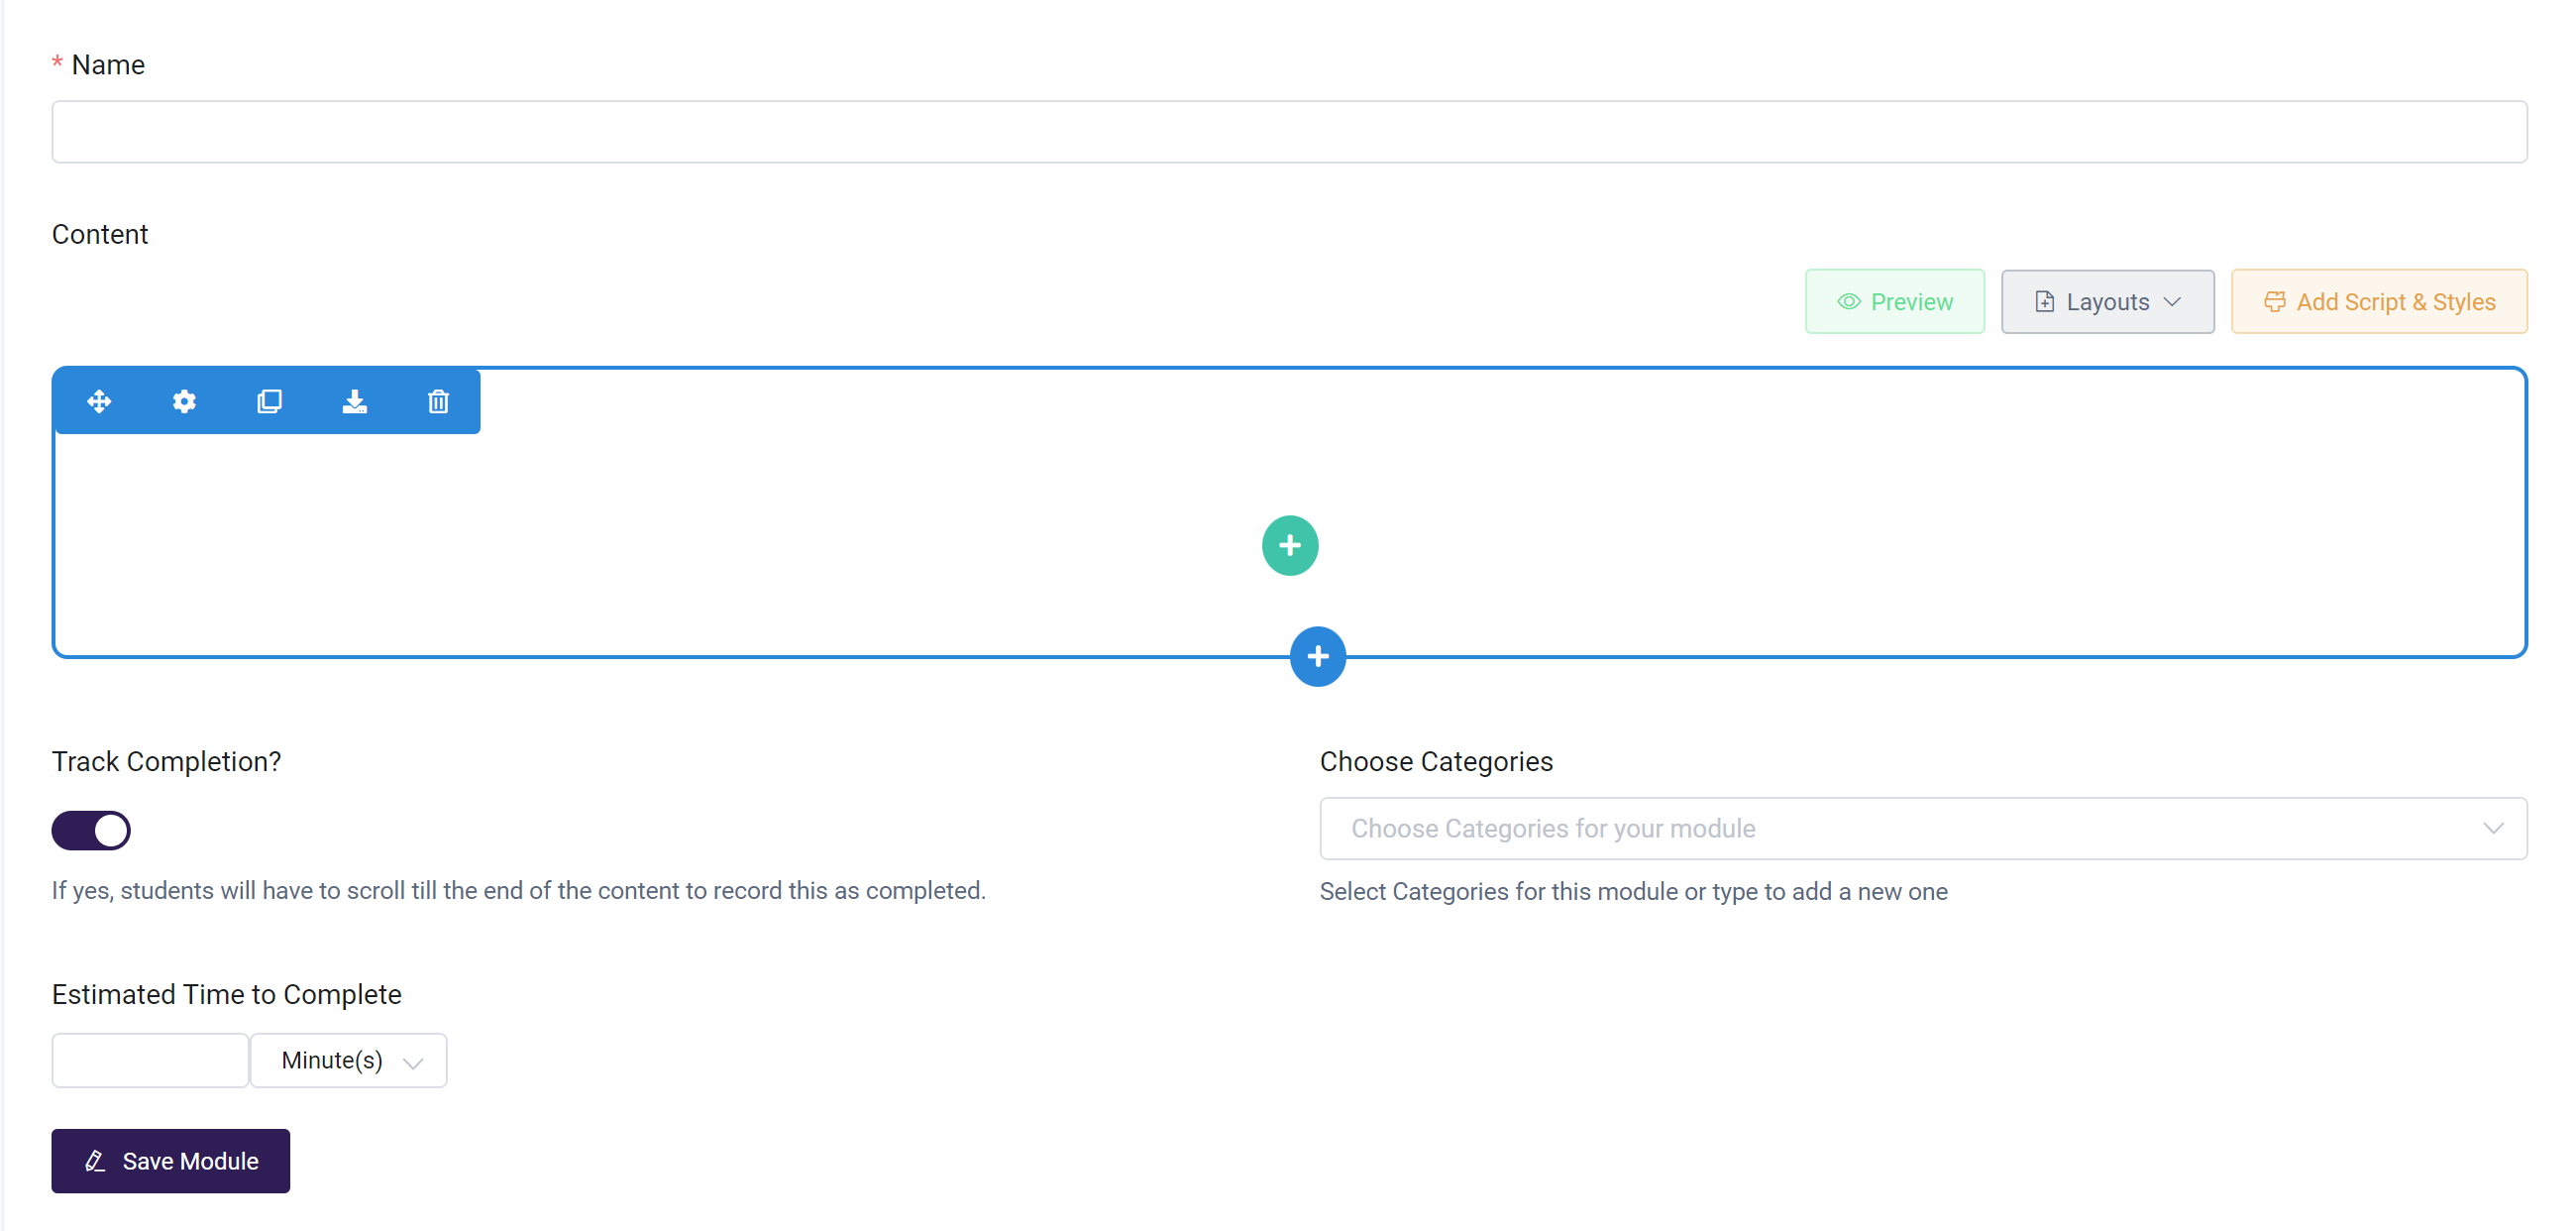
After creation, it will be redirected to the Edit Text Module page, where settings are configured and content can be added.
-
-
Track Completion: This requires a student to scroll to the end of the content before the module is marked as completed. If left off, the module will be marked as completed the moment the page loads.
-
Choose Module Categories: Select categories if you are using Module Categories to bundle modules for selling online or for Memberships.
-
You can set an estimated time to complete the module, indicating the ideal time required to finish it.
-
-
Now, add the content. Start by adding the necessary sections for your page. Remember, you'll want to add a section for each main purpose. You can add new sections by clicking the blue + icon as seen below:

-
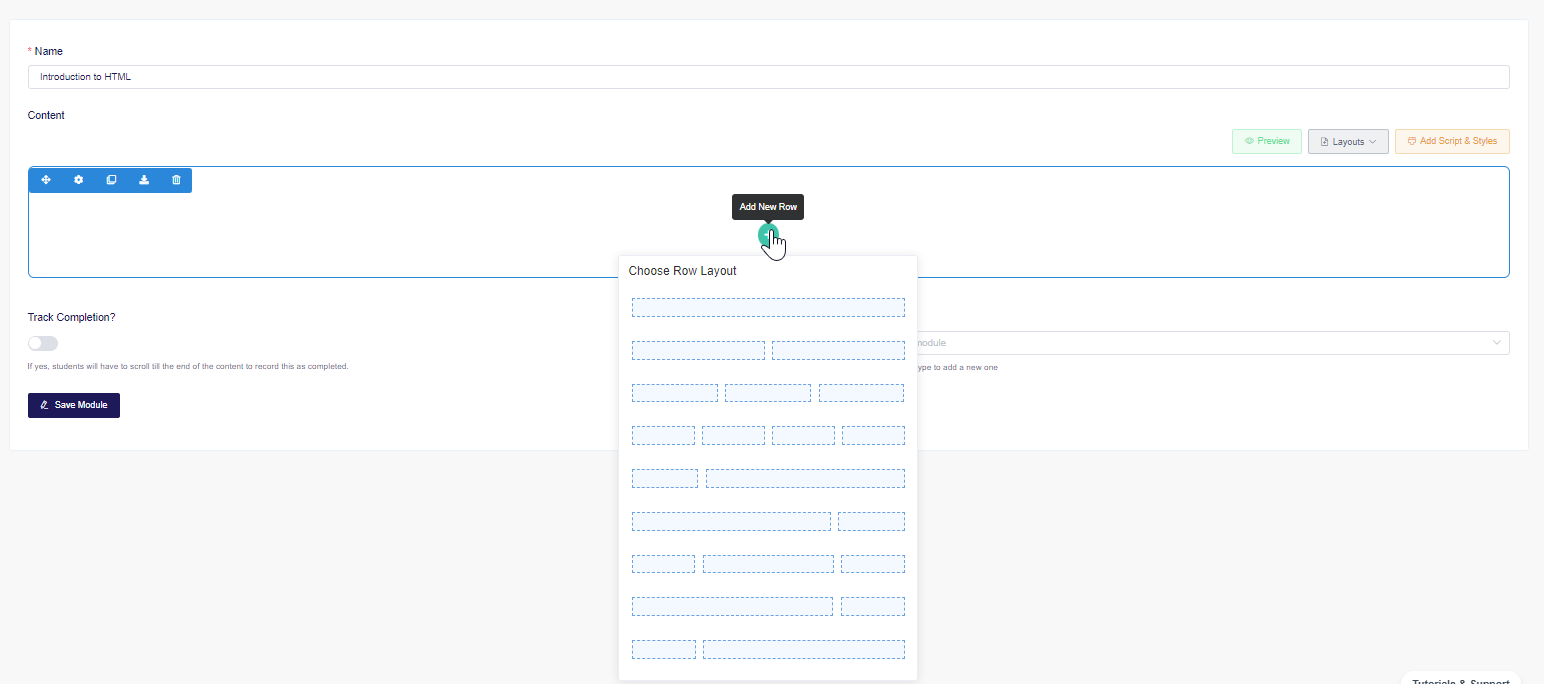
Add rows to each section via the green + button. This is how you decide how you want your blocks of content laid out--for instance, do you want one column of content in a row or multiple? You can also have more than one row in a section.
-
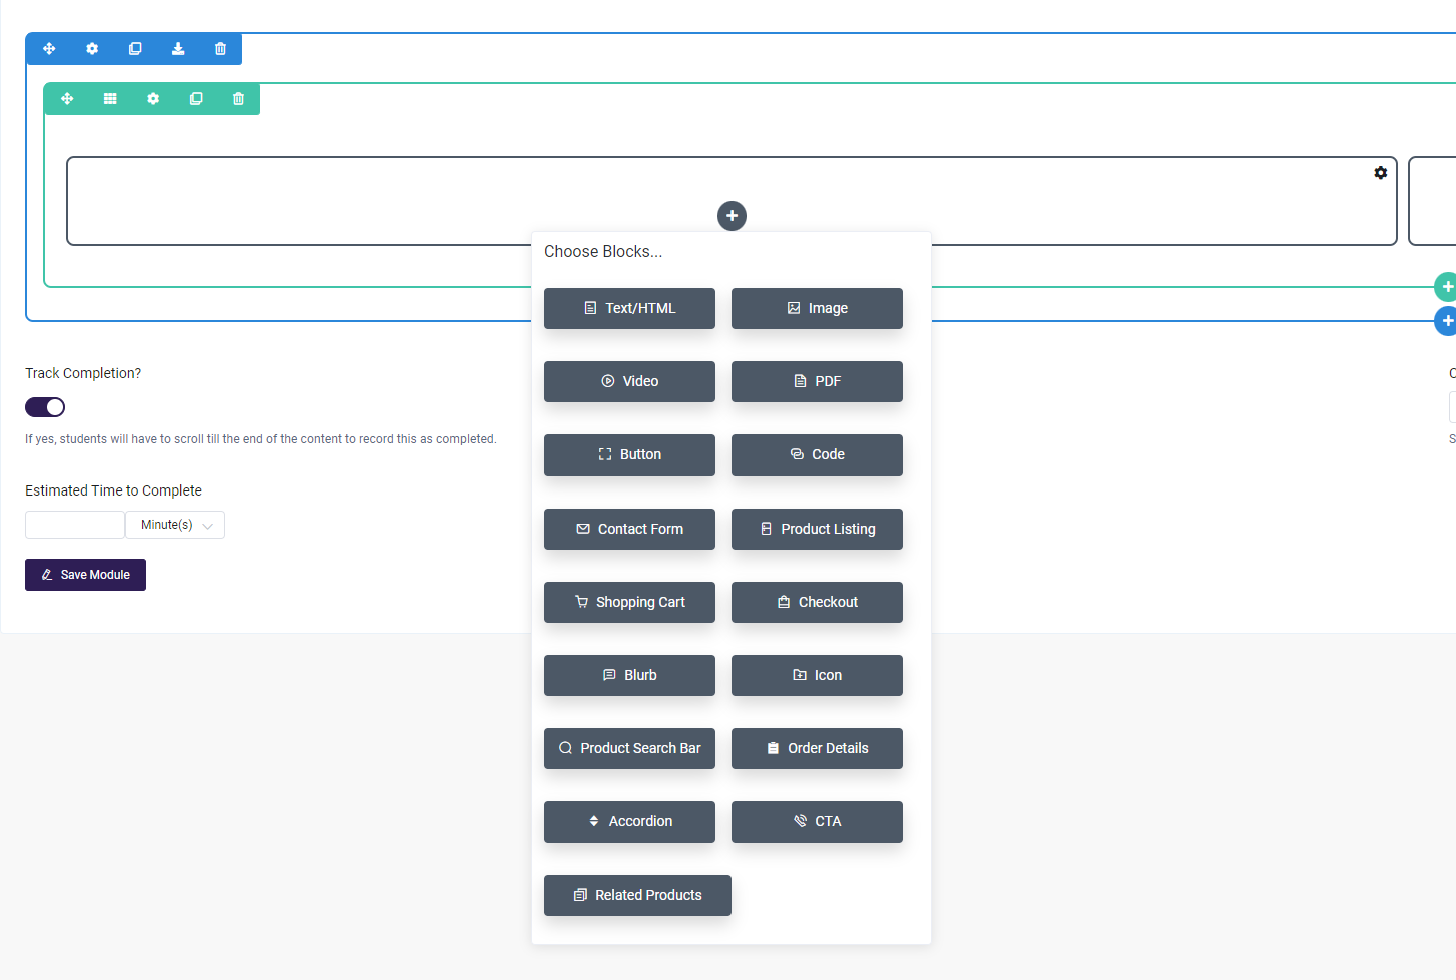
Add blocks to each row by clicking the grey + button. Then, select what sort of block you want to add from the options below. Please also note that rows can have multiple blocks!
-
There are several different types of blocks, and you can choose the one that applies to the content you want to add--choose Text/HTML if you want to add text, Image to add a picture to that block, etc.
-
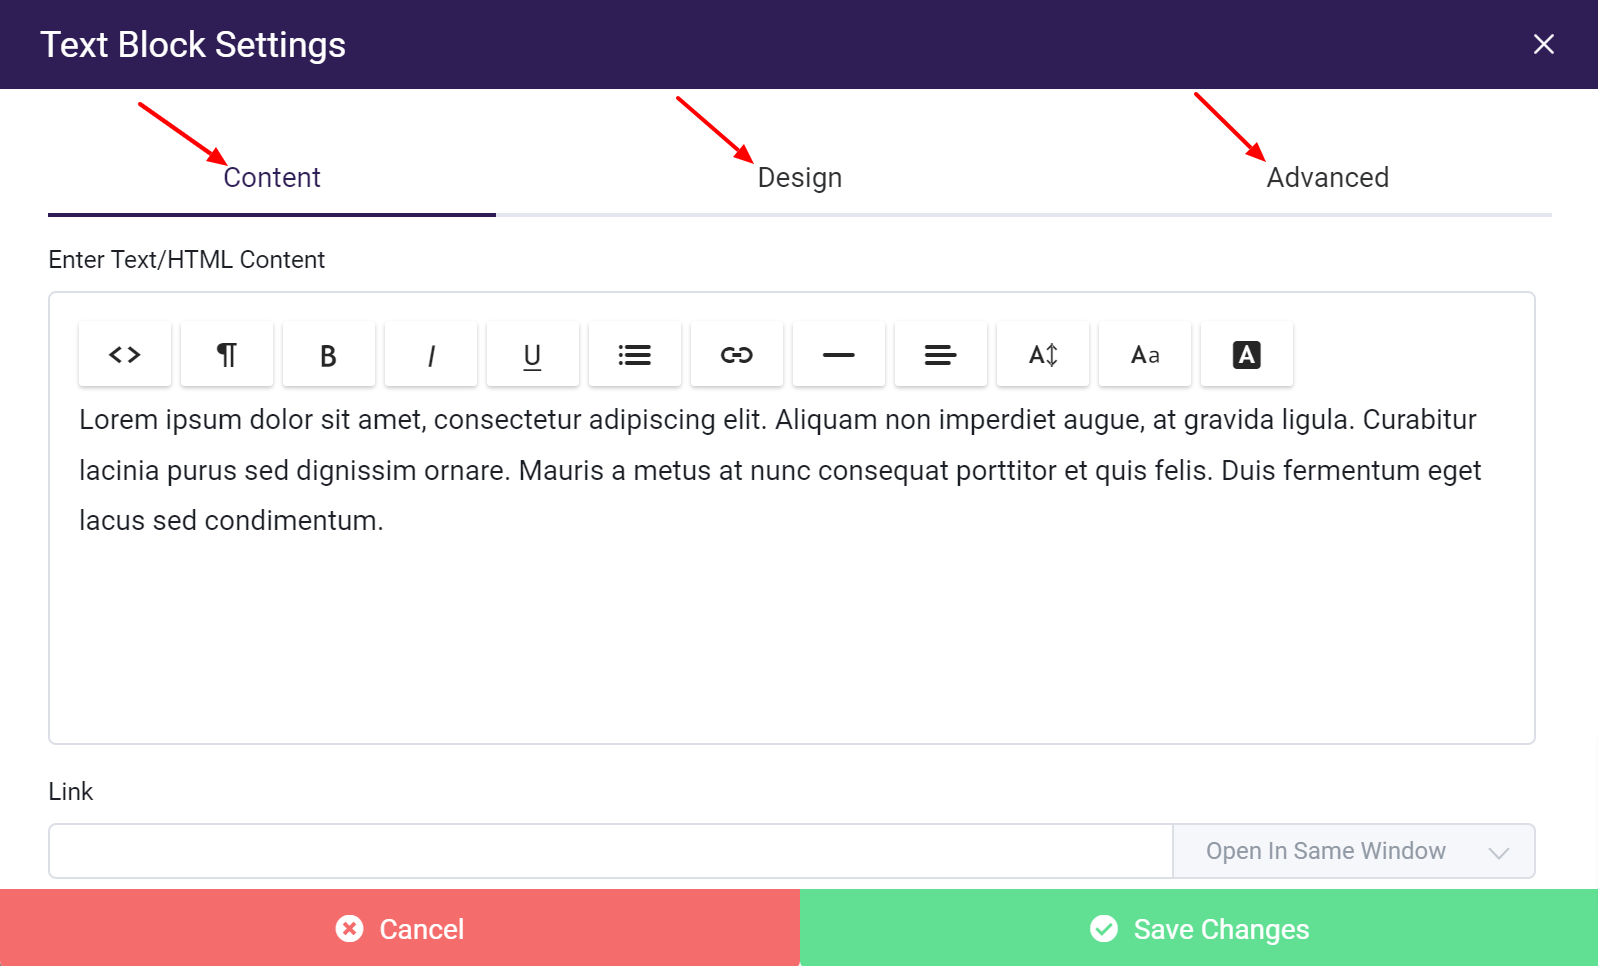
To add or edit the content within a block, click the Settings gear icon or simply double-click the solid gray rectangle. Enter your content, and click Save Changes.
- You are welcome to add custom HTML to your page. At any point, you can switch the page builder from text view to HTML view. This can be done by selecting the HTML option
(<>)from the Content menu. - On the context menu, the ¶ icon will allow you to format the element you have selected, and you can also bold, italicize, underline, add bullets/numbers as well as change the font, font color, and size
- Hint: after saving your block content, you can duplicate the block by clicking the Clone Block button (double square icon)
- You are welcome to add custom HTML to your page. At any point, you can switch the page builder from text view to HTML view. This can be done by selecting the HTML option
-
Further, customize the block by clicking the Design tab after entering your content on the Content tab. Here, you can adjust spacing, alignment, and borders. Or, click the Advanced tab to add a custom class.
-
You'll also see the Add Script & Styles button--if you would like to add page-specific script to this module, learn more here. You can also add page-specific CSS in this area if you are comfortable doing so.
-
Once you have entered the sections, rows, and blocks, feel free to use the Preview option to see what the module will look like:

Be sure to click Update Module when you're done.
To ensure the module is added to a course to make it accessible to students. Refer to the next section for details on this step.
For more information on viewing, editing, or deleting existing Modules, see this article.
Adding a Text/HTML Module to a Course
Now that your module has been created, you can add it to the Course or Courses so that it is accessible to Students:
-
From the Owner Dashboard, choose Courses, then All Courses
-
Find the Course you want to add the Module to, and click the three-dot action menu. Select Edit
-
Click the Step 2: Curriculum tab
-
Click "Add Module" and then opt to "Select an existing module from the list"
- Search the drop-down menu for your Module name, and select it.
- Once the Module is added to the bottom of your course list, you have the option to edit the module to make changes to its content or remove the module from the course.
-
Click and drag the modules to rearrange them in the order they should be presented in the course. This involves placing the modules in a suitable order along with the sections if used.
-
You have the option to:
- Lock the Module, which forces a student to complete it before being able to move on to the next module in the course
- Set the� availability of the Module, which allows you to set a date when the module will be available to a student. This gives an Admin or Instructor the control to make modules available to students over time or to restrict a student from completing the course too quickly.
- You can also set a minimum amount of time spent in the module that the student must abide by in the Module before being allowed to move on to the next module.
-
Save your course changes by clicking Update Course in the upper right corner. If you get distracted or navigate to another section of the platform, changes may not be saved if you do not update before leaving a page you have made changes to.
Please see this guide for the full details for Creating and Updating a Course.
Learner Experience of Text/HTML Module
When a learner opens a text module they will see the module just like a web page. They can click all the links and buttons added to a text module.
Using Layouts
With the Layouts option, you can create and save your custom layouts--for instance, if you will be using the same content structure for many modules and just need to swap out the text or images.
To create your own layout:
- From the Pages & Menus tab, choose Pages and click on the page you want to save as a layout.
- Click the Layouts button and choose Save Layout--enter a name, and Save.
Then, when you go to create a new module:
- Choose Layouts
- Select Load Layout
- Choose Your Library
- Select the Layout you want to use, and then add in the content as normal