Using PowerPoints in a Course
PowerPoint is a widely utilized software that enables the creation of slides incorporating text, images, videos, animations, and timed elements to effectively present information. Recognized for its extensive use in educational settings, this module allows instructors to seamlessly integrate PowerPoint presentations into their courses, providing students with the ability to view and interact with the content directly within the course environment.
Note that there are two ways to add your PowerPoint information to a module. You can follow the steps in this article, which will allow you to natively embed the PowerPoint into a module. Alternatively, you may also convert your PowerPoint presentation into HTML or SCORM format, and then create either a HTML module or SCORM module.
In this guide, we'll go over how to create a PowerPoint module, and what the student will experience.
In this article
- Creating a PowerPoint Module
- Adding a PowerPoint Module to a Course
- Student Experience of PowerPoint Module
Creating a PowerPoint Module
Before creating a PowerPoint module, you'll need to first have created your PowerPoint externally and have it available to upload. You can use Microsoft Office PowerPoint (which will be saved as a .ppt file), or can build a presentation in Google Slides, and export it as a .pptx file.
Note that PowerPoint modules can only work with files 20MB or lower since we use Microsoft and Google Office viewer online tools which have their own limits and will not allow the student to view the PowerPoint. If your PowerPoint size is larger then that, you can convert the PowerPoint file to a SCORM format using a SCORM authoring tool.
Once your PowerPoint is created, follow these steps to add it to a module.
-
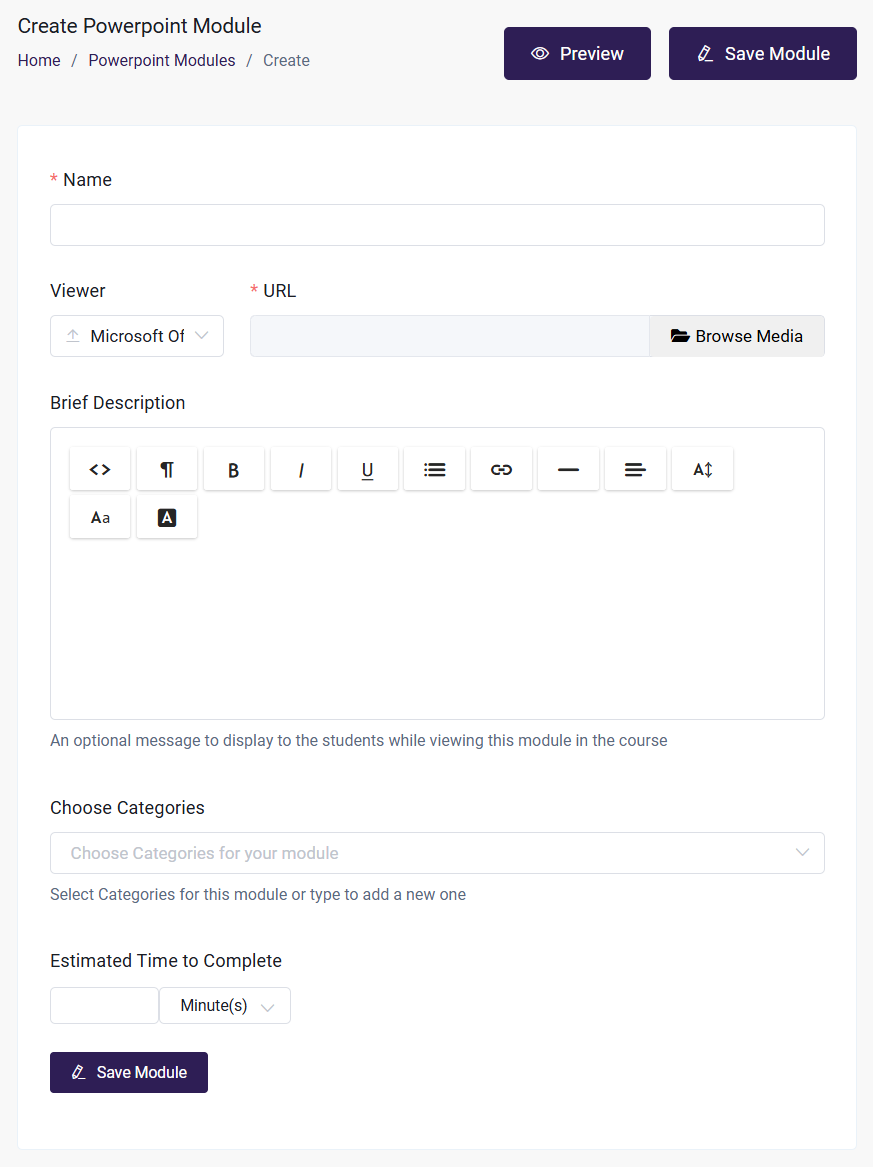
To create your module, navigate to the Courses section in your Dashboard, select the PowerPoint tab, and click on Create PowerPoint Module.

-
Give your PowerPoint module a name and a brief description that will be seen by your students when looking at the module in the course player. The brief description field is customizable and can include HTML elements like images or videos.
-
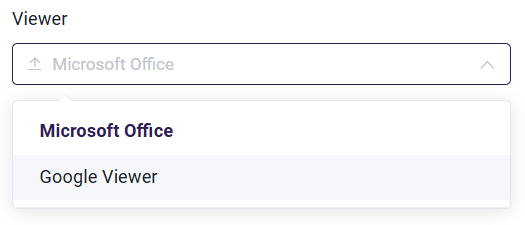
Select what Viewer you want to use for the PowerPoint from the dropdown menu. You may choose between Microsoft Office, or Google Viewer. These viewers will look slightly different to the student. See the Student Experience section below for more details.
-
Upload your PowerPoint by clicking Browse Media. You may upload a .ppt or .pptx file.
-
Select or add a Module Category if you'd like--this is useful if you use our Membership Plans feature.
-
You can set an estimated time to complete the module, which indicates the ideal amount of time required to finish it.

-
Click on Save Module to create the PowerPoint module
Then, we want to make sure the PowerPoint is made available in a course. Check out the next section for the steps.
We've also got this helpful video walkthrough, if you're more of a visual learner!
Adding a PowerPoint Module to a Course
Now that your module has been created, you can add it to the course(s) so that it is accessible to students:
-
From the Admin Dashboard, choose Courses, then All Courses
-
Find the Course you want to add the Module to, and click the three-dot action menu. Select Edit
-
Click the Step 2: Curriculum tab
-
Click "Add Module" and then opt to "Select an existing module from the list"
- Search the drop-down menu for your Module name, and select it.
- Once the Module is added to the bottom of your course list, you have the option of entering the Edit Module page to make changes to its content or removing the module from the course.
-
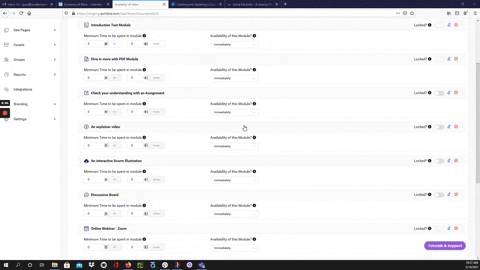
Click and drag the modules to rearrange them in the order they should be presented in the course. This involves placing the modules in a suitable order along with the sections if used.
-
You have the option to:
- Lock the Module, which forces a student to complete it before being able to move on to the next module in the course
- Set the availability of the Module, which allows you set a date when the module will be available to a student. This gives an Admin or Instructor the control to make modules available to students over time or to restrict a student from completing the course too quickly.
- You can also set a minimum amount time spent in the module that the student must abide by in the Module before being allowed to move on to the next module.
-
Save your course changes by clicking Update Course in the upper right corner. If you get distracted or navigate to another section of the platform, changes may not be saved if you do not update before leaving a page you have made changes to.
Please see this guide for the full details of Creating and Updating a Course.
Currently, there is no functionality to track how much of the presentation has been viewed or to automatically mark the module as complete when all slides are reviewed. At present, the module is marked complete as soon as it is launched.
Student Experience of PowerPoint Module
There are a few differences between how the Microsoft Office Viewer and the Google Viewer look to the student. However, both will allow the student to view and go through the PowerPoint from within their browser.
Microsoft Office Viewer
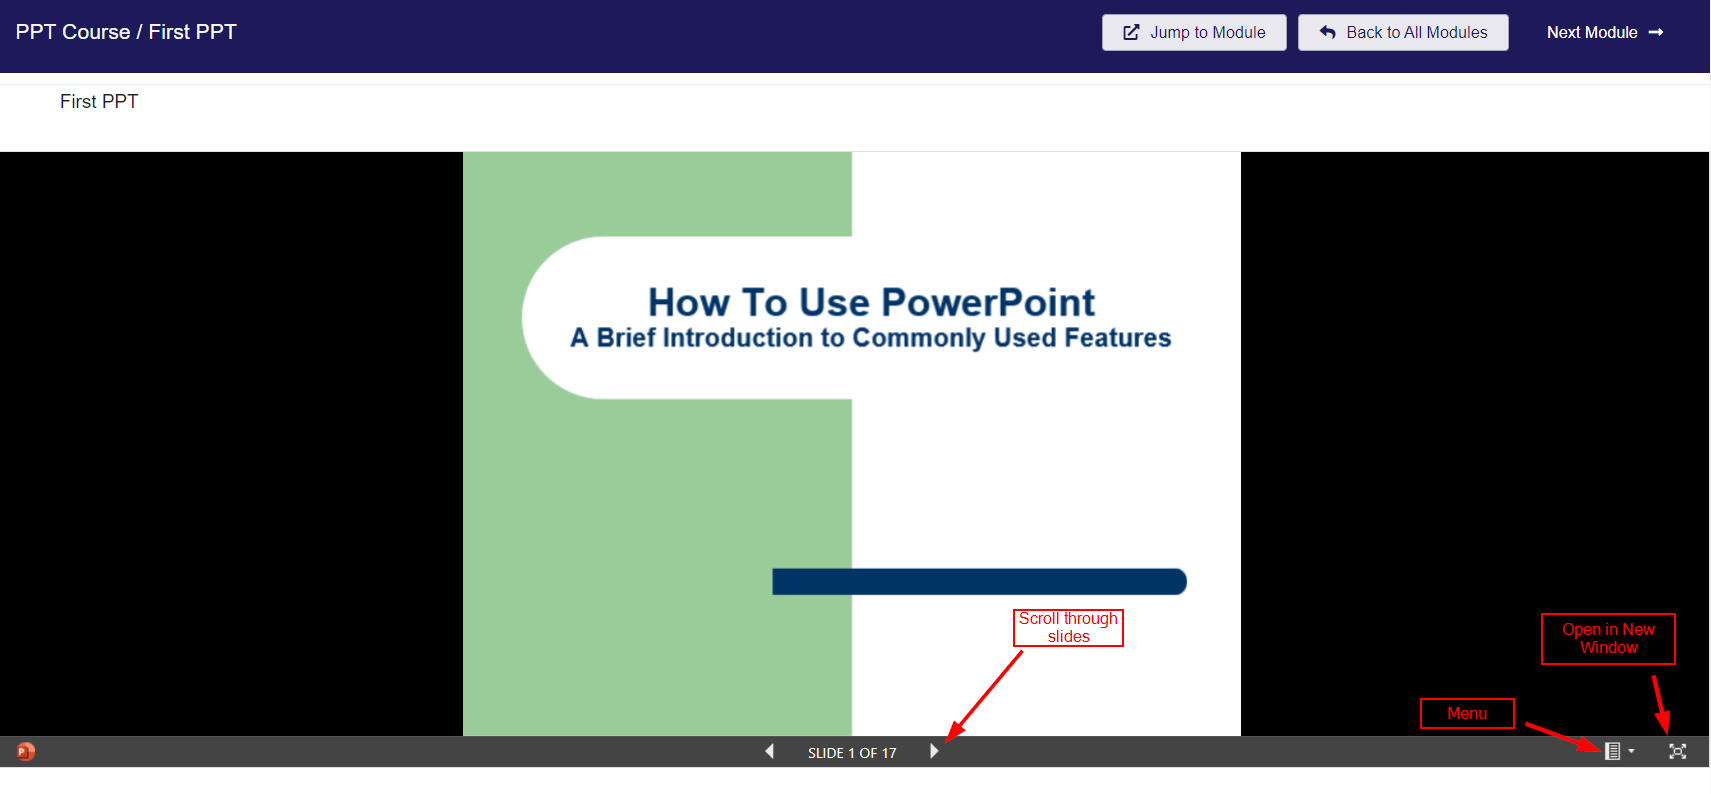
If Microsoft Office was selected as the viewer in the module, the student view will look like the image below. The student will be able to go through the slides by clicking through at the bottom, and will also have the option to download a copy or print it as a PDF via the Menu option in the lower right corner.
The student may also open the PowerPoint in a new window, which will open the presentation in a new browser tab. From there, the student may opt to Start the Slideshow, which will open the presentation in the full screen and they can go through the pages by clicking or using the arrow keys on their keyboard.
If viewing the module on mobile view, the student will be able to use landscape view to view the entire slide. They may swipe over the slides to scroll through them. As on the desktop site, they may also open the PowerPoint in a new window, which will open the presentation in a new browser tab.
Note that while it's possible to view the PowerPoint modules on mobile, the information is more easily viewable on a desktop device, or a mobile device with a larger screen such as a tablet.
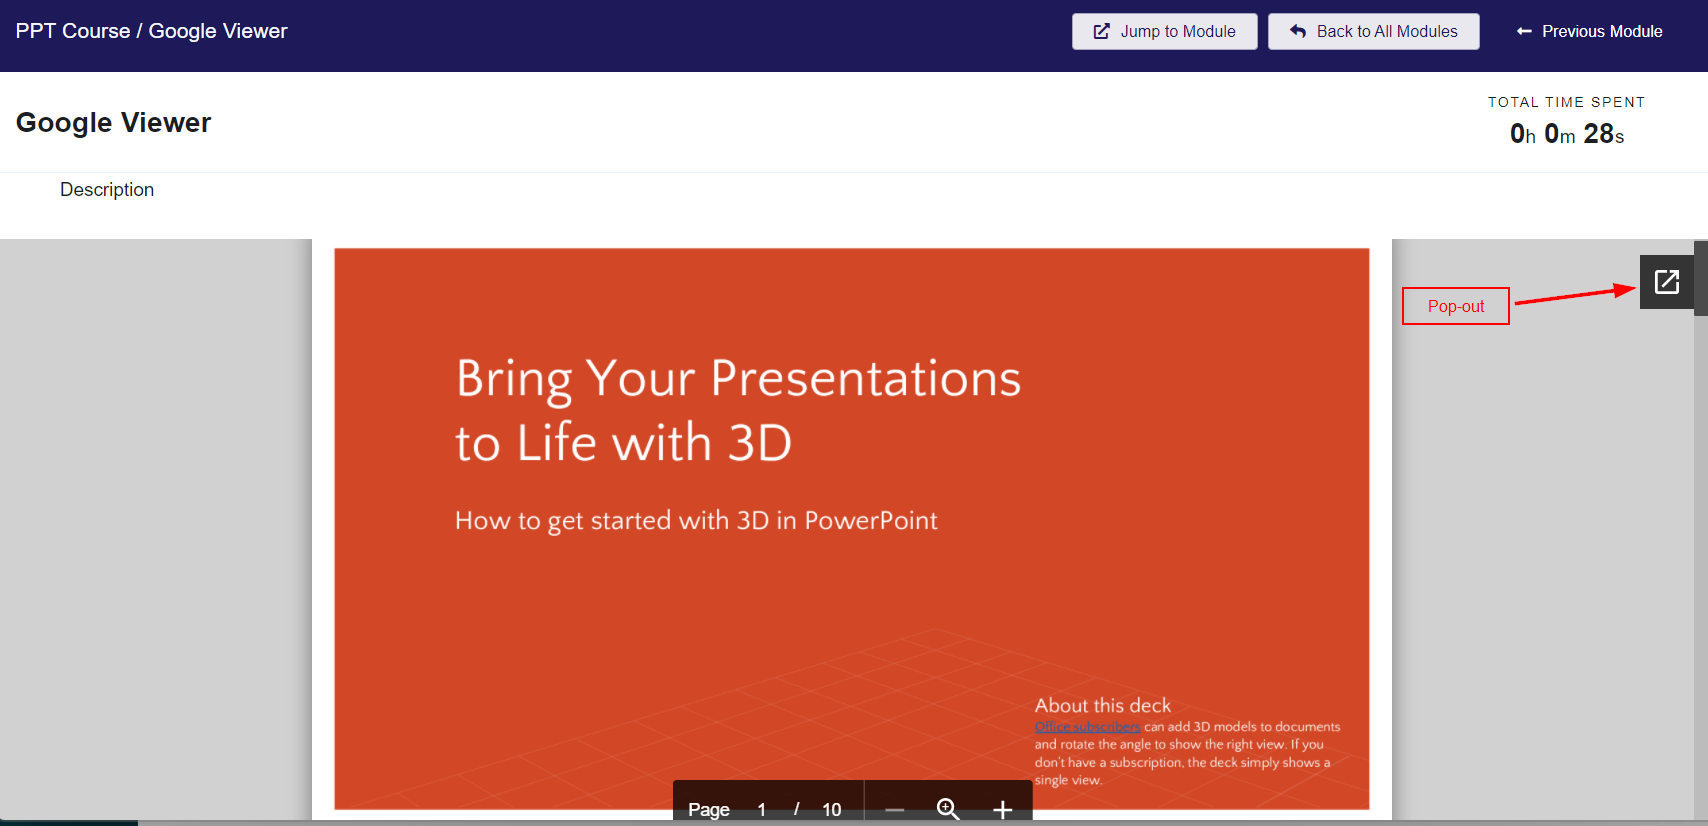
Google Viewer
If Google Viewer was selected as the viewer in the module, the student view will look like the image below. The student will be able to go through the slides using the scroll bar. They may also choose to pop out the PowerPoint into a new tab.
If viewing the module on mobile view, the student will be able to use landscape view to view the entire slide. They may swipe over the slides to scroll through them. They may also access the full screen mode, by tapping the pop-out icon, just as on the desktop version.
Note that while it's possible to view the PowerPoint modules on mobile, the information is more easily viewable on a desktop device, or a mobile device with a larger screen such as a tablet.