The Media Library and Uploaded Files
The Media Library is where all your uploaded files are stored and organized. Whenever you need to add something, like a Featured Image for a Course or Product, or a PDF or Video for a Module, you’ll first upload it to the Media Library.
Once uploaded, your files will be saved in the Media Library, so you can easily find and use them whenever you need.
In this guide, we'll be going over how to access the Media Library, uploading media as well as accepted file types and sizes.
Accessing the Media Library and Uploading Files
The Media Library is accessed through the Dashboard. You can add uploads here directly, as well as view what has already been added. To access the Media Library and add an upload:
- From the owner dashboard, select Assets, then Media Library. Here you can see all the items that have been uploaded.
- Inside the Media Library, you can add your file by dragging and dropping it here or selecting Upload Media:

Note on Video Encoding: When a video is added to the Media Library, it is first uploaded to the Academy of Mine servers. This process is reflected in the progress bar visible during your upload. When uploading a large file, the progress bar may reach 98% and then stick there for a while as the rest of the upload process completes. Don't worry, that's normal behavior.
![]()
Once the file has been successfully uploaded to the Academy of Mine, we will begin encoding your file and transforming it into a streaming HLS video. This will add an additional waiting period before your video file is finalized and ready for use in your Video Module as an m3u8 file.
When your video file is ready, it will be stored in the Media Library as a link, which you can select to include in your module. But feel free to start building your Video Module while your video uploads in the background.
Note that you are also able to add items to the Media Library inside certain Module editors as well as when uploading a featured image for courses or products. With this method, you'll launch the Media Library by selecting Browse Media when attempting to add a file to your Module or Course/Product:

This will launch the Media Library where you will upload your file by dragging and dropping or choosing Upload Media.
Selecting & Managing Files
You can select files from the Media Library to add to modules and are able to delete single files as well as bulk delete.
Selecting Files
Once a file has been successfully uploaded, it will be converted to a URL that you can use with Modules (for or adding images to Courses/Products.
To add your file to a Module, you can select it from the list of files available in your Media Library, copy it to your clipboard using "Choose/Select" and then paste it into your Module. Or, if you are already inside a Module or adding an image to a Course/Products, you can choose Browse Media to open the Media Library and then select your file.

You can even link to files that have been uploaded to the Media Library in the Course or Modules descriptions! For instance, if there's a PDF that you want to include in a Video Module description (for additional context or materials), you can follow these steps:
- Head to Assets>Media Library, and find the item you want to link to. Click Choose/Select to copy the URL
- Go to the Module or Course that you want to add the link to. In this example, we'll add a link to a PDF to a Video Module description.
- In the Brief Description text field, enter your desired text. Highlight the words that you want to hyperlink to the URL you copied from the file in the Media Library, then click the Link icon like this:
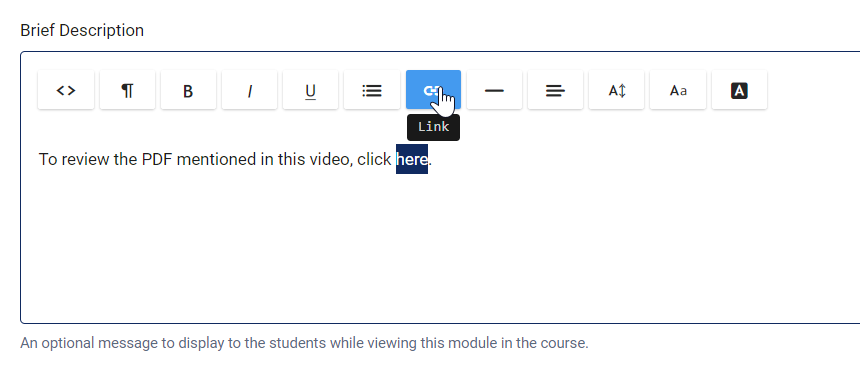
- Then click Insert Link, and paste the copied URL. Choose if you want the link to open in a new tab, and then click Insert
- You can opt to Preview the Module to make sure everything is looking good, and then click Update Module to save your changes
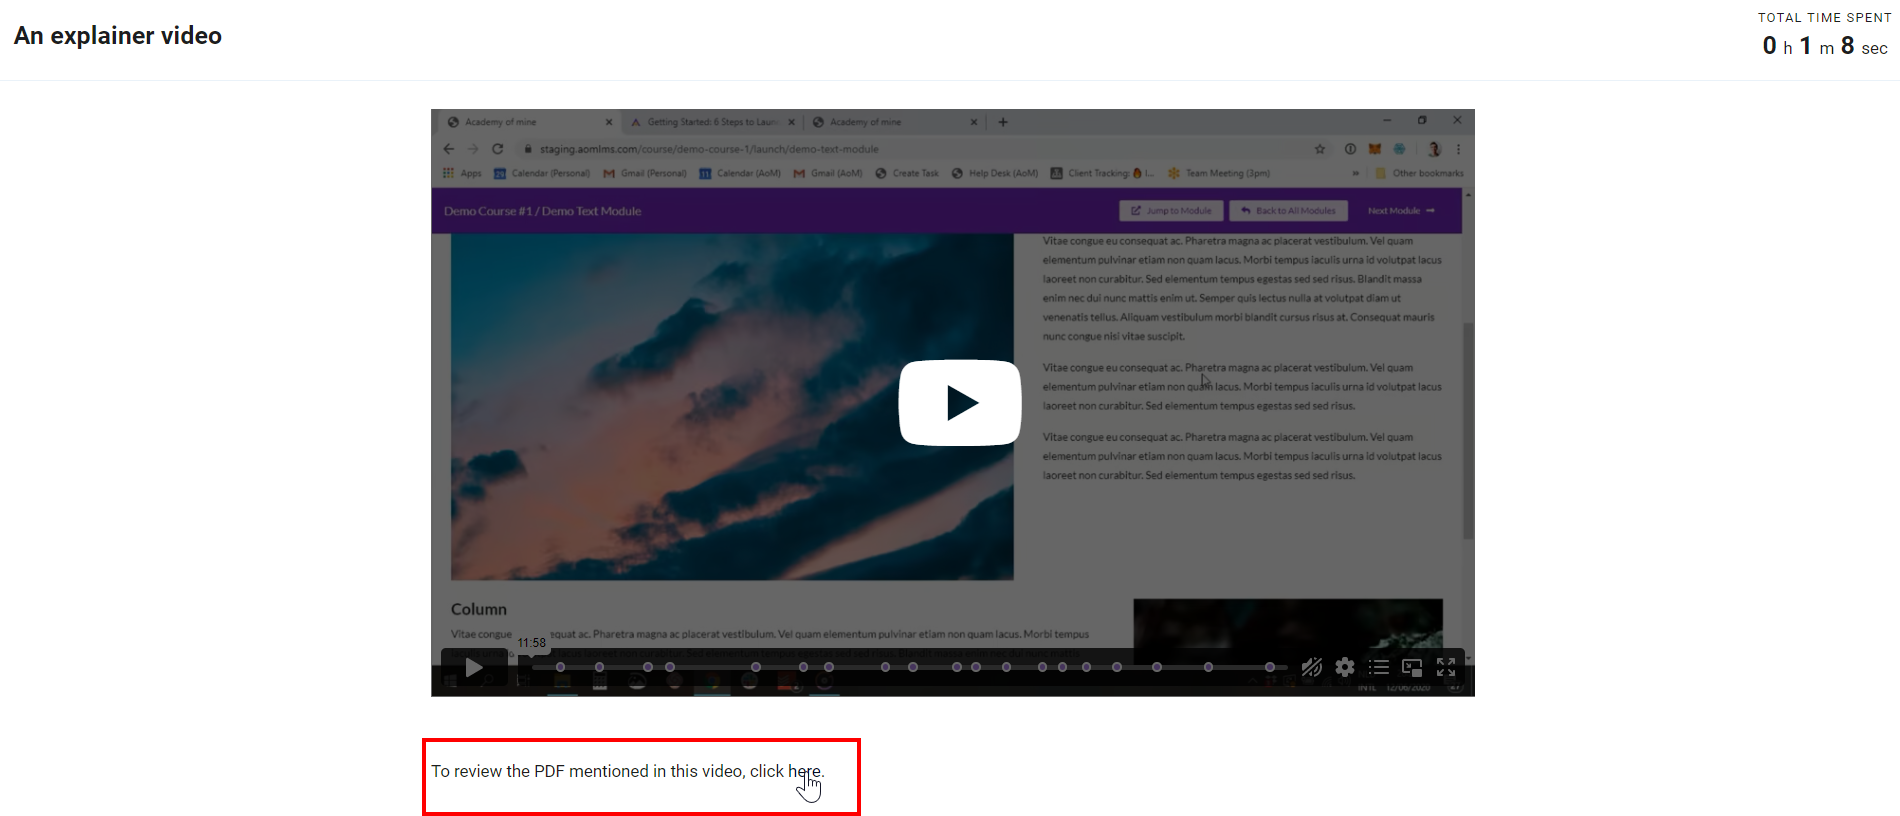
- Now, when the student views the Video Module, they'll see the description and if they click on the hyperlink, the file linked will open in their browser!
Managing Files
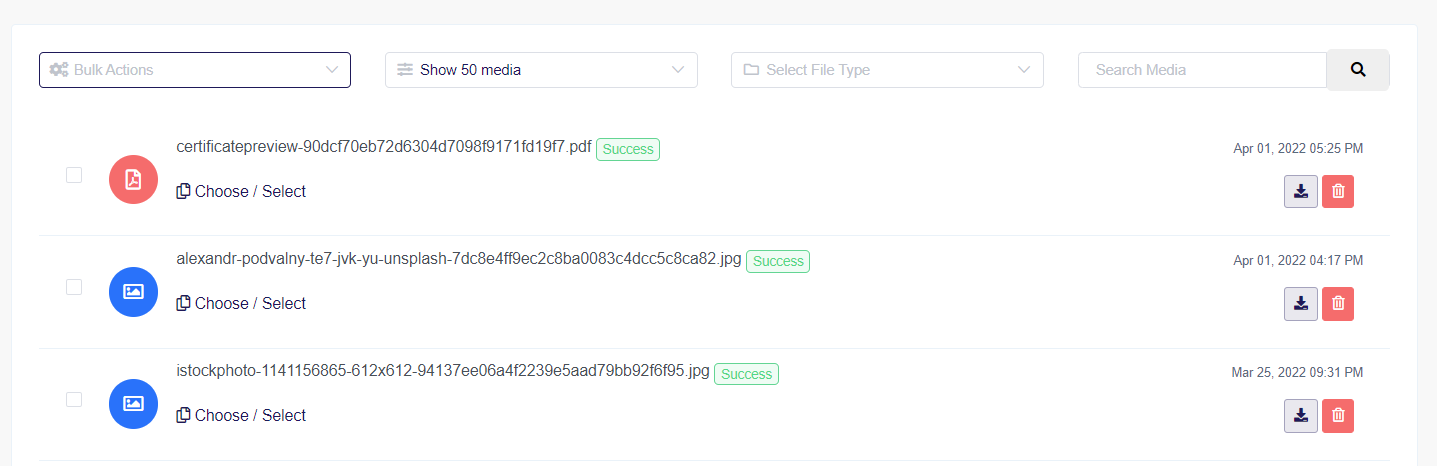
You are able to sort the Media Library by File Type--simply select the file type from the dropdown menu. You may also search the media.
You can download a file by clicking the download icon to the right of the file.
You can delete a file by clicking the trashcan icon to the right of the file. You can also delete multiple files at a time using the Bulk Action option. Check the box to the left of the items you want to delete, then select the Bulk Action menu and opt to delete:
Accepted File Types and Sizes
The maximum size for uploading an individual file is 512 MB. If your file is larger than that, please contact support and we will help you with it.
Accepted file types are as follows:
- Image file types: JPG, PNG, GIF, BMP, TIFF, EXIF, SVG and more
- Video file types: MP4, MOV, AVI, MKV, WMV, WEBM, QT, MPG, M4V, and more
- **Document file types:**PDF, DOC, DOCX, XLS, XLSX, PPT, PPTX, XML, and more
- PowerPoint files: PPTX (Note that PowerPoint modules can only work with files 20MB or lower since we use Microsoft and Google Office viewer online tools which have their own limits and will not allow the student to view the PowerPoint. If your PowerPoint size is larger then that, you can convert the PowerPoint file to a SCORM format using a SCORM authoring tool.)
- Other file types: Some file types not listed above may still successfully upload and be categorized as "Other." If you have questions about a specific file type not listed, please reach out to [email protected]