Using SCORM in a Course
SCORM is a standard framework for online course content that can be run inside any web browser, making it incredibly portable and reusable. If you use SCORM, you can create a SCORM module so that learners can access that SCORM content within your Course.
For a bit of background, SCORM files are created outside of Academy of Mine, and then uploaded to your account. Then you can create a Module and add it to a Course.
In this guide, we'll be going through creating the SCORM module. Before you can create a SCORM module, you'll want to make sure that you're comfortable with what SCORM is, as well as have your SCORM packages handy--either already added to AOM, or ready to be uploaded. With that in mind, please take a look at these guides before proceeding with creating a SCORM module.
- What is SCORM, and Integrating SCORM Packages into Academy of Mine
- Using SCORM Authoring Tools
- Exporting SCORM Packages for Academy of Mine
In this article
Creating a SCORM Module
There are a few main parts to creating a SCORM module and we'll go through them step-by-step below. Or, if you're more of a visual person, check out this video:
Step 1: Create the Module & Add Basic Info
-
From the Admin Dashboard, select Courses, then Scorm/xAPI under the Modules header
-
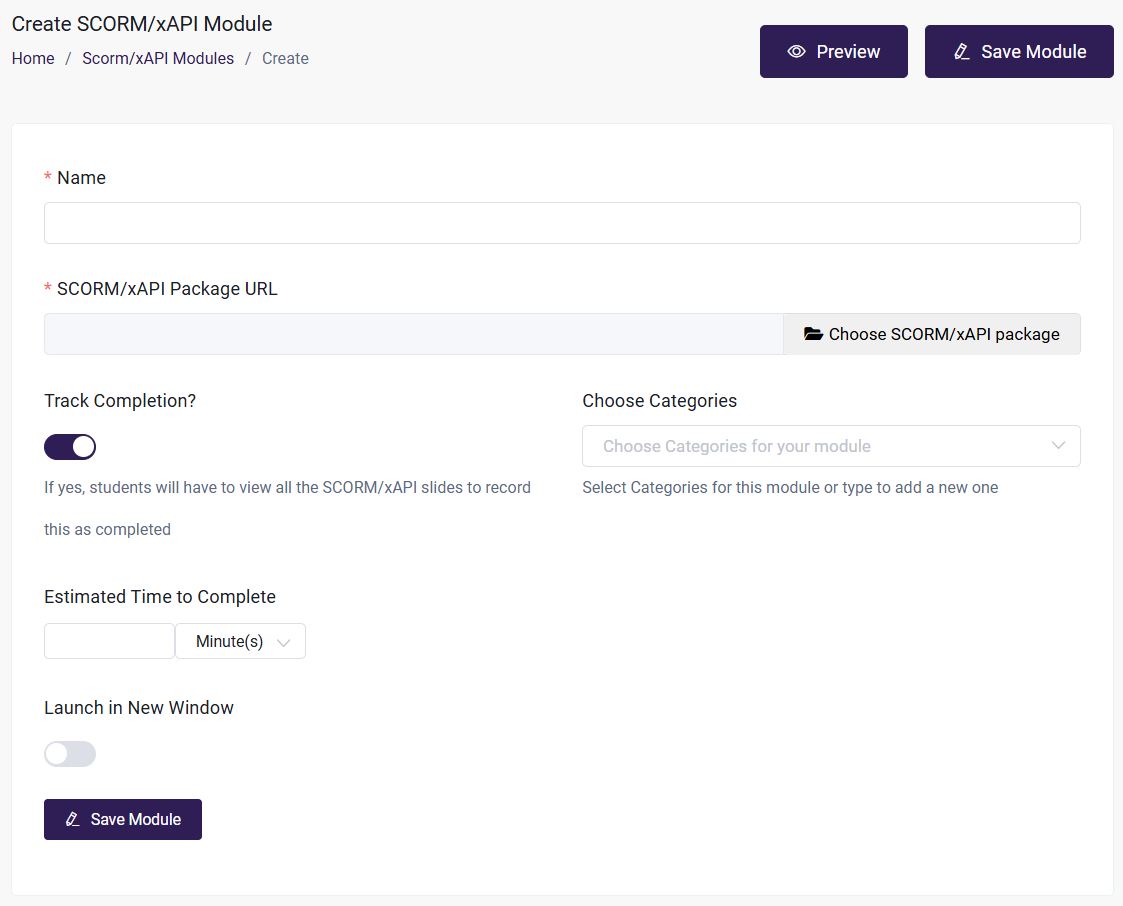
Click on Create Scorm/xAPI Module

-
Enter the module's Name
-
Choose if you want to Track Completion. If this toggled to on, learners will have to view all the SCORM slides for this modules to be recorded as completed
-
Choose Course Categories: If you are using Course Categories to bundle courses for selling online or for Memberships, select categories.
-
You can set an estimated time to complete the module, which indicates the ideal amount of time required to finish it.
Step 2: Add the SCORM Content
- Now, let's add the SCORM content. Your SCORM package ZIP file must first be uploaded to the SCORM Packages library, before it can be added to a Module. This can be done in two ways:
- You can add the SCORM package before creating the module--from the Admin Dashboard, choose Assets, then Media Library.
- There you can drag and drop your file or Browse it.
- It's also possible to upload your SCORM Package ZIP file to the SCORM Packages library directly from the Edit/Create SCORM Module page.
- Regardless of how the file has been added, once your SCORM Package ZIP file has been uploaded, you can select it to add to the SCORM Package URL field by clicking Choose Scorm/xAPI Package.
- Preview what the module will look like to learners by selecting Preview in the upper right corner.
- Click Save Module to save your changes.
Then, we want to make sure the module is made available in a course. Once the module has been saved, you can add it to a Course using the steps below.
Adding a SCORM Module to a Course
Now that your module has been created, you can add it to the Course or Courses so that it is accessible to learners:
-
From the Admin Dashboard, choose Courses, then All Courses
-
Find the Course you want to add the Module to, and click the three-dot action menu. Select Edit
-
Click the Step 2: Curriculum tab
-
Click "Add Module" and then opt to "Select an existing module from the list"
- Search the drop-down menu for your Module name, and select it.
- Once the Module is added to the bottom of your course list, you have the option of entering the Edit Module page to make changes to its content or removing the module from the course.
-
Click and drag the modules to rearrange them in the order they should be presented in the course. This involves placing the modules in a suitable order along with the sections if used.
-
You have the option to:
- Lock the Module, which forces a learner to complete it before being able to move on to the next module in the course
- Set the availability of the Module, which allows you set a date when the module will be available to a learner. This gives an Admin or Instructor the control to make modules available to learners over time or to restrict a learner from completing the course too quickly.
- You can also set a minimum amount time spent in the module that the learner must abide by in the Module before being allowed to move on to the next module.
-
Save your course changes by clicking Update Course in the upper right corner. If you get distracted or navigate to another section of the platform, changes may not be saved if you do not update before leaving a page you have made changes to.
Please see this guide for the full details of Creating and Updating a Course.
Learner Experience of a SCORM Module
Learners will view your SCORM package slides from inside the Module.
The Module heading will still contain the Course controls, and the timer will be visible.

When the Module has been completed, the learner will be able to advance to the next module in the Course.