Using Assignments in a Course
Assignment Modules are tools designed to facilitate the collection of students' responses to prompts provided by instructors. You can present a question or challenge, and students can respond by writing an answer or uploading a file. Once a student submits their work, you will receive a notification, allowing you to review their submission and either accept or reject it. Finally, you can assign a grade based on their response.
This guide will walk you through creating an Assignment Module, exploring the student experience, and understanding how instructors can view and evaluate submissions.
In this article
- Creating an Assignment Module
- Adding an Assignment Module to a Course
- Student Experience of an Assignment Module
- Instructor Experience of Evaluating Assignments
Creating an Assignment Module
Now that you know what an Assignment Module entails, let's build one.
-
From the Admin Dashboard, select Courses, then choose Assignments under the Modules header
-
Click on Create Assignment Module

-
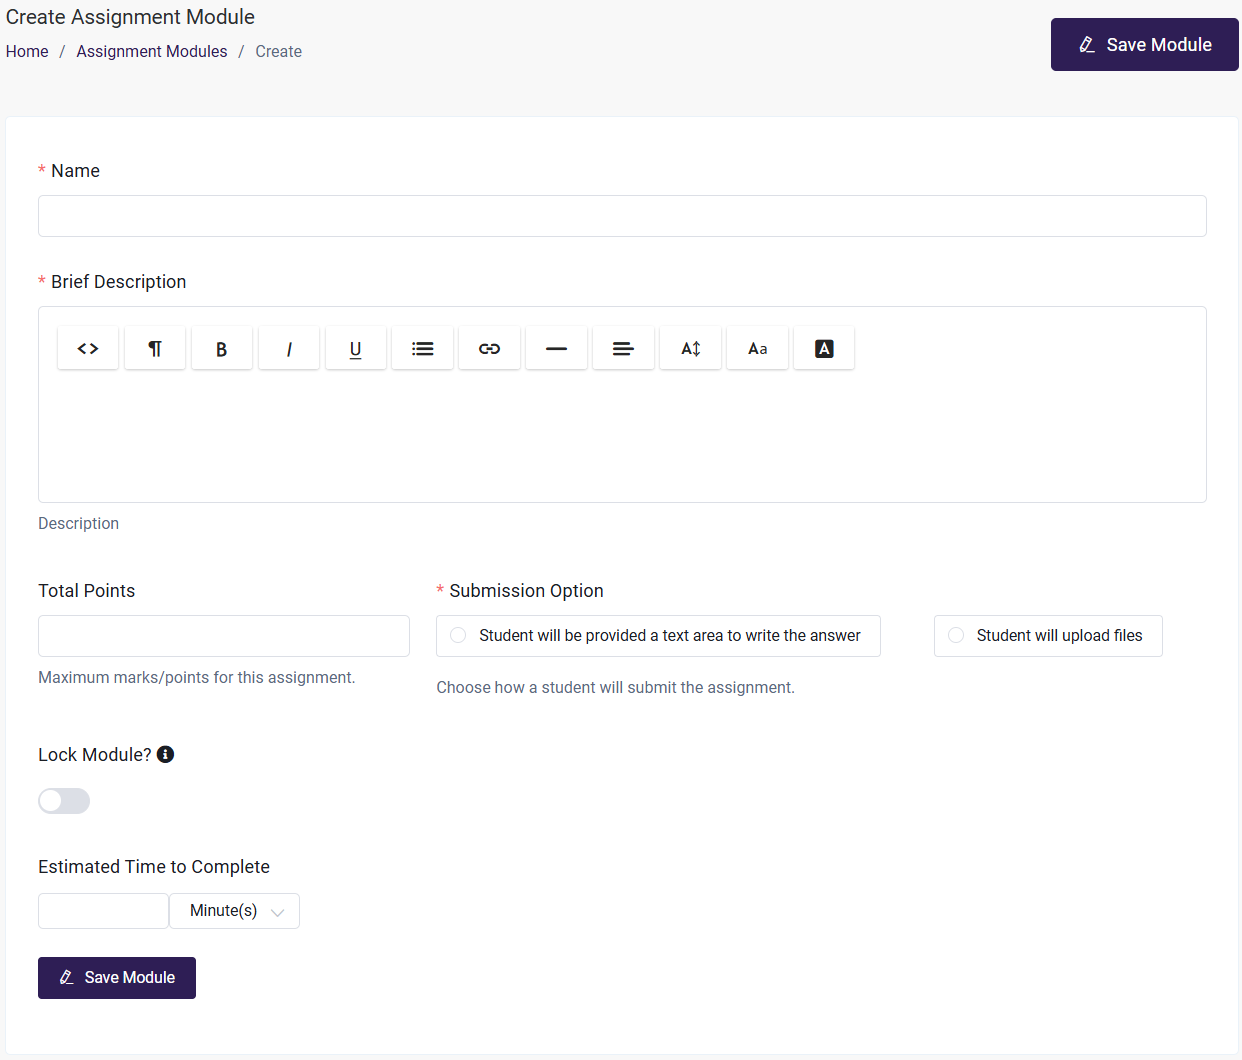
Enter the Name of the Module
-
Add a Brief Description: this is where you will put the question, prompt or any instructions that the student might need for the assignment. The text editor allows for content formatting, as well as custom HTML to make it look and feel how you choose.
-
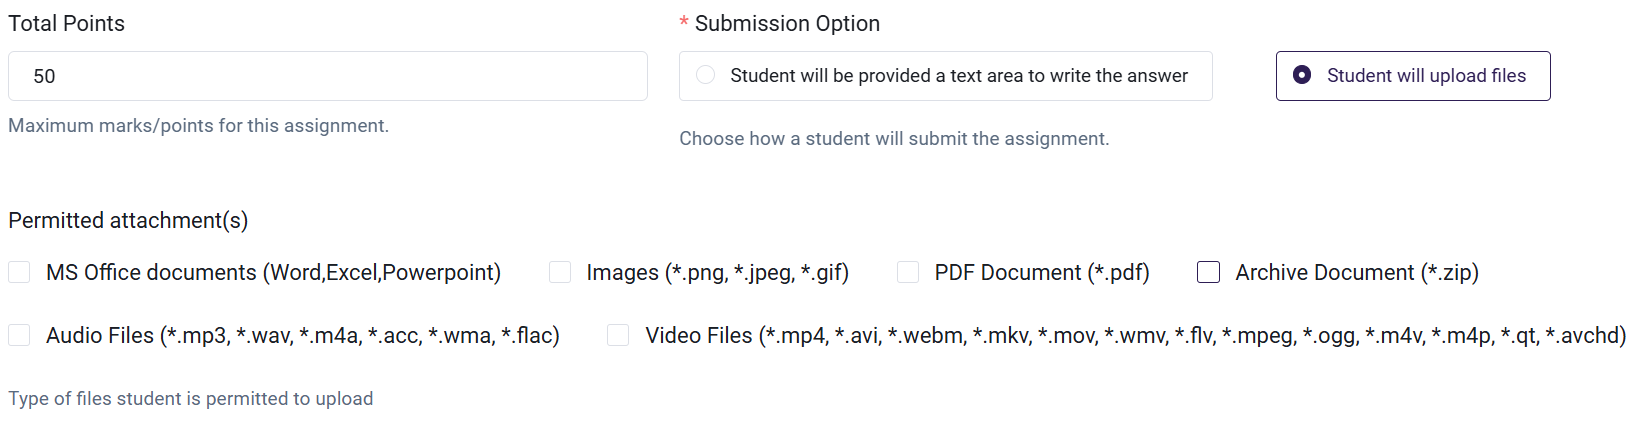
Set Total Points for the Assignment: You can customize the value of this individual assignment by assigning a maximum point total.
-
Choose the Submission Option
-
Student will be provided a text area: text area is provided below your challenge to allow your students to respond.

-
Students will be prompted to upload a file to complete the module. If this option is selected, you can specify the permitted file types, including MS Office documents, images, PDFs, ZIP files, audio, and video files. You can select multiple file types, but keep in mind that students are allowed to upload only one file per Assignment Module.
-
-
You can set an estimated time to complete the module, which indicates the ideal amount of time required to finish it.

-
On the user end, it will be displayed like this.

-
Save Module when you're done.
Then, we want to make sure the module is made available in a course. Once the module has been saved, you can add it to a Course using the steps below.
For more information on viewing, editing or deleting existing Modules, see this article.
Adding an Assignment Module to a Course
Now that your module has been created, you can add it to the Course or Courses so that it is accessible to Students:
-
From the Admin Dashboard, choose Courses, then All Courses
-
Find the Course you want to add the Module to, and click the three-dot action menu. Select Edit
-
Click the Step 2: Curriculum tab
-
Click "Add Module" and then opt to "Select an existing module from the list"
- Search the drop-down menu for your Module name, and select it.
- Once the Module is added to the bottom of your course list, you have the option of entering the Edit Module page to make changes to its content or removing the module from the course.
-
Click and drag the modules to rearrange them in the order they should be presented in the course. This involves placing the modules in a suitable order along with the sections if used.
-
You have the option to:
- Lock the Module, which forces a student to complete it before being able to move on to the next module in the course
- Set the availability of the Module, which allows you set a date when the module will be available to a student. This gives an Admin or Instructor the control to make modules available to students over time or to restrict a student from completing the course too quickly.
- You can also set a minimum amount time spent in the module that the student must abide by in the Module before being allowed to move on to the next module.
-
Save your course changes by clicking Update Course in the upper right corner. If you get distracted or navigate to another section of the platform, changes may not be saved if you do not update before leaving a page you have made changes to.
If you're a more visual learner, check out this video that walks you through how to create an Assignment Module:
Please see this guide for the full details of Creating and Updating a Course.
Student Experience of an Assignment Module
Now let's go through what a student will see when going through an Assignment Module.
Written Response Submission
- The student's view of the Assignment Module will include the instructor's Brief Description where the question, prompt or instructions are composed.
- Below that is a place for the student to write their response.
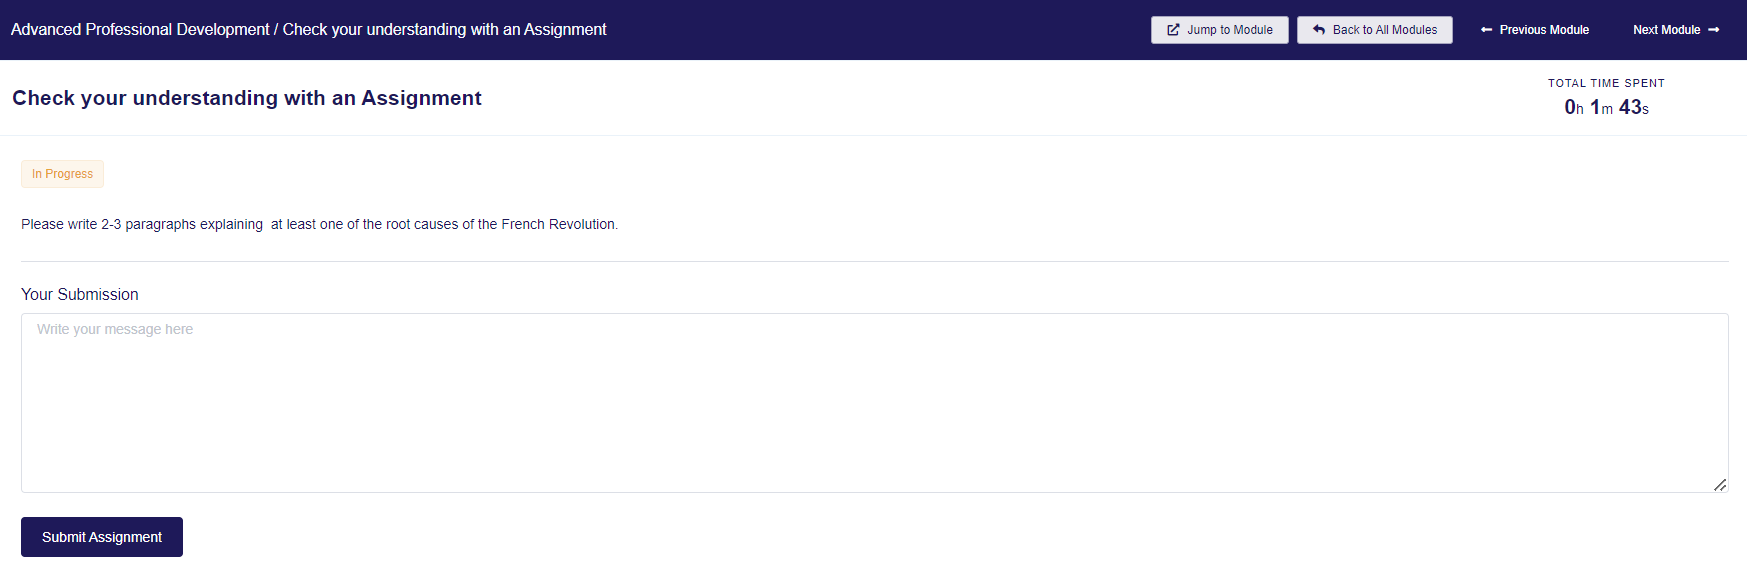
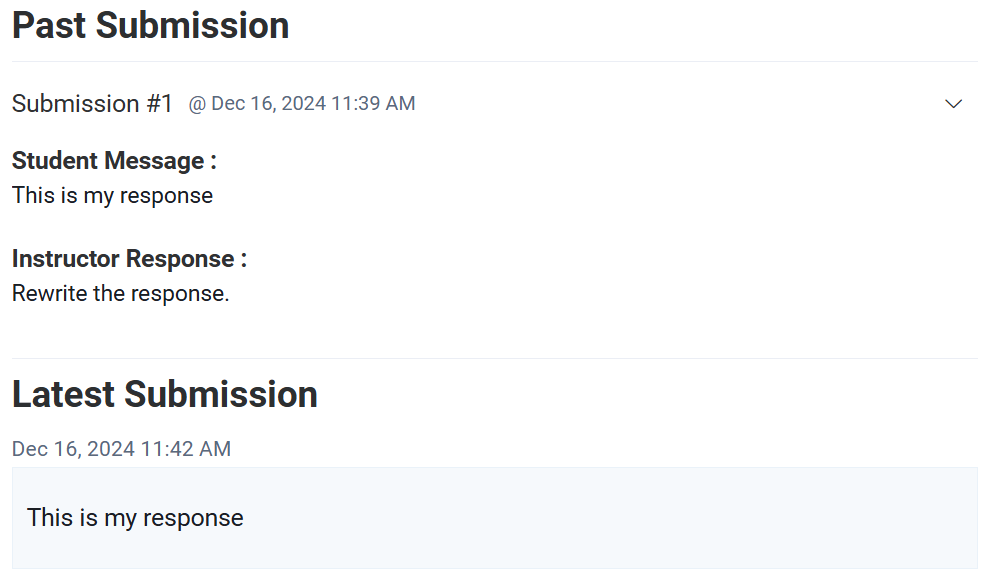
- When Submit Assignment is selected, the student will be shown a confirmation message that the response has been sent successfully.

- The student will then wait for an evaluation from the instructor. If the submission is accepted, the Module will update to 100% completed, and the student can move on.
If the submission is rejected, the student will restart the Module, and submit a new response.
File Upload Submission
- As with the written response option, the student's view of the Assignment Module will include the instructor's Brief Description where the question is composed.
- Below that is a place for the student to upload their file. The file must be a file type (audio, video, image, document) chosen by the instructor.
There is also a space for an optional message, if you would like your students to submit both a file and write a response to the assignment question.
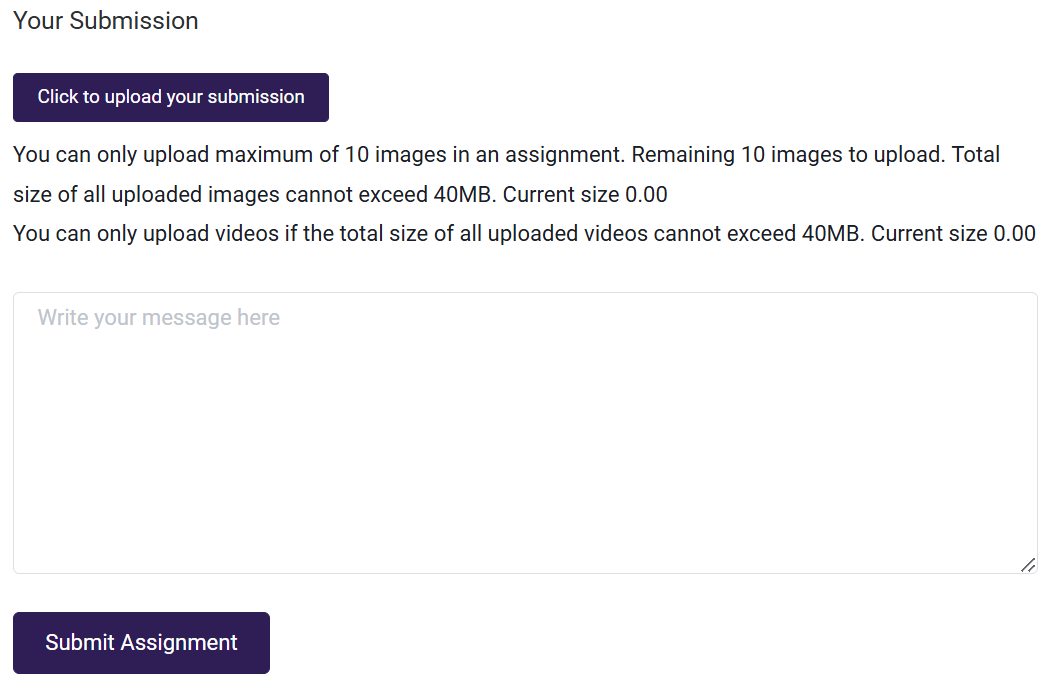
- When Submit Assignment is selected, the student will be shown a confirmation message that the response has been sent successfully.
- The student will then wait for an evaluation from the instructor. If the submission is accepted, the Module will update to 100% completed, and the student will move on to the next Module.
If the submission is rejected, the student will restart the Module, and submit a new response.
Instructor Experience of Evaluating Assignments
Once the student has submitted the Assignment, you can evaluate assignment submissions.
-
From the Admin Dashboard, select Courses, then All Courses
-
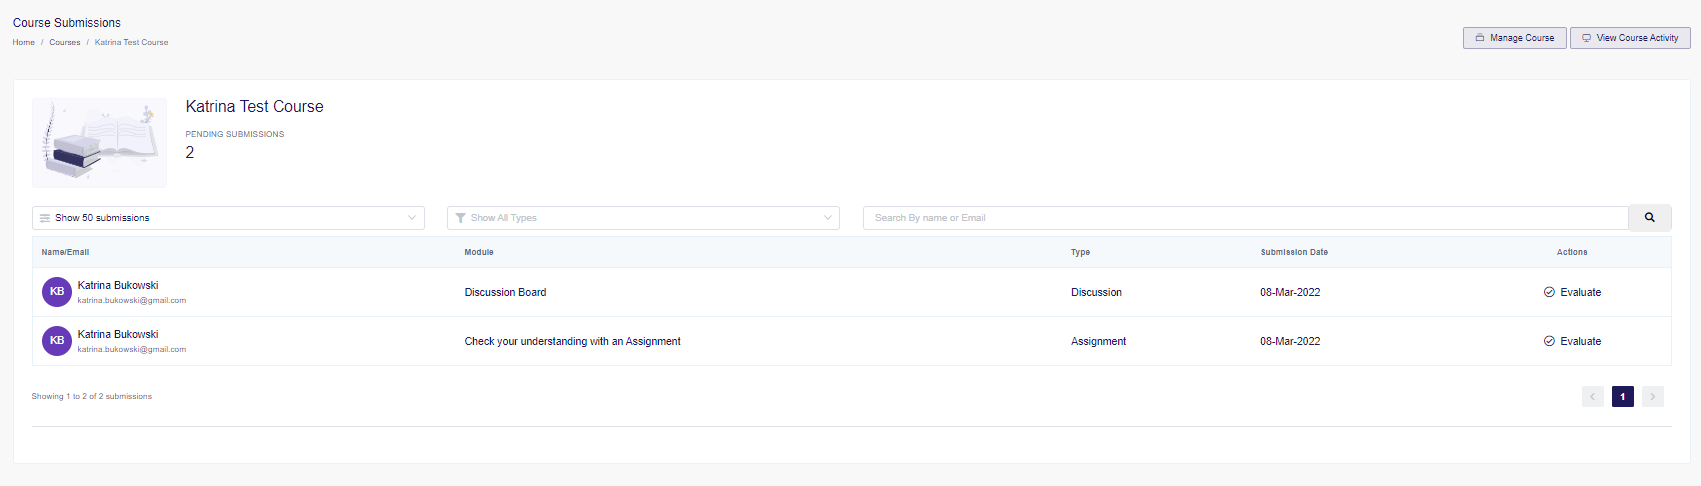
Find the course you are looking to evaluate assignment submissions for in the table and click the three-dot action menu to select View Submissions. You are then able to see all Pending Submissions for that Course, and are also able to filter by Type (Discussion or Assignment) and search by student name.
-
Find the student and submission you want to evaluate and click the Evaluate link.
-
Read the message from the student and click the Download link to download their submitted file.
-
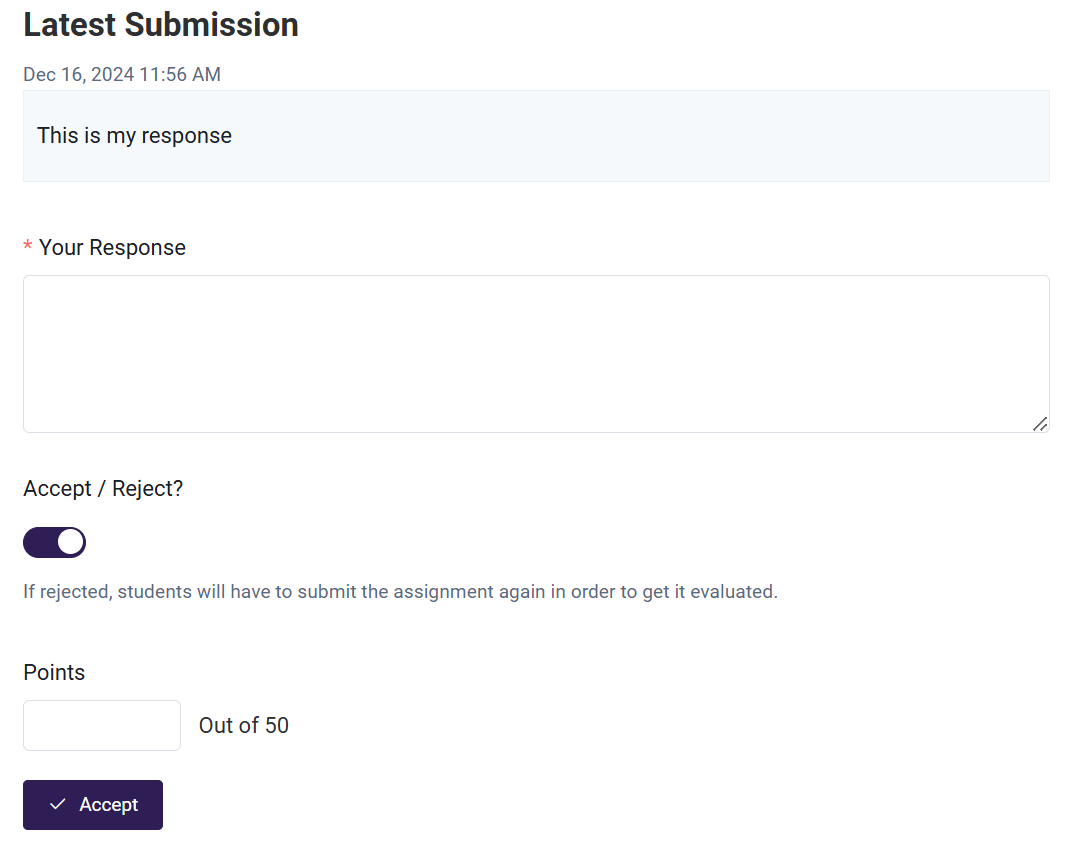
Write out a response so the student knows what they did right or what they should improve, decide whether you want to Accept or Reject the submission (enable toggle to Accept), and determine the points they have earned for their submission.
-
Click the Accept (or Reject) button to complete the evaluation. If you have rejected the Assignment submission, the student will be asked to re-submit an improved version and you can once more evaluate it. If you accept, their module will be completed.
For More information about Managing the Assignment , please refer this documentation.
-
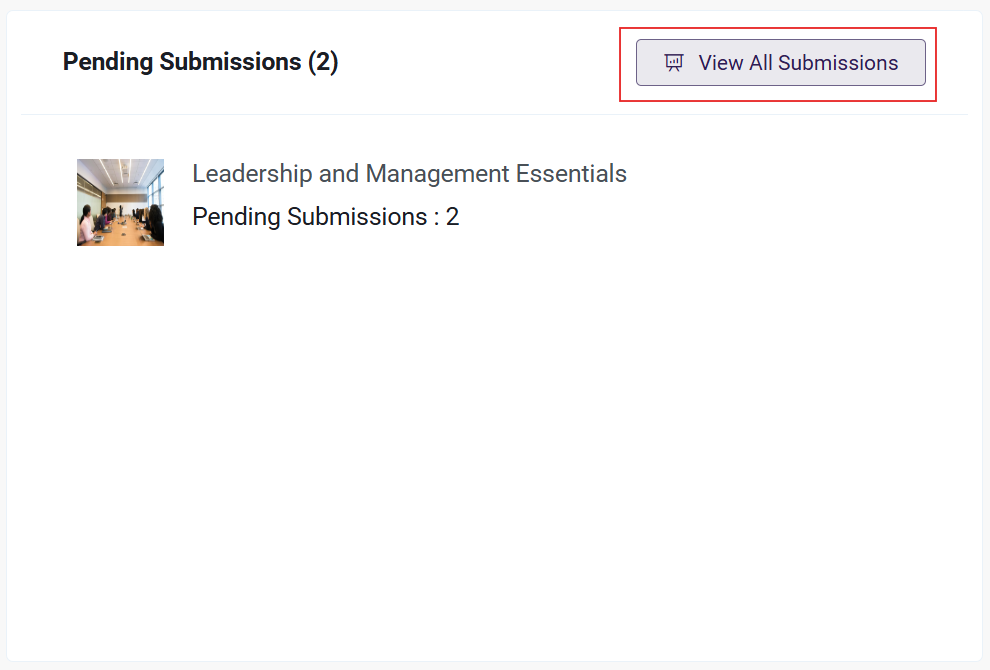
You're also able to view all Pending Submissions right on your Dashboard.
-
Click on View all Submissions to access a list of all pending submissions across all courses it includes both assignments and discussions. You can filter the list by type (Discussion or Assignment) or search for a specific student by name.
- Once you've located the course you want to evaluate, click Evaluate under the Actions column.
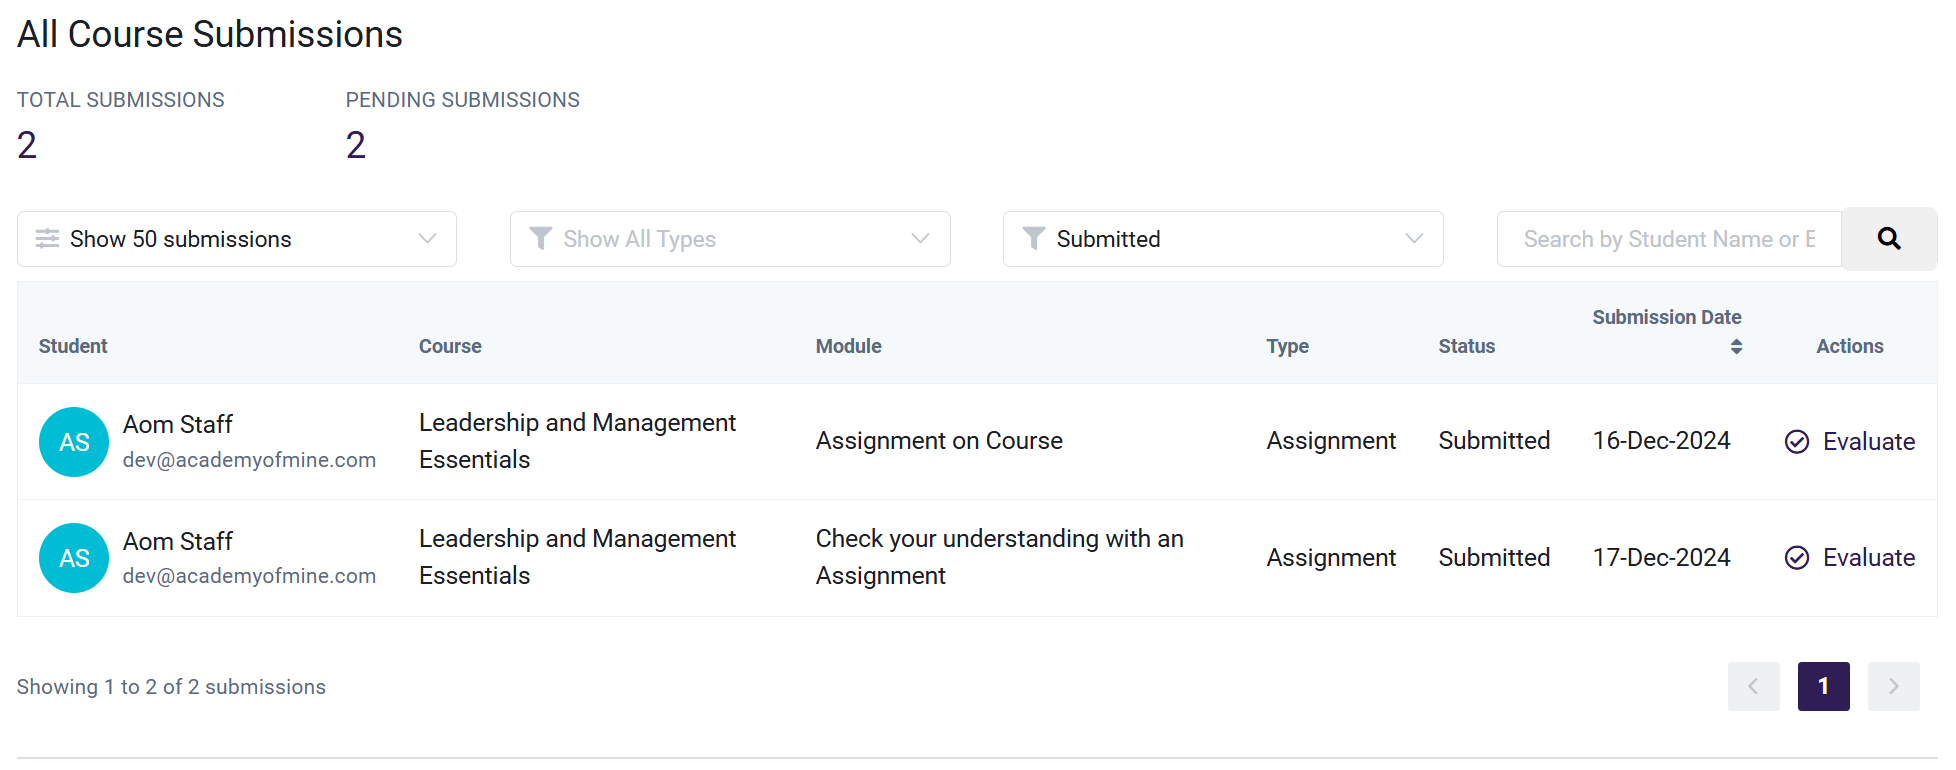
- Read the student's comments, enter your response, and award a point value and click Accept.
- Once the assignment is submitted, evaluated, or rejected, an email will be triggered.
- Assignment Submission: When a Student submits a response in an Assignment module, an automated email is triggered so the author of the course (either an Instructor or Admin) knows to evaluate it.
- Assignment Evaluation: Once an Instructor/Admin completes their evaluation of the Student's response in the Assignment module, the Student will be sent an automated email letting them know they can view their evaluation, including a grade and/or Instructor's comments.
- Assignment Rejection: If an Instructor evaluates a Student assignment and selects the Reject option, an assignment rejection email will be triggered and sent to the Student to let them know they will need to go back to the module and re-submit a new response to the assignment.
To enable this email setting, please refer to the documentation.