Creating or Importing Questions for Quizzes
The questions within a Quiz Module are undoubtedly its most essential component In Academy of Mine, you can create questions directly within the platform or import them from an external source using Excel.
This guide will walk you through the process of creating and organizing questions, preparing them for inclusion in a Quiz Module, and effectively using Question Categories.
Be sure to check out our related guide, Using Quizzes and Exams in Your Course
In this article
- Bulk Importing Questions with Spreadsheets
- Create a Question Inside the Quiz Module
- Create a Question on the Questions Page
- Question Categories
Bulk Importing Questions with Spreadsheets
Many of our clients have a large number of questions ready and prefer to import them into a quiz all at once, rather than setting up each question manually. To simplify this process, we offer a bulk question import feature that allows you to quickly upload questions from an Excel file into your platform and quizzes.
In this section, we’ll explain the required file format for importing questions and guide you through the steps to complete the import process.
File Format for Bulk Import
Let's first go over how the questions will need to be formatted:
- The file must be in .xlsx format, and must only have one worksheet. If you would like, a sample file is available to download on the Bulk Upload Questions page.
There is a limit of 500 questions that can be uploaded per file. If you have more than 500 questions, please separate them into multiple files and upload each sequentially.
The file must be formatted with the following header/first row values:

- Question_Type
- Question_Title
- Question_Content
- Question_Category
- Answer_Hint
- Answer_Explanation
- Correct_Answer
- Option_1
- Option_2
- Option_3
- Option_4
It is possible to add an Option_5, etc, if you require additional columns.
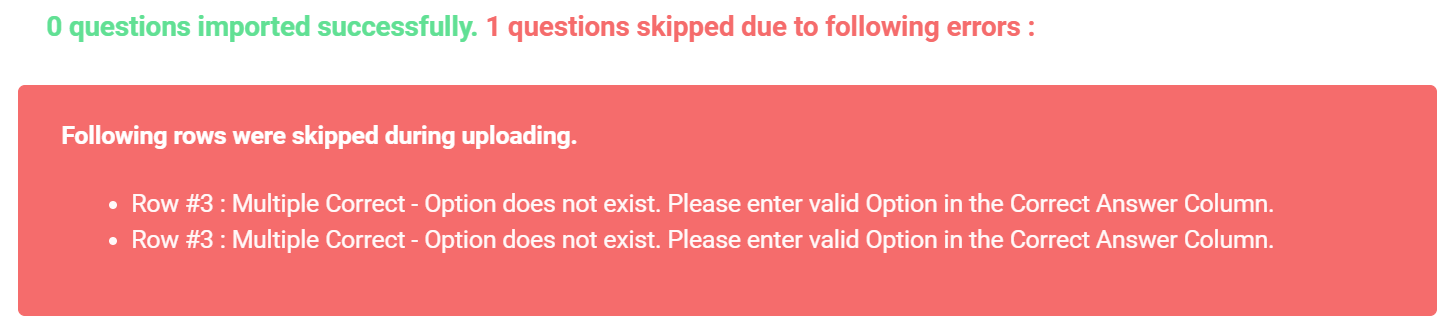
If a row of your file has an error, it will be skipped during the upload process. You will receive a report of the errors as shown below, and you can try to upload those specific questions later.
Importing Questions
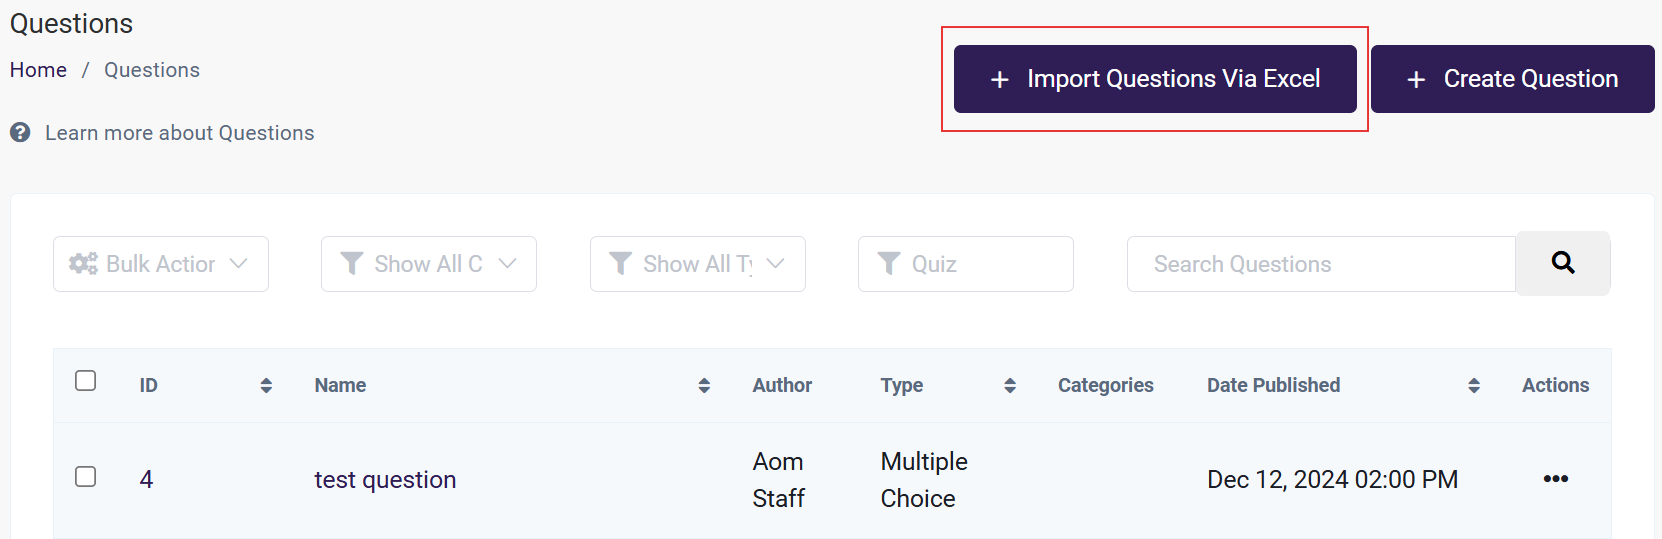
There are two places where you can bulk import quiz questions: while creating or editing a Quiz Module or uploading them from the Questions page which can be found under Courses -> Questions in the Dashboard Menu Sidebar.
Within a Quiz Module


From the Questions page
When importing within a Quiz Module, the questions will automatically be added to the quiz. Within the Questions page, they will be uploaded to the platform and can be added to a Quiz Module later on. No matter where you upload your questions, the process is the same.
- Click Import Questions via Excel
- Read the General Instructions. There is also a Sample File you can use as a starting point.

- Build out the sample file with the content of your quiz questions as per the instructions that are provided, or ensure your file matches the parameters. Besides the first row of the file which will be the header with the title of the columns, each subsequent row will represent one questions with all the information needed.
Make sure your spreadsheet contains a single worksheet. Multiple worksheets in the file may cause the upload to fail.
- Upload the file by dragging and dropping or clicking the upload box

-
On the Questions page, you can choose to upload questions to an existing quiz or multiple quizzes, create a new quiz for the upload, or simply add the questions to the Questions page without assigning them to a quiz. Regardless of your choice, all uploaded questions will be accessible on the Questions page.
- Add These Questions to Existing Quiz: This option will immediately place the newly uploaded questions into one or more existing Quiz Modules that you have selected.
- Create a New Static Quiz with These Questions: This option allows you to upload your questions and create a brand new Quiz Module. You will be prompted to name your Quiz Module and can find it in the Courses -> Quiz Module page.
- To add Questions independently to the Questions page: Choosing Add These Questions to Existing Quiz and leaving the field blank will upload the questions unassociated with any quiz.
-
Click Upload Questions to upload the file. If you are working on a quiz, do not forget to save/update the quiz module.
Creating a Question Inside a Quiz Module
When making a Static Quiz, you have the option of creating a question directly inside the Quiz Module.
-
From the Admin Dashboard, select Courses, then choose Quizzes to create a new module or edit an existing one. Learn more about creating a Quiz module and the question types here.
-
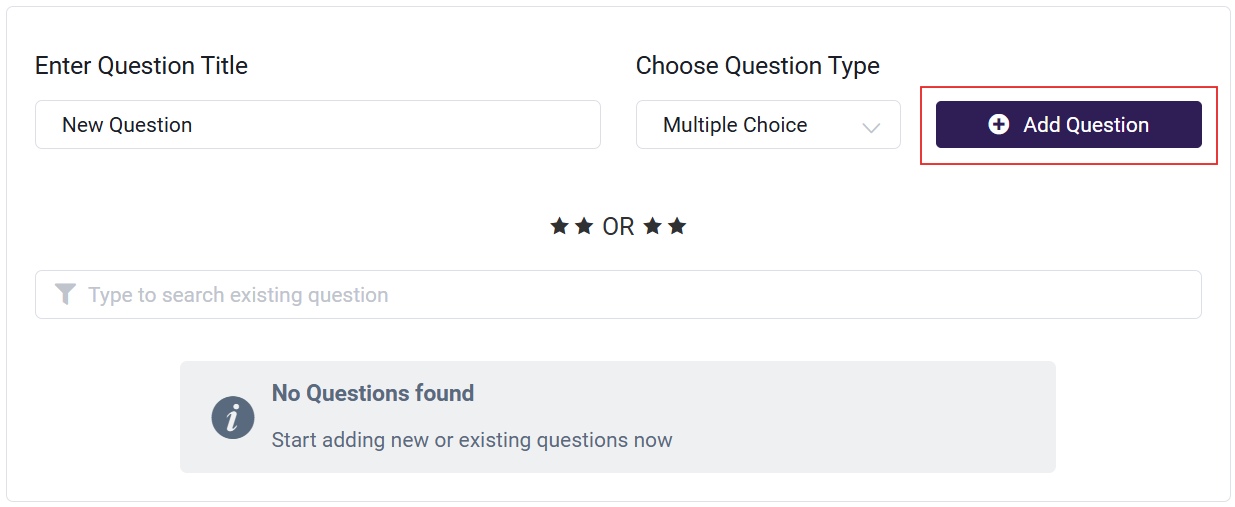
Create a question title and choose the question type, then select Add Question.
-
The question will then be added to the list of questions for this quiz. Drag it to rearrange its order, or select Shuffle Questions to randomize the entire quiz.
-
Selecting the Edit button will open the question on the Questions Page, where you can fully customize it and add the answers etc.

Creating a Question on the Questions Page
The Questions page will store all the questions in your account. You can bulk import questions here, as discussed above, or you can add individual questions as well. Once your question has been created on the Questions Page, it can be added to any Quiz Module in the Search Existing Question field.
- To add individual questions to the Questions page, go to the Admin Dashboard and choose Course, then Questions.
- Click on Create Question
- Title: the Title of your question is used to reference it when organizing your questions and creating your Quiz Modules. The Title will be visible on the sidebar of the course player as the user navigates through the quiz.
- Add Your Question & Content: the Question & Content section is where the actual question is asked. This field allows custom HTML, which means you can insert images, videos, or anything else you would like to embed.

-
Select a Question Category (Optional): Question categories are used to group questions together for Dynamic Quizzes. You can read more about Quiz Types here.
-
You may also view, add and edit Question Categories from the Admin Dashboard by going to Courses -> Extra -> Question Categories.
Choose the category and click on Add Category.

-
-
Choose a Question Type: There are four question types:
- Multiple Choice: These can have a single correct answers. Use Add Option to add choices, then select Is Correct to determine what answer is correct. Choices can also be rearranged by dragging them up or down the list.
- Multiple Correct: These can have more than one correct answer. Use Add Option to add choices, then select Is Correct to for all the answers that apply. Choices can also be rearranged by dragging them up or down the list.
- Short Answers questions are similar to Multiple Choice, but the user is required to type the answer themselves. Use Add Option to add choices
Note: You may want to include multiple variations of the same answer, to account for possible typos or differences in your users' typing.

- Match Answers: Allows you to have multiple items that the users match answers to. The user will drag the answer to the correct match. Additional matches can be added if you want to use distractors (so there are more options then items).
-
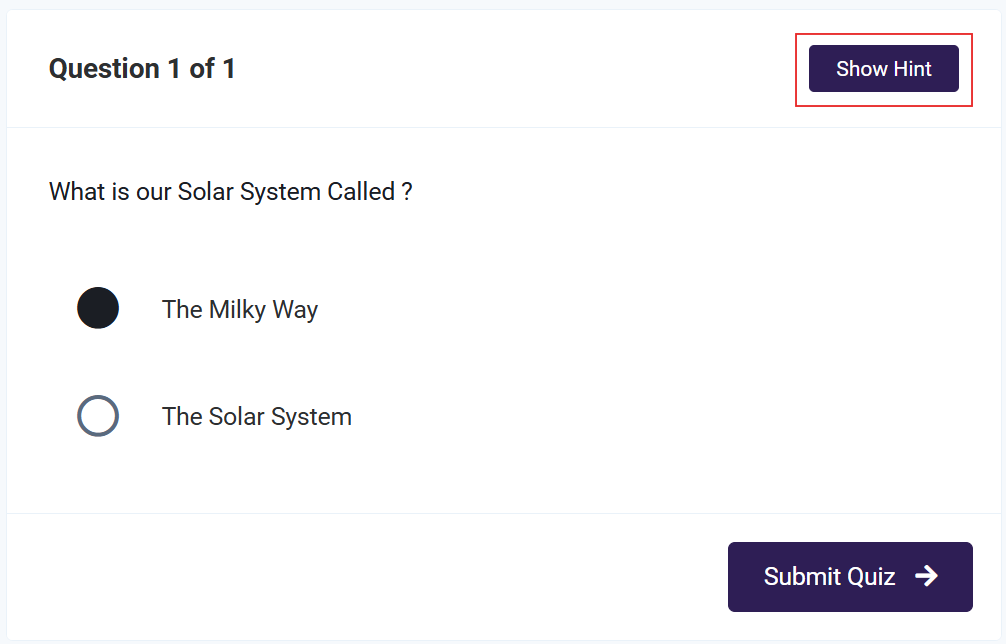
Choose to provide an Answer Hint (Optional): You have the option of providing a text hint for your question. It will appear for the user on the quiz as shown below, to the right of the question.

-
Choose to provide an Answer Explanation (Optional): If included, this will be displayed on the Scorecard after the quiz has been completed.
If you have selected to never show the correct answers in the scorecard, your Answer Explanation will not be displayed.

- Click Save Question when you're done!
Question Categories
The Question Category is used to easily group together a series of questions, and is essential for creating a Dynamic Quiz. Dynamic Quizzes will draw their pool of questions from a selected Question Category.
Question Categories can be found in the Admin Dashboard, under Courses -> Extra -> Question Categories.
To create a new category click on Create Question Category.

A popup will appear, enter the category name and click Submit to save the category.

From there, you can edit your current category by clicking the three-dot menu to the right of the category, or create a new one.

Once the category has been saved, you can add it to questions, or you can bulk add questions to a category by following these steps:
-
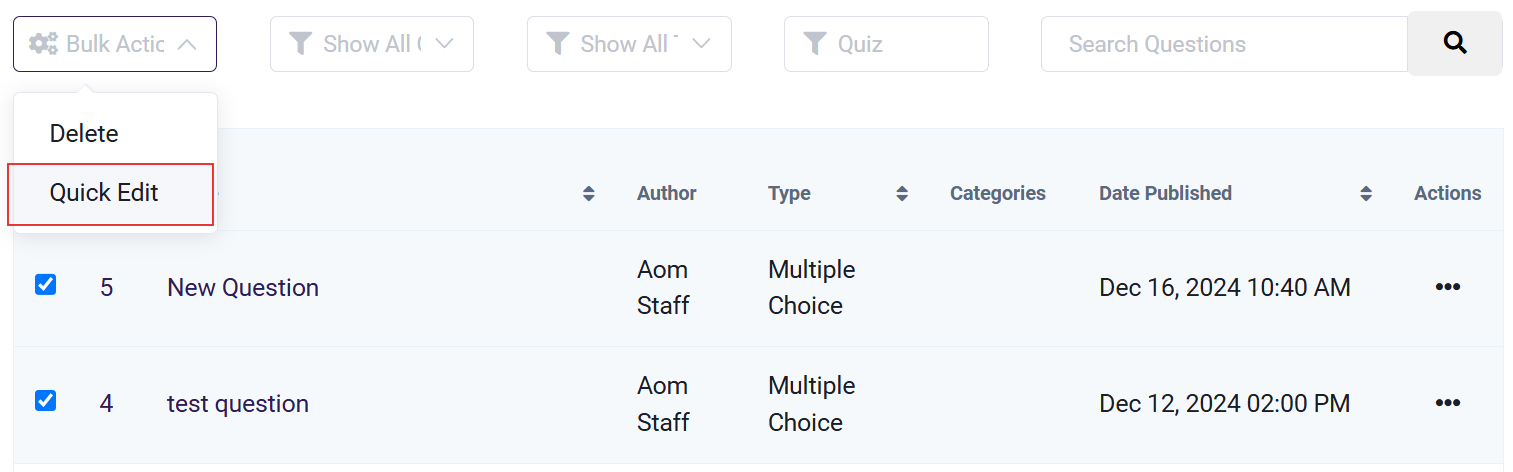
From the Admin Dashboard, choose Courses, then Questions.
-
Select the questions you want to use in a category by clicking the checkboxes on the left.
-
Click Bulk Actions.
-
Choose Quick Edit.
-
Choose a Category from the dropdown menu, and Confirm.
