Using Products to Offer Self-Enrollment in Courses
Once you have created your course, the next step is to enroll learners so they can access the course and have it appear on their dashboard. Simply creating a course will not make the course content publicly accessible to learners.
There are several ways to enroll learners into a course: an Admin or Portal Admin can upload and enroll a learner, or learners can self-enroll into a course. If you want to enable self-enrollment for a course, continue reading. In this article, we’ll cover how to set up Products, which are required for self-enrollment and online purchases via eCommerce. We will explain how to create Products for both Self-Paced and Instructor-Led courses.
If a learner enrolls in a class within an Instructor-Led course, they will be added to the class roster and gain access to study materials (if any are included) as well as webinar information for virtual classes.
Please note that Instructor-Led courses may not be available to legacy users. If you have questions about the availability of this feature or adding it to your platform, contact support for assistance.
Additionally, all actions described in this article are accessible only to Owners and Staff member with permission.
Be sure to review our overview of Courses: Introduction to Courses
You'll also want to check out our guide on Setting up eCommerce so that you're able to accept payment for your Products.
In this article
- Products and Courses
- The Course Catalog
- Creating a New Product
- Video Walkthrough of Creating a Product
- Editing a Product
- Next Step
Products and Courses
Before we dive in, let’s clarify the relationship between Products and Courses. Products enable you to sell your courses to learners or make them available for self-enrollment or purchase through our automated system. To be precise, the learner is not purchasing a course directly; they are purchasing a Product that contains one or more courses.
This distinction is important to understand:
- Courses only appear on a learner's dashboard once they are enrolled.
- Products allow learners to purchase enrollment into courses.
When a learner buys a Product, they are automatically enrolled in all the courses included in that Product. Products are what appear in the Course Catalog, and purchasing a Product (even if free) enrolls learners in the courses it contains.
If you want to offer courses for free in the Course Catalog, enabling learners to self-enroll at no cost, the courses still need to be included in a Product, with the price set to 0.
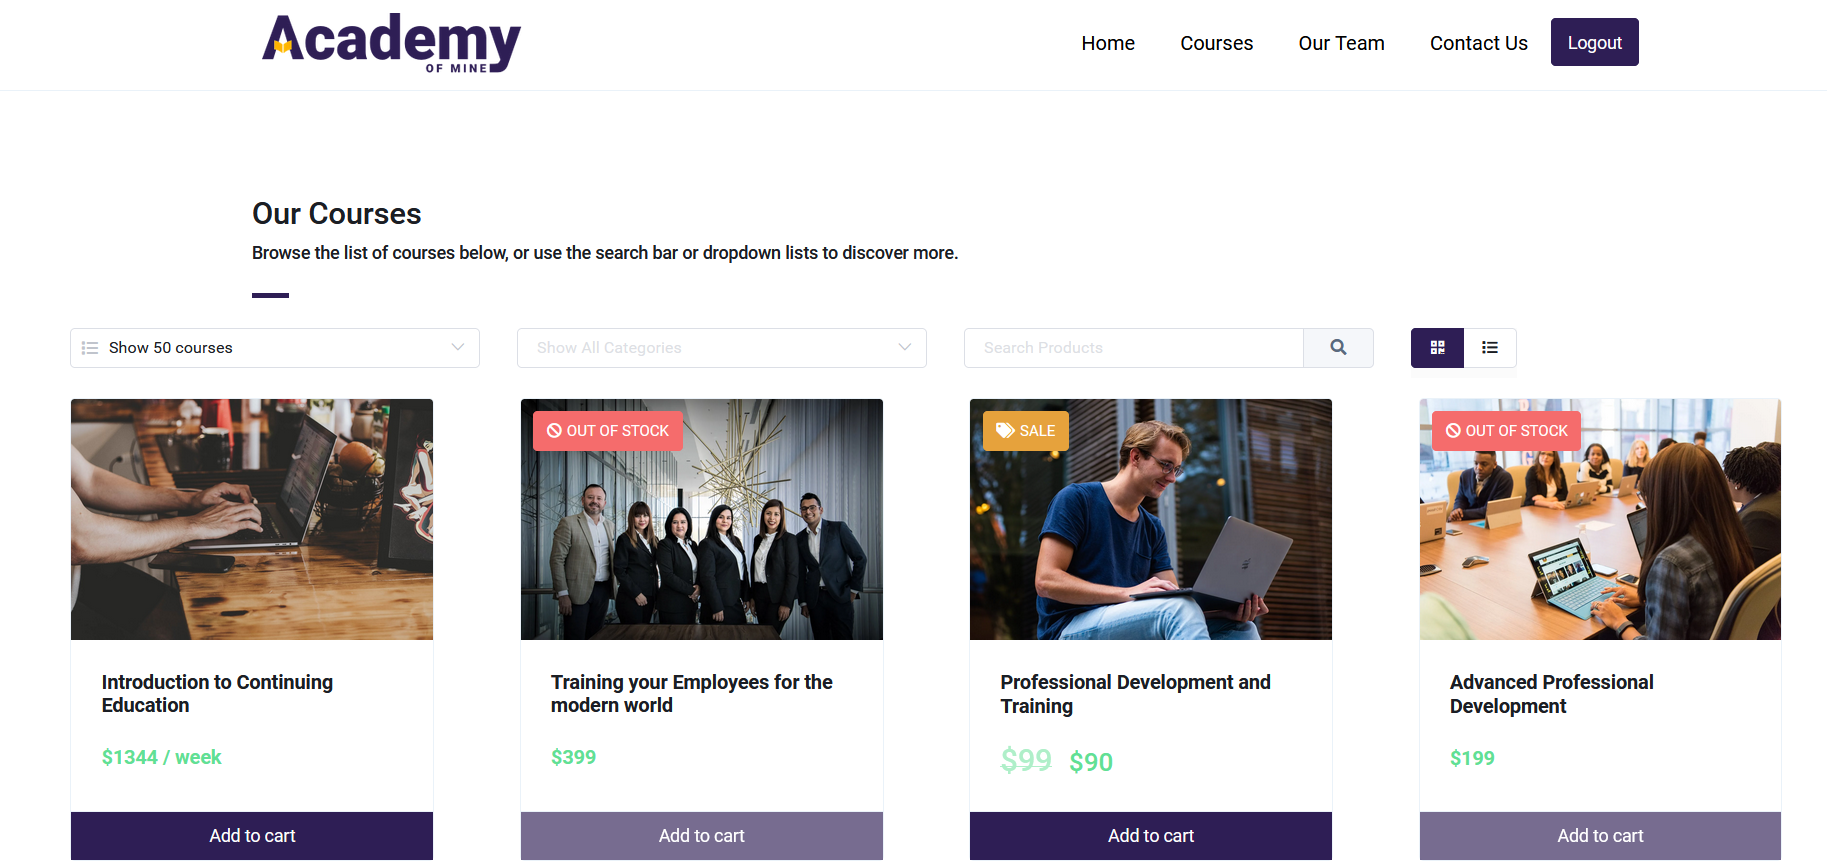
The Course Catalog
The Course Catalog page is the showcase of all the Products you offer. All the information you will add to your Product can be found here. The Course Catalog is where potential learners will be able to browse your offerings, add products to their cart, and check out and complete purchases. It will look something like this:
The Course Catalog is fully customizable. For more info on this, read our article on Building a Course Catalog.
Creating a New Product
Now let's go over creating a Product that will be added to the Course Catalog! When creating a Product, information will be added and organized using the tabs on the left side of the screen, we'll go through each tab below, or you can click the link to jump to a section.
The sections to add information to are:
- General Details: basic information about your Product
- Price: where you'll add the price for the product (or 0 if it's free)
- Sale: optional, though available if you'd like to offer a sale
- Sales Tax: optional, if you want to add taxes.
- Free Trial: also optional, available if you're offering a Subscription Product
- Availability: enter the status of your Product--if it's in stock or out of stock
- Course Access: where you'll choose what Courses will be included with the Product
- Related Products: Add other products your customers might be interested in purchasing
- SEO: optional choice to add search engine optimization title and description
Remember to click Save Product once you're done entering all the necessary information!
Section 1: General Details
First, you'll start by creating a new Product and adding the General Details which will be the basic descriptions of your Product.
-
From the Admin Dashboard, select the eCommerce tab, and then select Products
-
On the Products page, you'll find a listing of every Product in your account. This is where you can Edit an Existing Product or create a new one
-
Create a new Product by clicking on "Add Product" at the top right corner of the page
-
Choose the Product Type: Simple or Subscription
- Simple: A simple Product is treated as one single item for purchase. For example, a Product containing access to two Courses. The initial payment completes the purchase.
- Subscription: A subscription Product is an ongoing purchase at set intervals. Based on the payment schedule, the learner's credit card will be charged regularly for as long as the subscription is active--you can choose to set an expiration date. The subscription payment will also auto-cancelled after three consecutive failed attempts at payment.
-
Enter in the General Details
-
Title: The title of the Product will show in your Course Catalog, as well as on order invoices and e-commerce email notifications. Choose a clear, descriptive, but short title. Depending on where it is displayed, a very long title will possibly be broken into multiple lines or may have some other formatting issues. It's recommended that you keep your Product titles short and distinctive, in order for your learners to find them when browsing your catalog.
-
Featured Image: The Featured Image of the Product will be displayed in the Course Catalog. We recommend uploading a unique image to help your product stand out. Click "Browse Media" to open the Media Library, where you can upload your image. Once the file has been successfully uploaded, it will appear in the Media Library. You can then select it for your course by clicking "Choose" or "Select." Alternatively, you can choose a previously uploaded image as your Featured Image.
- The Featured Image is in a 3:2 aspect ratio, with the width being 1.5 times the size of the height. We recommend image dimensions of 300 px by 200 px for the best performance and visibility. Larger images can cause issues with page size and performance. Smaller images can cause formatting issues. The key is that all Featured Images should be the same size, so they look uniform in the learner view and course catalog. |
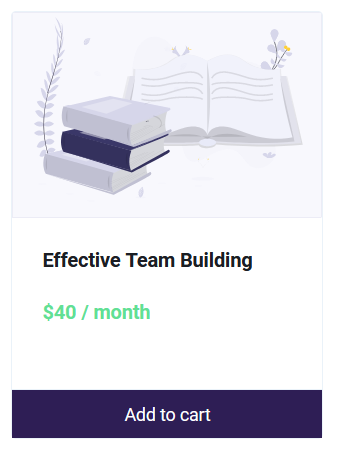
- Keep in mind, Featured Images are not required. If you choose not to upload an image, a sample image will be displayed instead. This sample image will be the same for all Products that do not use a custom Featured Image.
- When not in the process of creating a course, you can upload and view files in the Media Library by selecting "Assets" and then "Media Library" on the Sidebar.
-
Select Category: This links the product to a Product Category that can be used by a learner to filter through the Products shown in the Course Catalog, and can be used by administrators to filter through the table of Products in the Admin Dashboard. If you have already created a Product Category, you can assign the Category here. If you have not already created a Product Category, you can create one by simply typing the name of the Category you would like to create and hit "Enter." You can read more about using Product Categories here.
-
Catalog Rank: You can set the rank/order number of the products. The products in the catalog will be listed serially according to the number mentioned here. If 2 or more products have been provided the same catalog rank then the products will be listed according to the date of creation.
-
Content: This is where you can design how your Product's listing page looks with our Page Builder. You can read more about Customizing a Product Page here.
-
Section 2: Price
The price of your Product can be set in the Price section. The Base Currency is selected in the eCommerce Settings, in the General tab, and that currency will be used for the sale of all your Products. For more information on Base Currency and other eCommerce details, see our Introduction to eCommerce article.
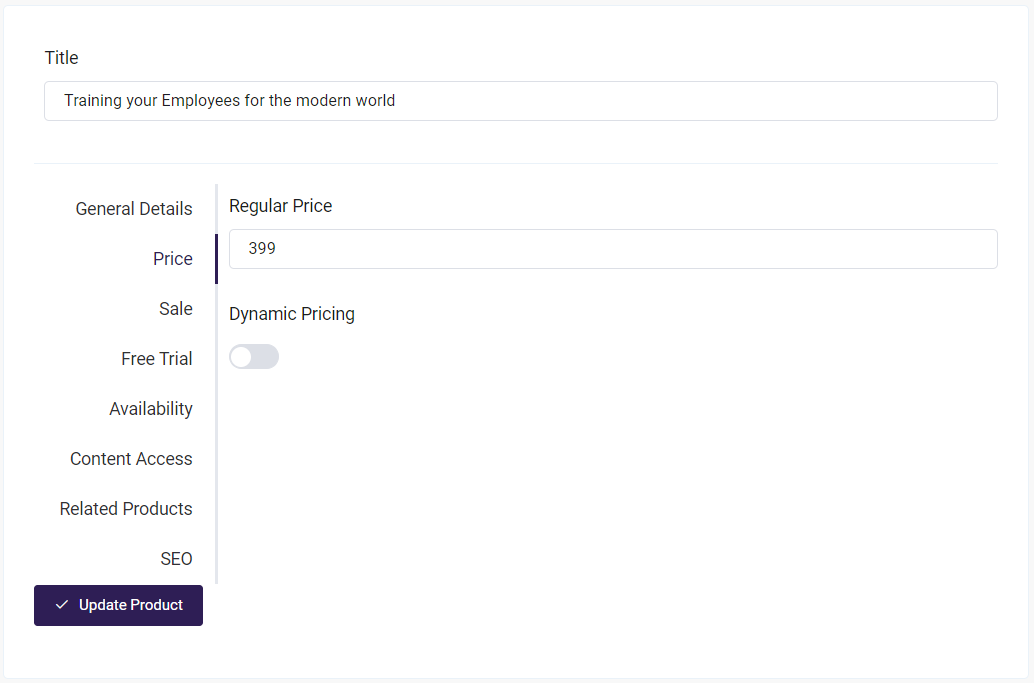
Regular Price
If a Simple Product is being created, you will have the option to enter a regular price. This would be a one-time purchase with payment completed at checkout.
Note: If you would like to offer your product for free in the Course Catalog, then set the price to 0. However, if you do NOT want to offer your product for free, you need to enter your desired price here.
If you skip this step, you can end up giving your product away for free to learners without intending to. It is worth taking the time to double-check the price you set every time you make a Product available. And always make sure you click the "Update Product" button when you are done.
Dynamic Pricing
Dynamic Pricing allows you to set the price based on the quantity of items that a user is purchasing. You can set different tiers of pricing for different amounts of a Product.
- Go to eCommerce -> Products -> Add product and enter your Product's details.
- Go to **Price ->**click the Dynamic Pricing option.
- Enter Minimum and Maximum quantities. This allows you to set the range that a Product will be at a certain price. You can add as many Pricing tiers as you would like by clicking on the + button
- Set the Price Per Product within each Product range.
- Save Product to lock in your Pricing tiers.

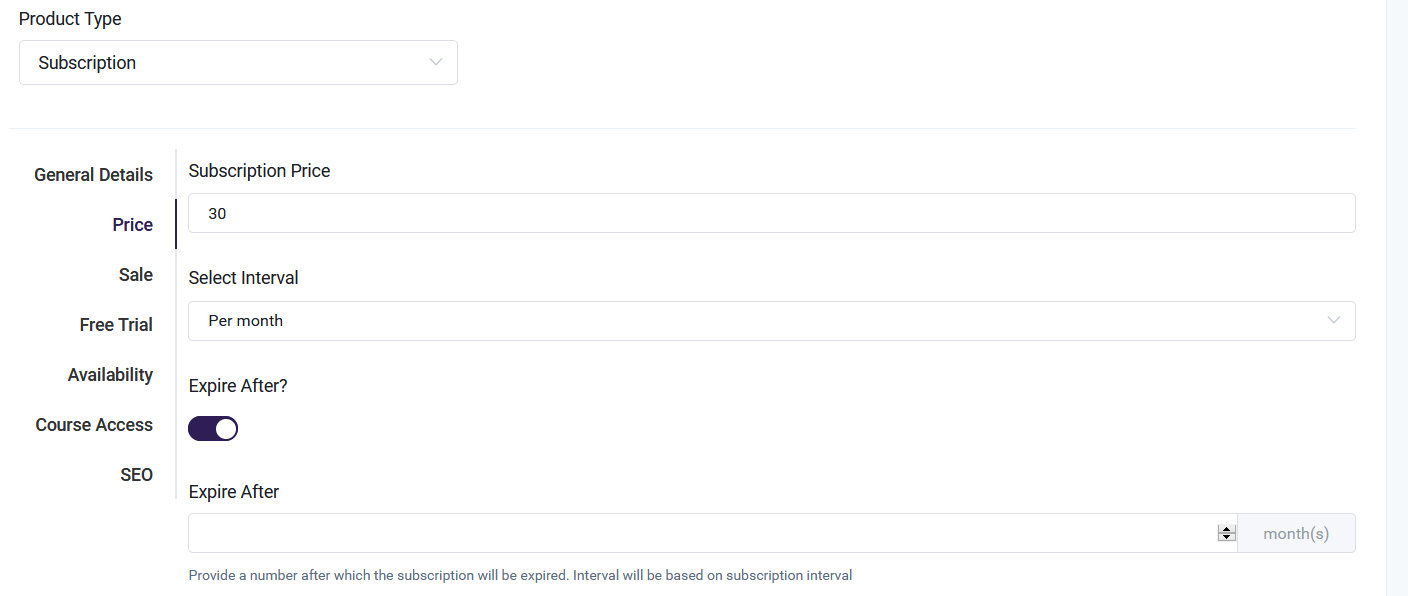
Subscription Price
A subscription Product will have the option for a subscription price. You can select the payment interval as days, weeks, months, or years from the drop-down menu. You can also choose for the subscription to expire after a set interval. In the image below, you can see that:
- The price has been set to 30 (Base Currency is set in eCommerce General Settings)
- The subscription interval has been set to "per month."
- The "Expire After" button has been selected
- Now the Admin will need to enter the number of months in the "Expire After" field
Section 3: Sale
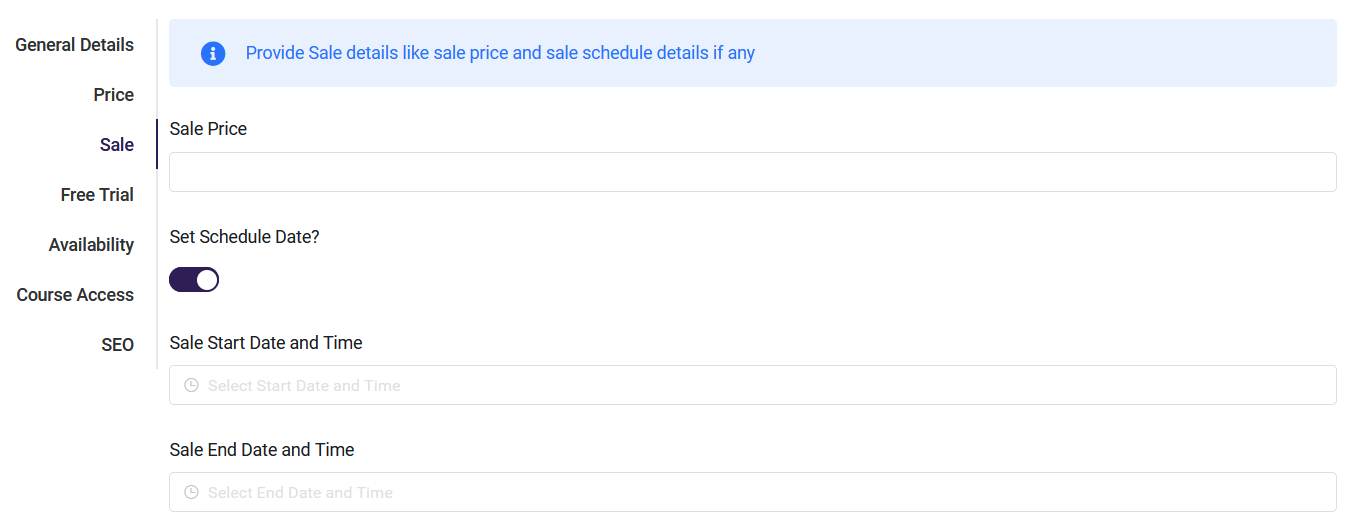
If you would like to offer a sale period for your Product, you can set that up in the Sale section. A sale price can create interest and urgency which can mean additional learners buying your product.
Set the sale price as a lower amount than your regular price. You have the option to schedule a start and end date for your sale period to create a limited-time offer. In the example below, note that the "Set Schedule Date" toggle has been turned on, and the Admin can now enter a Sale Start Date and Time as well as a Sale End Date and Time.
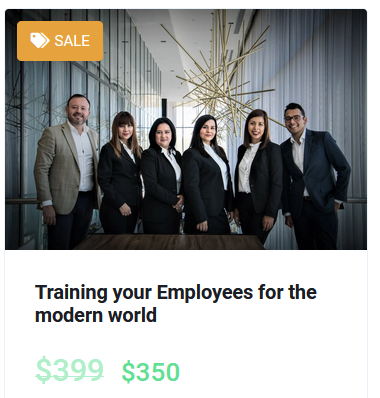
This is what it will look like in the Course Catalog.
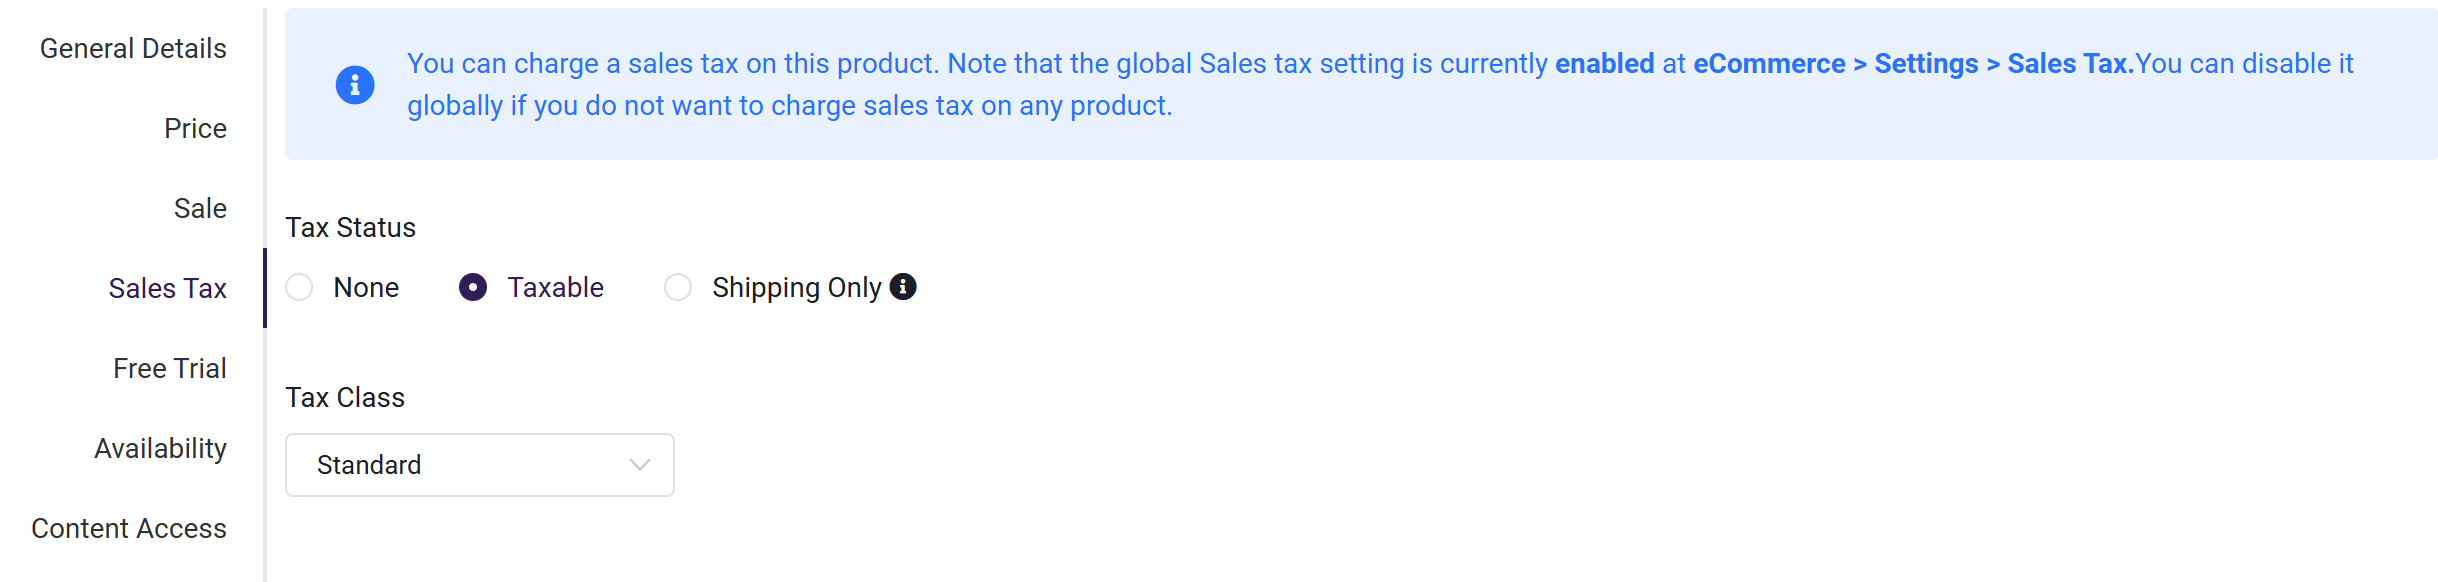
Section 4: Sales Taxes
To use this setting turn on Sales Tax from E-commerce->SalesTax, update the setting, and save. Then apply tax on product accordingly as shown below
Section 5: Free Trial
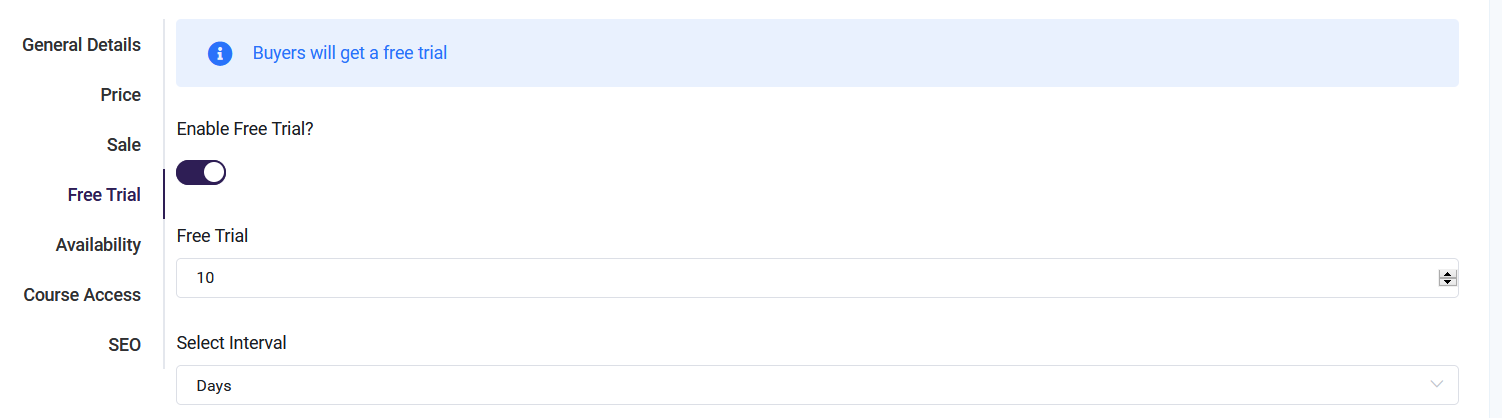
It's possible to create an automated free trial period for your Product. This will be handy in attracting buyers for your product that may be interested, but not sure if they want to buy. A Free Trial will allow them to have access for a set period of time before billing starts.
- Note: This option is only available for subscription Products
- When enabled, you can set the interval of your free trial in days, weeks, months, or years
- When a learner purchases the Product, their credit card info is entered, but the card will not be charged until the free trial period has concluded
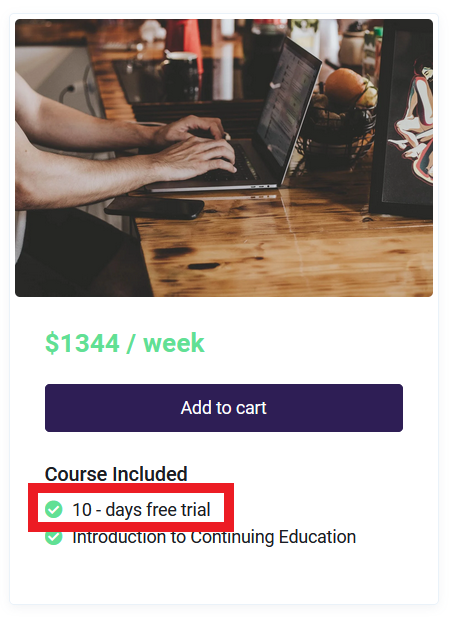
In the example below, Free Trial is enabled, and the Admin has set the interval to 10 days. Once the 10-day Free Trial passes, the normal subscription interval begins, and the credit card is charged.
And this is how it looks in the Course Catalog:
Section 6: Availability
If you are offering a limited number of seats for your Product, you can set the availability in the Course Catalog to show potential Learners.
There are three options for availability:
- In Stock - the Product is available immediately to anyone who wishes to purchase it
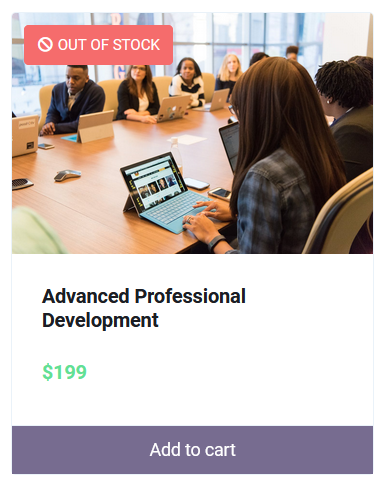
- Out of Stock - the Product is no longer available for purchase. This option can be used when there are a limited number of seats for a course and they are all taken. You would manually change the Availability to "Out of Stock" until seats become available
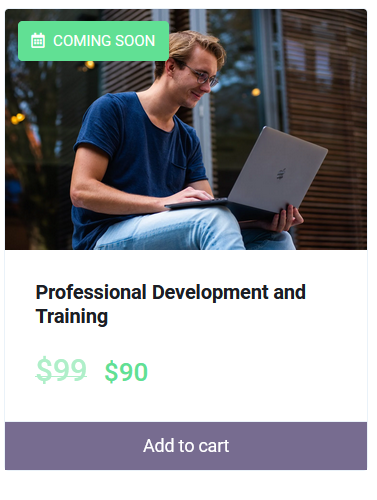
- Coming Soon - The product has not been made available yet. This status can be chosen for a variety of reasons, among them creating awareness or excitement for Products you are still working on
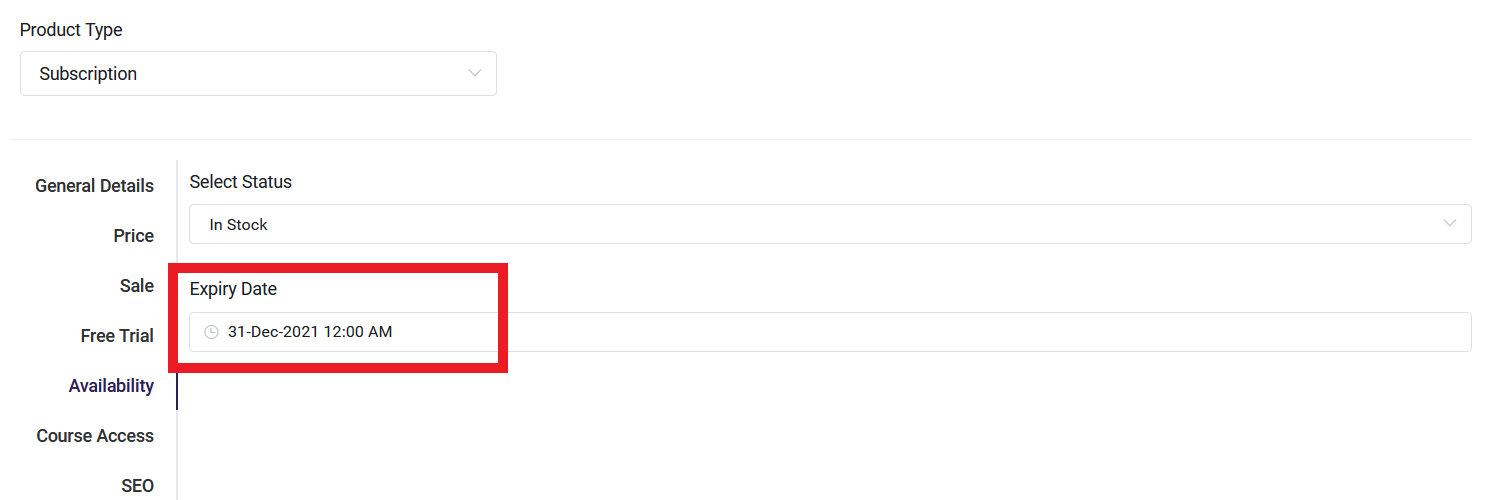
You can also set an expiration date for the Product, after which the Product will no longer be available. When using this option, a pop-up calendar will allow quick access to the exact date you want.
Section 7: Content Access
The most important aspect of creating a Product is adding Course access to it. This allows a learner to make a single purchase and receive access to a Course or a bundle of Courses (in the case of Self-paced courses--Instructor-led courses cannot be bundled).
This also gives an Instructor the ability to add or remove Course access for a Learner after the Product has been purchased, which can be important for a Subscription Product.
Select Type of Course
If you have the Instructor-Led course type available to your platform, you will need to choose what type of Course the Product will include. Select either Self-paced or Instructor-led
Note that instructor-led courses may not be available to legacy users. Please contact support if you have questions about the availability of this feature and adding it to your platform!

Select Associated Course
If the Product is for Self-paced courses, you can add as many Courses as you would like as an associated Course. Just start typing the name of the Course you would like to add, then click on the title when it appears in the drop-down menu to add it. Repeat this process to add additional Courses.
If the Product is for an Instructor-Led course, you can select a single instructor-led course from the dropdown menu to be a part of the Product. Learners will be able to select what class time and location they want to enroll in on the Course Catalog.
Select Course Categories
For Self-Paced courses only: if you have previously created a Course category, you can quickly associate all the Courses in that category with this Product. Using categories can help save you time in this process as well as keep groups of Courses bundled together. If you have not created a category, you can not create one here. If you'd like to add a Course category to the Product, you can either create the category before creating the Product or finish creating the Product, then create the category afterward. You can then return to the product and add the Category.
Select Associated Learning Path
For Self-paced courses only: You can choose a Learning Path! Type in the name of the Learning Path, and the Courses included will be added to the Product.
Select Learning Path Categories
For Self-Paced courses only: if you have previously created learning path categories, you can quickly associate all the Learning paths in that category with this Product. If you have not created a category, you can not create one here. If you'd like to add a Learning Path category to the Product, you can either create the category before creating the Product or finish creating the Product, then create the category afterward. You can then return to the product and add the Category.
**Warning :***Adding a Course Category to a Product will grant the purchaser access to every Course included in that category.*That is in addition to the associated Courses added in this section. A learner will receive access to the Courses listed in associated Courses AND all the Courses in a Course category.
Creating and using a Course category is a helpful way to quickly bundle Courses and add them to a Product. You must be careful when adding a Course category to a Course, because once that category is added to a product ALL Courses in that category will be available for the price of that Product.
If you do not need to create a Course category, just leave that part blank. This way you will avoid the possibility of including Courses that you do not intend to include in a Product.
Section 8: Related Products
You can include related Products here as a way to drive additional sales. Select any other Products you want to be suggested to a customer by searching for a Product name in the Select Related Products field.
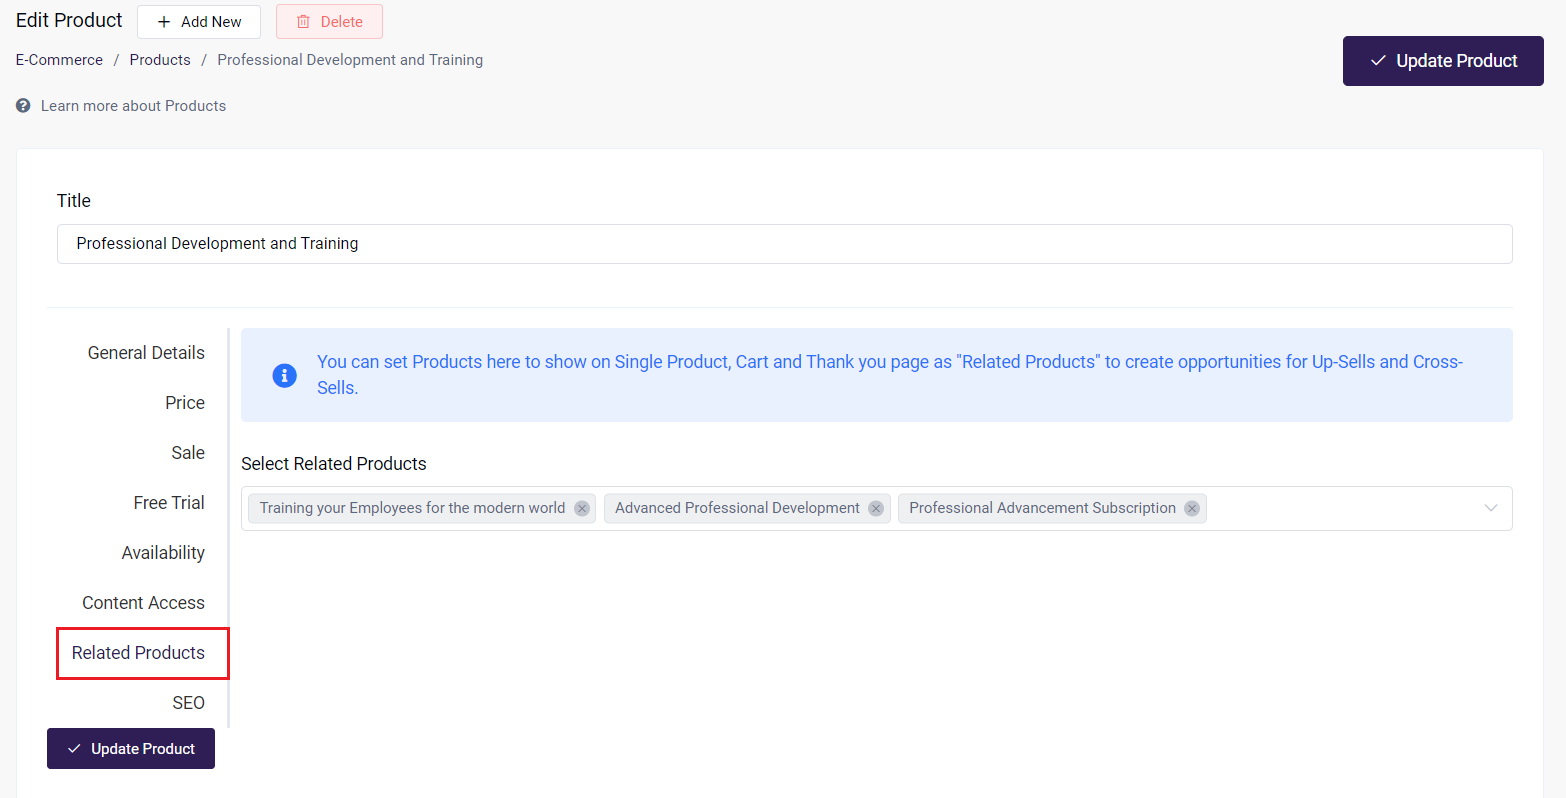
Related Products will show up in three places:
- On a Product's Description page:

Related Products on the Product Description page
- While a customer is viewing their Cart:
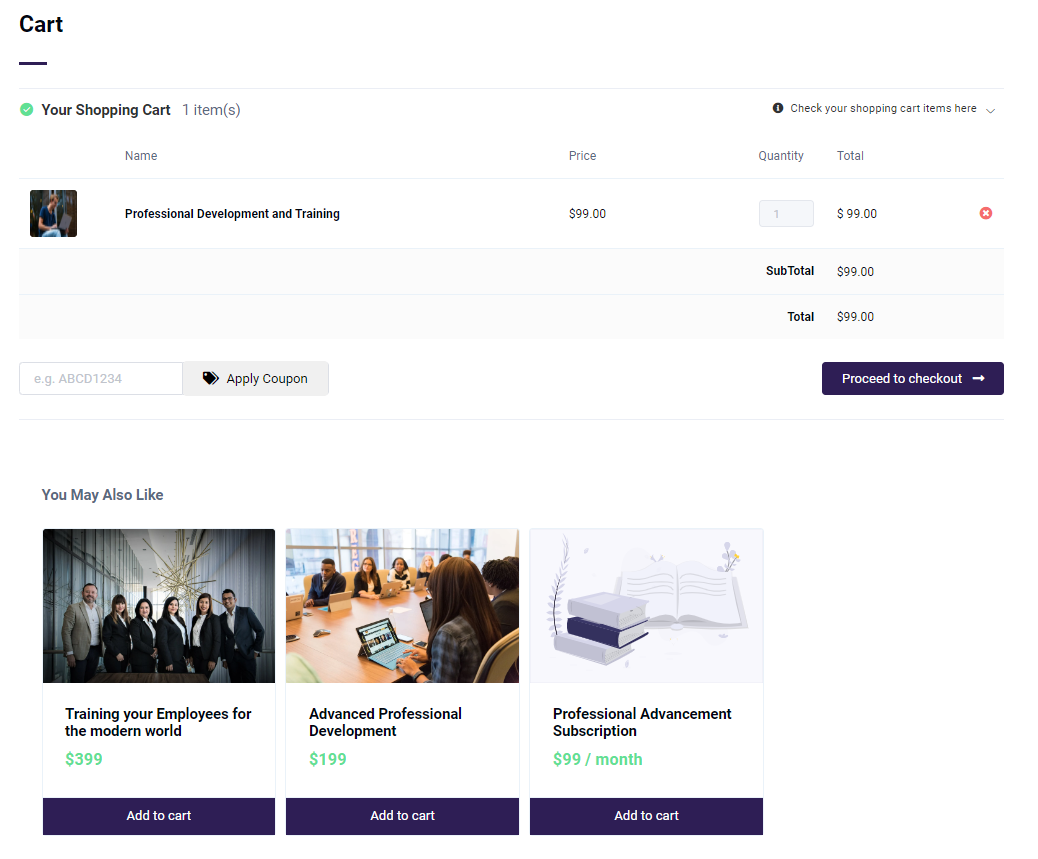
Related Products in Cart
- And finally, after they have completed their purchase on the Thank You page:|
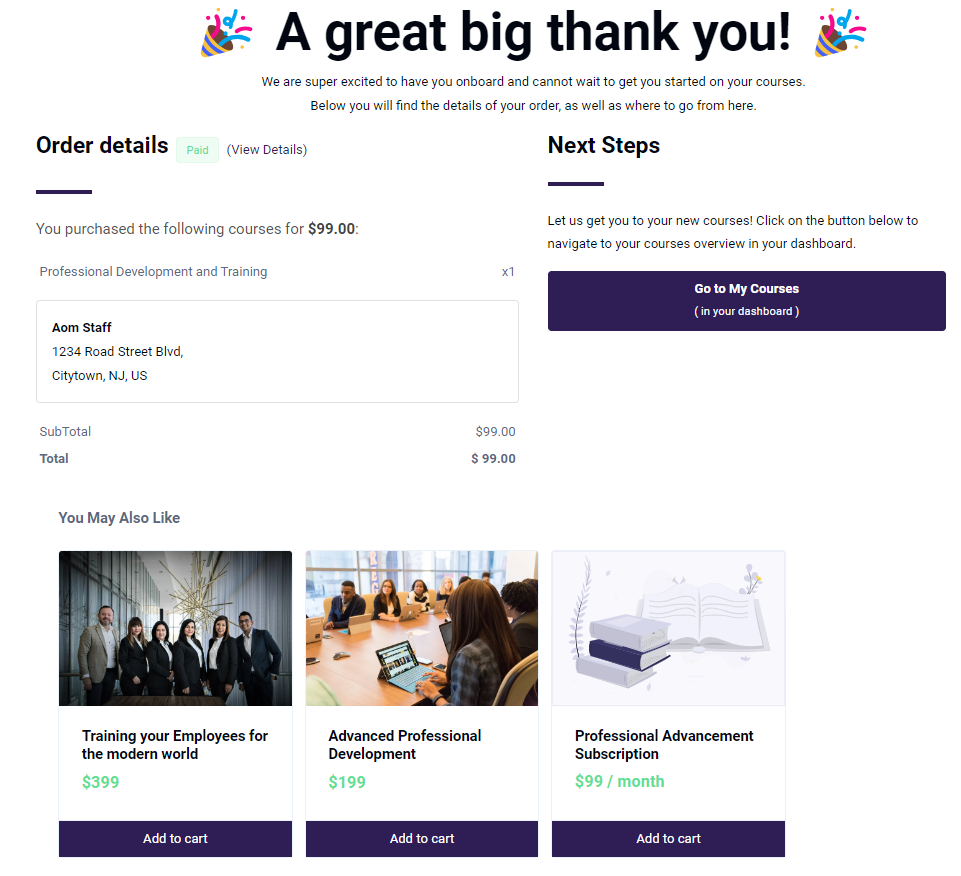
Related Products on the Thank You page
Section 9: SEO
You have the option to add search engine optimization to your Product if you wish. Create a descriptive title then add relevant keywords in the SEO Description to help increase visibility and traffic to your Product, which can lead to additional sales.

Remember to click Save Product once you're done entering all the necessary information!
Video Walkthrough of Creating a Product
If you are a visual learner, check out this video which will go through how to create a Product, as well as what it looks like for a learner purchasing a Product!
Editing an Existing Product
Navigate to the Products page from the Dashboard, by clicking eCommerce then Products in the Sidebar. On the Products page, you'll find a listing of every Product in your account. Here is where you can edit any one of them, or bulk edit them as well.
Editing a Single Product
-
You can make changes to a single product in several ways:
-
Click on the Product ID number
-
Click on the Product Title
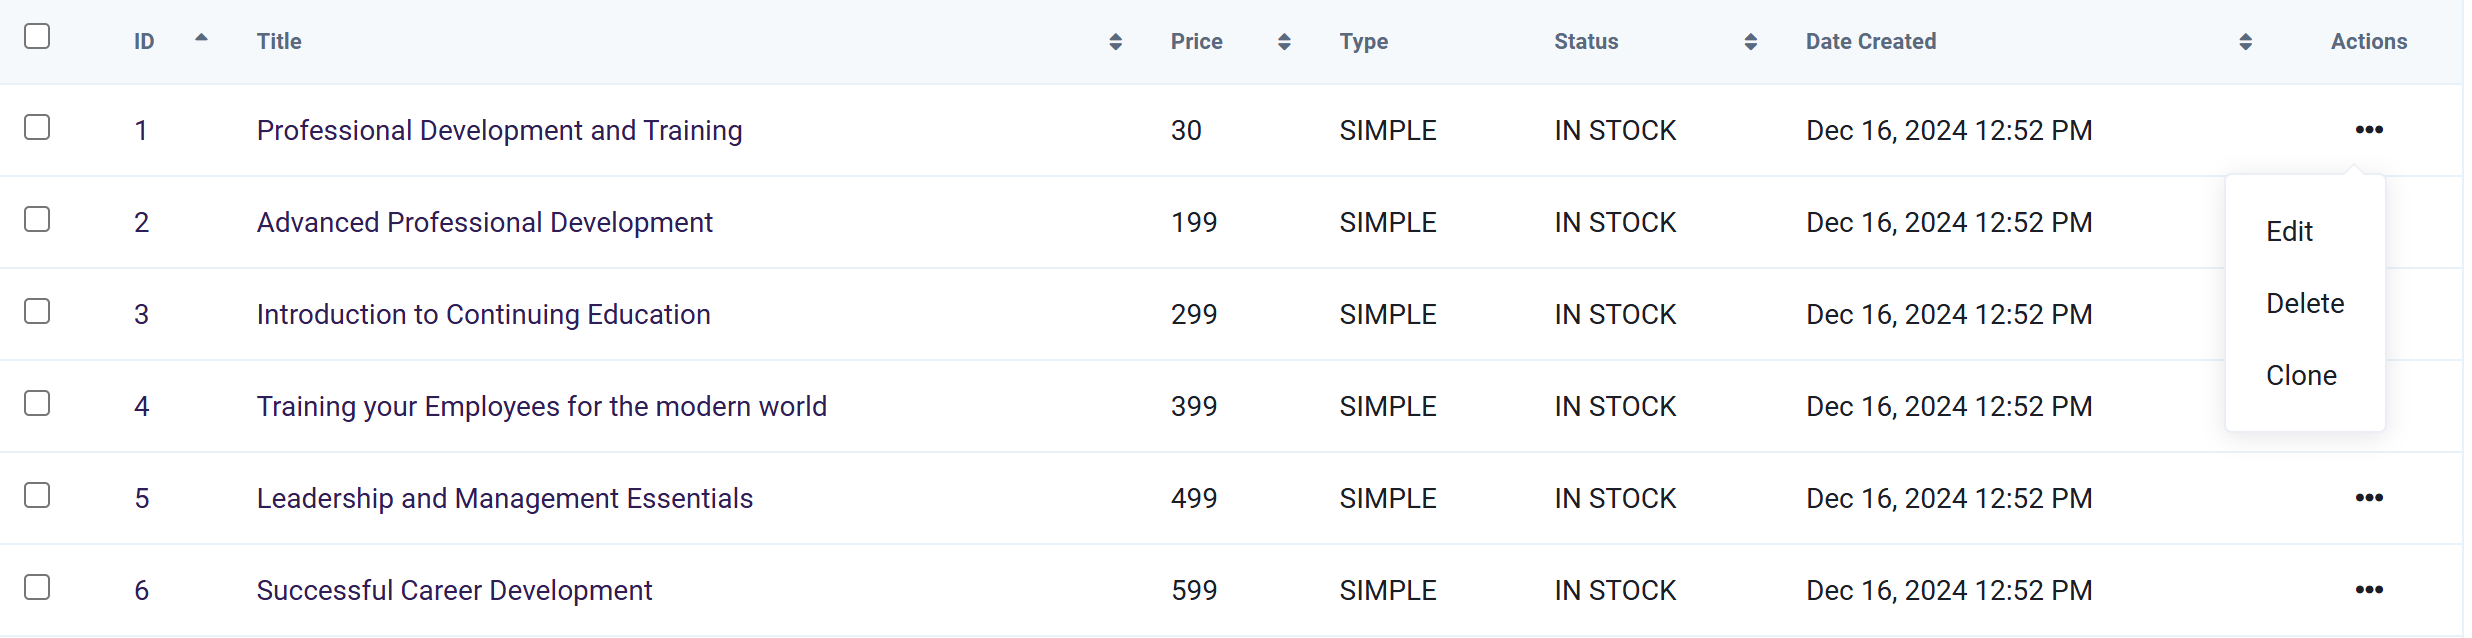
-
Click on the 3 dots to open the "Actions" menu on the far right, then "Edit."
-
-
Once on the Edit Product page, you can change all the information that was entered during the steps of creating the Product:
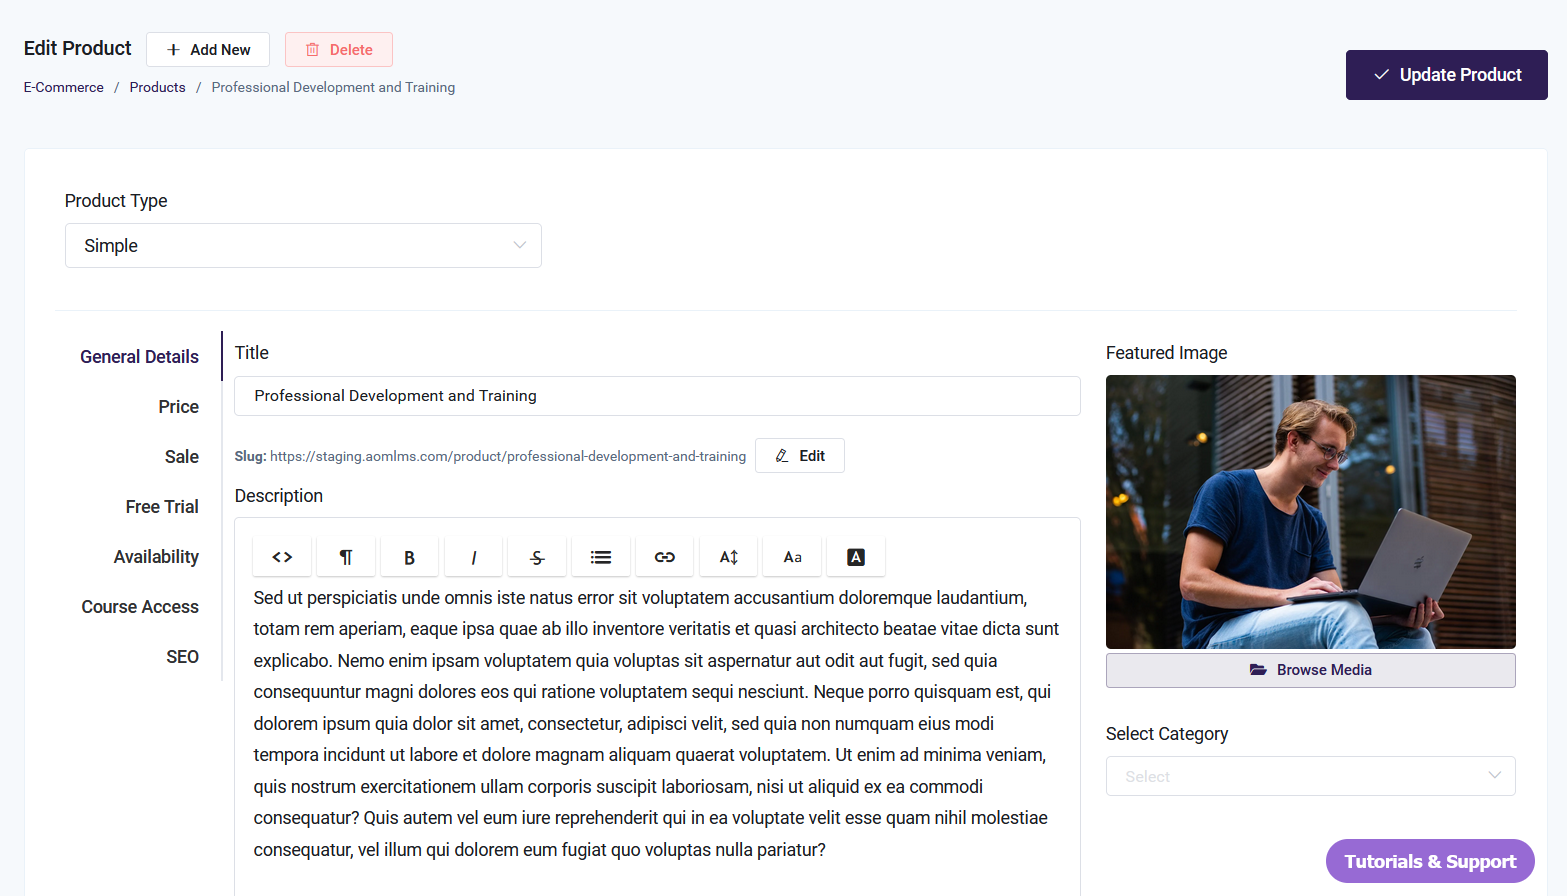
-
Be sure to click Update Product when you're done making your changes
Bulk Actions
There are two actions that can be performed on multiple Products at once--Delete and Quick Edit (which allows you to mark selected Products as Out of Stock.
-
To bulk edit Products, select the products you would like to edit by clicking each box to the left of the Product names. Or you can click the box at the top to Select All on Page.
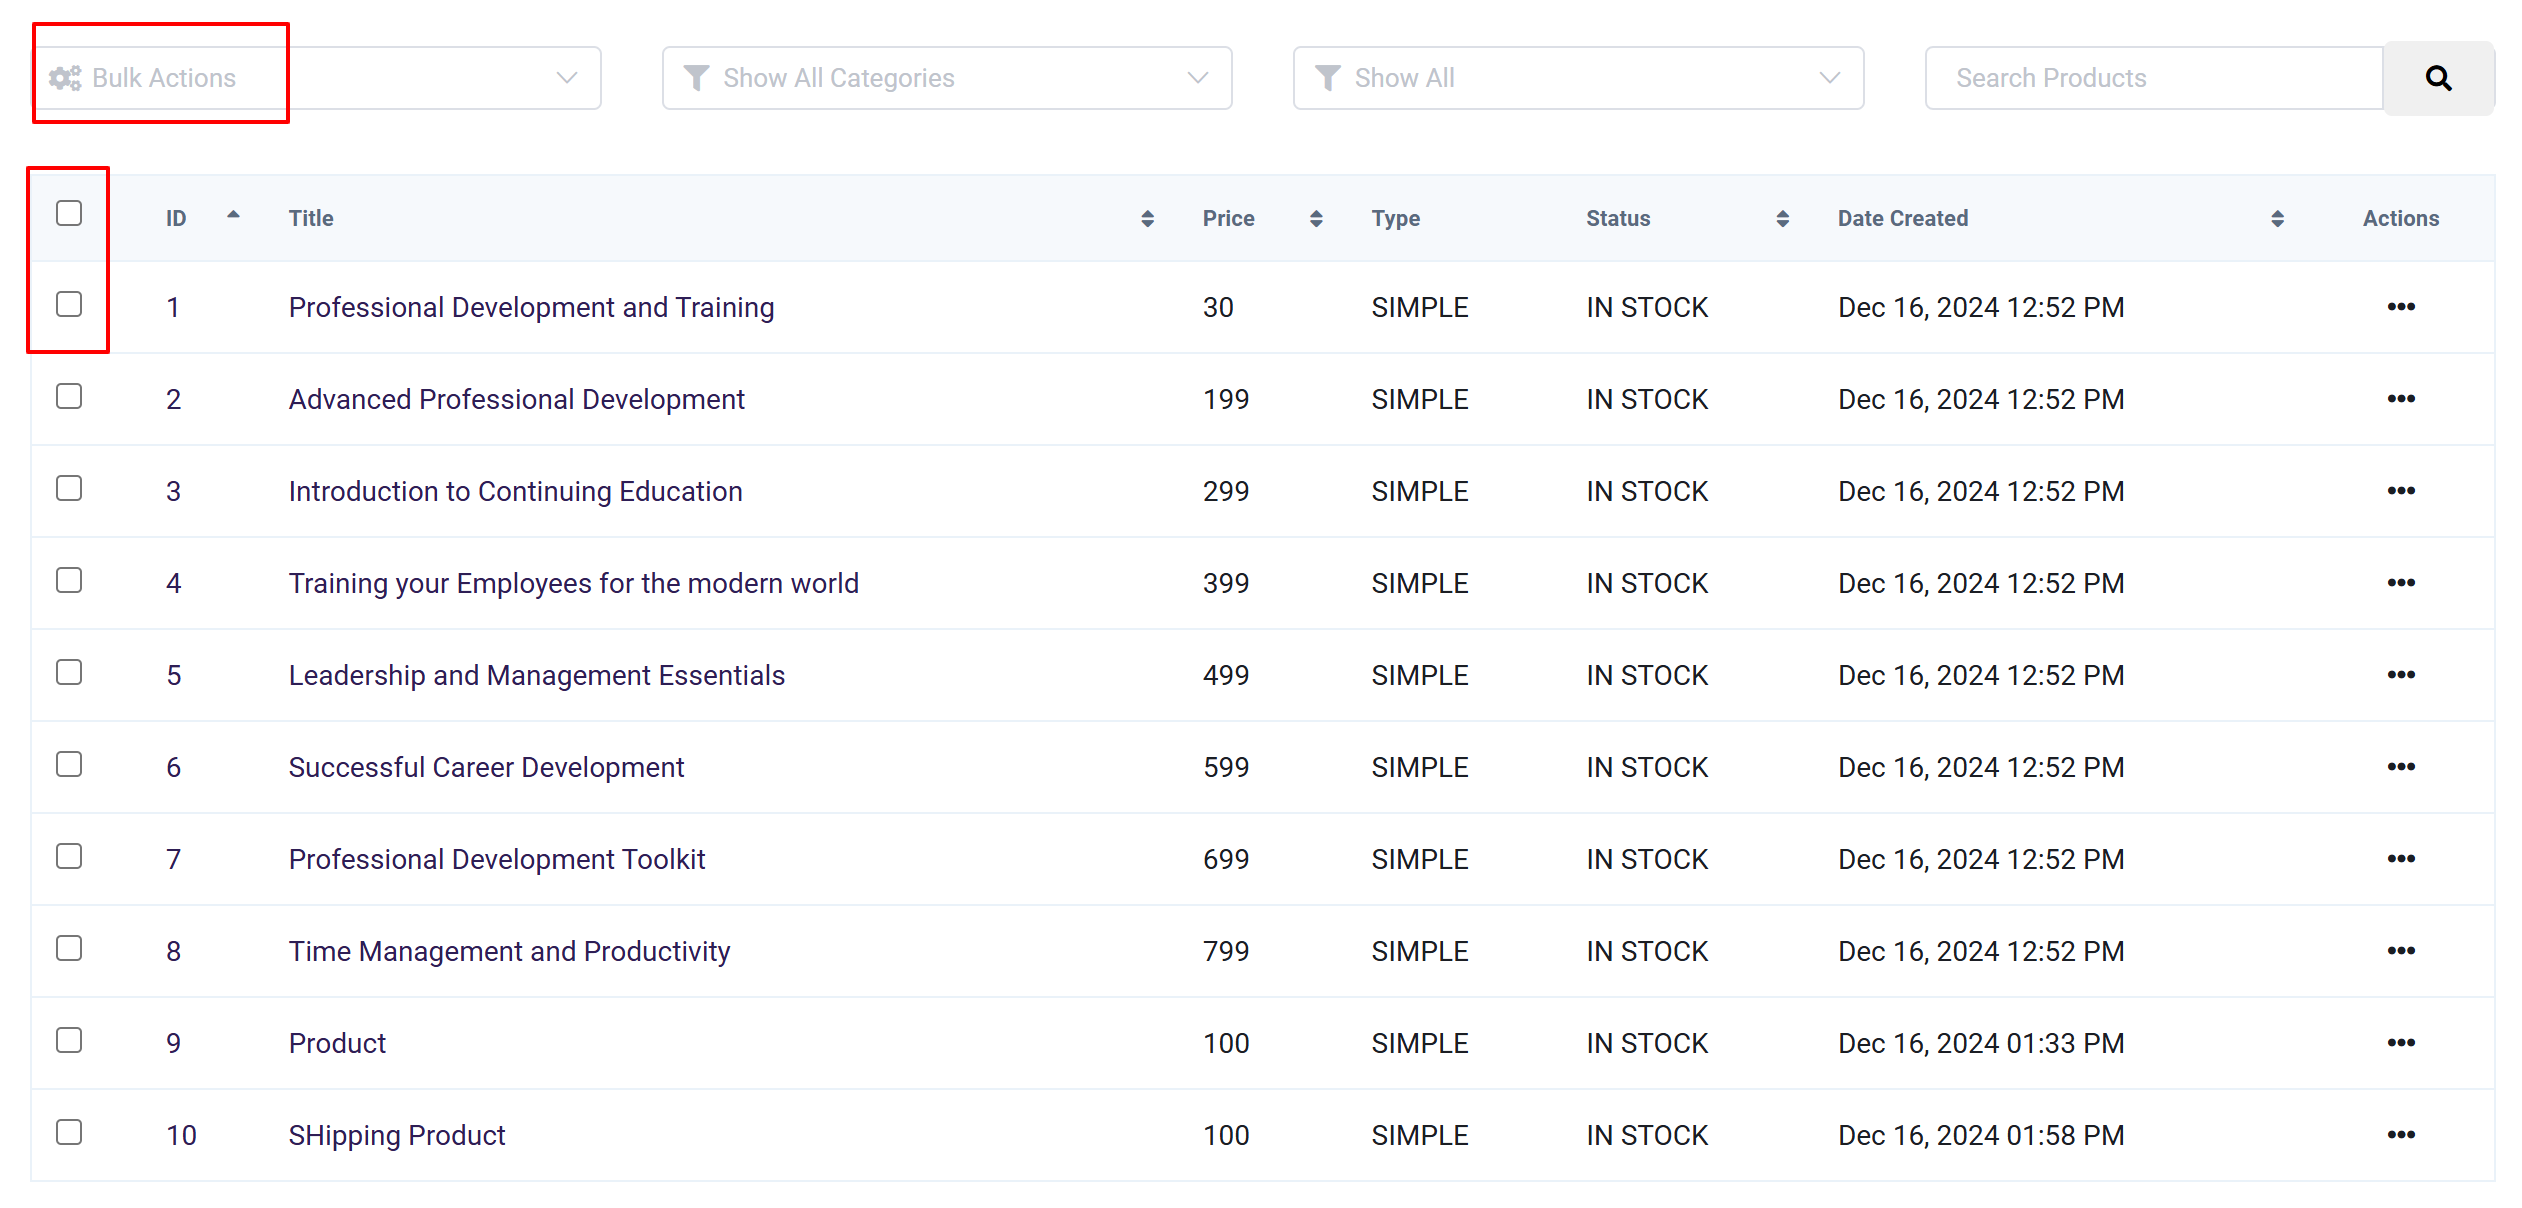
-
Once you have selected your Products, click on the Bulk Actions menu, and select either Delete or Quick Edit:
- Delete: This will delete the selected Products. This action can not be reversed, so be careful when using it.
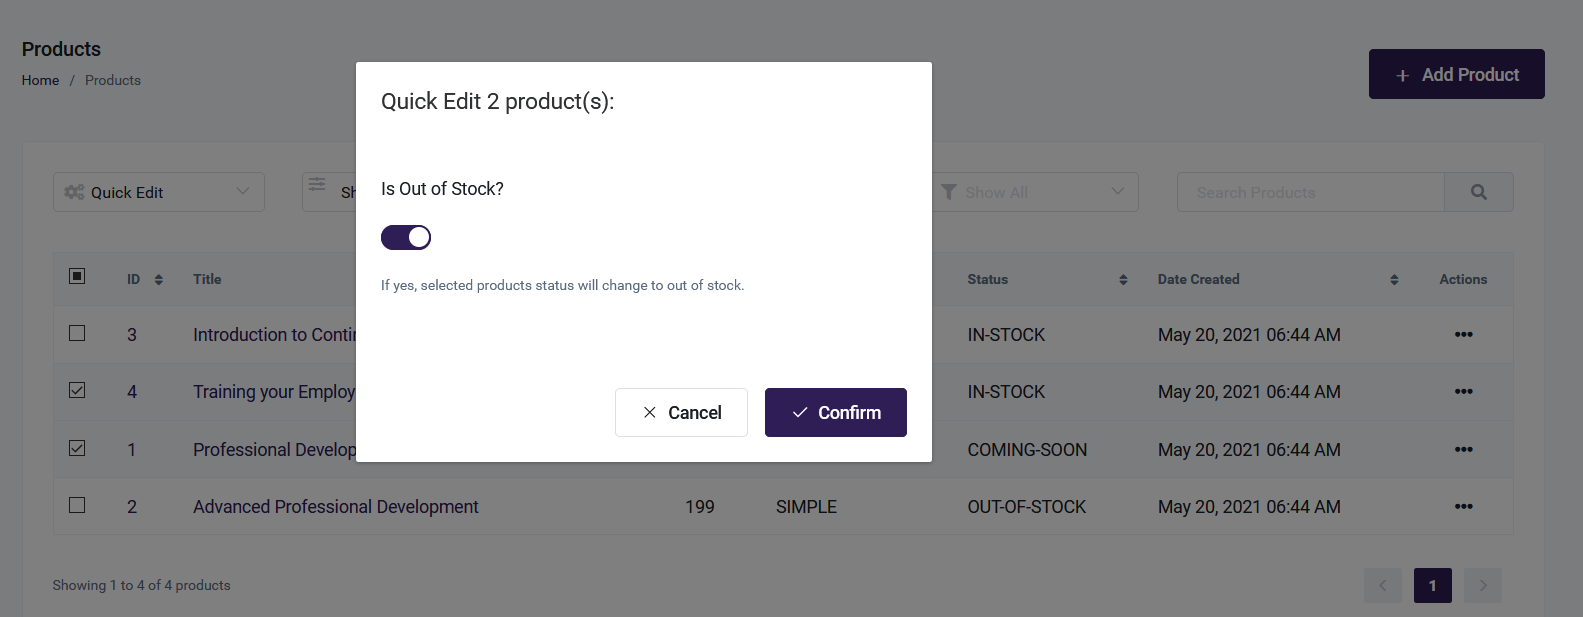
- Quick Edit: This gives you the option to mark the selected Products as Out of Stock. An example of using this option would be if you have set a limited number of seats for that Product and all seats are in use. This will be covered in more detail later in this article. Once you confirm this bulk Quick Edit, click Confirm. The selected Products will now show as Out of Stock in the Course Catalog. The Admin can return the status to In Stock by manually editing the individual Products when the seats are once again available.
-
Make sure to click on the Update Product button before leaving the page to save your changes!
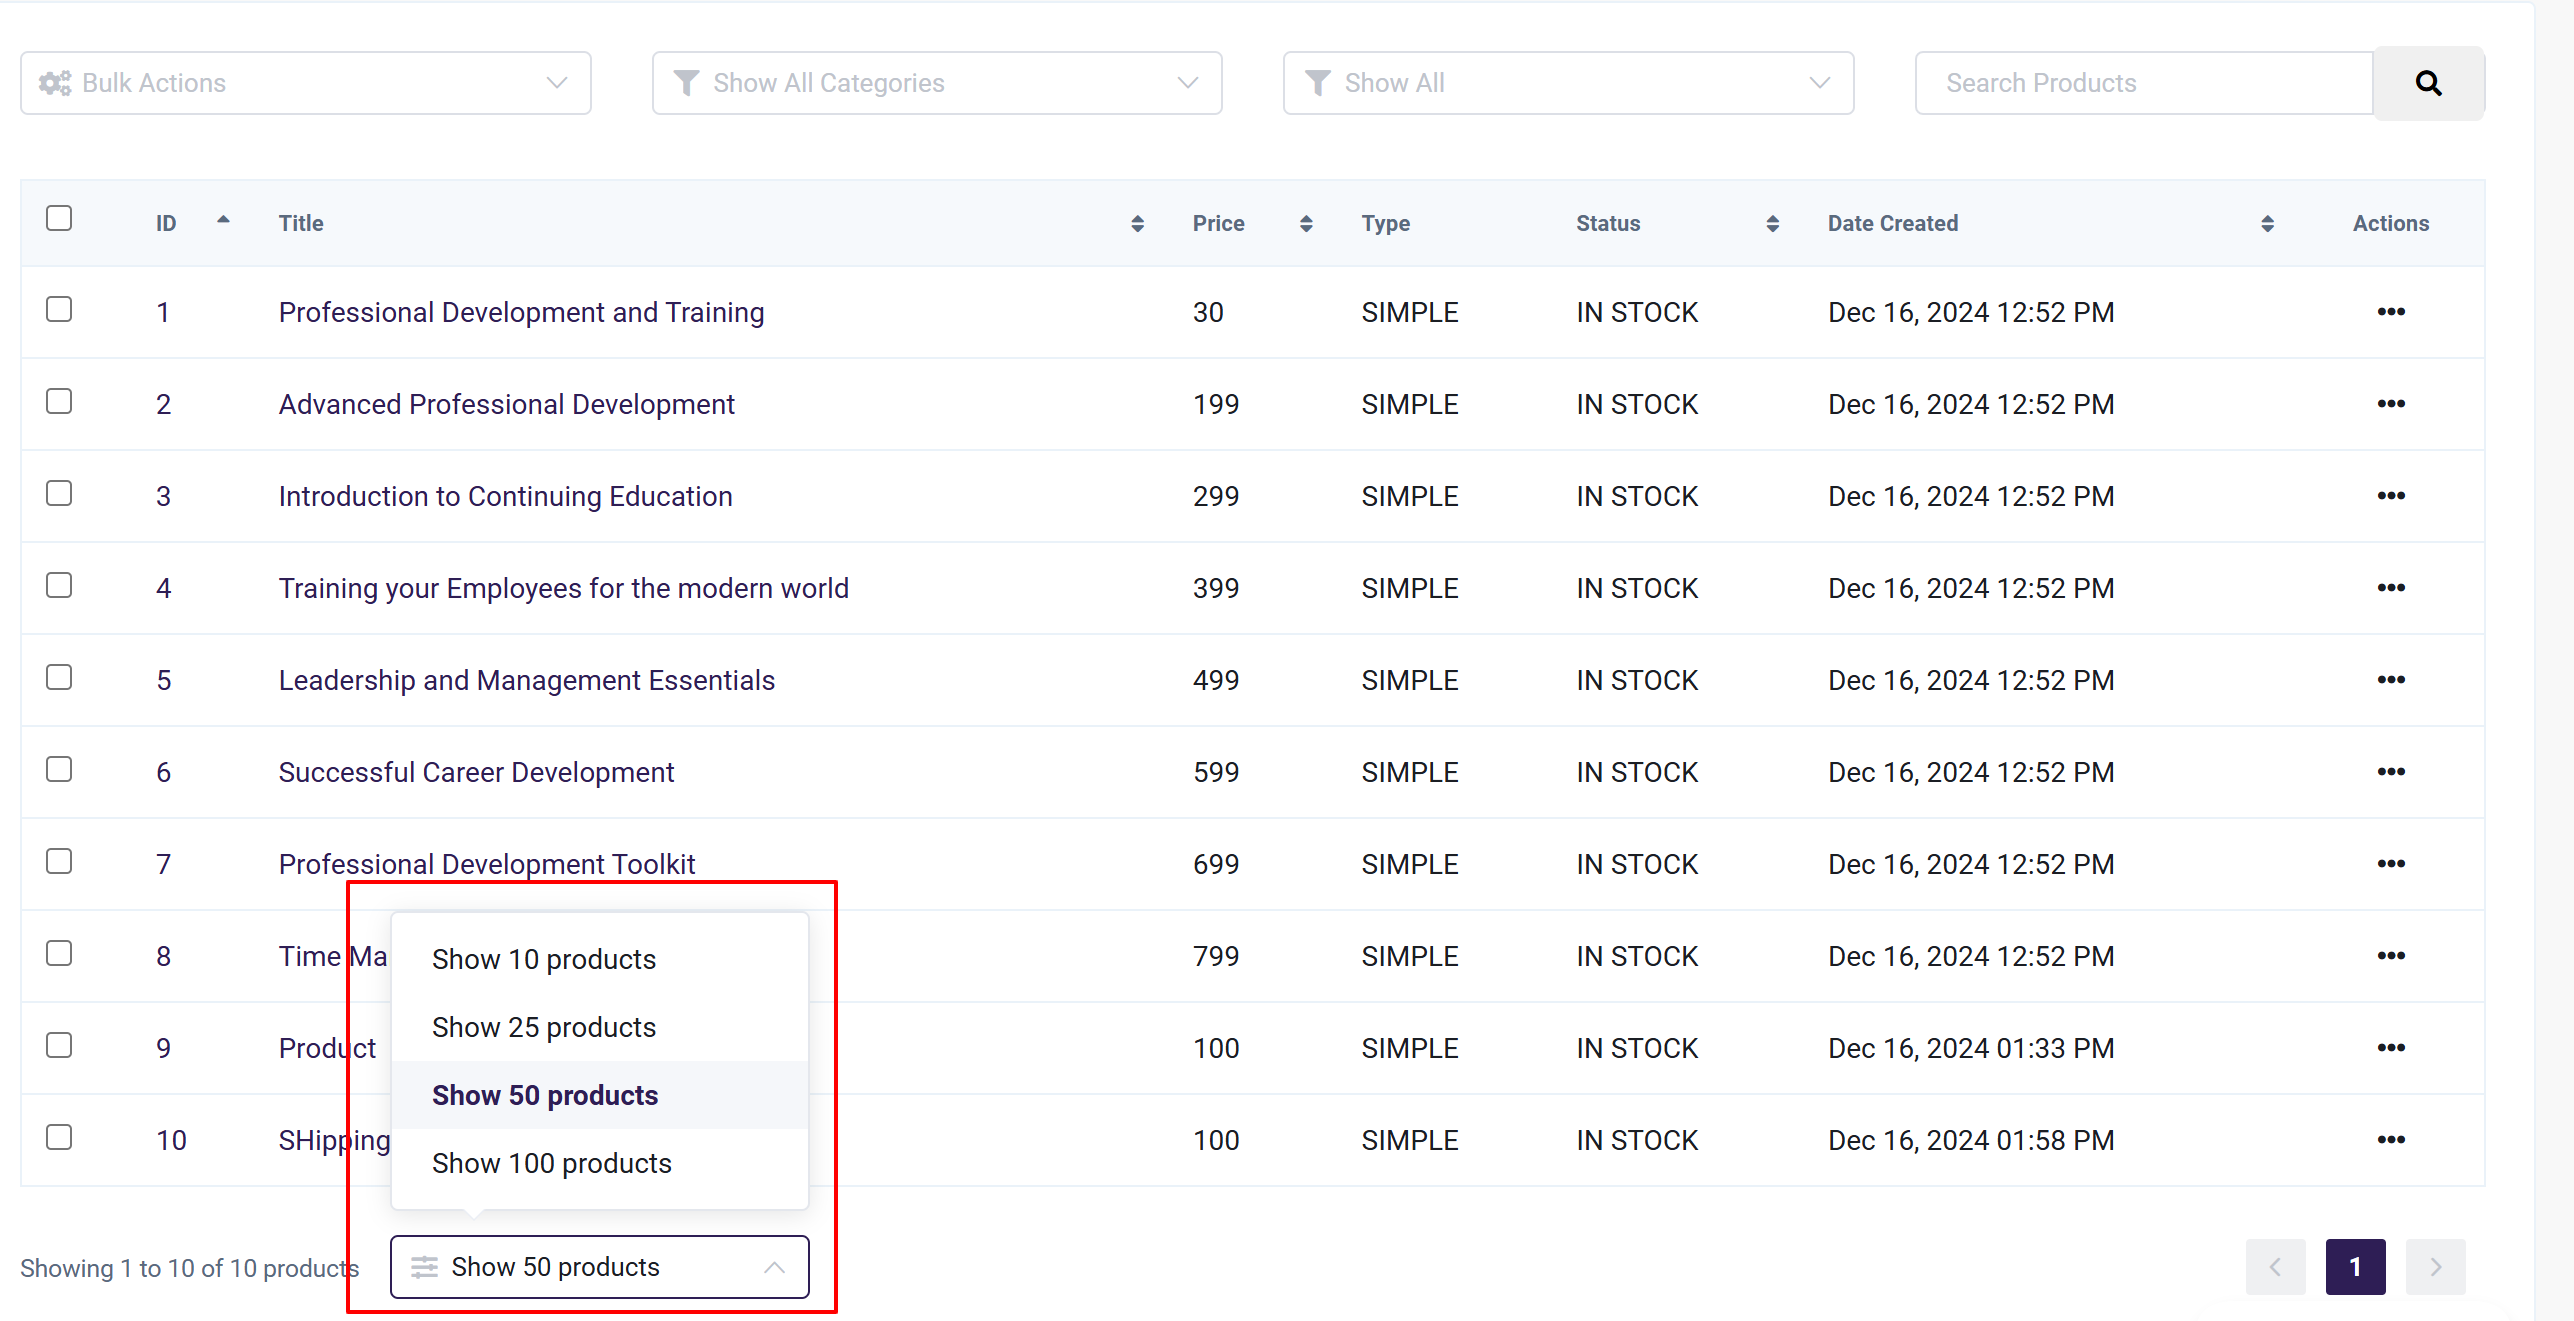
Note: when clicking on the "Select All on Page" box, you will only be performing Bulk Actions on the Products that appear on that page. In the example below, there are only 4 Products. However, imagine that you have 14 Products, and need to perform a Bulk Action on all 14 of them. If you have "Show 10 Products" selected, and perform a Bulk Action, only the 10 Products showing will be affected. If you want to perform a Bulk Action on 14 Products, you would need to either adjust the setting to "Show 25 Products," or perform the Bulk Action more than once.
Next Step
Now that your Product has been created, you'll want to learn more about all the eCommerce aspects of your account. This guide will take you through everything related to eCommerce: