Integrating with PayPal for eCommerce
PayPal is an online payment platform that offers individuals and businesses low-cost services. It is fully integrated into Academy of Mine's checkout process. Payments made in Academy of Mine will be passed on to Paypal for collection.
Note: Academy of Mine does not directly collect payments. In order to collect payments, you will need to sign up with the payment gateway, PayPal, then connect it with the Academy of Mine platform using the API credentials provided by the payment gateway. Before proceeding with this guide, you must sign up by PayPal account.
This guide will help you complete your PayPal integration, set up testing, and ultimately go live to collect real payments.
Be sure to review our overview of eCommerce Setup guides: Introduction to eCommerce
Setting Up the PayPal Integration
There are four overarching steps to setting up this integration--preparing your AOM account, adding the PayPal API credentials, testing the test keys, and then adding the true production keys.
You'll need to have a PayPal account already set up, and will be going between the AOM site and PayPal. We'll go through each of these steps in detail here:
Step 1: Prepare Payment Settings in AOM
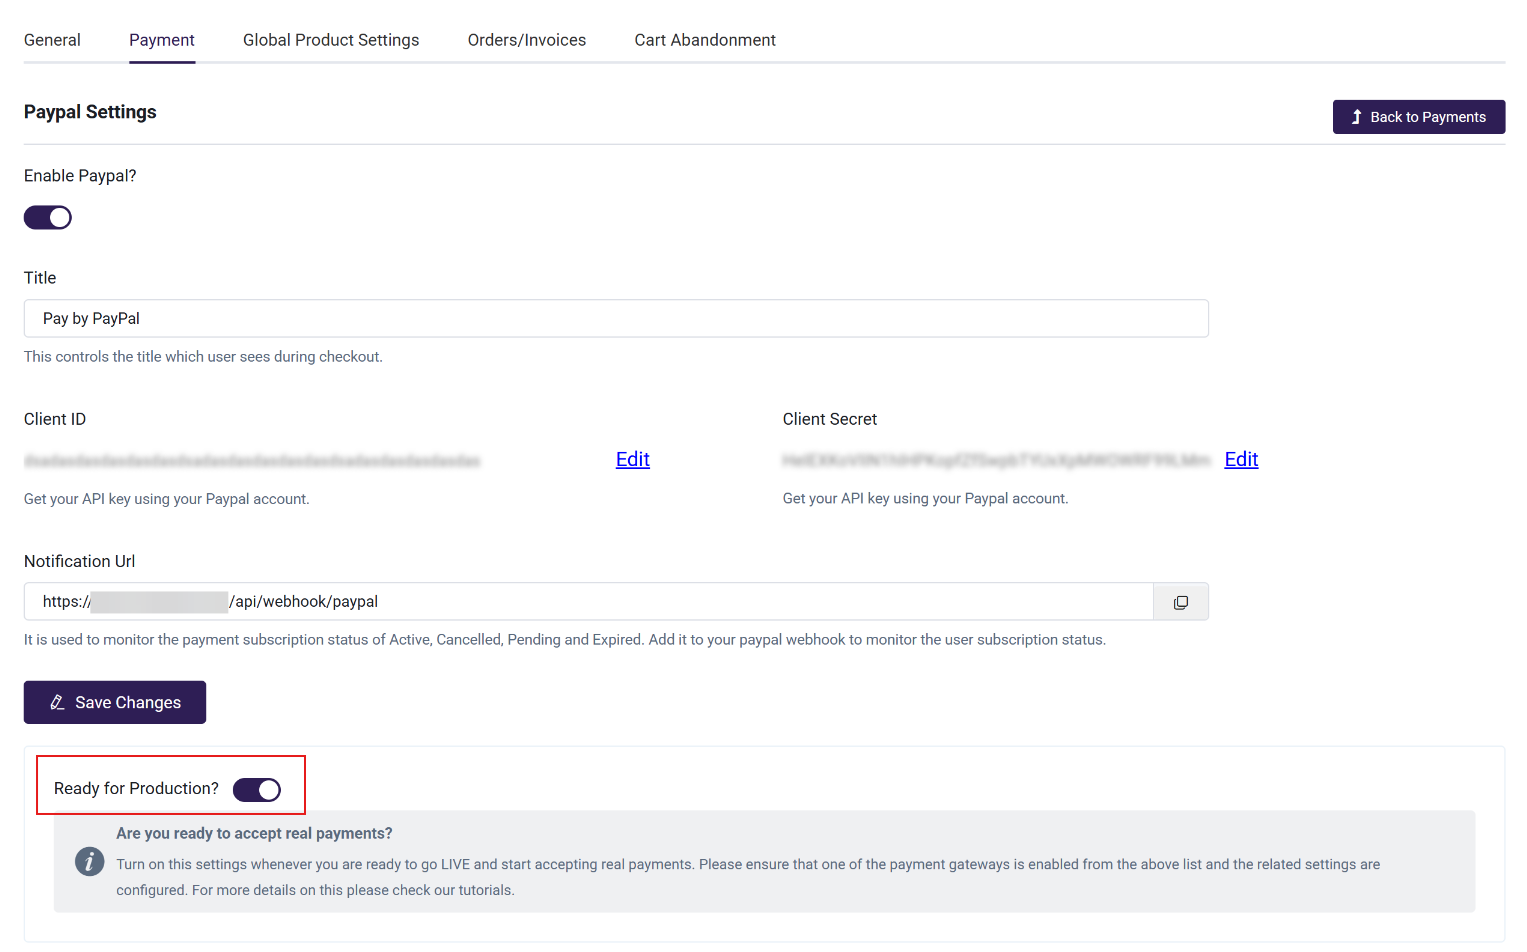
The first step is to set up the PayPal integration within Academy of Mine.
- From the Admin Dashboard, select eCommerce, then Settings. Then click the Payment tab
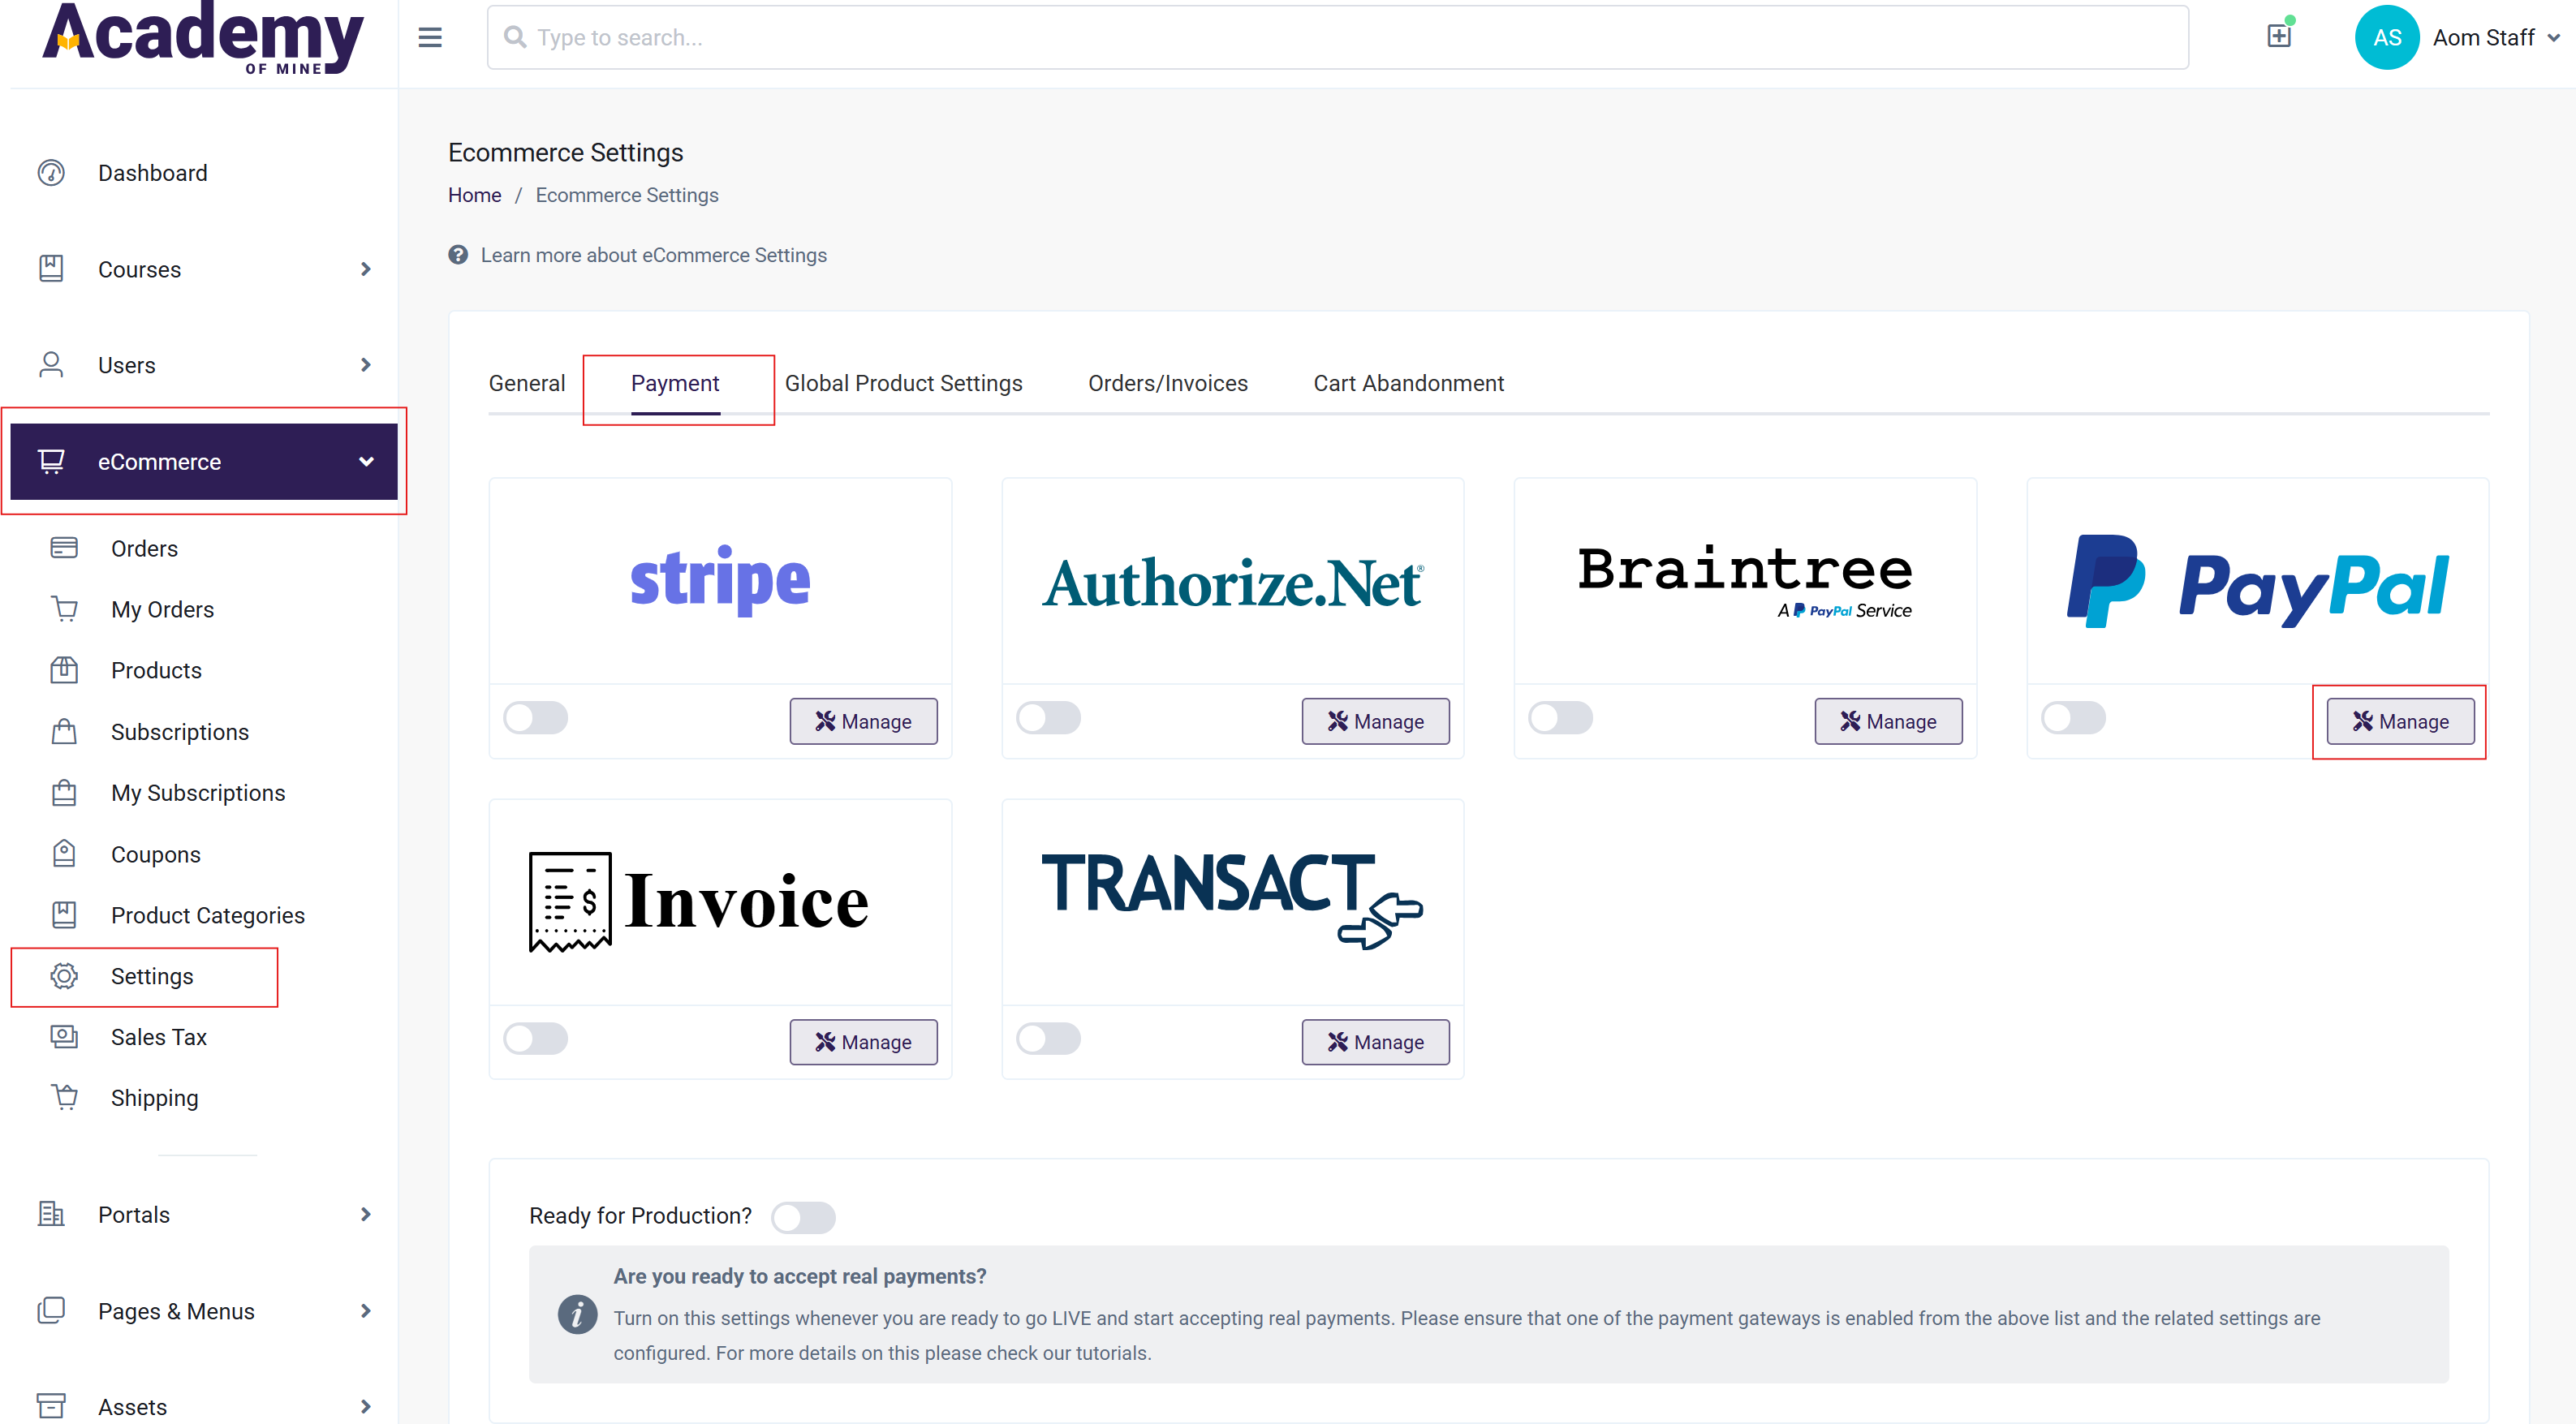
- Select Manage in the PayPal section to enter the PayPal Settings page.
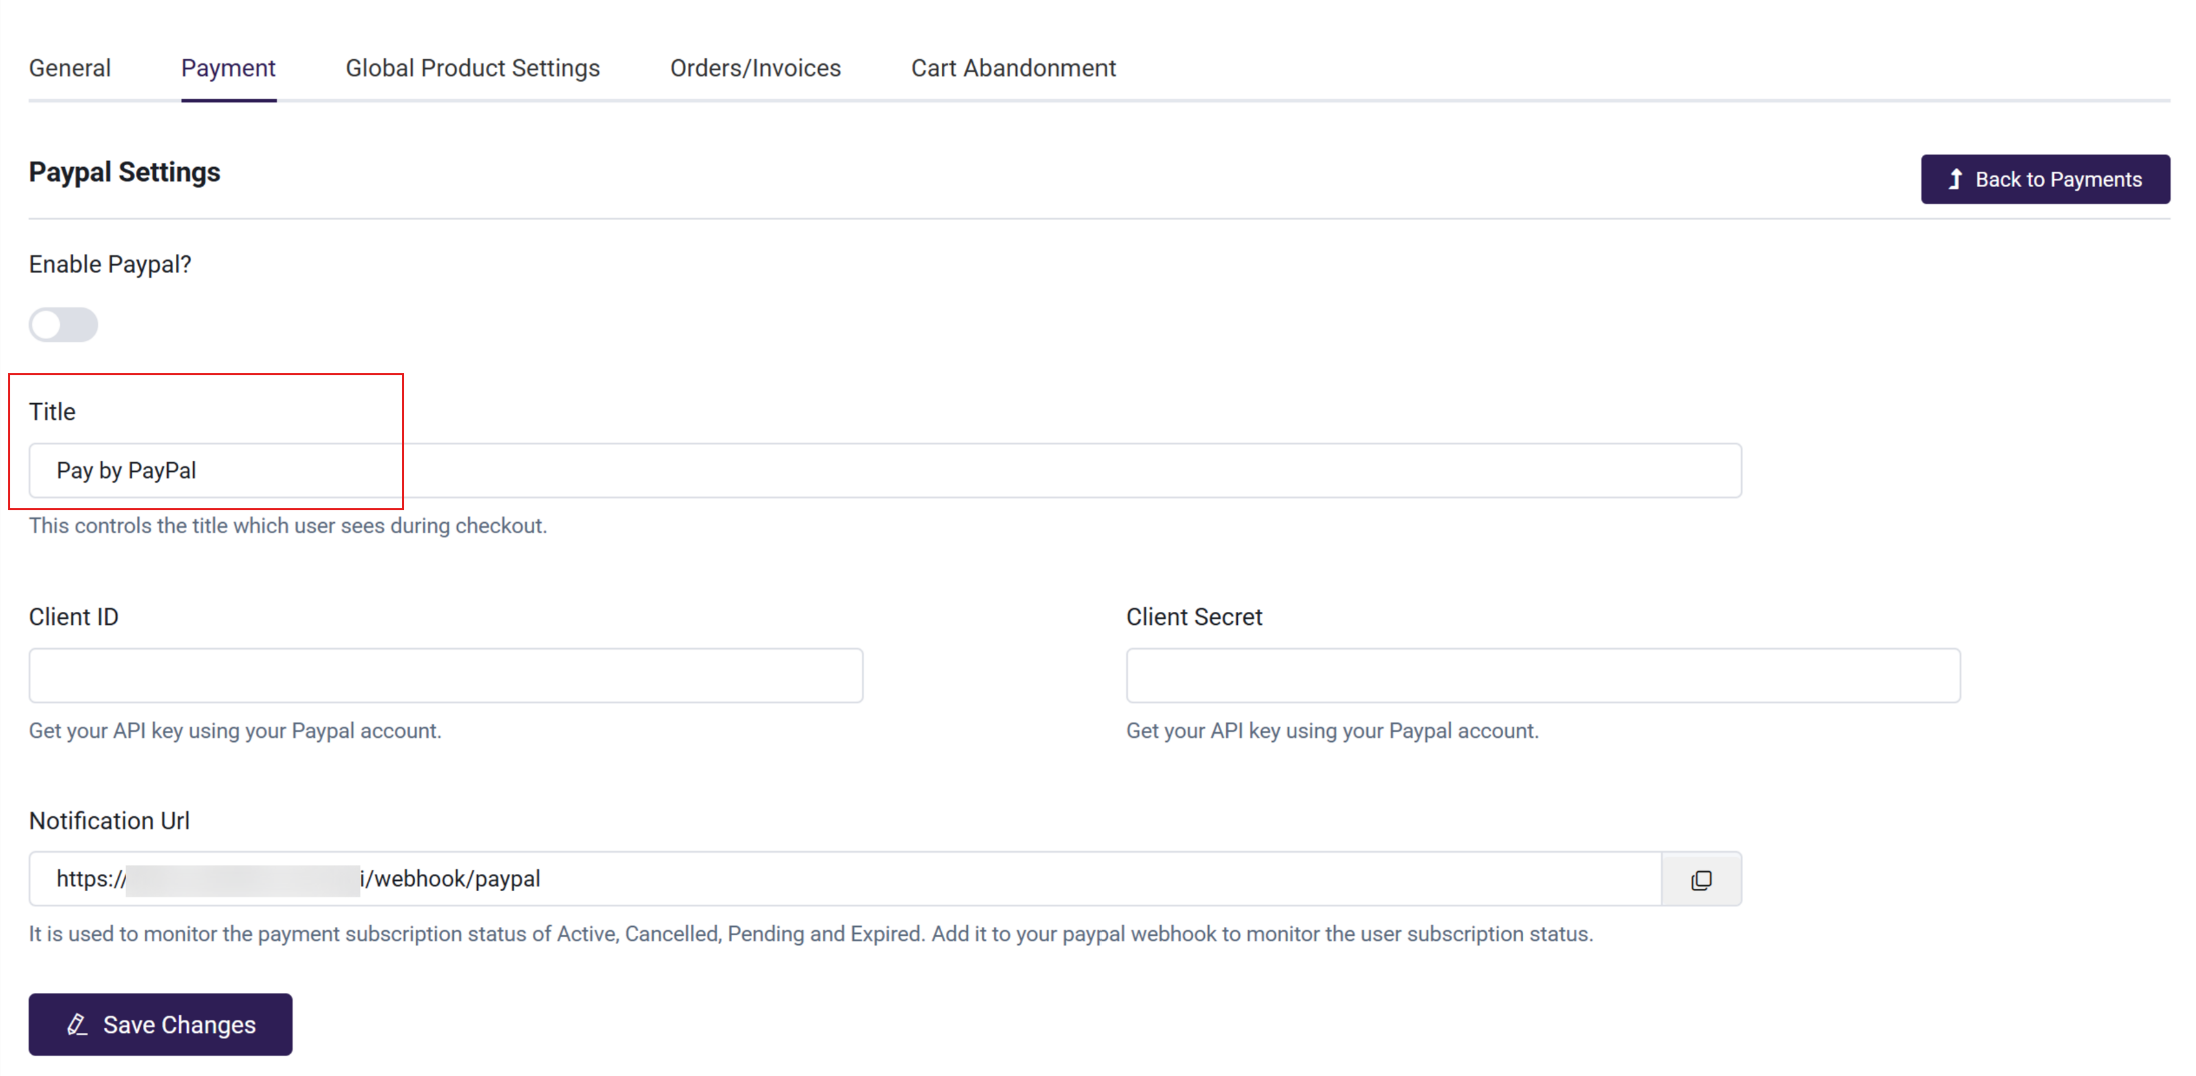
- Enter a Title: the title you add will appear on the Payment Details section of your checkout page.
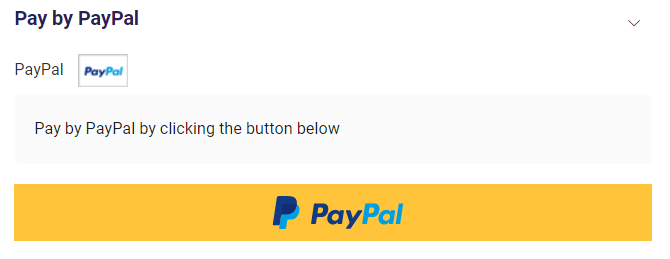
What the user sees during checkout:
Step 2: Add Your API Credentials & Webhooks
Now we will add the API credentials (to integrate PayPal with AOM for payments) and webhooks (to capture payment subscription status).
API Credentials
Note: PayPal has two sets of API keys, one for testing and one for real payments. You must use the test keys first, and once you are ready for real payments, you will swap the test keys for the live keys.
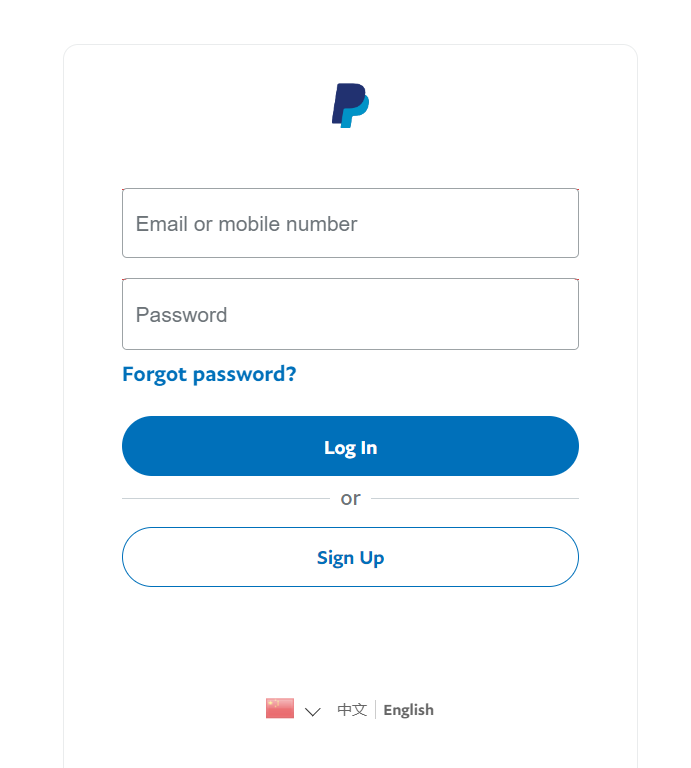
Before you can add the API keys, you'll need to either sign into or create a PayPal business account:
- To create an account, go to PayPal and click Sign Up
- Choose the Business Account
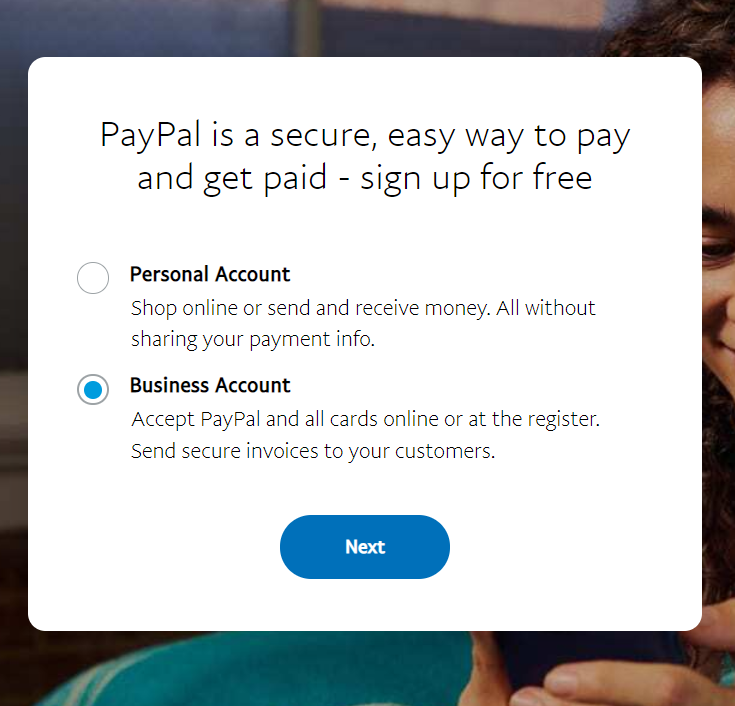
- Complete the Sign Up Process.
Once you've either created an account or logged in your existing PayPal Business account, you can continue:
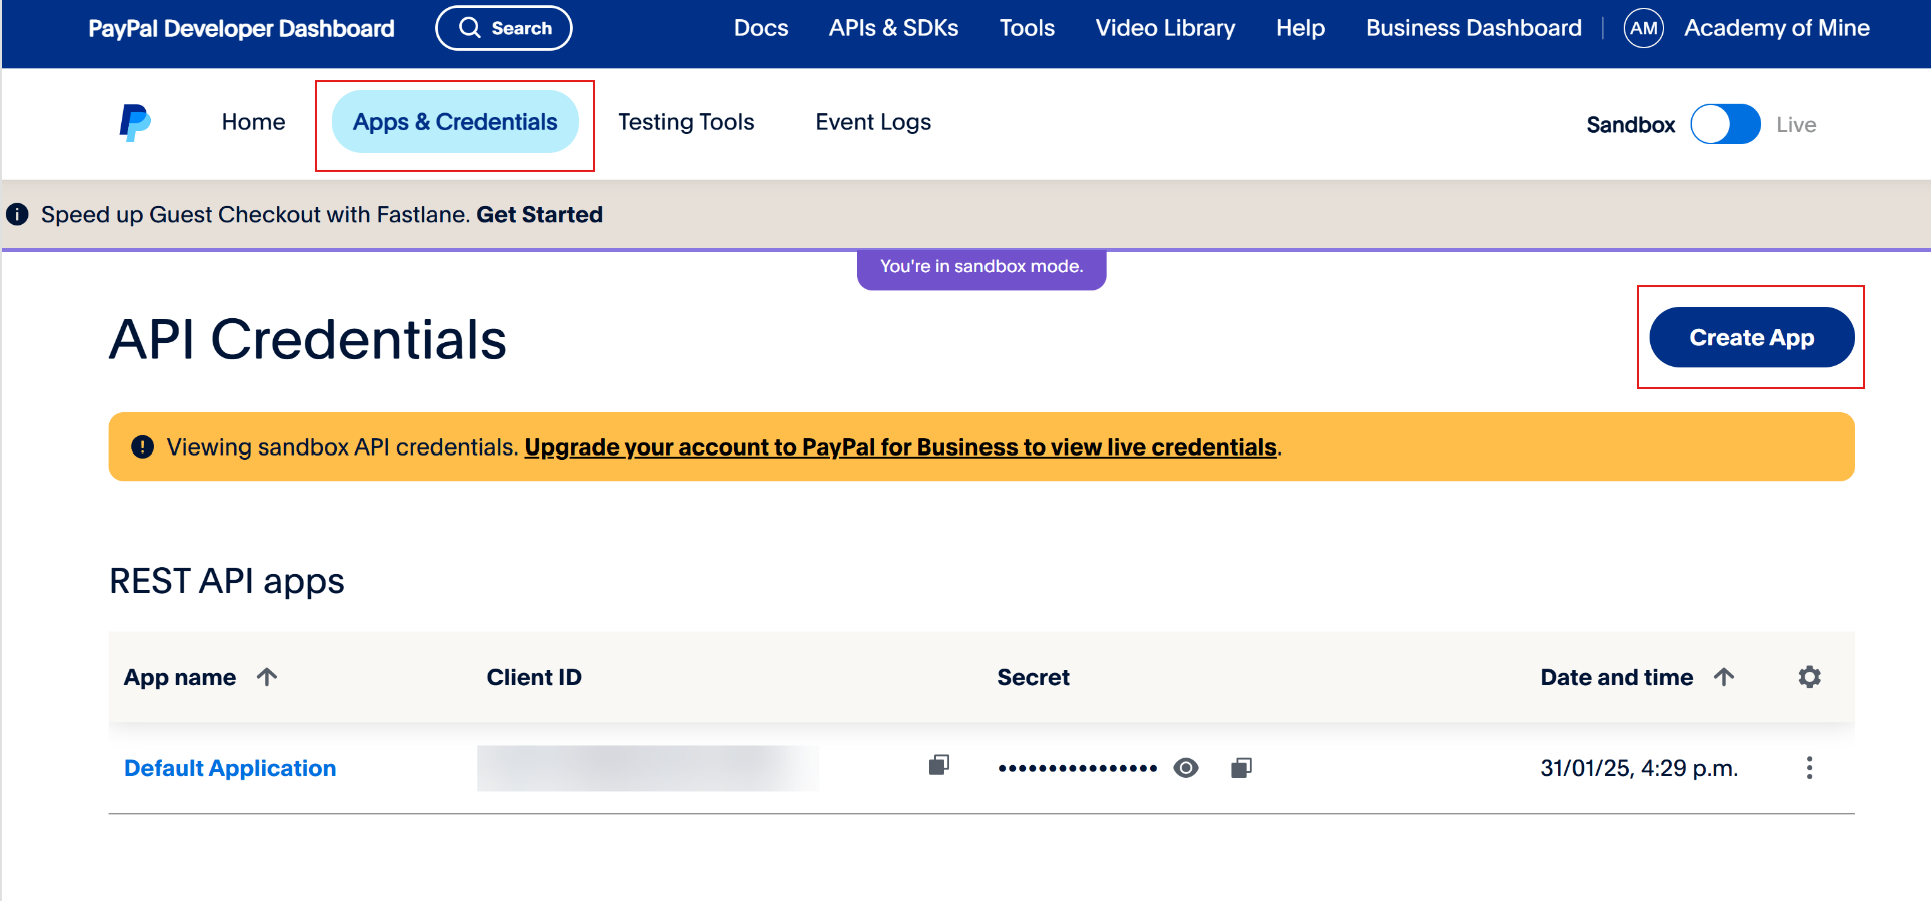
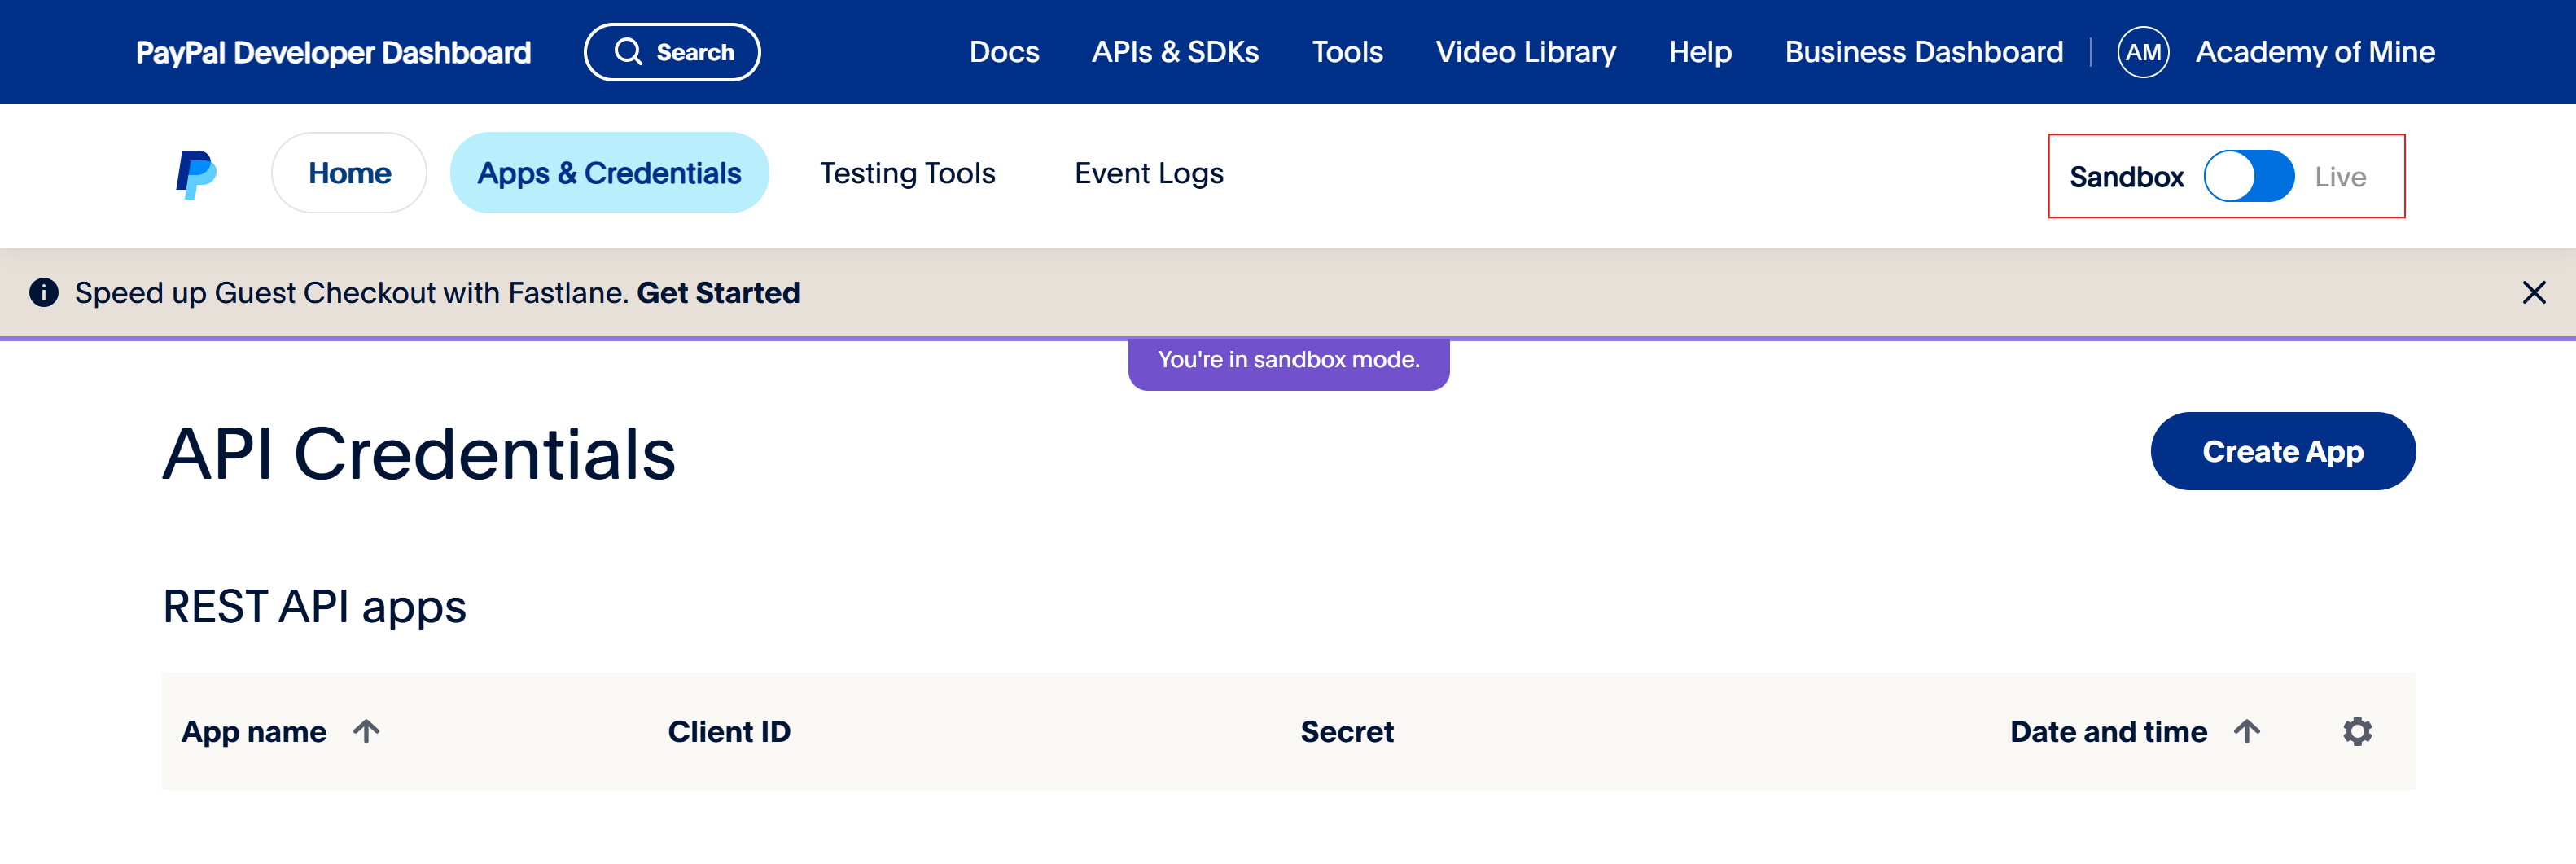
- Go to the PayPal Developer page and log in to the dashboard.
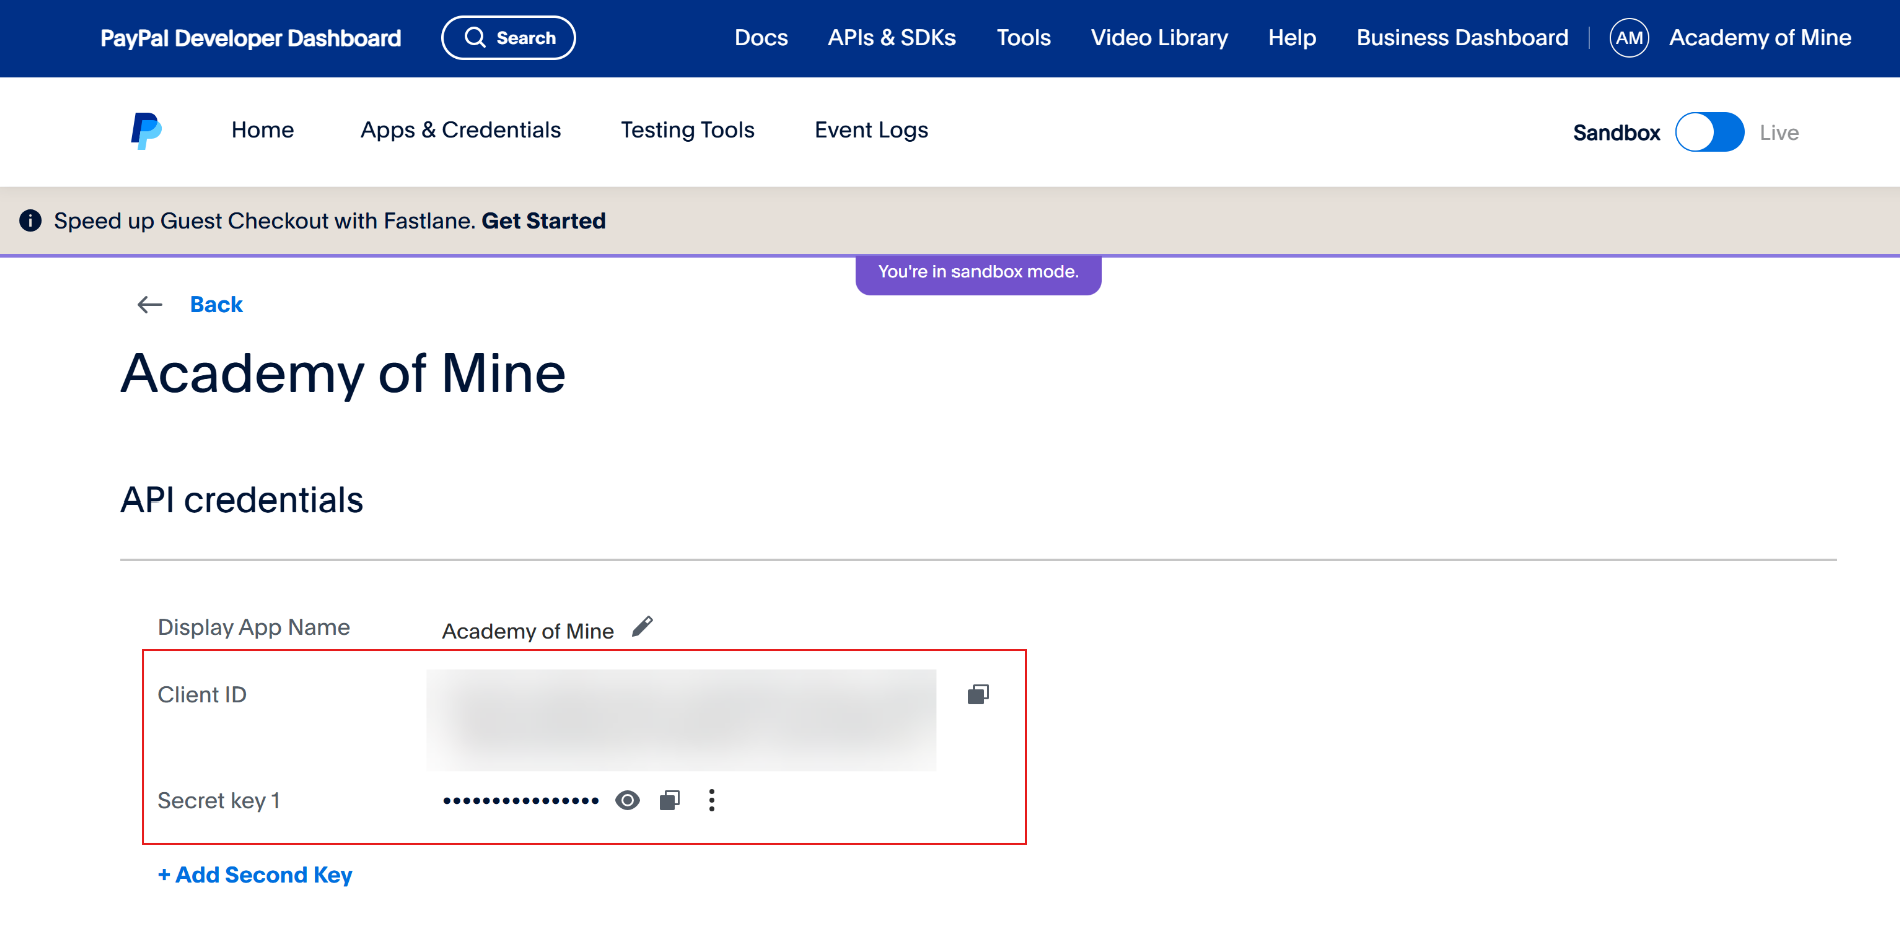
- After signing in, you’ll be able to get a personal PayPal API key. For this, go to the “App & Credentials” section and click “Create App”
- Enter an app name and click “Create App” once again. You’ll get a Client ID, a name of a Sandbox account and a “Secret”.
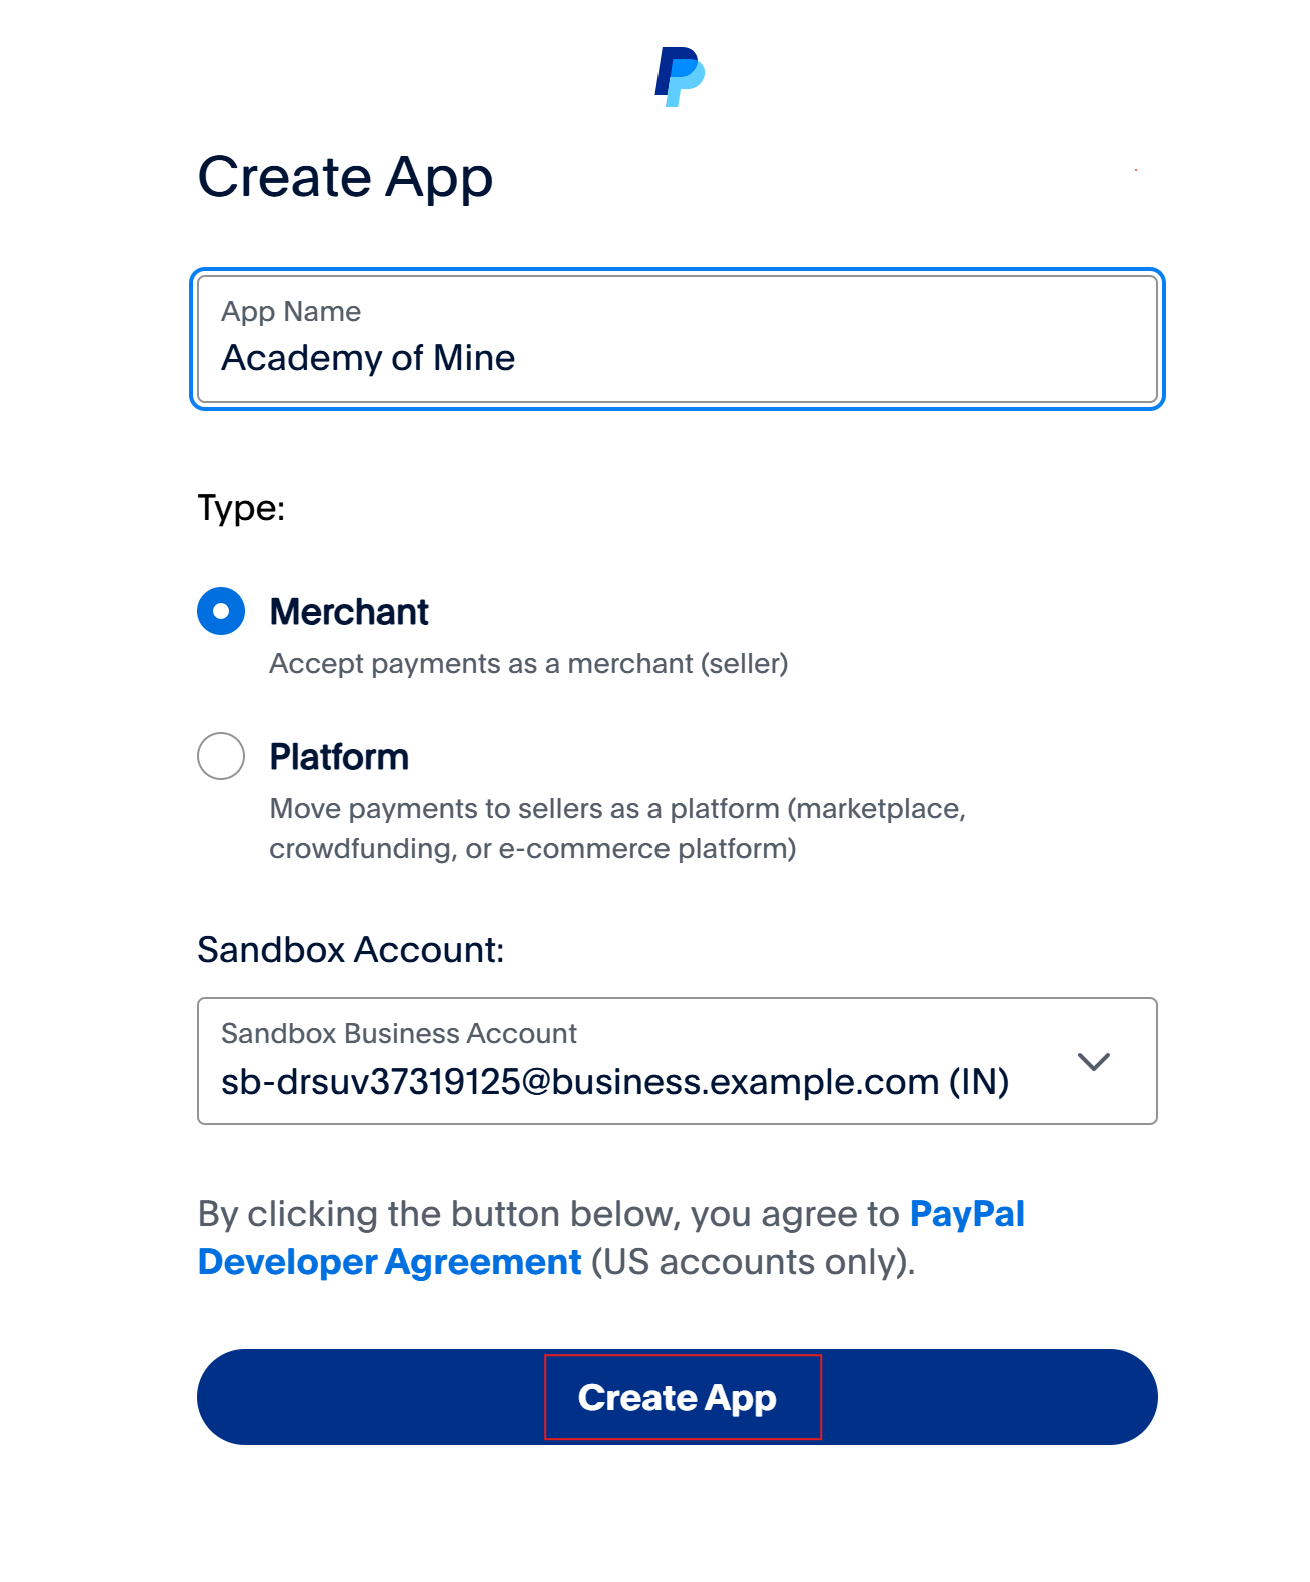
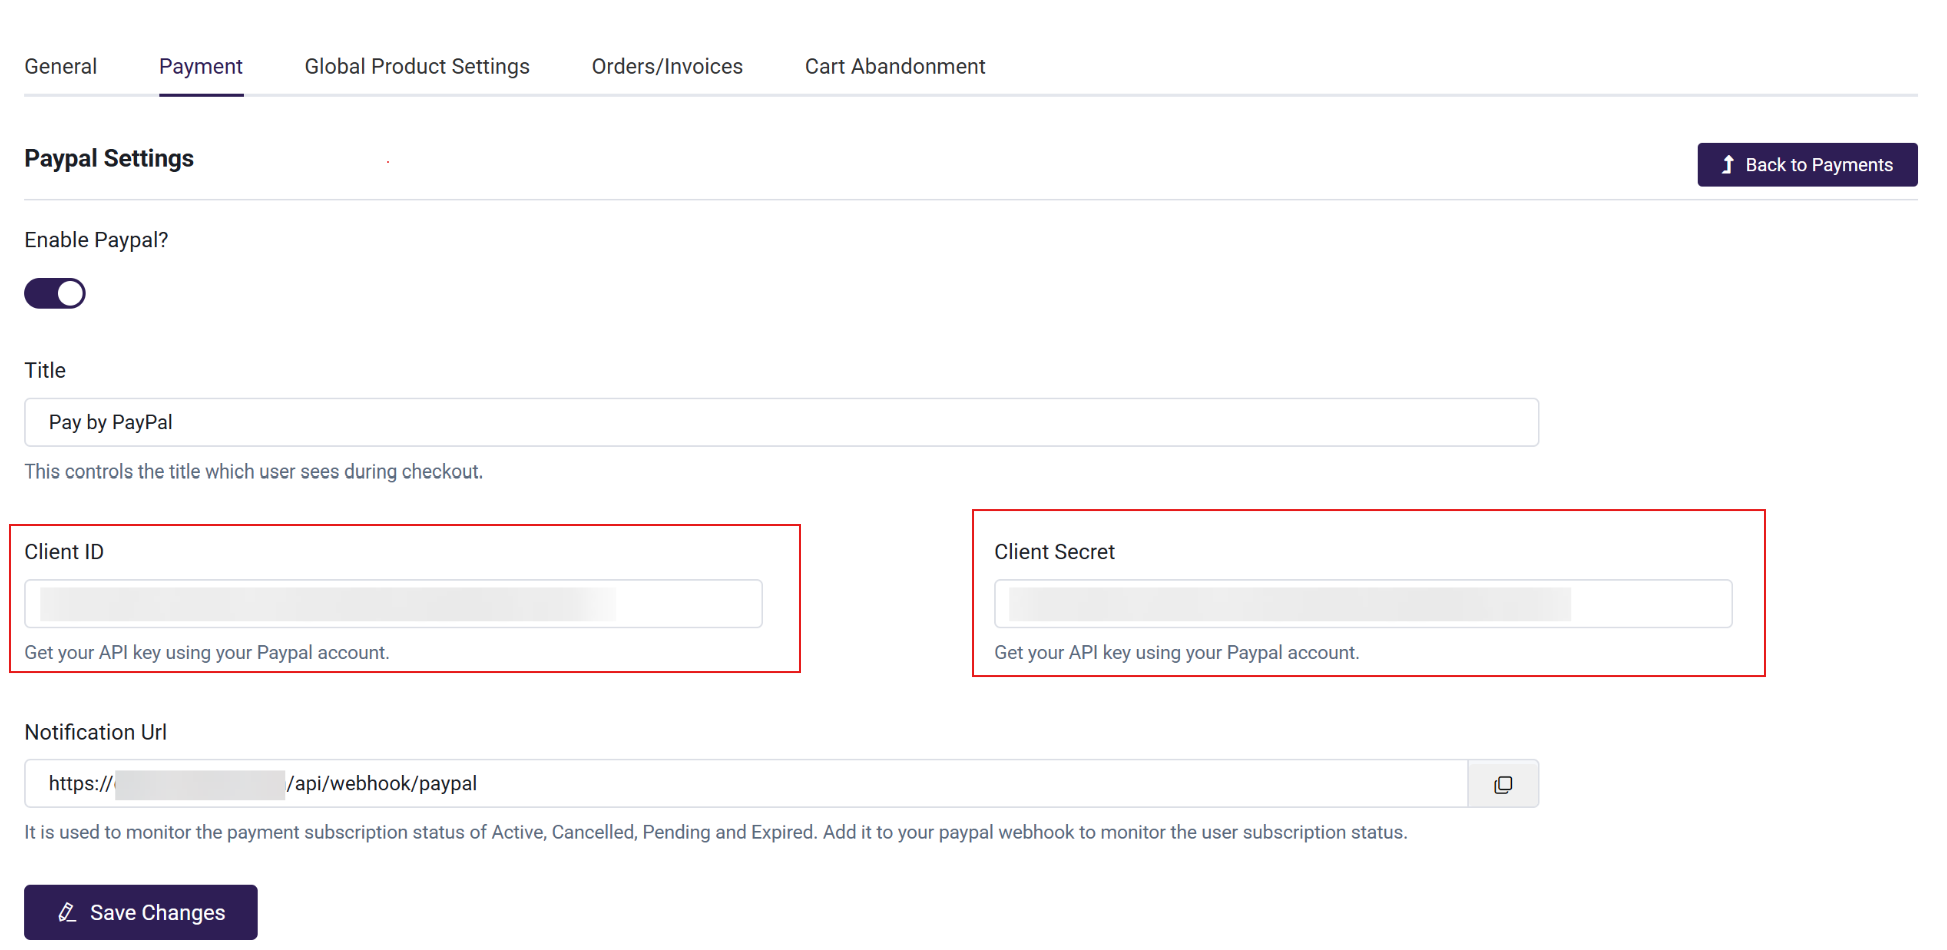
- Copy Your Client Id and Secret Key
- Paste it in your AOM Payment Setting:
Add Webhook to Capture Payment Subscription Status
A Webhook is an HTTP callback that occurs when something happens; a simple event-notification system via HTTP POST that allows developers to easily access notifications of payment activities, such as payment status update, or recurring charges. We will use this to keep track of which subscriptions are active.
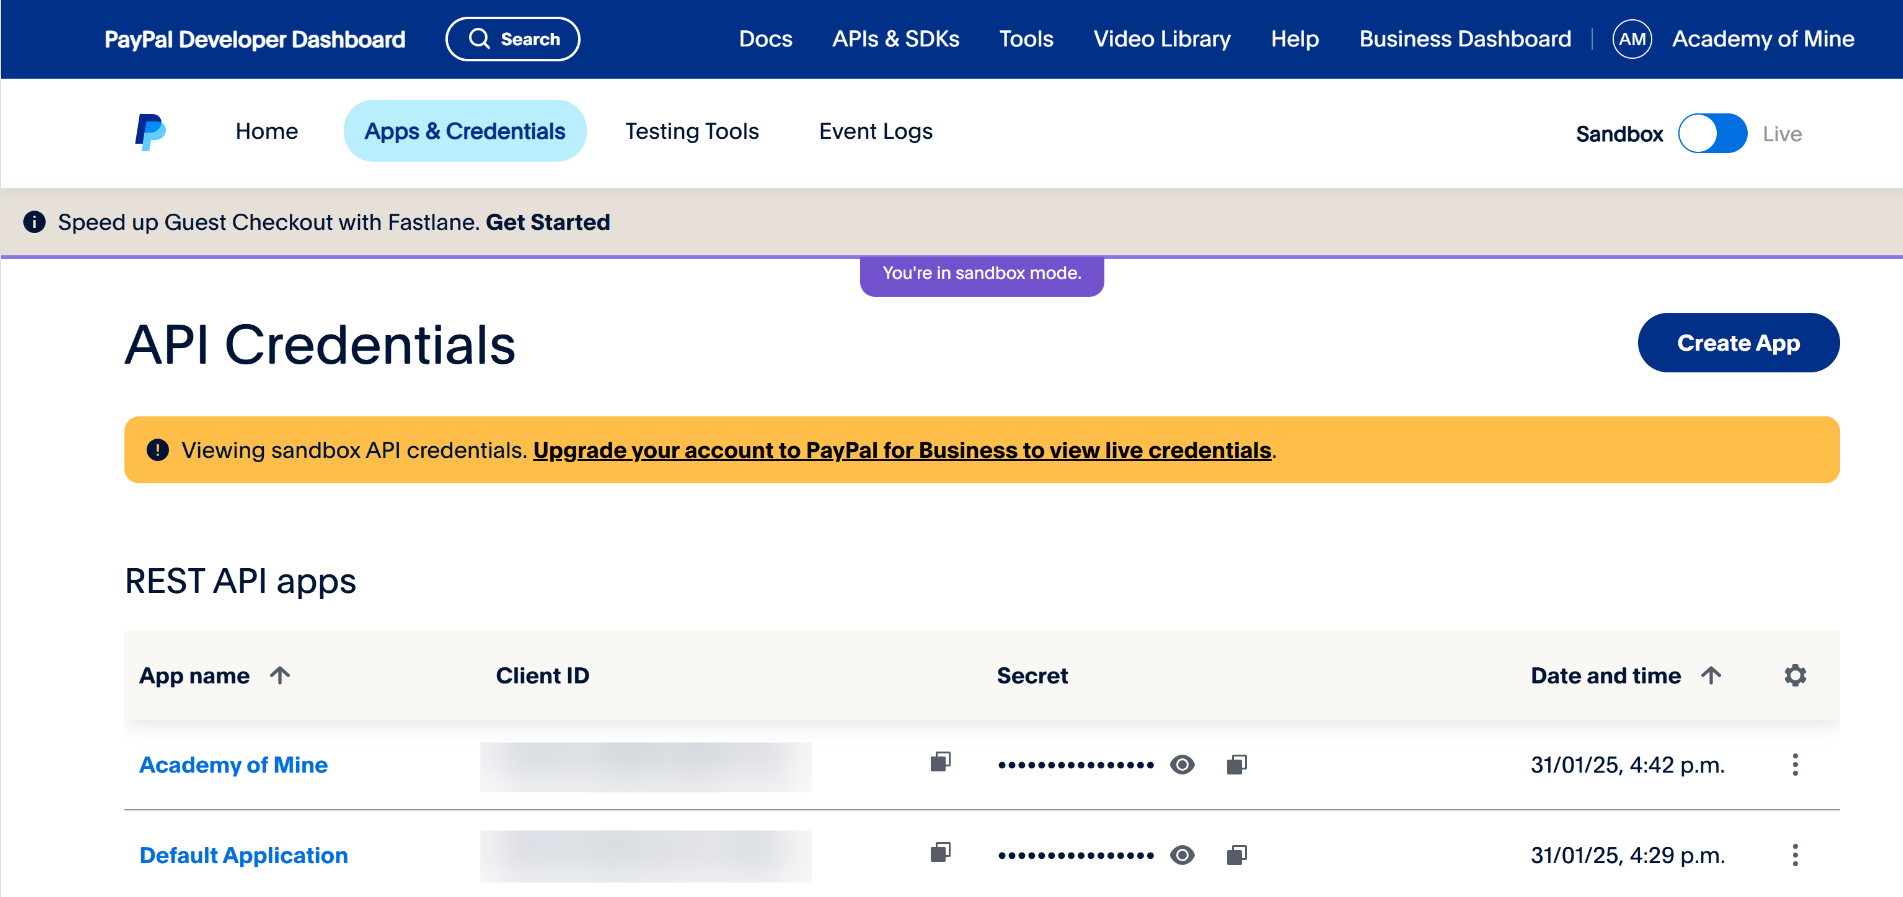
- To create a Webhook, navigate to the PayPal Dashboard, and click on Apps & Credentials. Then select the app in which you want to set up the Webhooks.
- You can see the details about your application. Notice in the top right that there are two buttons (Sandbox, Live), We'll be using Sandbox, but you need to set up your Live settings before going Live. To configure Webhooks for this app, click on Add Webhook as displayed in the screenshot:
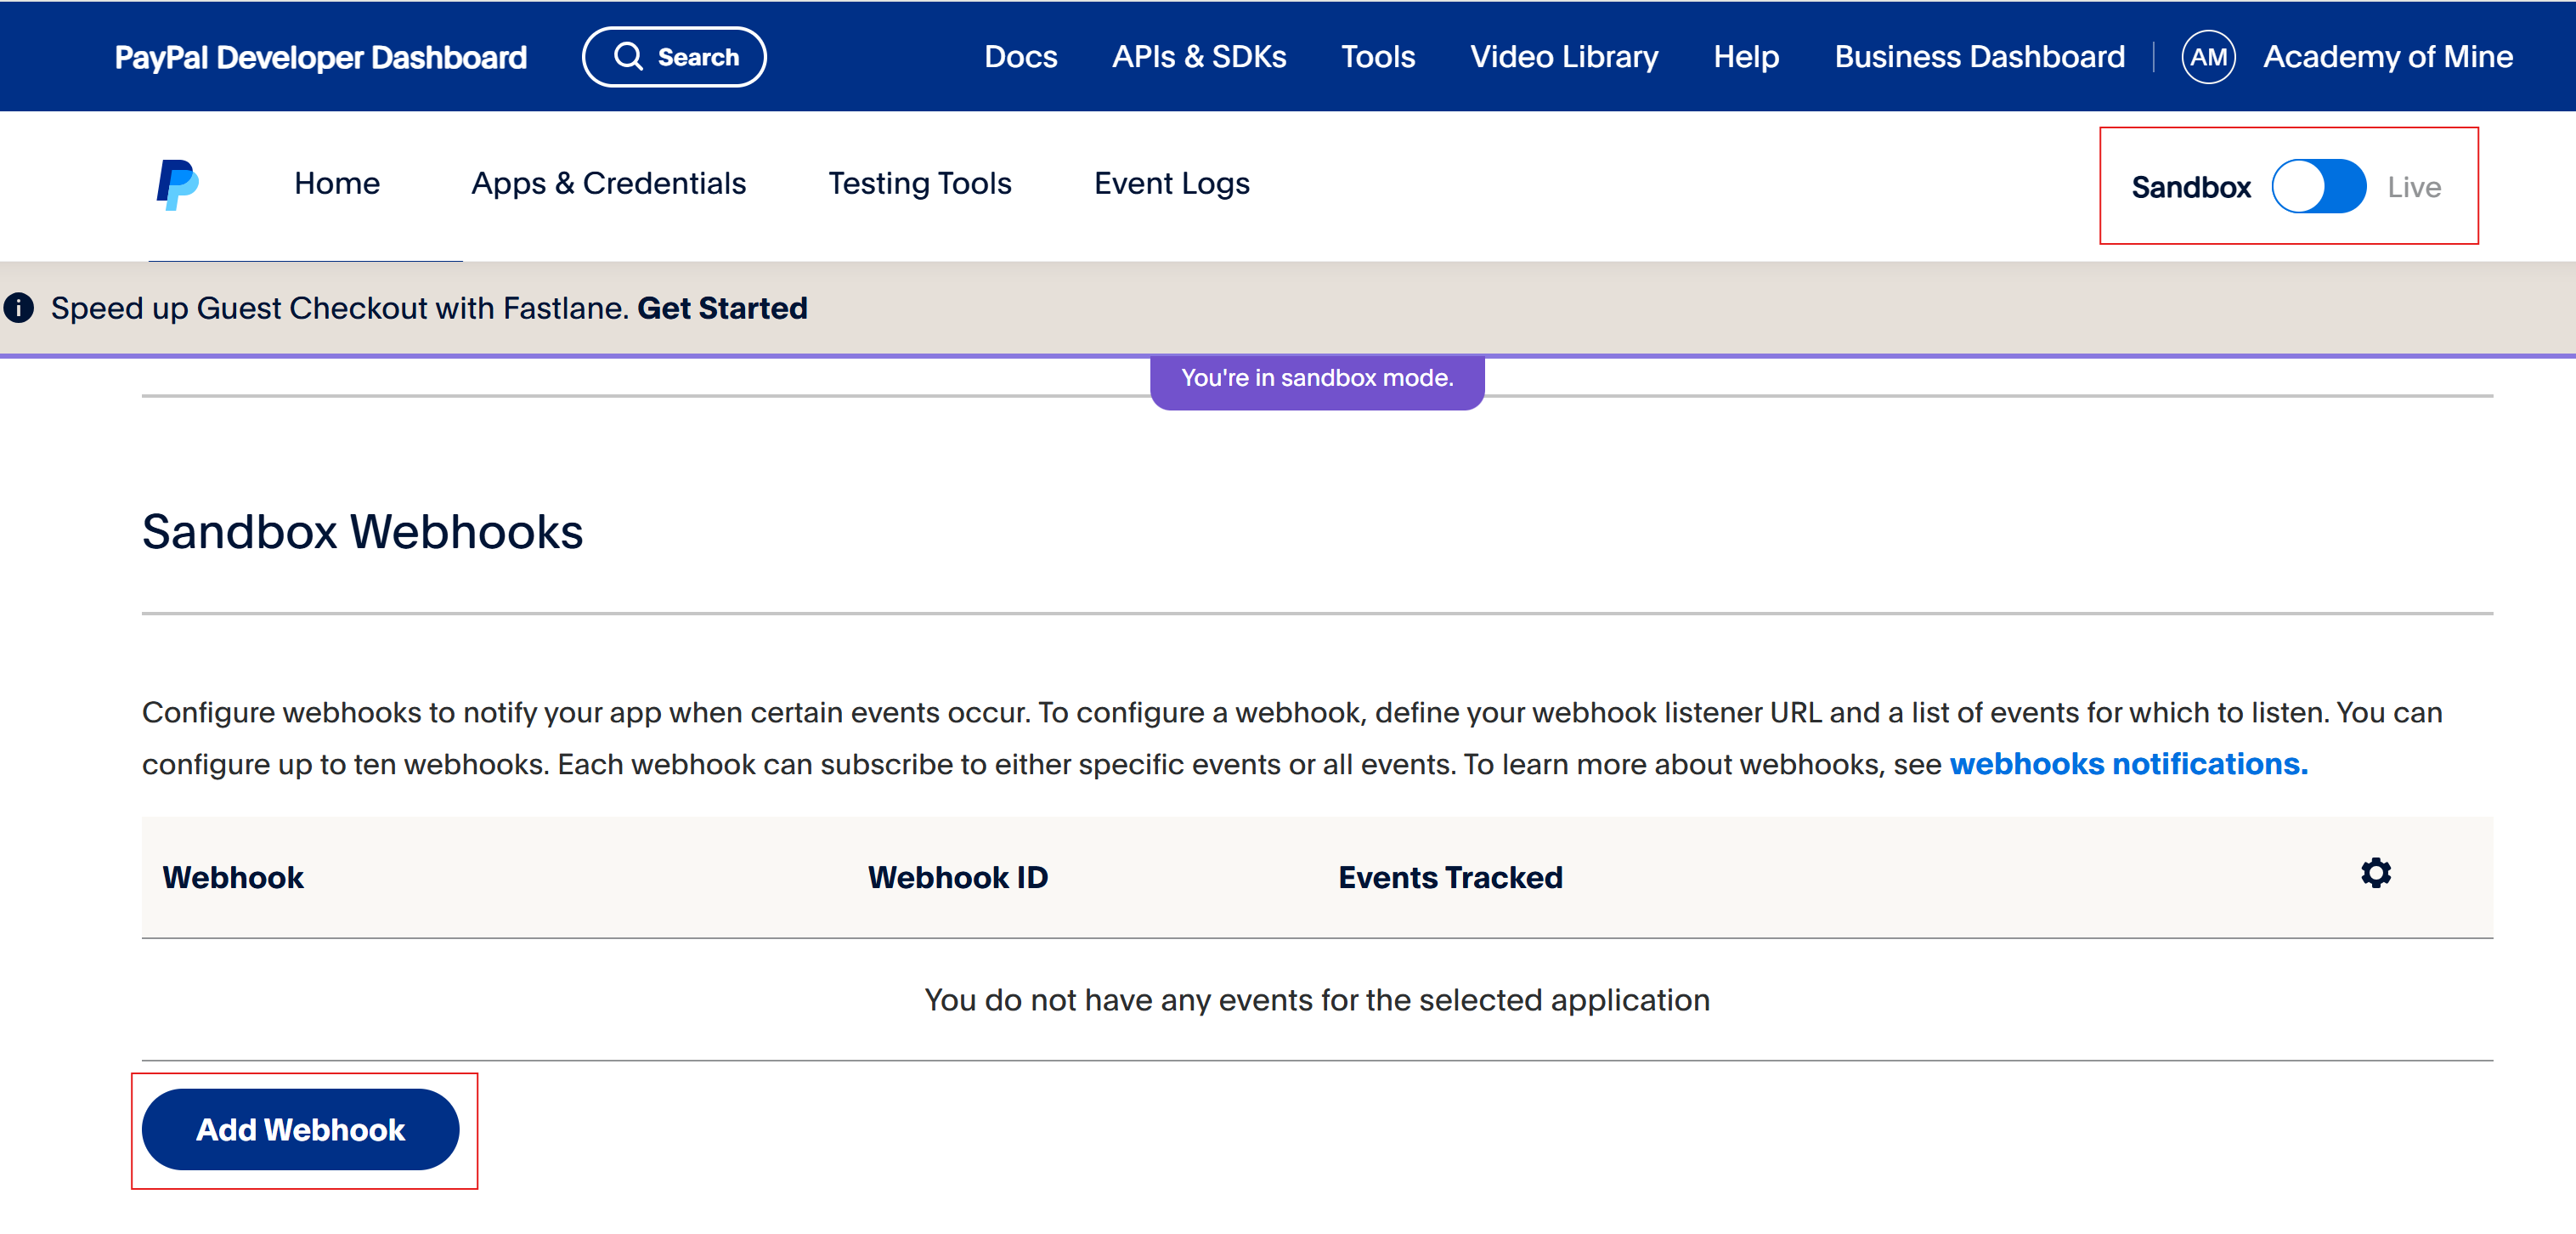
- Select the Event Types as the following and enter the URL where the Webhooks will be sent to (it has to be HTTPS).
Select the event types: Billing subscription cancelled, Billing subscription expired, Billing subscription payment activated, Billing subscription renewed, Billing subscription suspended.
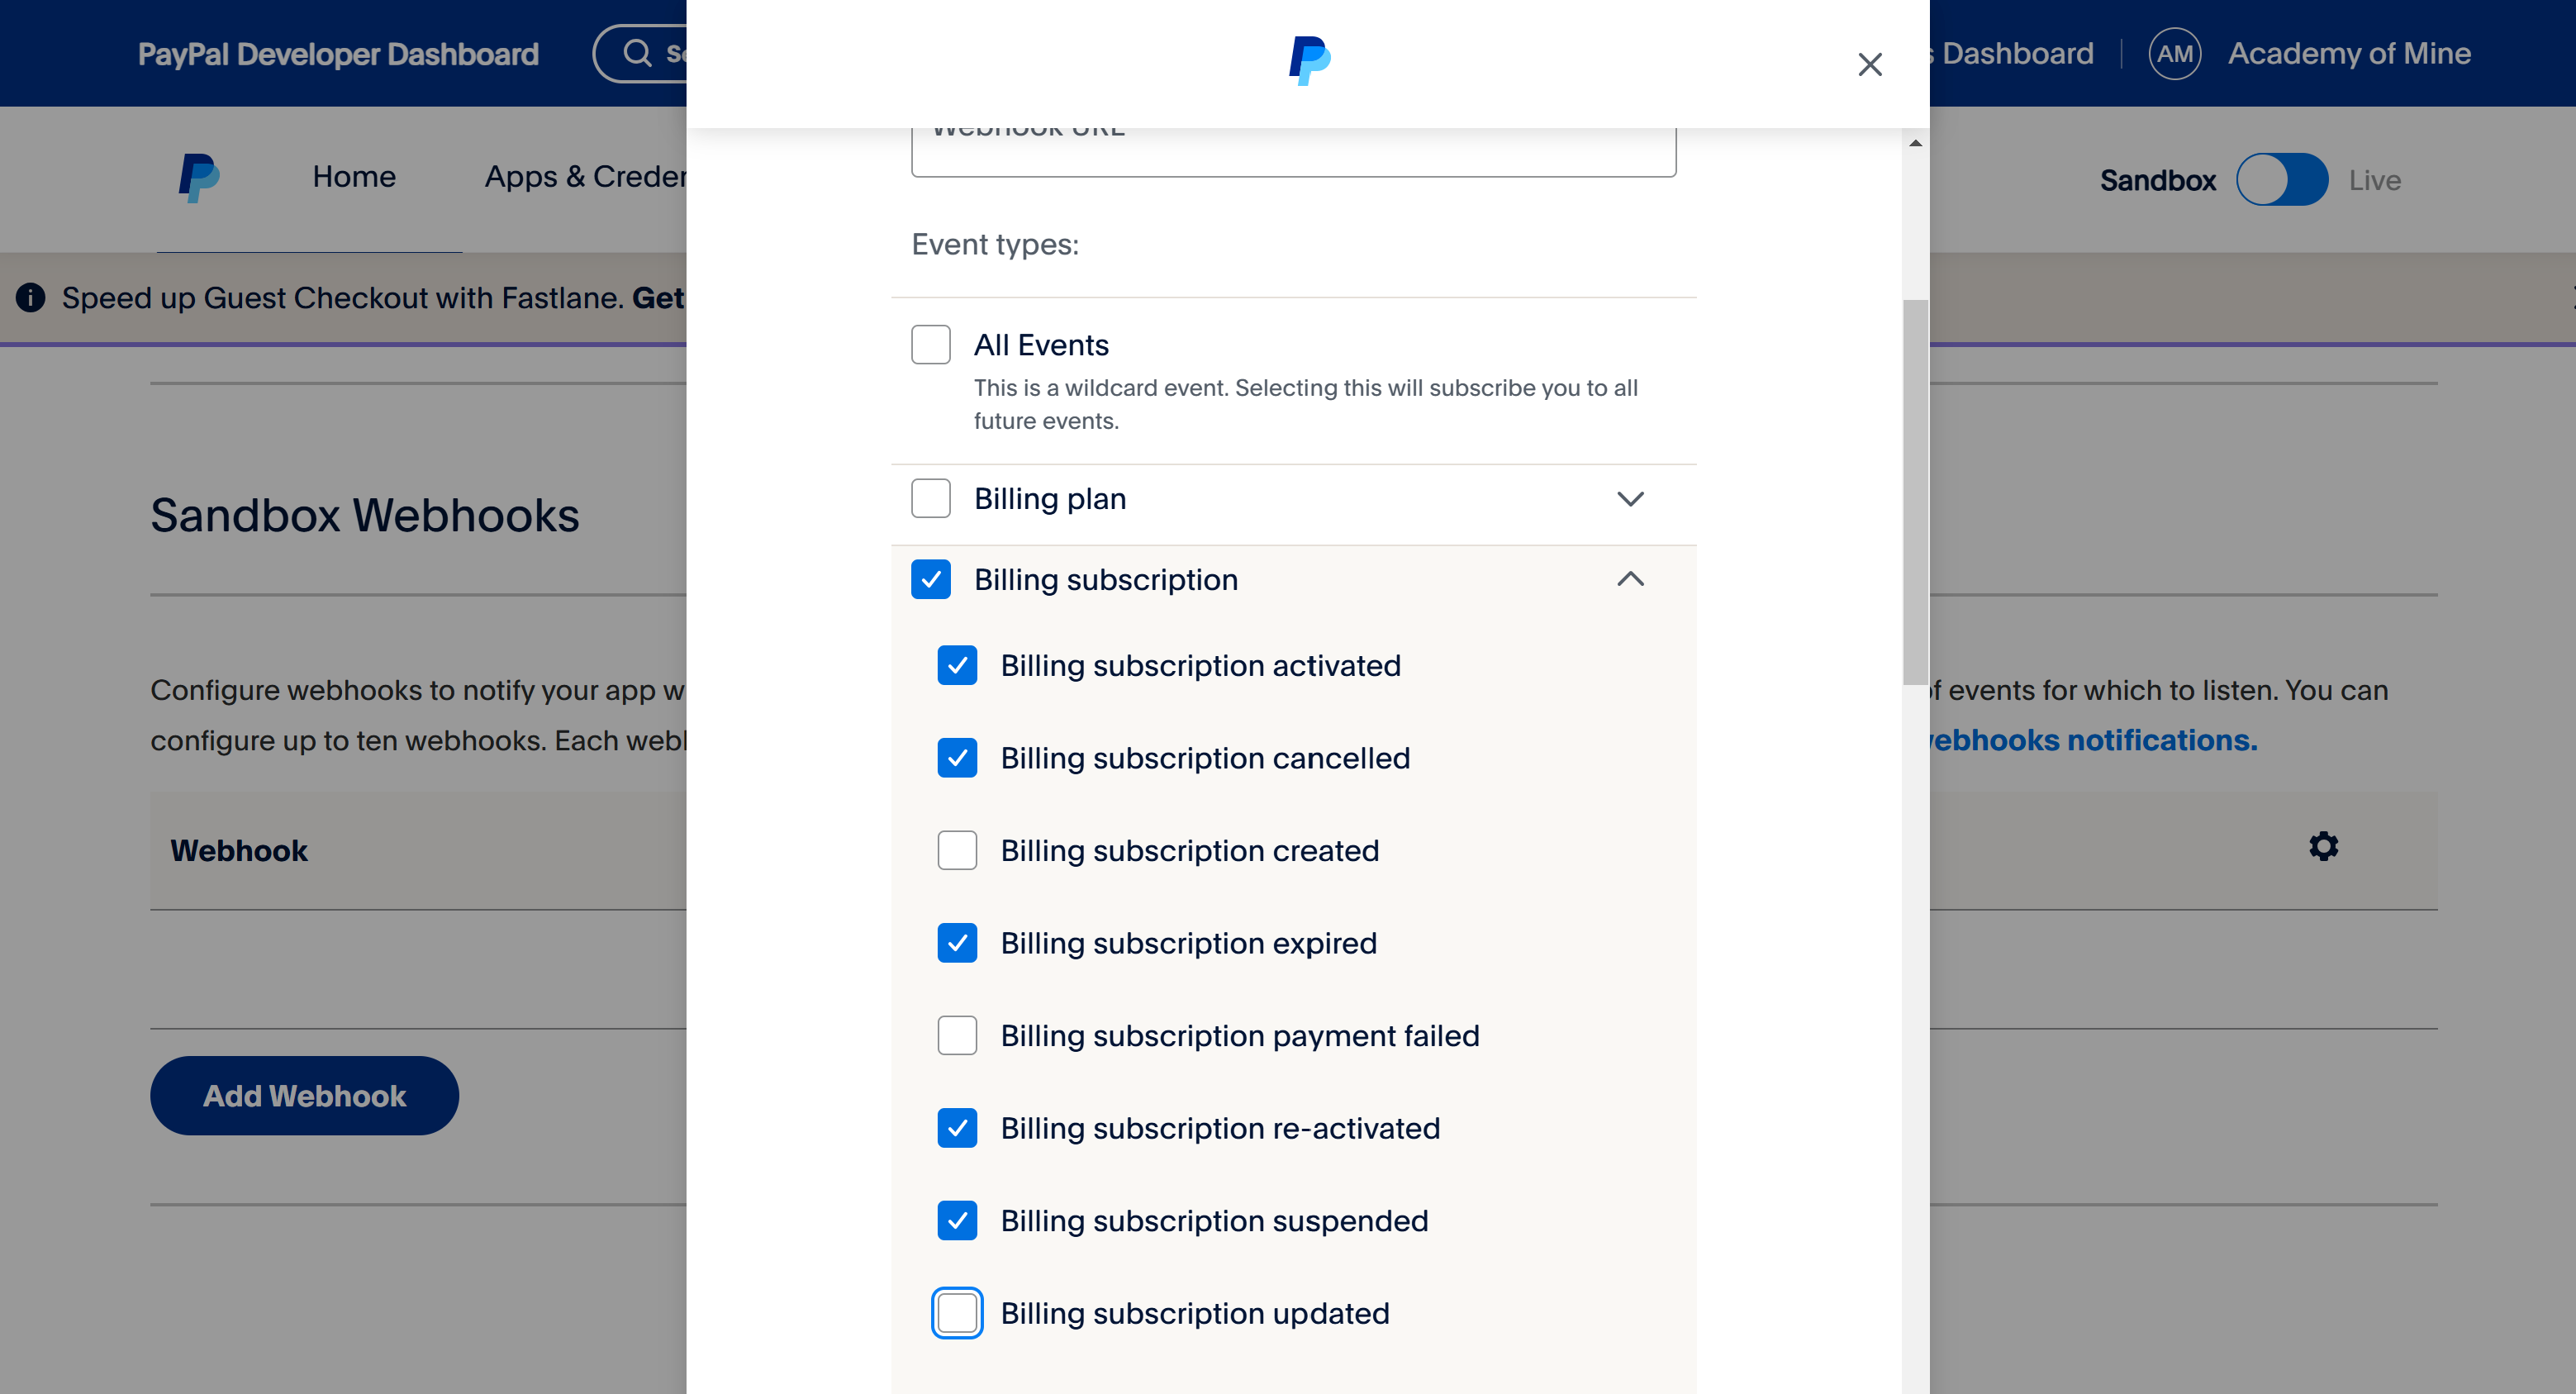
4.You have to then add the Webhook URL to AOM:

- Click Save Changes
Step 3: Begin Testing
- Once you have successfully added your Sandbox API credentials and enabled PayPal in AOM, you are ready to attempt test payments.
- When checking out and placing an order, it is important that you use a test credit card number provided by PayPal, rather than a live credit card. If you need a hand going through checkout, take a look here.
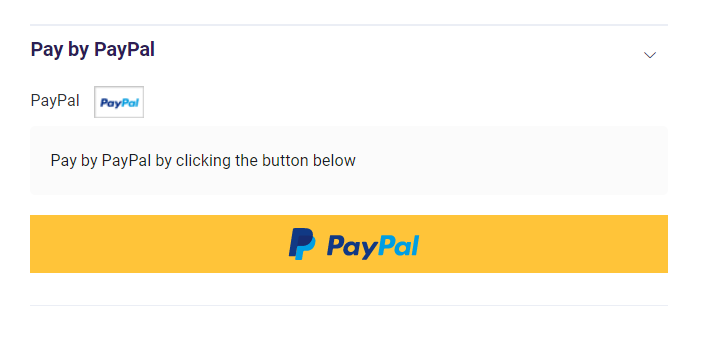
- You can checkout by PayPal:
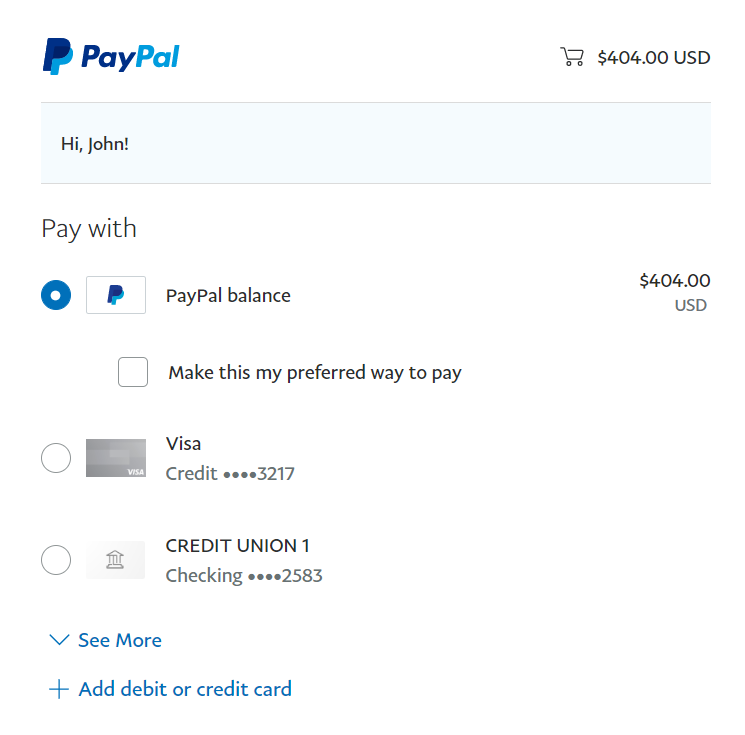
- You will be then redirected to PayPal:
Once your tests have completed successfully and you are ready to accept real payments, follow these steps:
Step 4: Ready for Production
Note: when using PayPal live API keys, real cards must be used, and real payments will be processed. PayPal live API keys are found in your Live Tab.
- Go To your Live Tab and Complete all the Verification Process to get your Live API Keys.
-
Update your live server configuration to Production values.
-
In your PayPal integration settings in AOM, enable the setting for Ready for Production. This is the final safety in place to prevent a real payment. Enabling it will officially turn on real payments.
-
Click Save Changes
-
Optional step: test real payments in your Academy of Mine account. Create low value transactions to test, for example a simple Product for $1. Again, you must use a real payment method for these tests.
Next Step
Up next, you'll learn about creating Products to sell your Courses: