SAML 2.0 Based Single Sign On (SSO) with Microsoft Azure Active Directory
Single Sign On (SSO) is an authentication process which enables a user to securely authenticate with multiple applications and websites by using just one set of credentials. This streamlines user access and removes the need for users to memorize passwords or sign in with a different account, and can make for a seamless transition for users to access their courses. AOM offers a Single Sign On (SSO) integration with any Identify provider that supports SAML protocol .
In this guide, we will be going over the steps required to activate and configure the SAML 2.0 SSO functionality using Microsoft Azure as the Identity Provider (IDP). The basic overview is, you will need to access the Microsoft Azure Portal. This is where we are going to configure the keys needed for the fields on the settings page. Then you'll enable the integration in AOM, and add that information you've gathered. Follow these steps to configure everything.
Step 1: View SAML 2.0 Settings in AOM
- From the Admin Dashboard in AOM, navigate to Integrations
- Click on the Manage button for the Single Sign On (SAML 2.0) section to navigate to the settings page.
- Notice that there are links for Metadata for IDP--you will need these in the step below when configuring. Leave this tab/page open.
Step 2: Configure SAML 2.0 SSO Functionality using Microsoft Azure
- Open a new tab and navigate to your Microsoft Azure Portal. This is where we are going to configure the keys needed for the fields on the settings page.
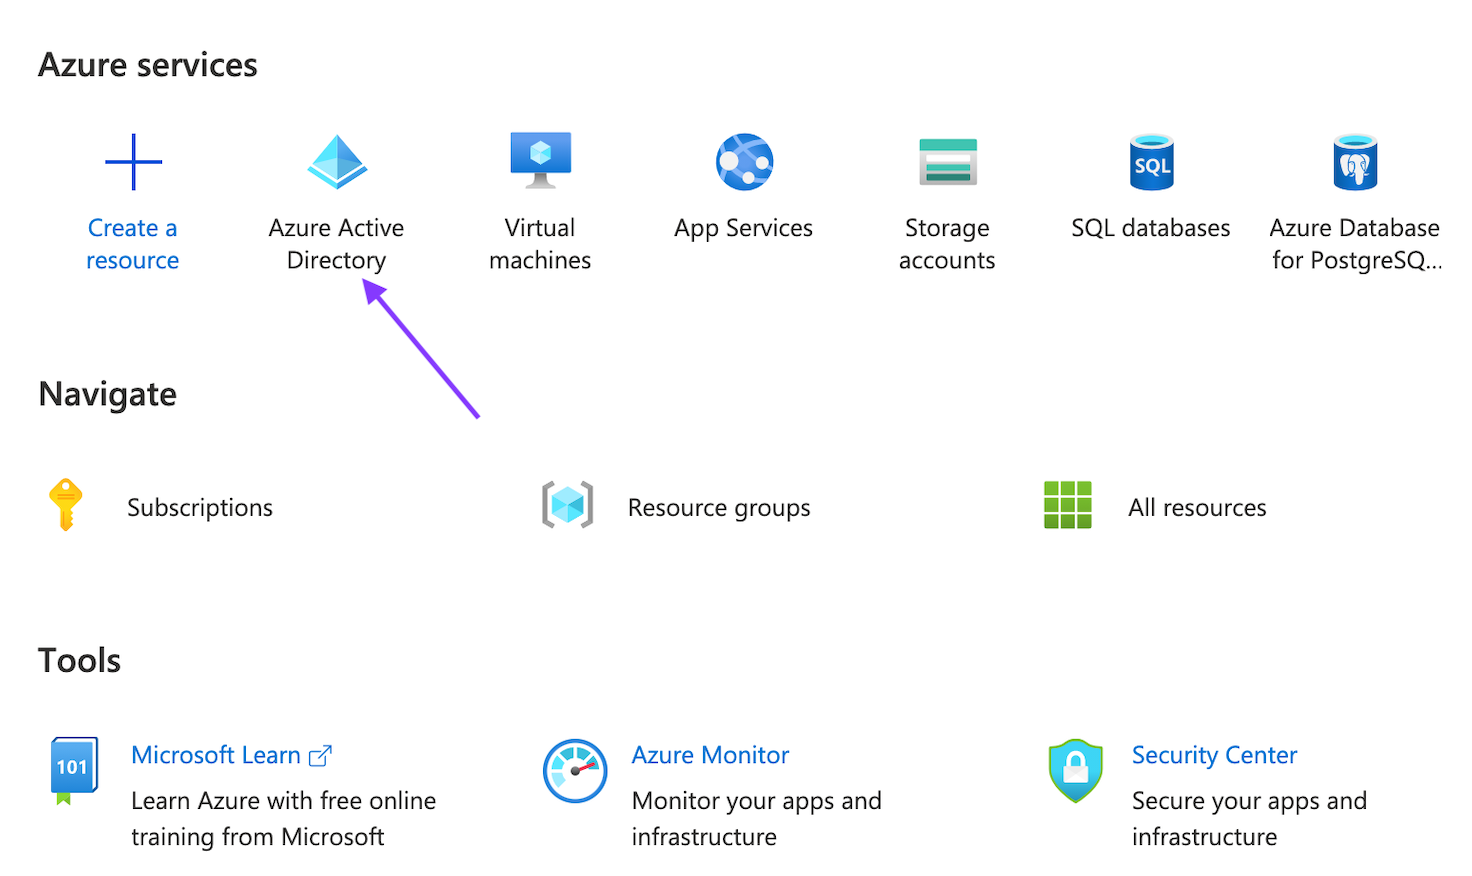
- You need to create an application inside Azure Active Directory first. To create an application, select Azure Active Directory.
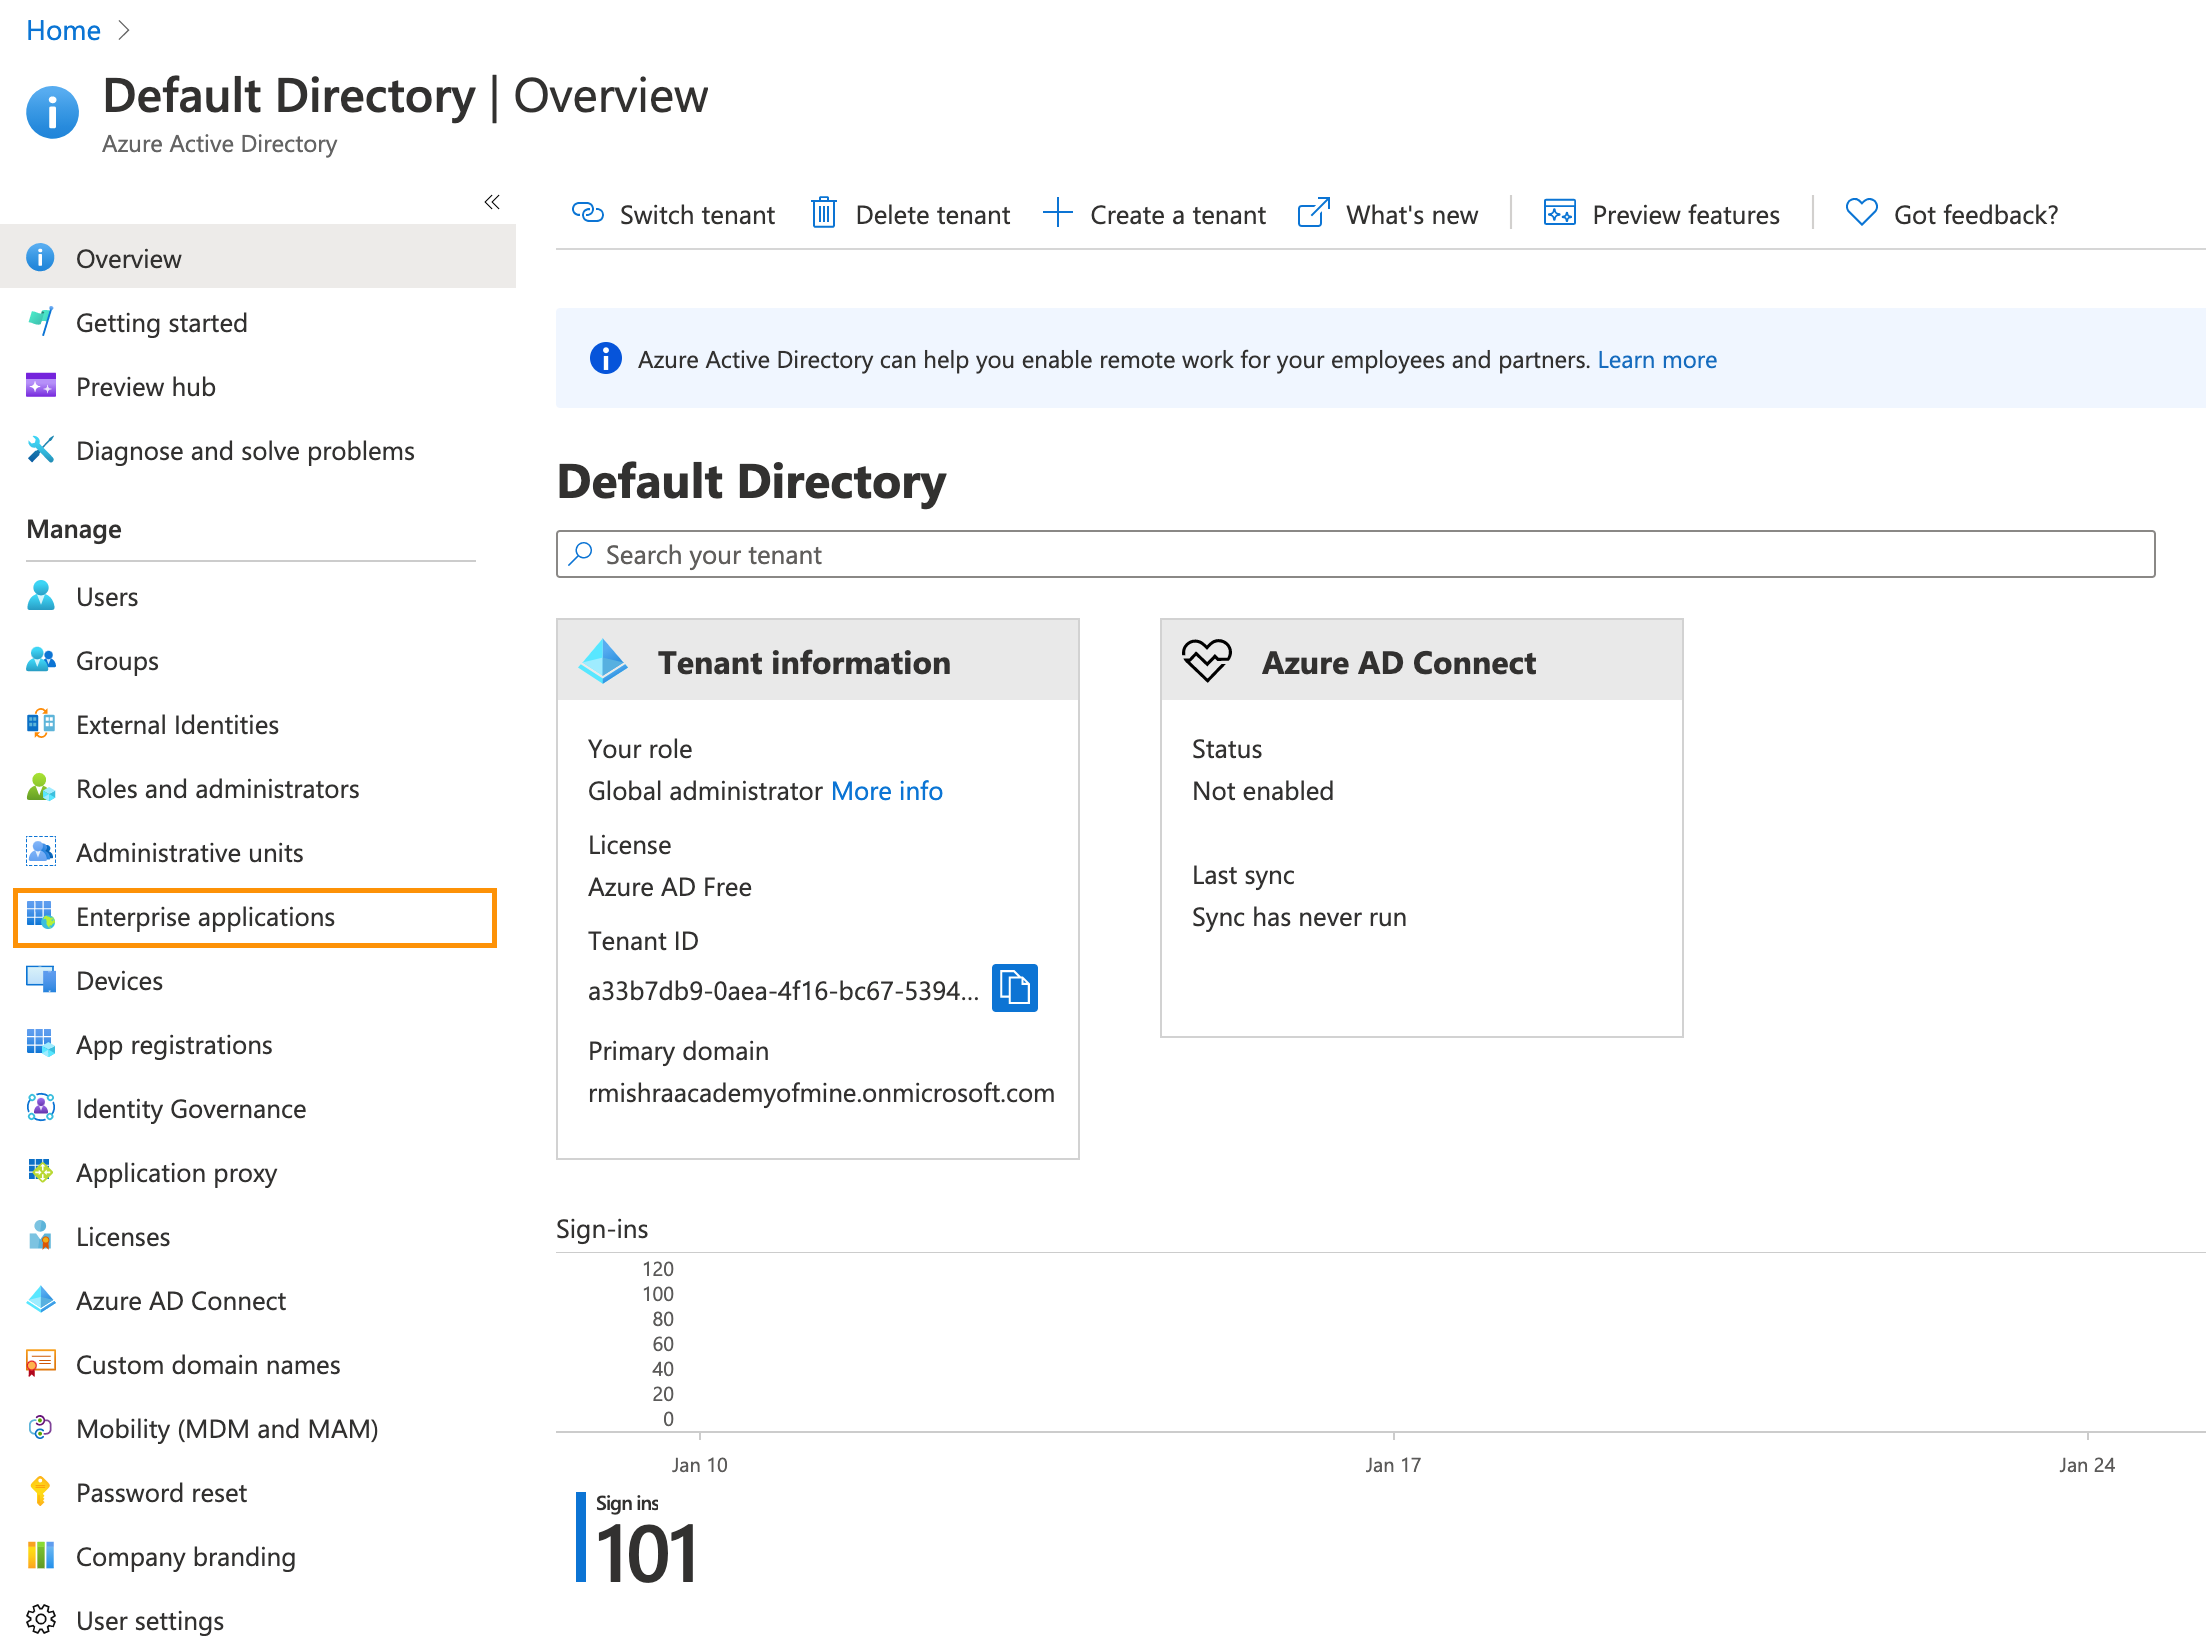
- Now in the left side panel, inside Manage Section, click on Enterprise applications
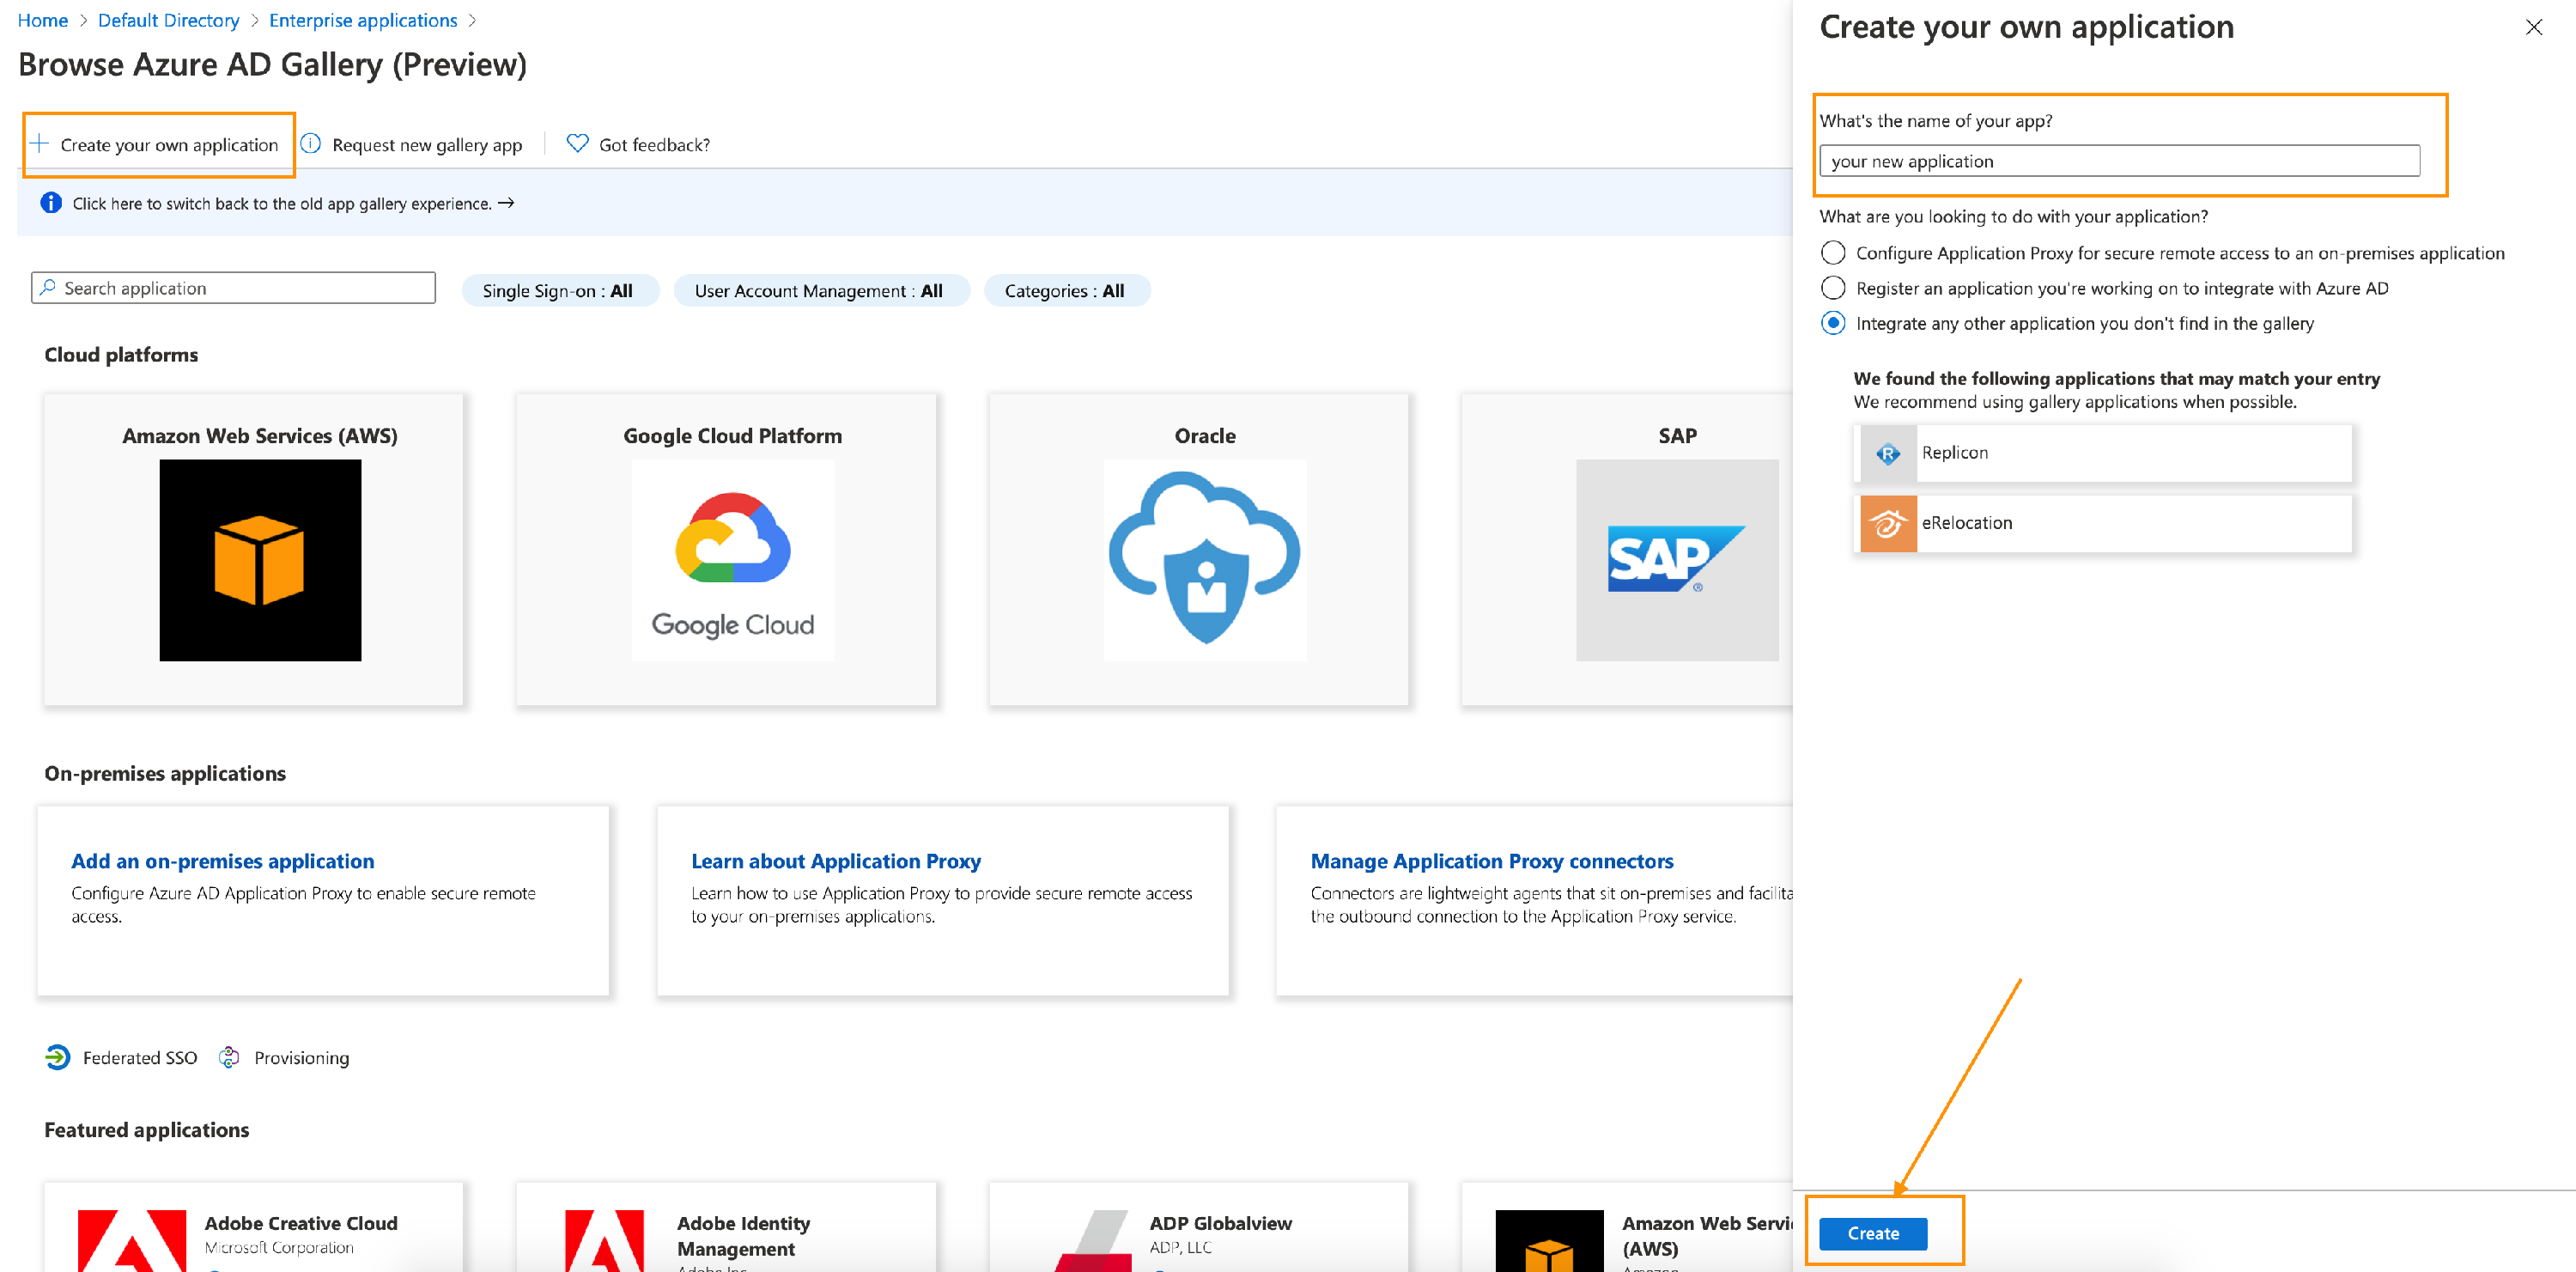
- Now click on + New Application.

- Click on Create your own application, a dialog box on the right panel will appear. Name your application (any name you want) and click on create button below.
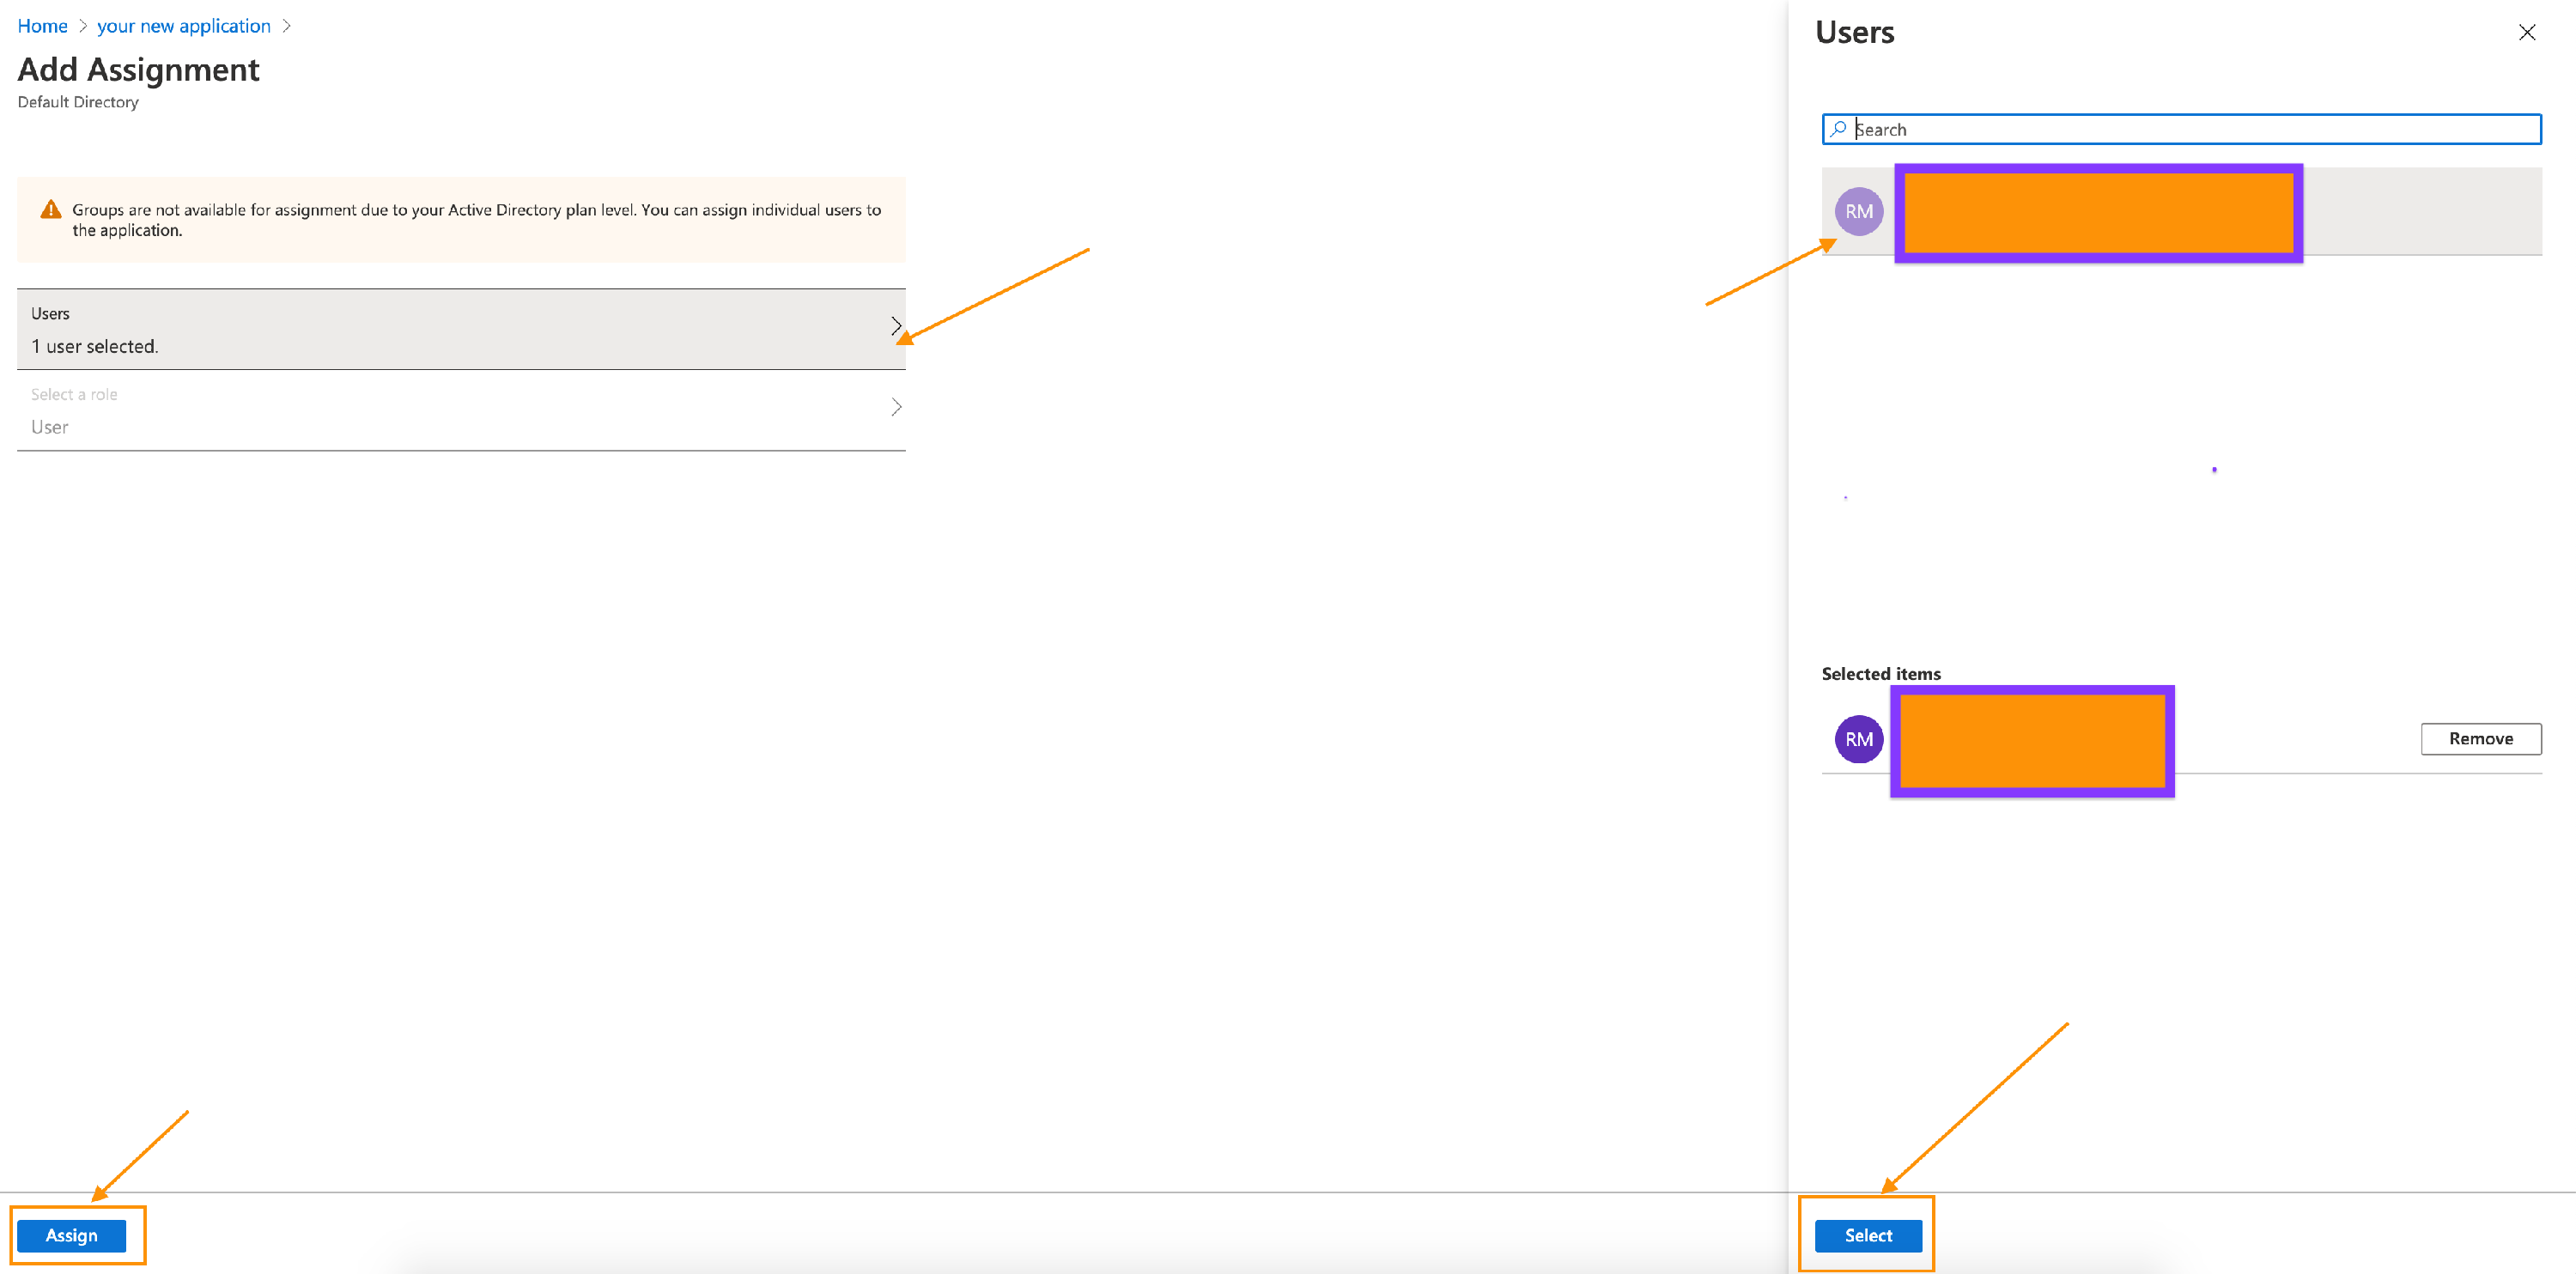
- Click on Assign Users and groups. You need to assign at least one user to this application.
- Click on Add user/group, then on the page, you need to select a user. Select a user and click on Assign button.
 8. Now, from the left side panel click on Single sign-on and then select SAML.
 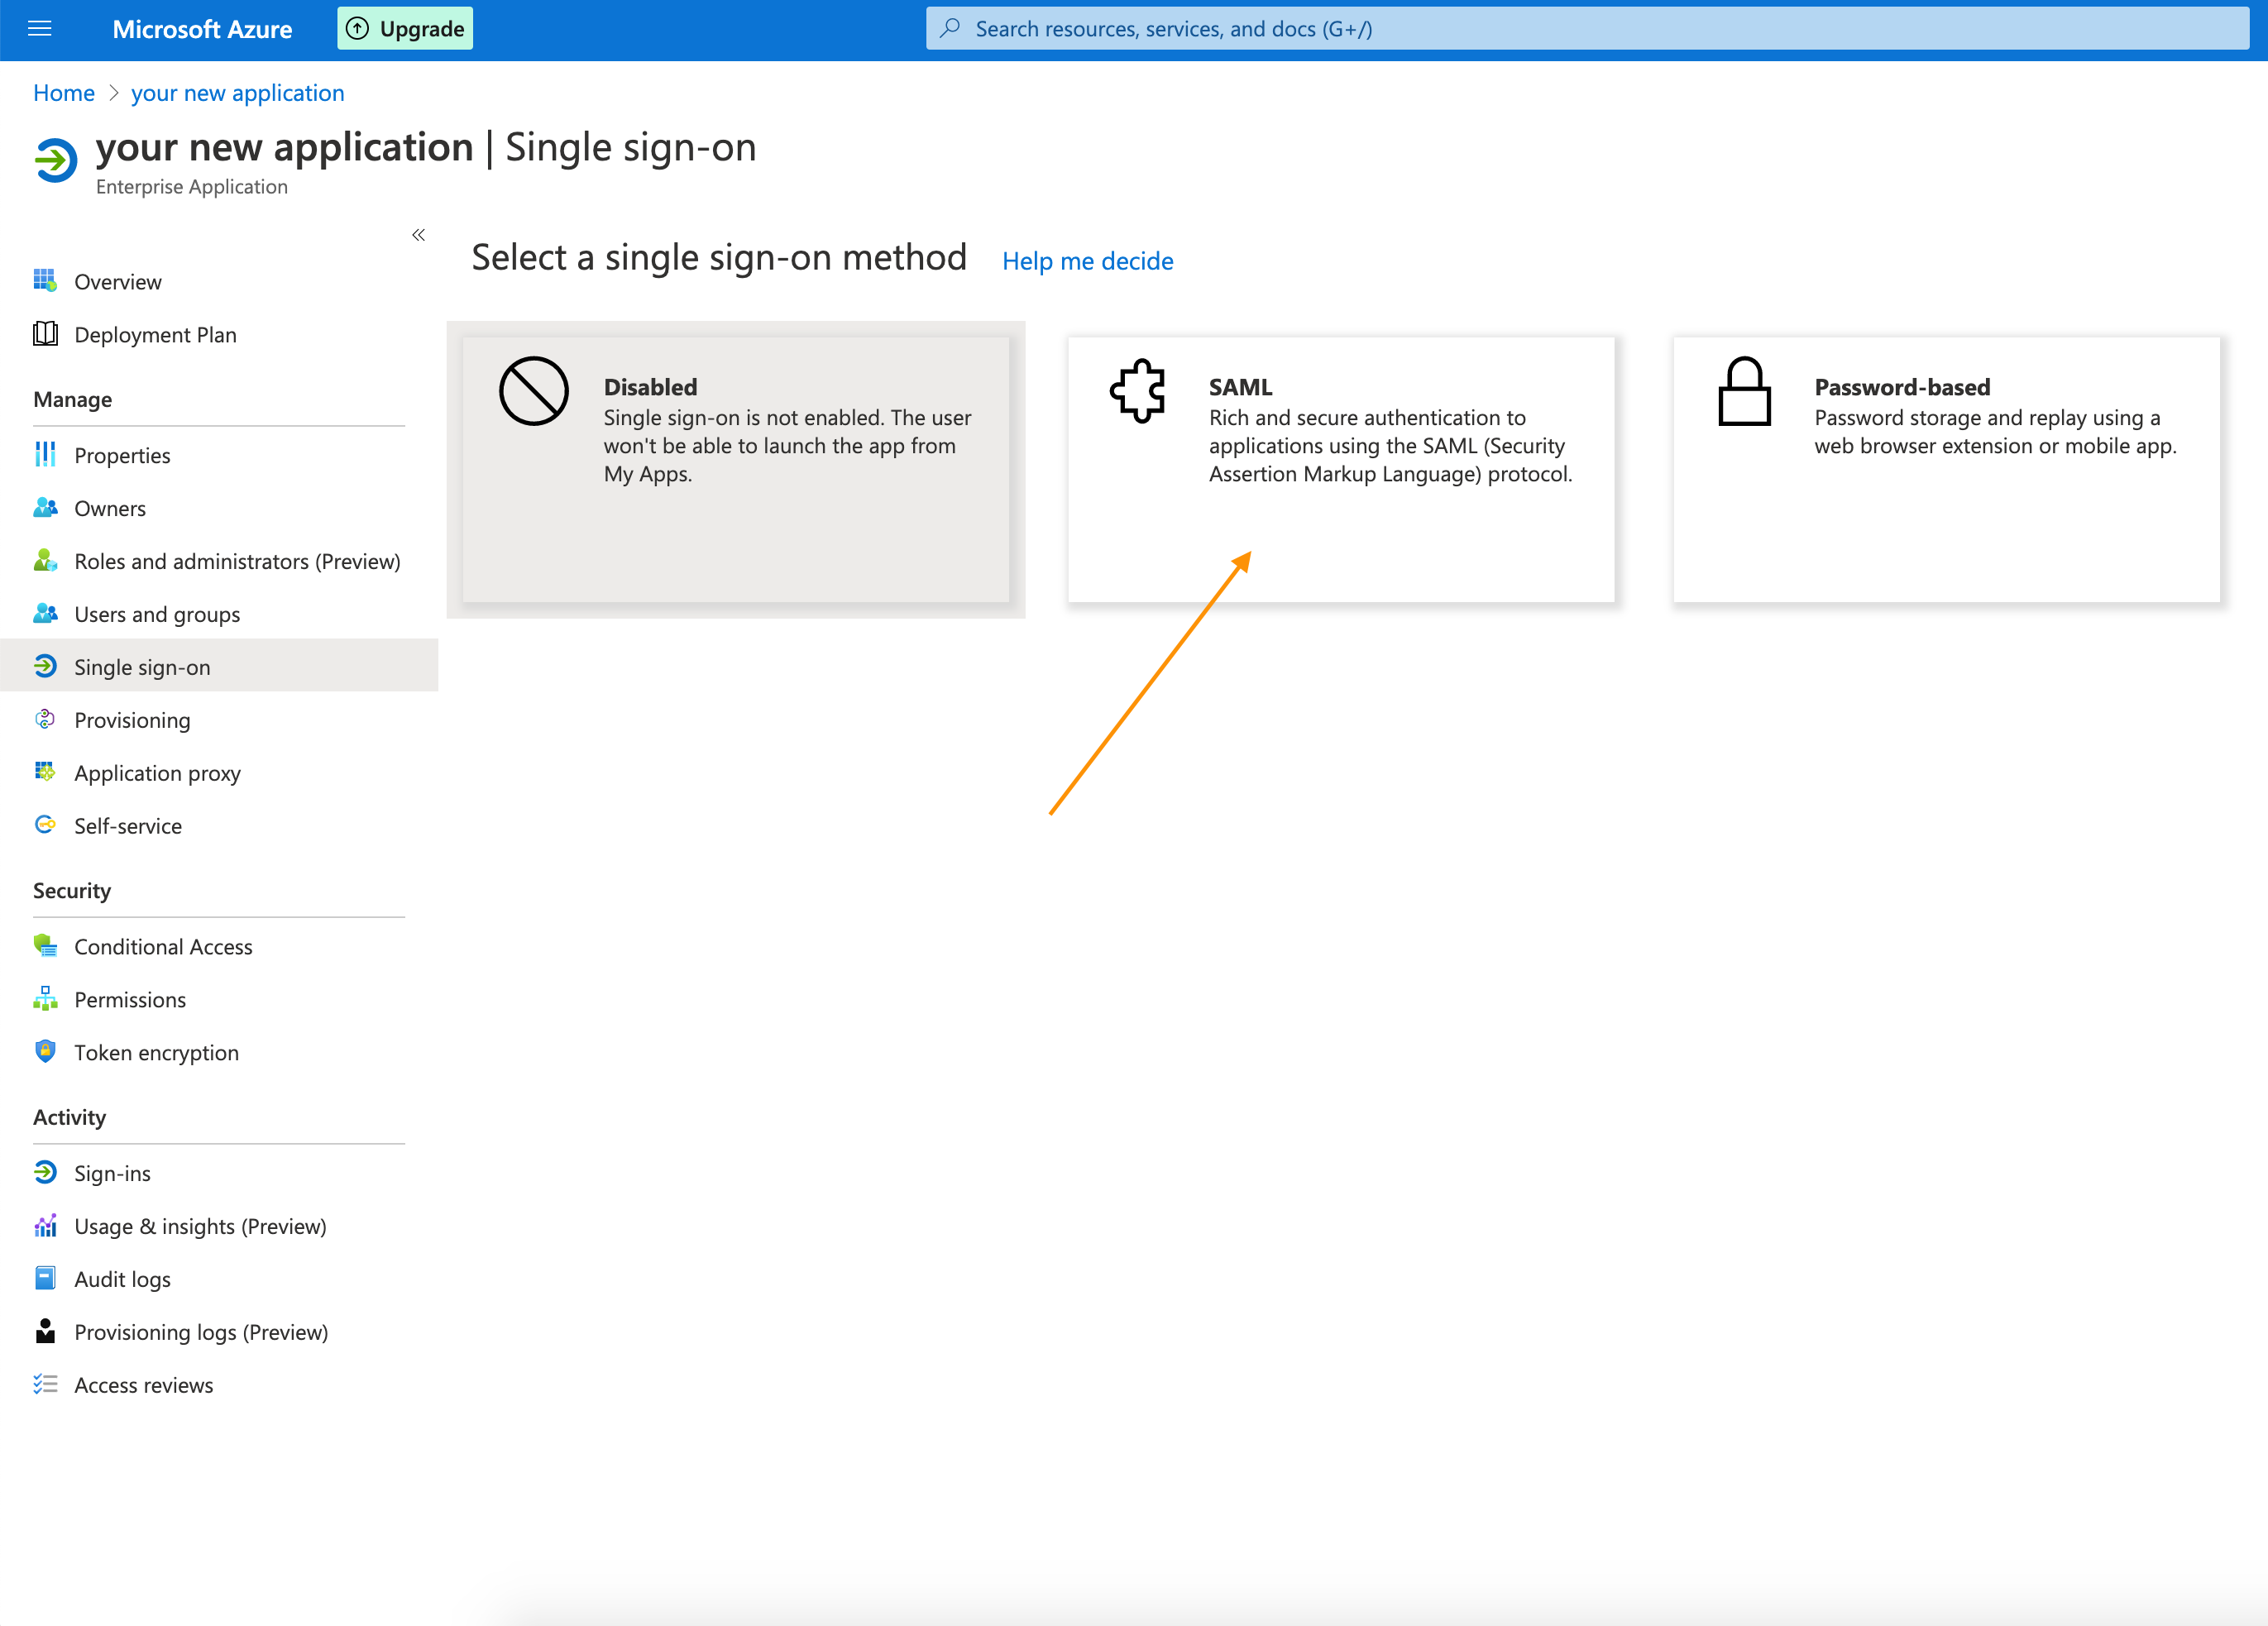 9. Click on the Upload metadata file and upload the metadata file downloaded from AOM platform. To get metadata file from AOM platform : Navigate the the AOM tab you have open to SAML 2.0 manage page, click on Provide this metadata URL inside Gather Metadata for IDP section.
10. After uploading, Azure will automatically read the configuration values. You need to click on save to save the changes. The page should look like this:
9. Click on the Upload metadata file and upload the metadata file downloaded from AOM platform. To get metadata file from AOM platform : Navigate the the AOM tab you have open to SAML 2.0 manage page, click on Provide this metadata URL inside Gather Metadata for IDP section.
10. After uploading, Azure will automatically read the configuration values. You need to click on save to save the changes. The page should look like this: 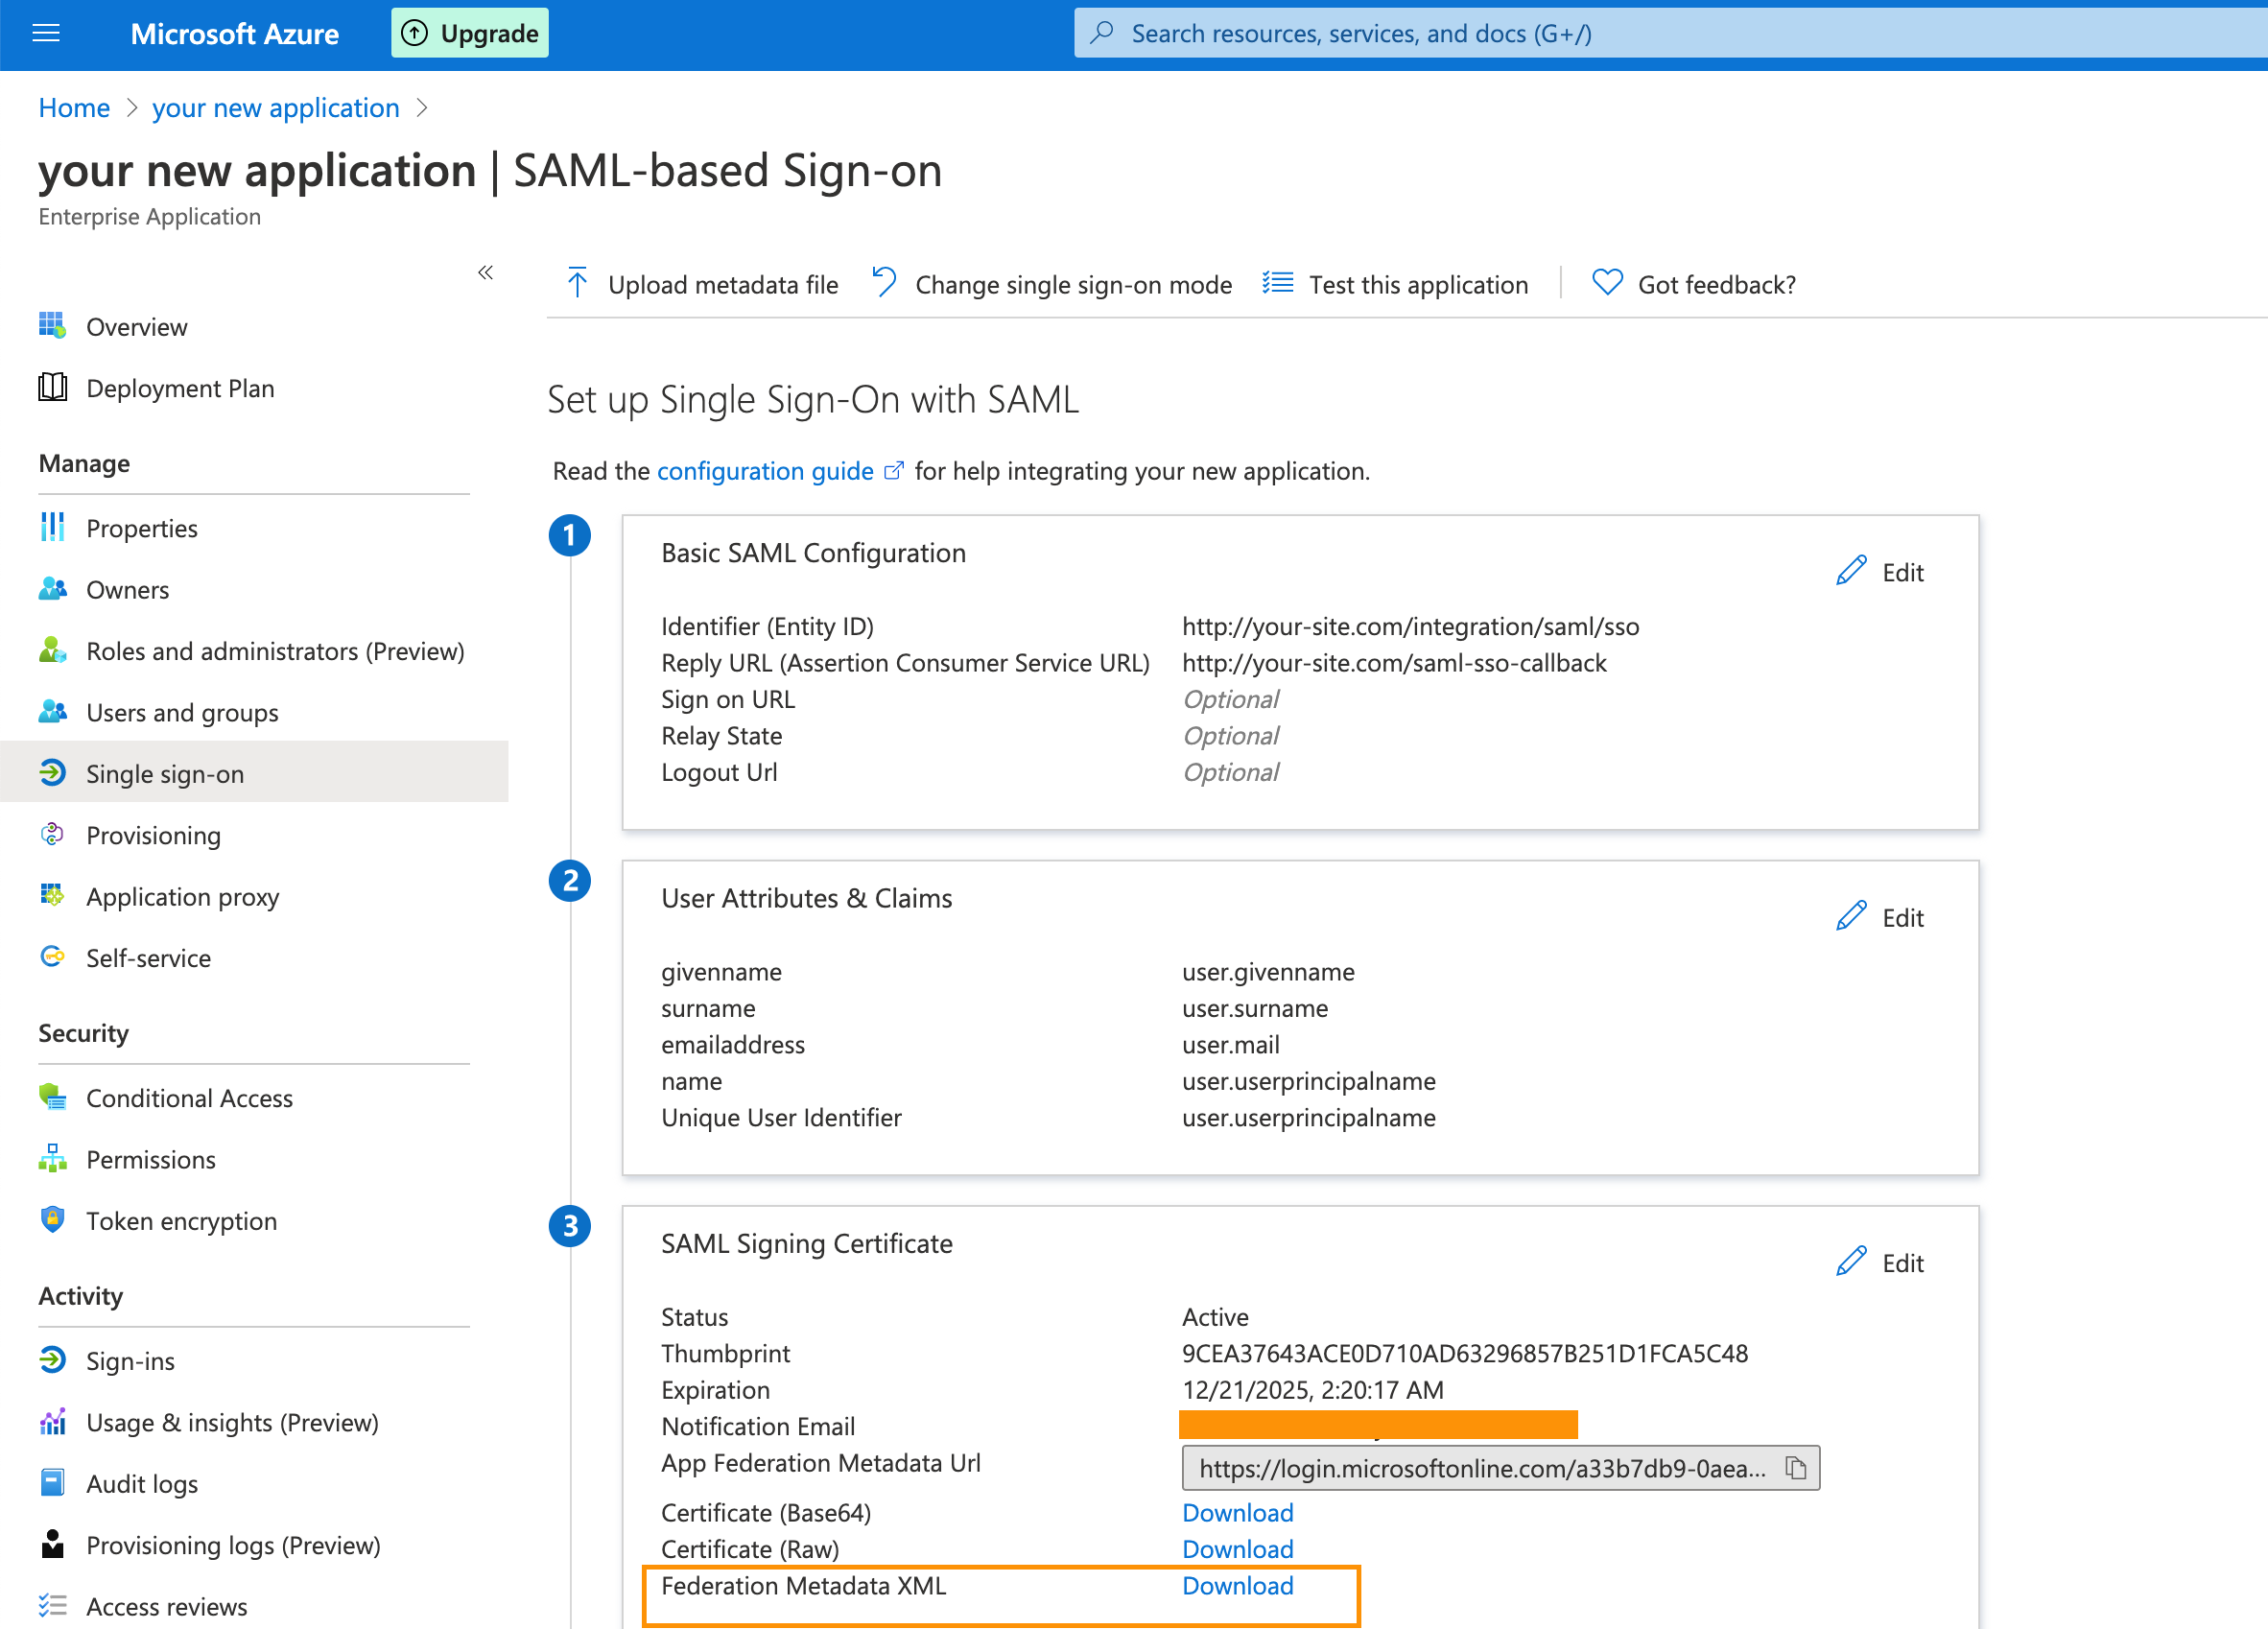 11. Now you need to download the Federation Metadata XML file as mentioned in above snapshot. This file will be needed when we will be setting up things in AOM.
12. Download the file and store it somewhere in your computer.
11. Now you need to download the Federation Metadata XML file as mentioned in above snapshot. This file will be needed when we will be setting up things in AOM.
12. Download the file and store it somewhere in your computer.
Step 3: Add SAML Information to AOM
Now that you have completed all the setup required from Azure platform side, you can add this information to the integration in AOM.
- Now, go back to the AOM page you have open to the SAML 2.0 Settings page (Integrations>Manage SAML 2.0)
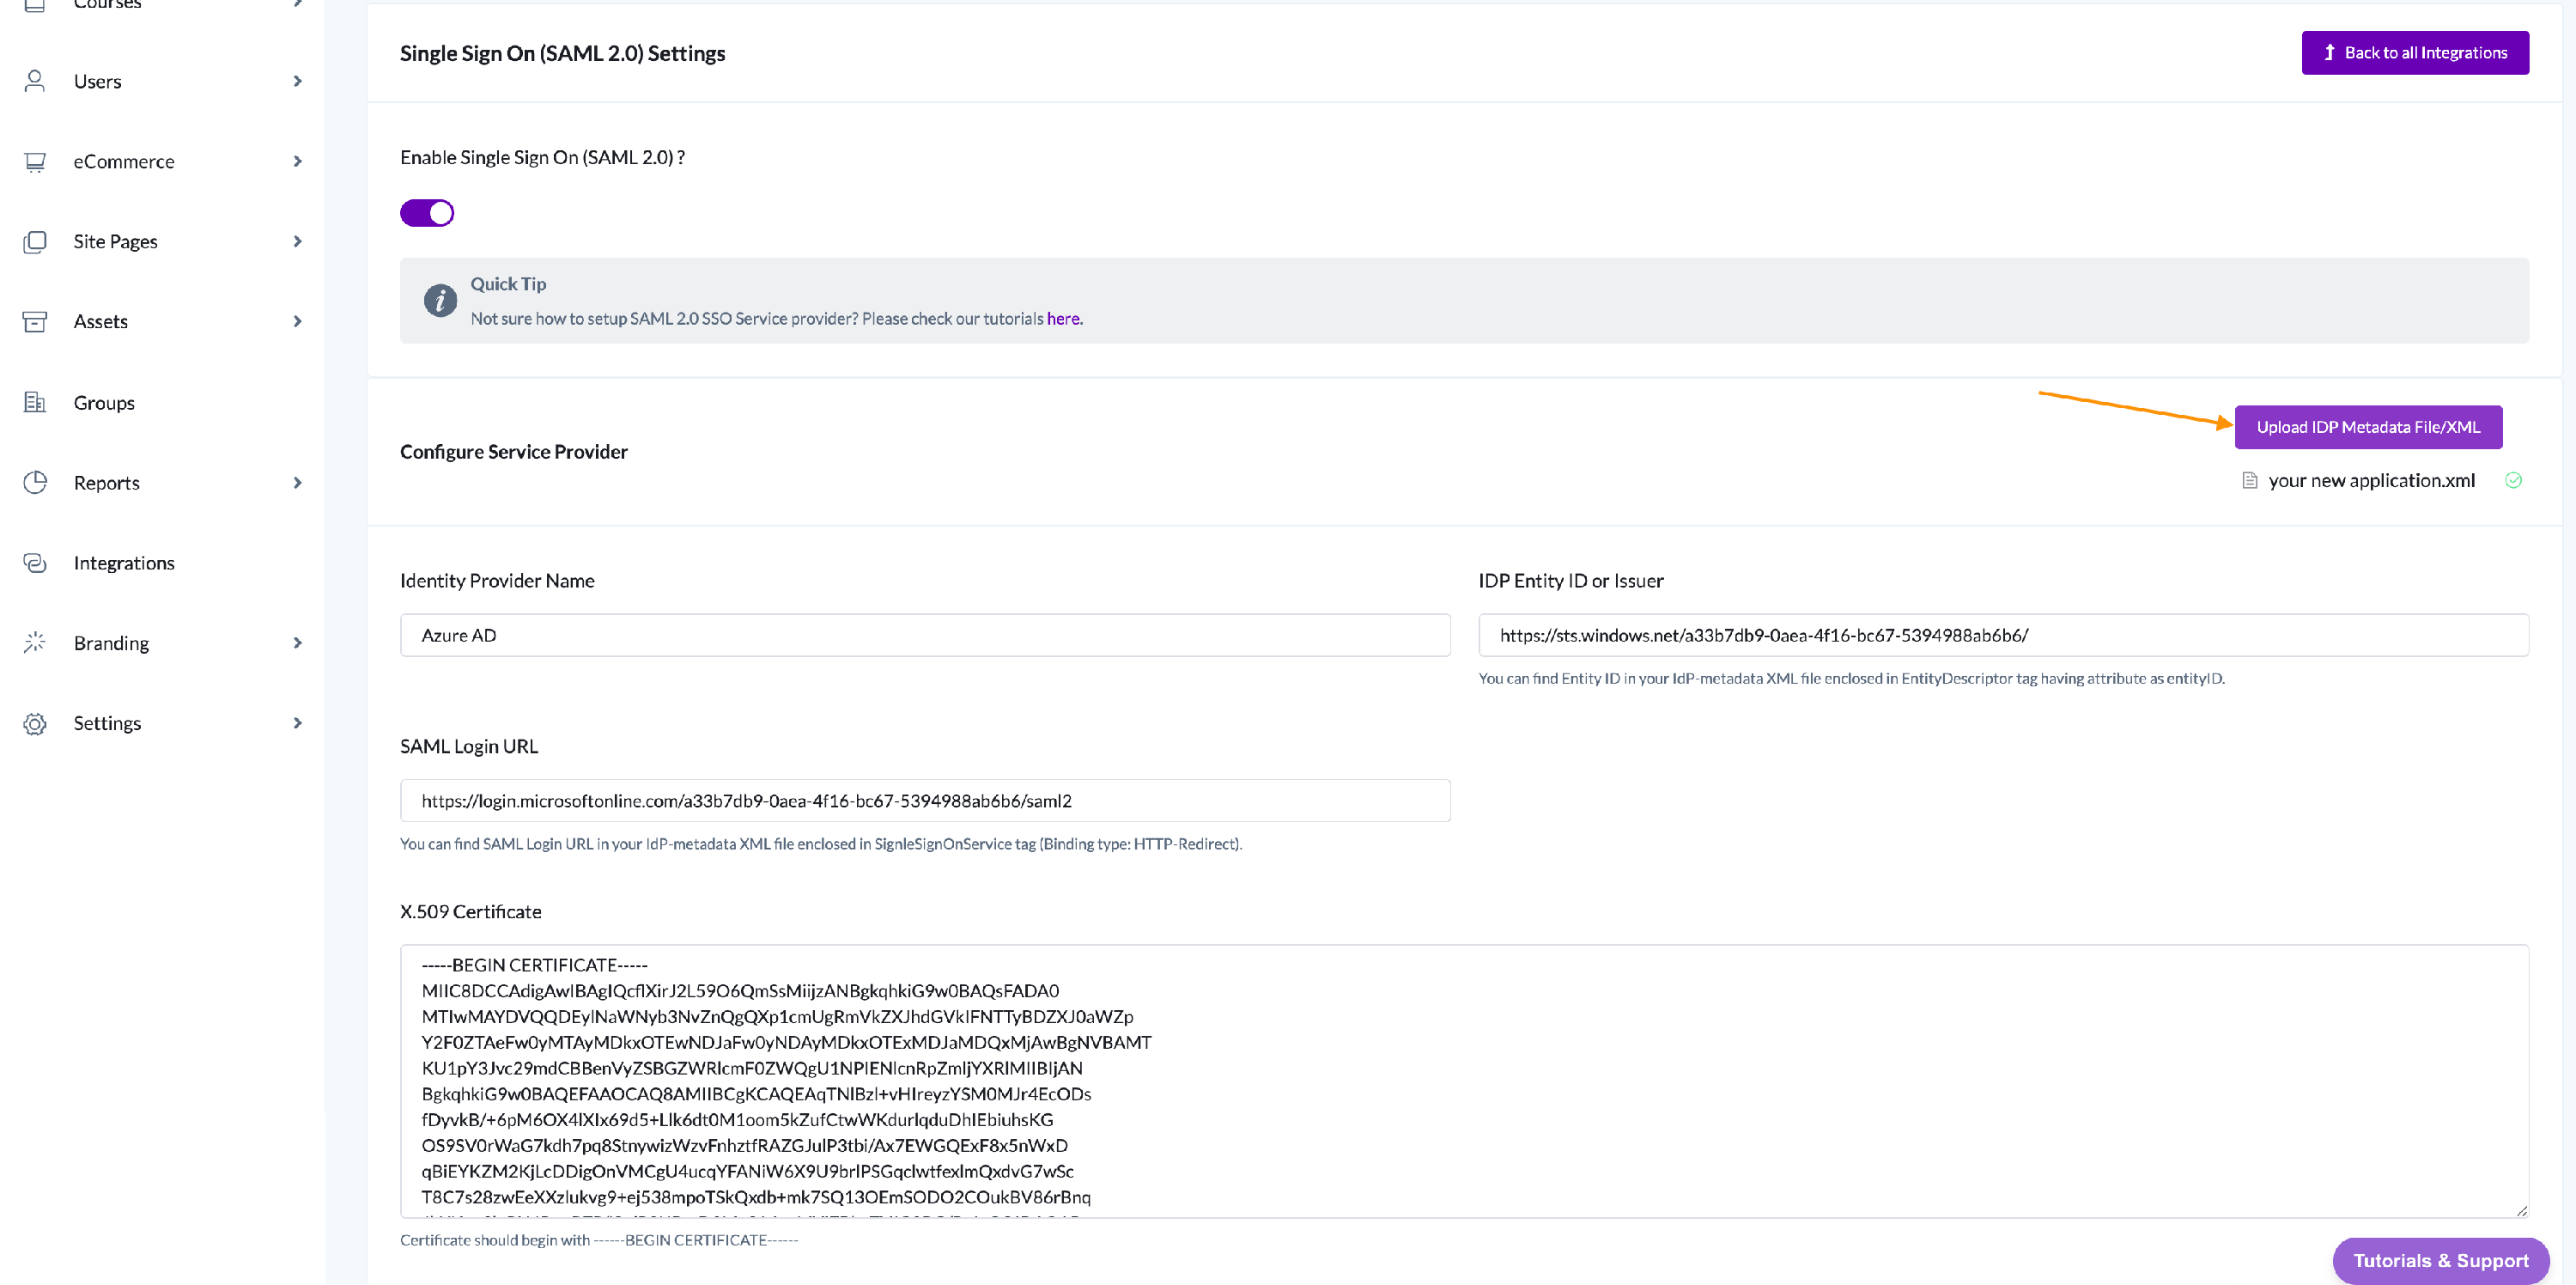
- Name the Provider inside Identity Provider Name and upload the Federation Metadata XML file which you downloaded.
After successful upload, all the values should automatically get filled in the form, like the snapshot below.
 3. Now you need to map the user attributes so that AOM can read the data from Azure response. There are few fields which you need to fill:
Email Attribute
First Name Attribute
Last Name Attribute 4. To configure Login with button text and color, you can change it using Login Button Text and Login Button Color 5. Finally click on Save changes, and you are done.
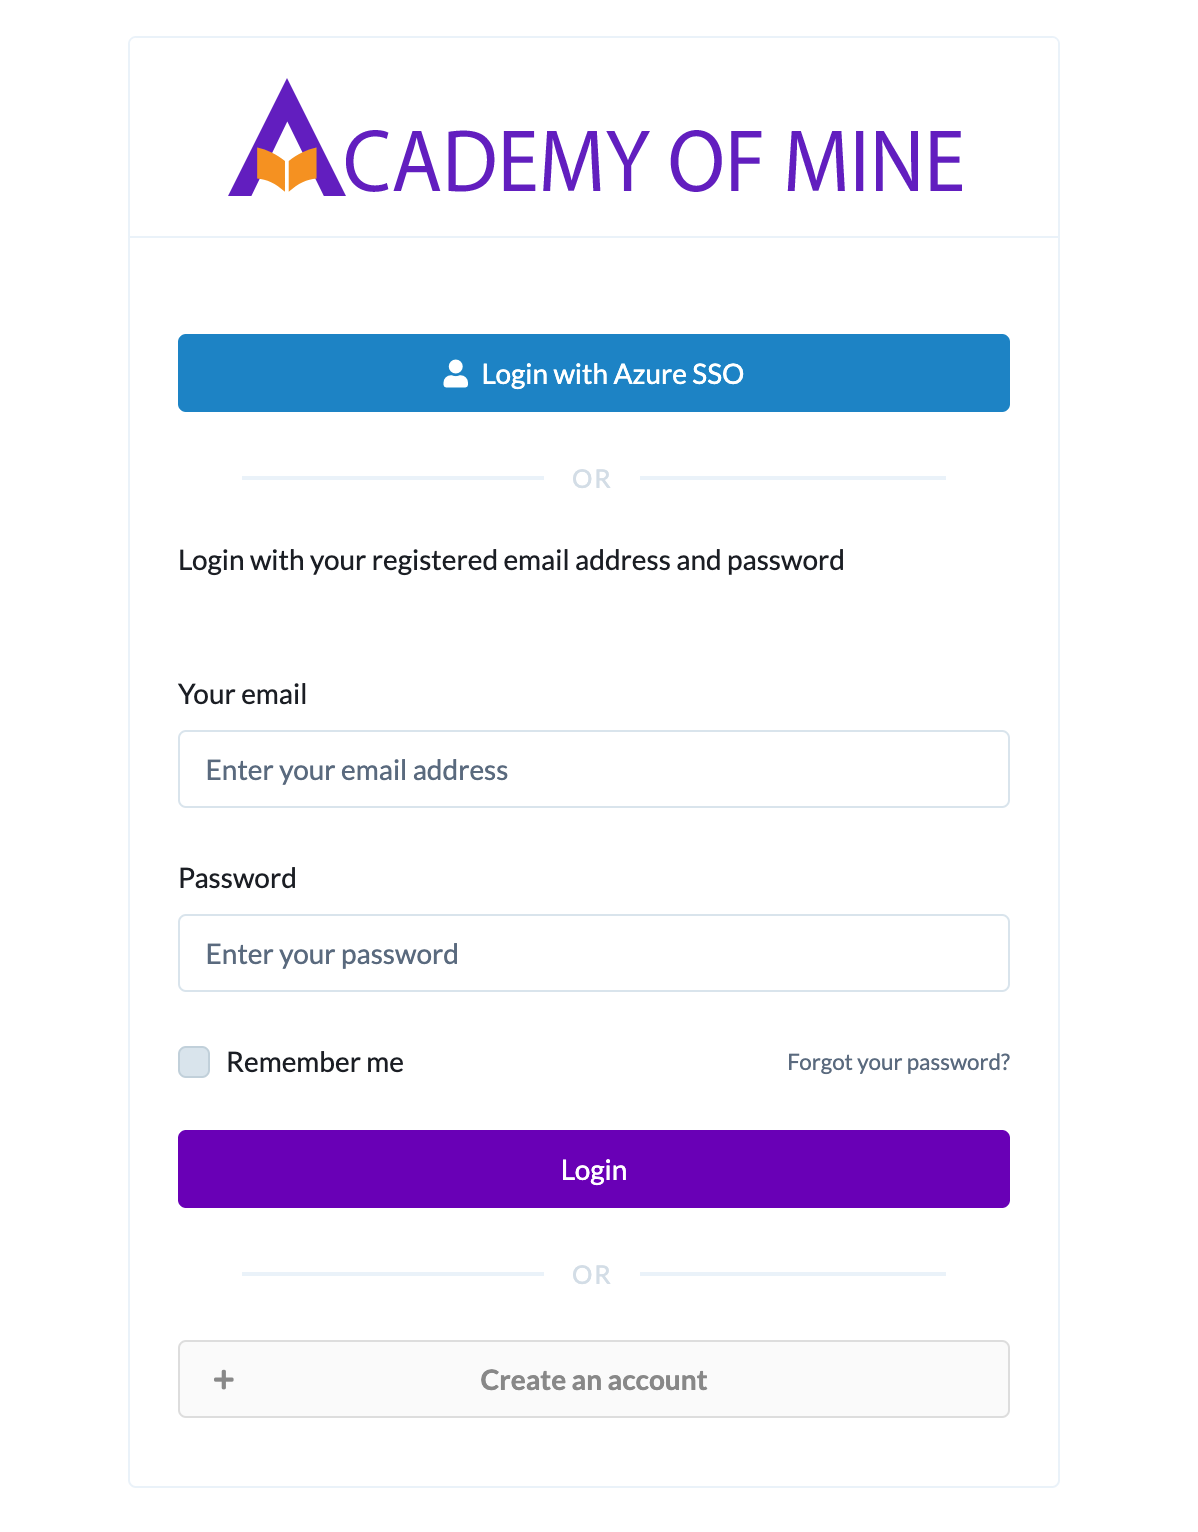
Now if you go to your AOM platform login page, you should see one extra Login with Button for SAML 2.0 SSO login: