Integrating HubSpot with your LMS
Academy of Mine provides clients with a HubSpot Integration that allows you to track learner activity and progress in the LMS, and trigger changes in HubSpot data accordingly. For example, this can be used to update HubSpot Contacts details with changing user or course information, or even to track and sync progress data for specific course enrollments of a learner (Deal properties in HubSpot can be leveraged to track a particular learner x course enrollment combination and update it with detailed progress information).
This integration will recognize LMS events such as New Account Created, Account Details Updated, Course Completed, and more, and pass data along to HubSpot, allowing you to keep your Contacts and Deals synced. Note: the data changes and storage is specifically in relation to Contacts and Deals in HubSpot.
In this guide, we will go through how to activate and configure your HubSpot integration.
Step 1: Open HubSpot Integration Settings
- From the Admin Dashboard, select the Integrations tab
- Locate the HubSpot integration option and click Manage
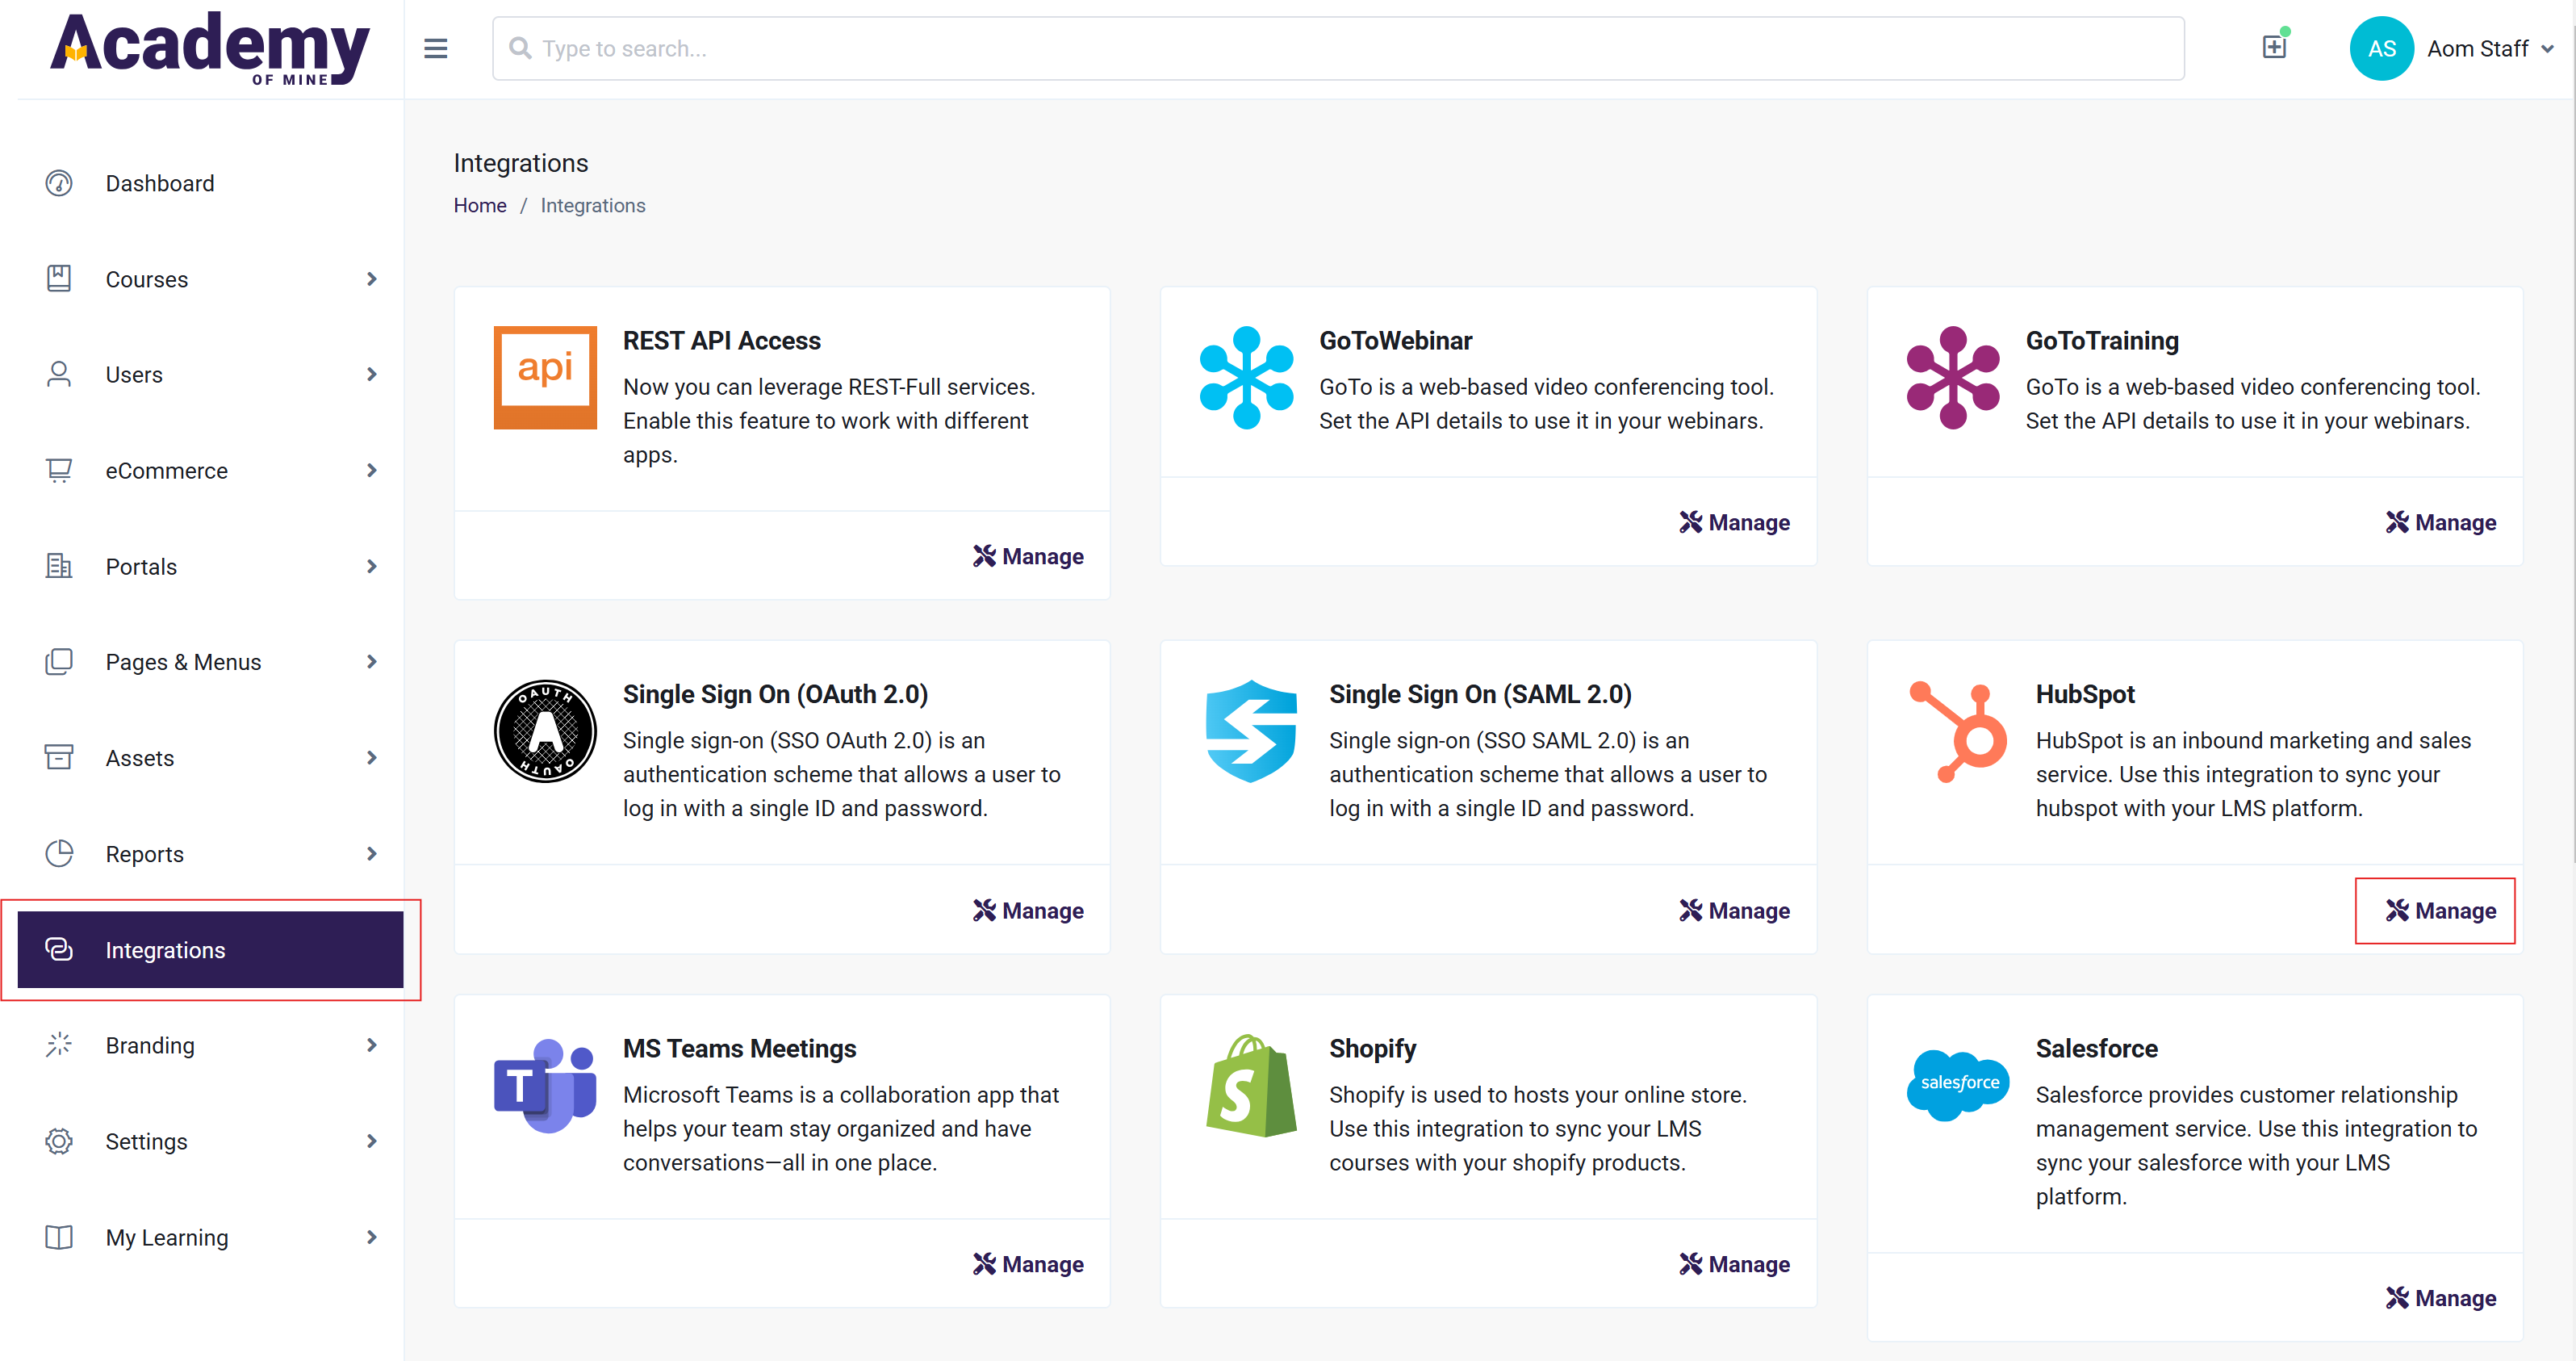
- Here, you can see the information that you'll need to configure and add from HubSpot in the following steps
Step 2: Configure HubSpot Keys & Add to AOM
- Open a new tab and navigate to your HubSpot Portal.
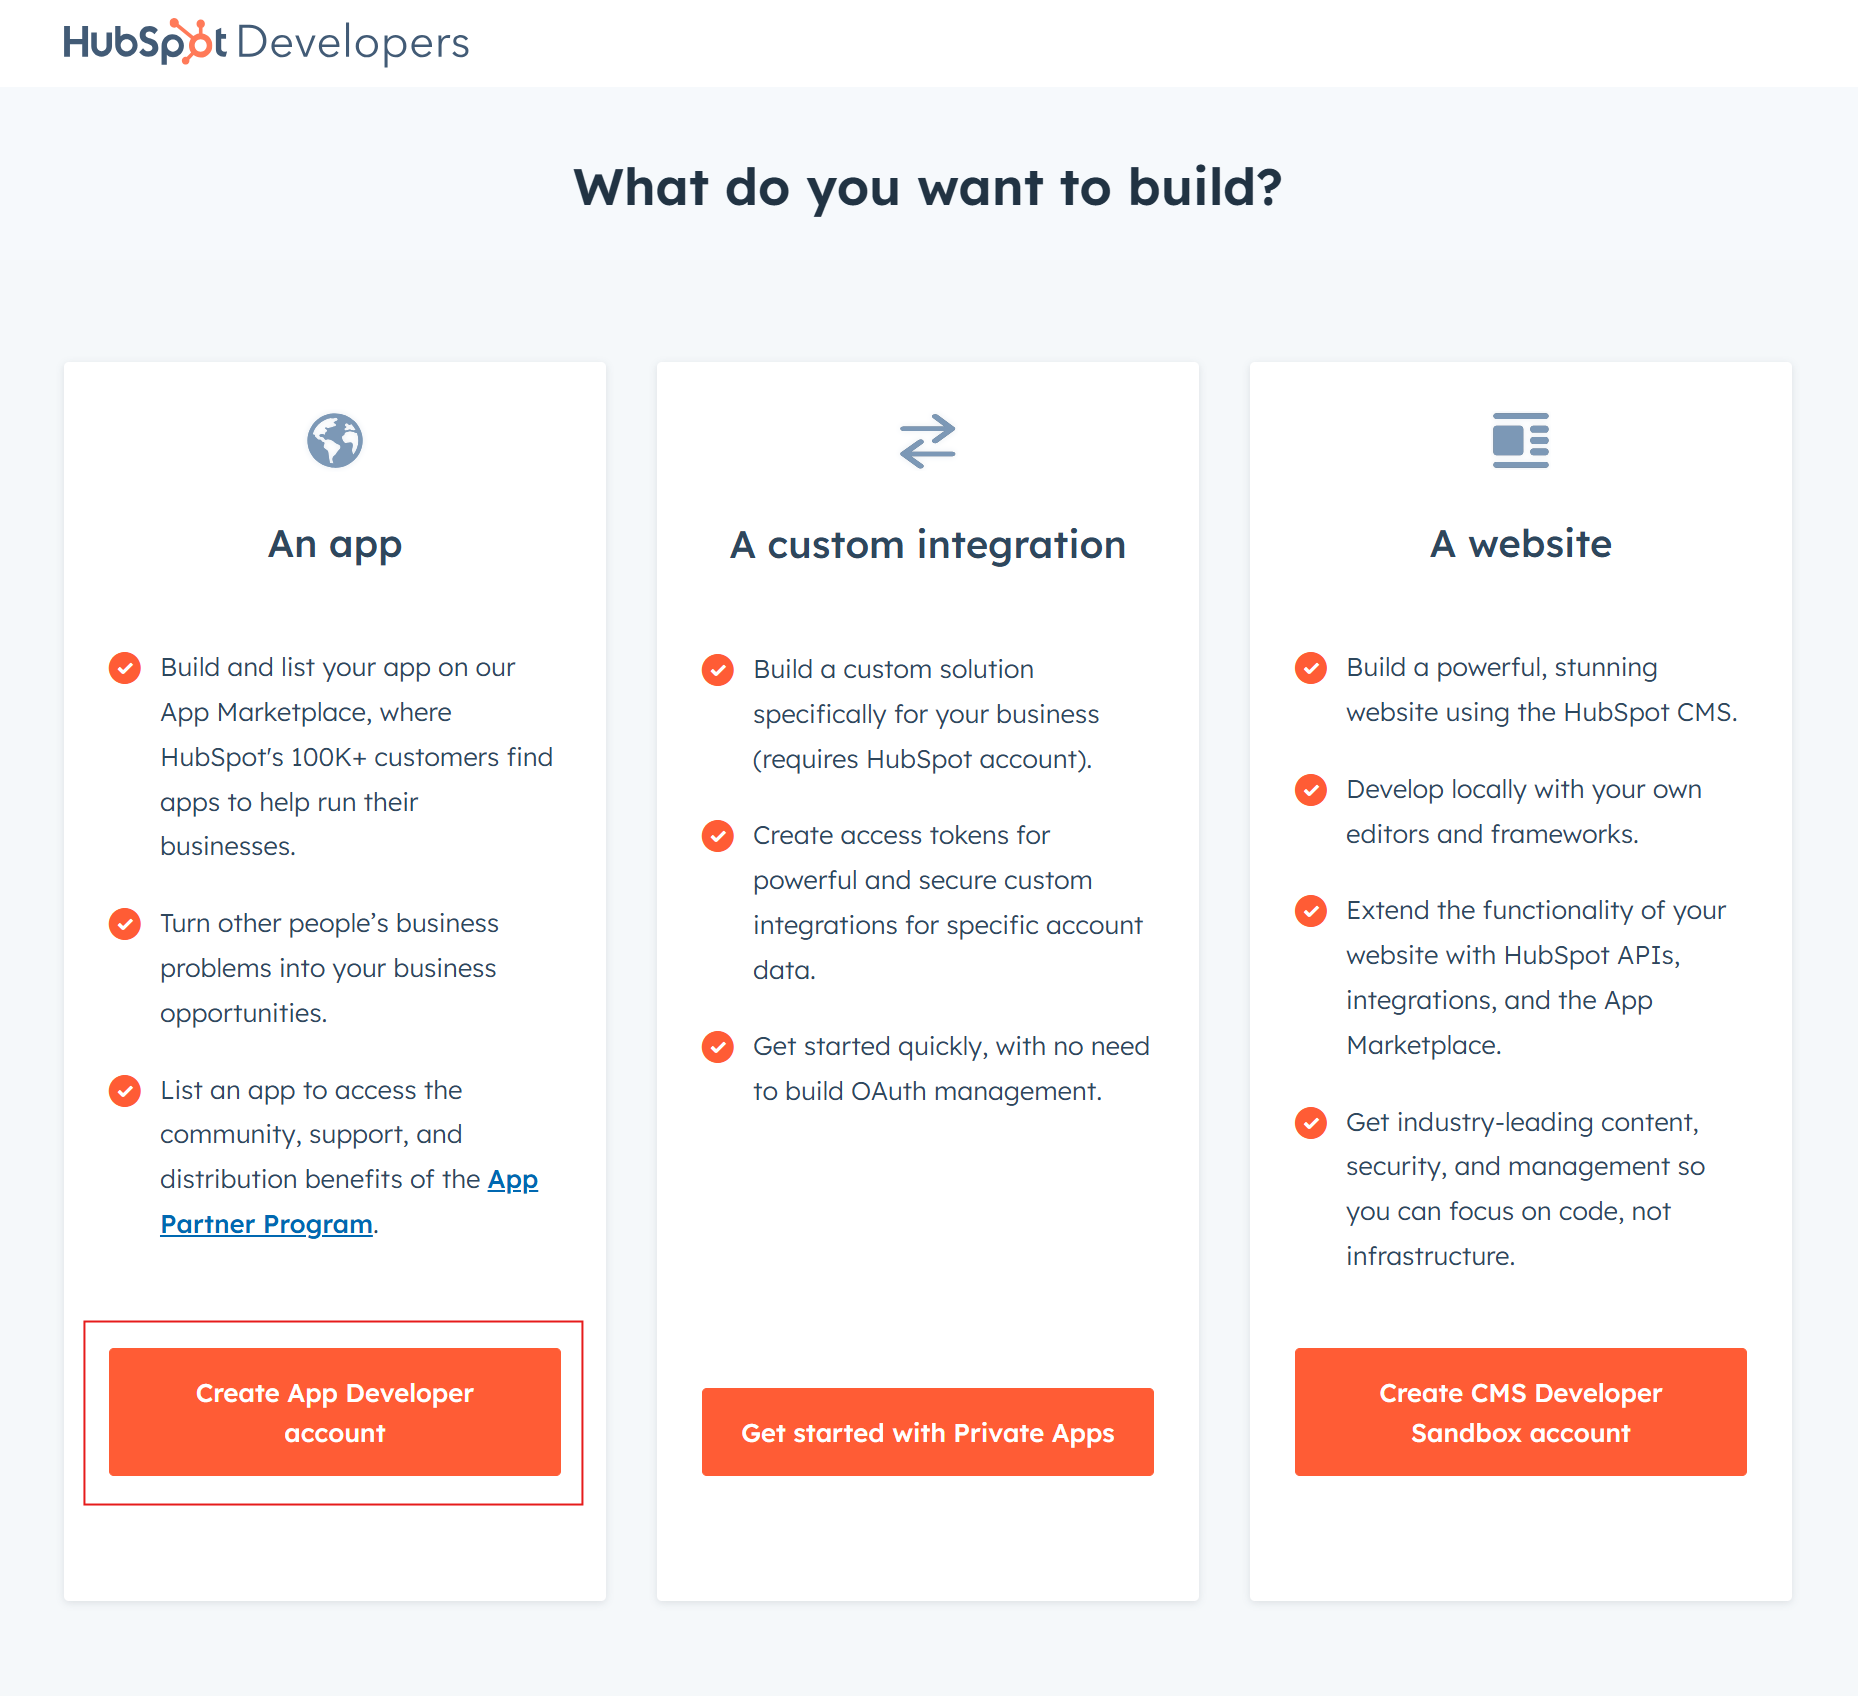
- Once you have logged into your HubSpot Portal, open a new tab once again and navigate to HubSpot Developers. This is where you are going to configure the keys needed by the AOM LMS.
- You will need to create an "app developer account" in HubSpot Developers if you haven't already. To create a developer account, click the Create app developer account button.
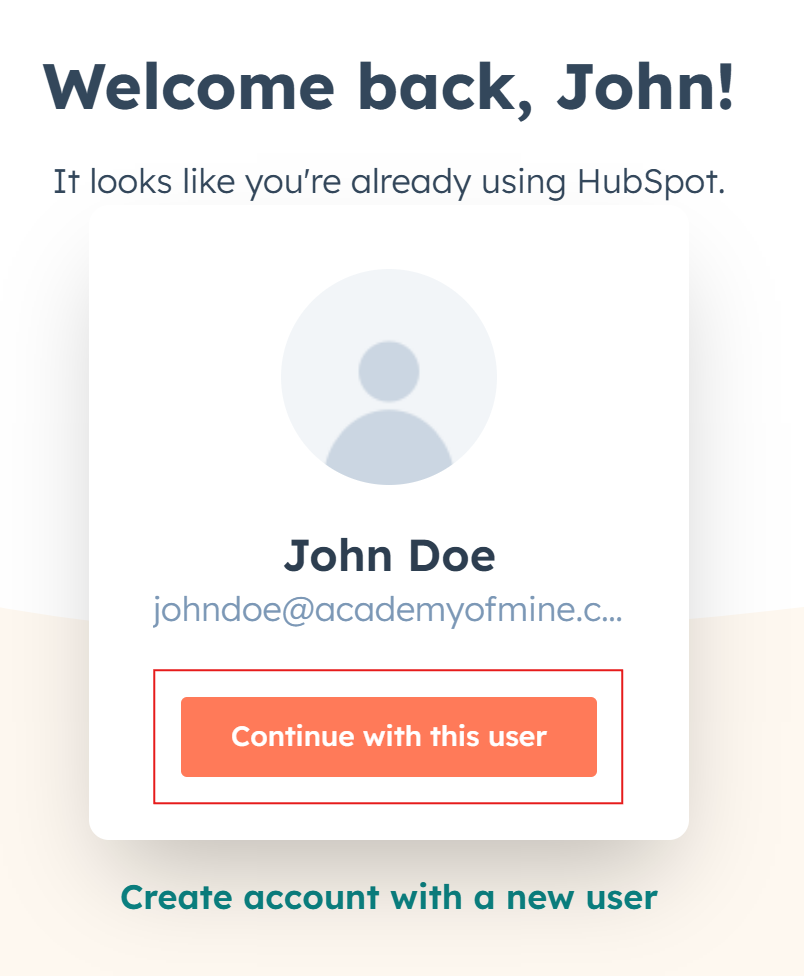
- Click the Continue with this user button.
- Then click the Start Sign-Up button.
- HubSpot will now ask you some questions about your account. Please answer those questions accordingly and click Finish signing up.
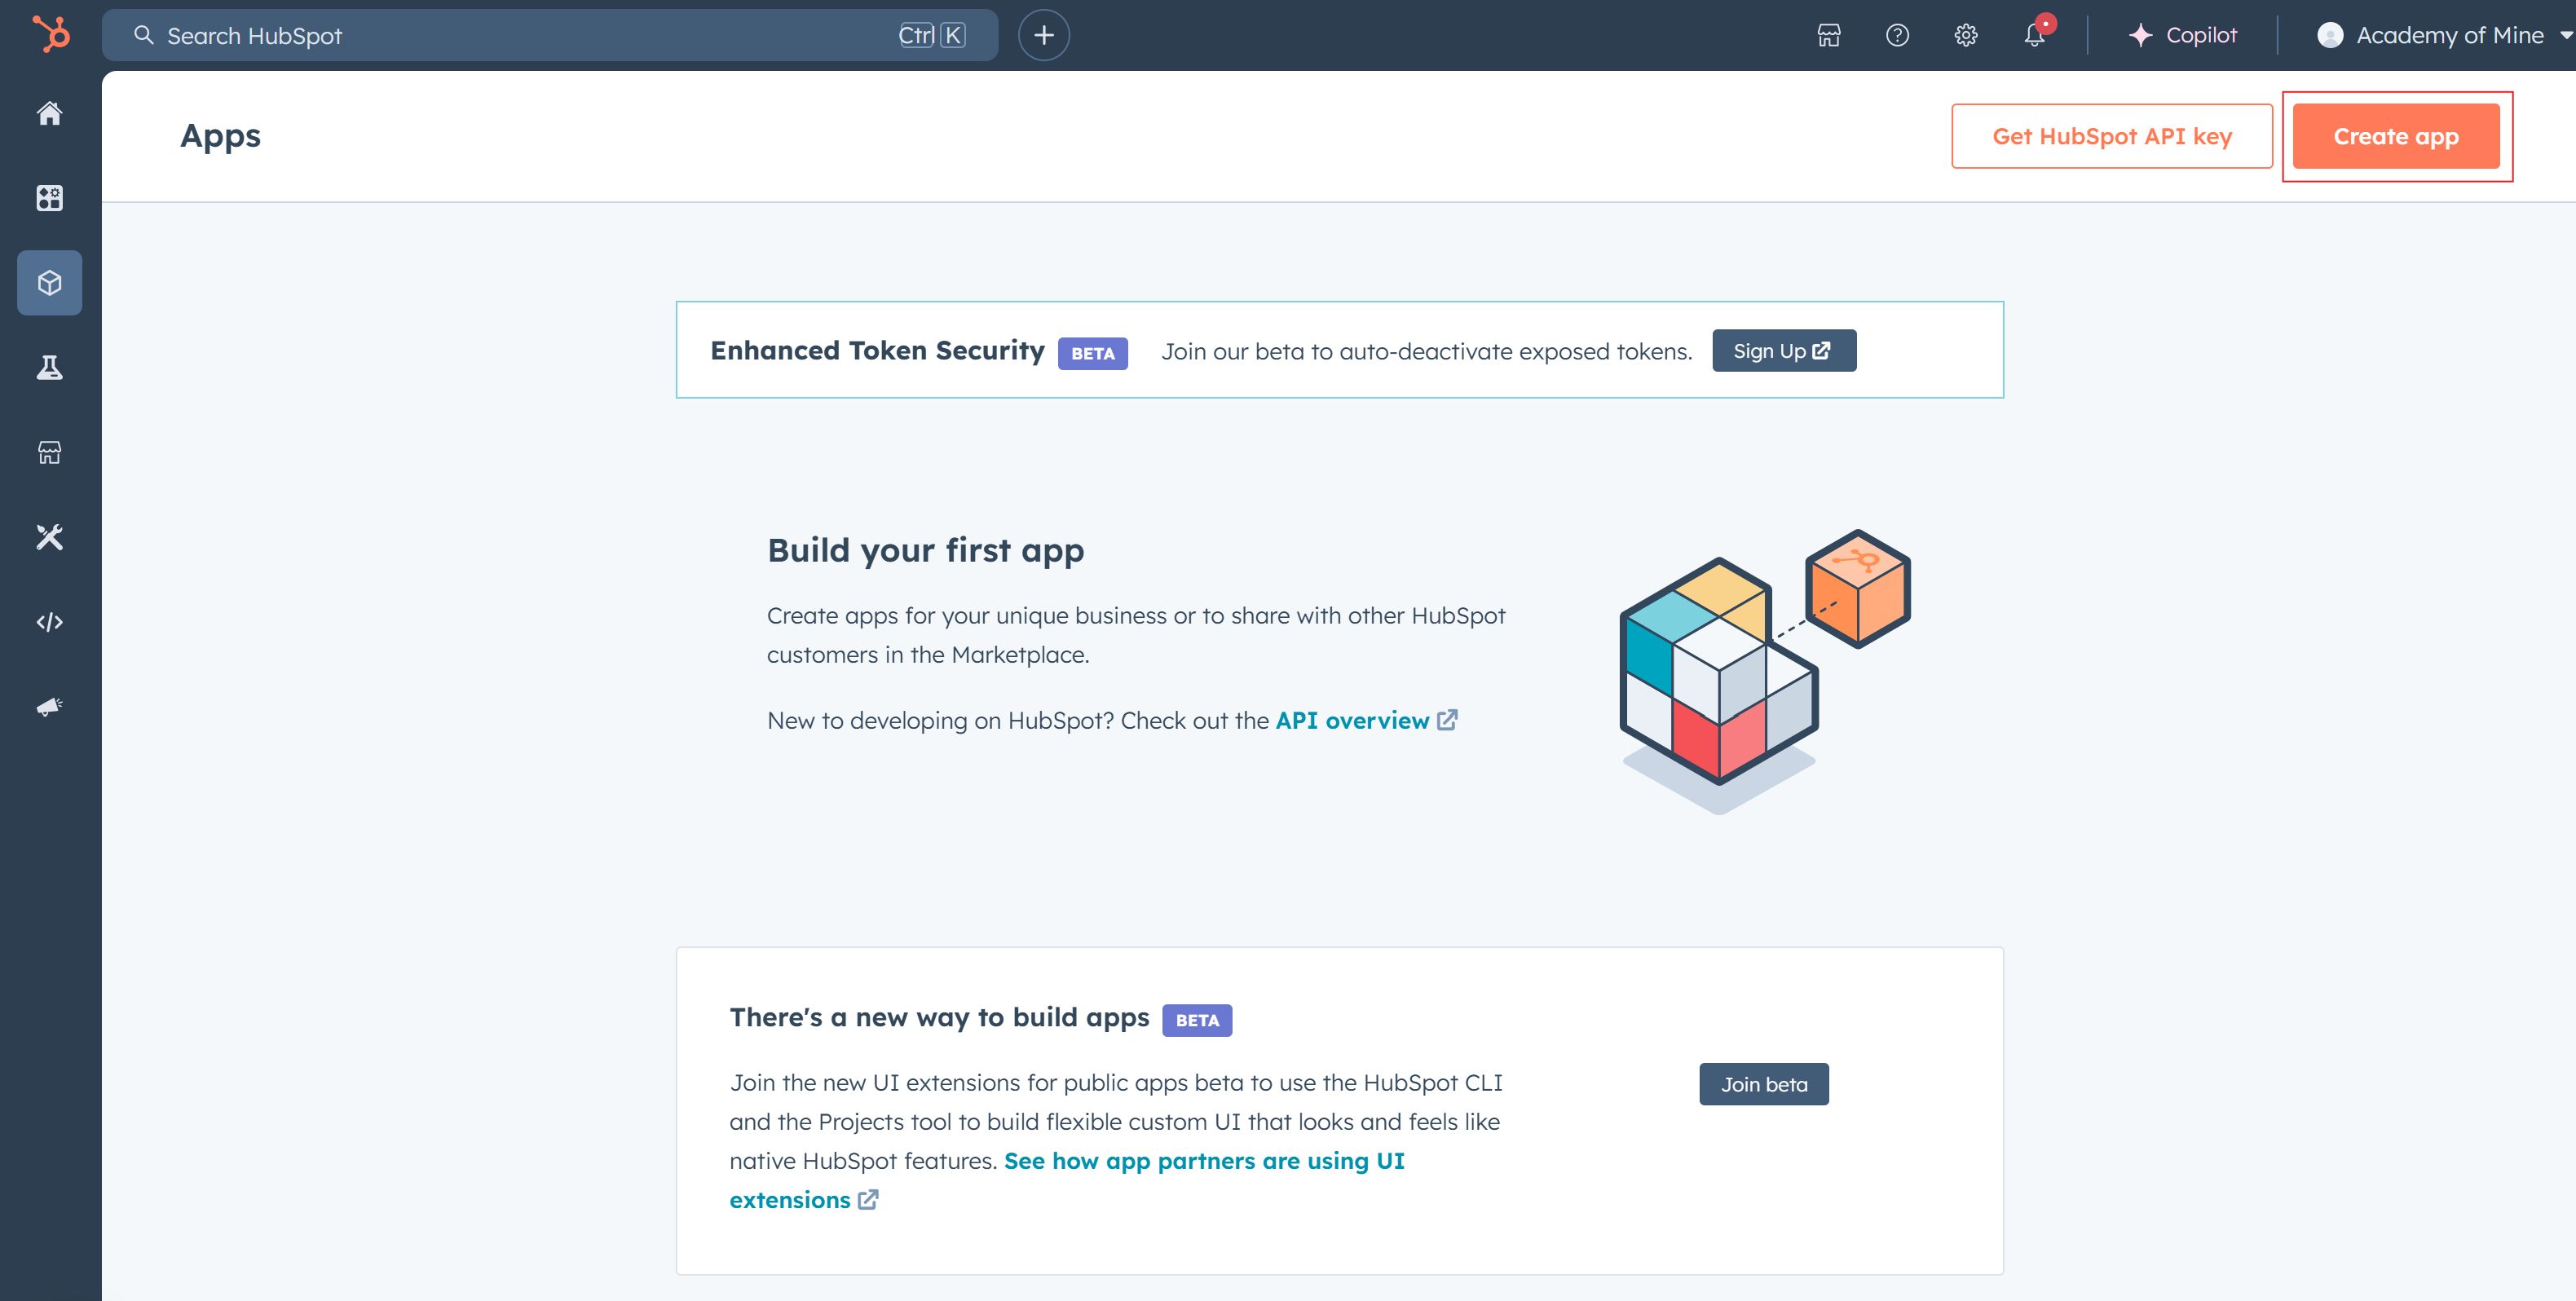
- After the signup is completed, you'll be redirected to the Home Page. Here, select Create app.
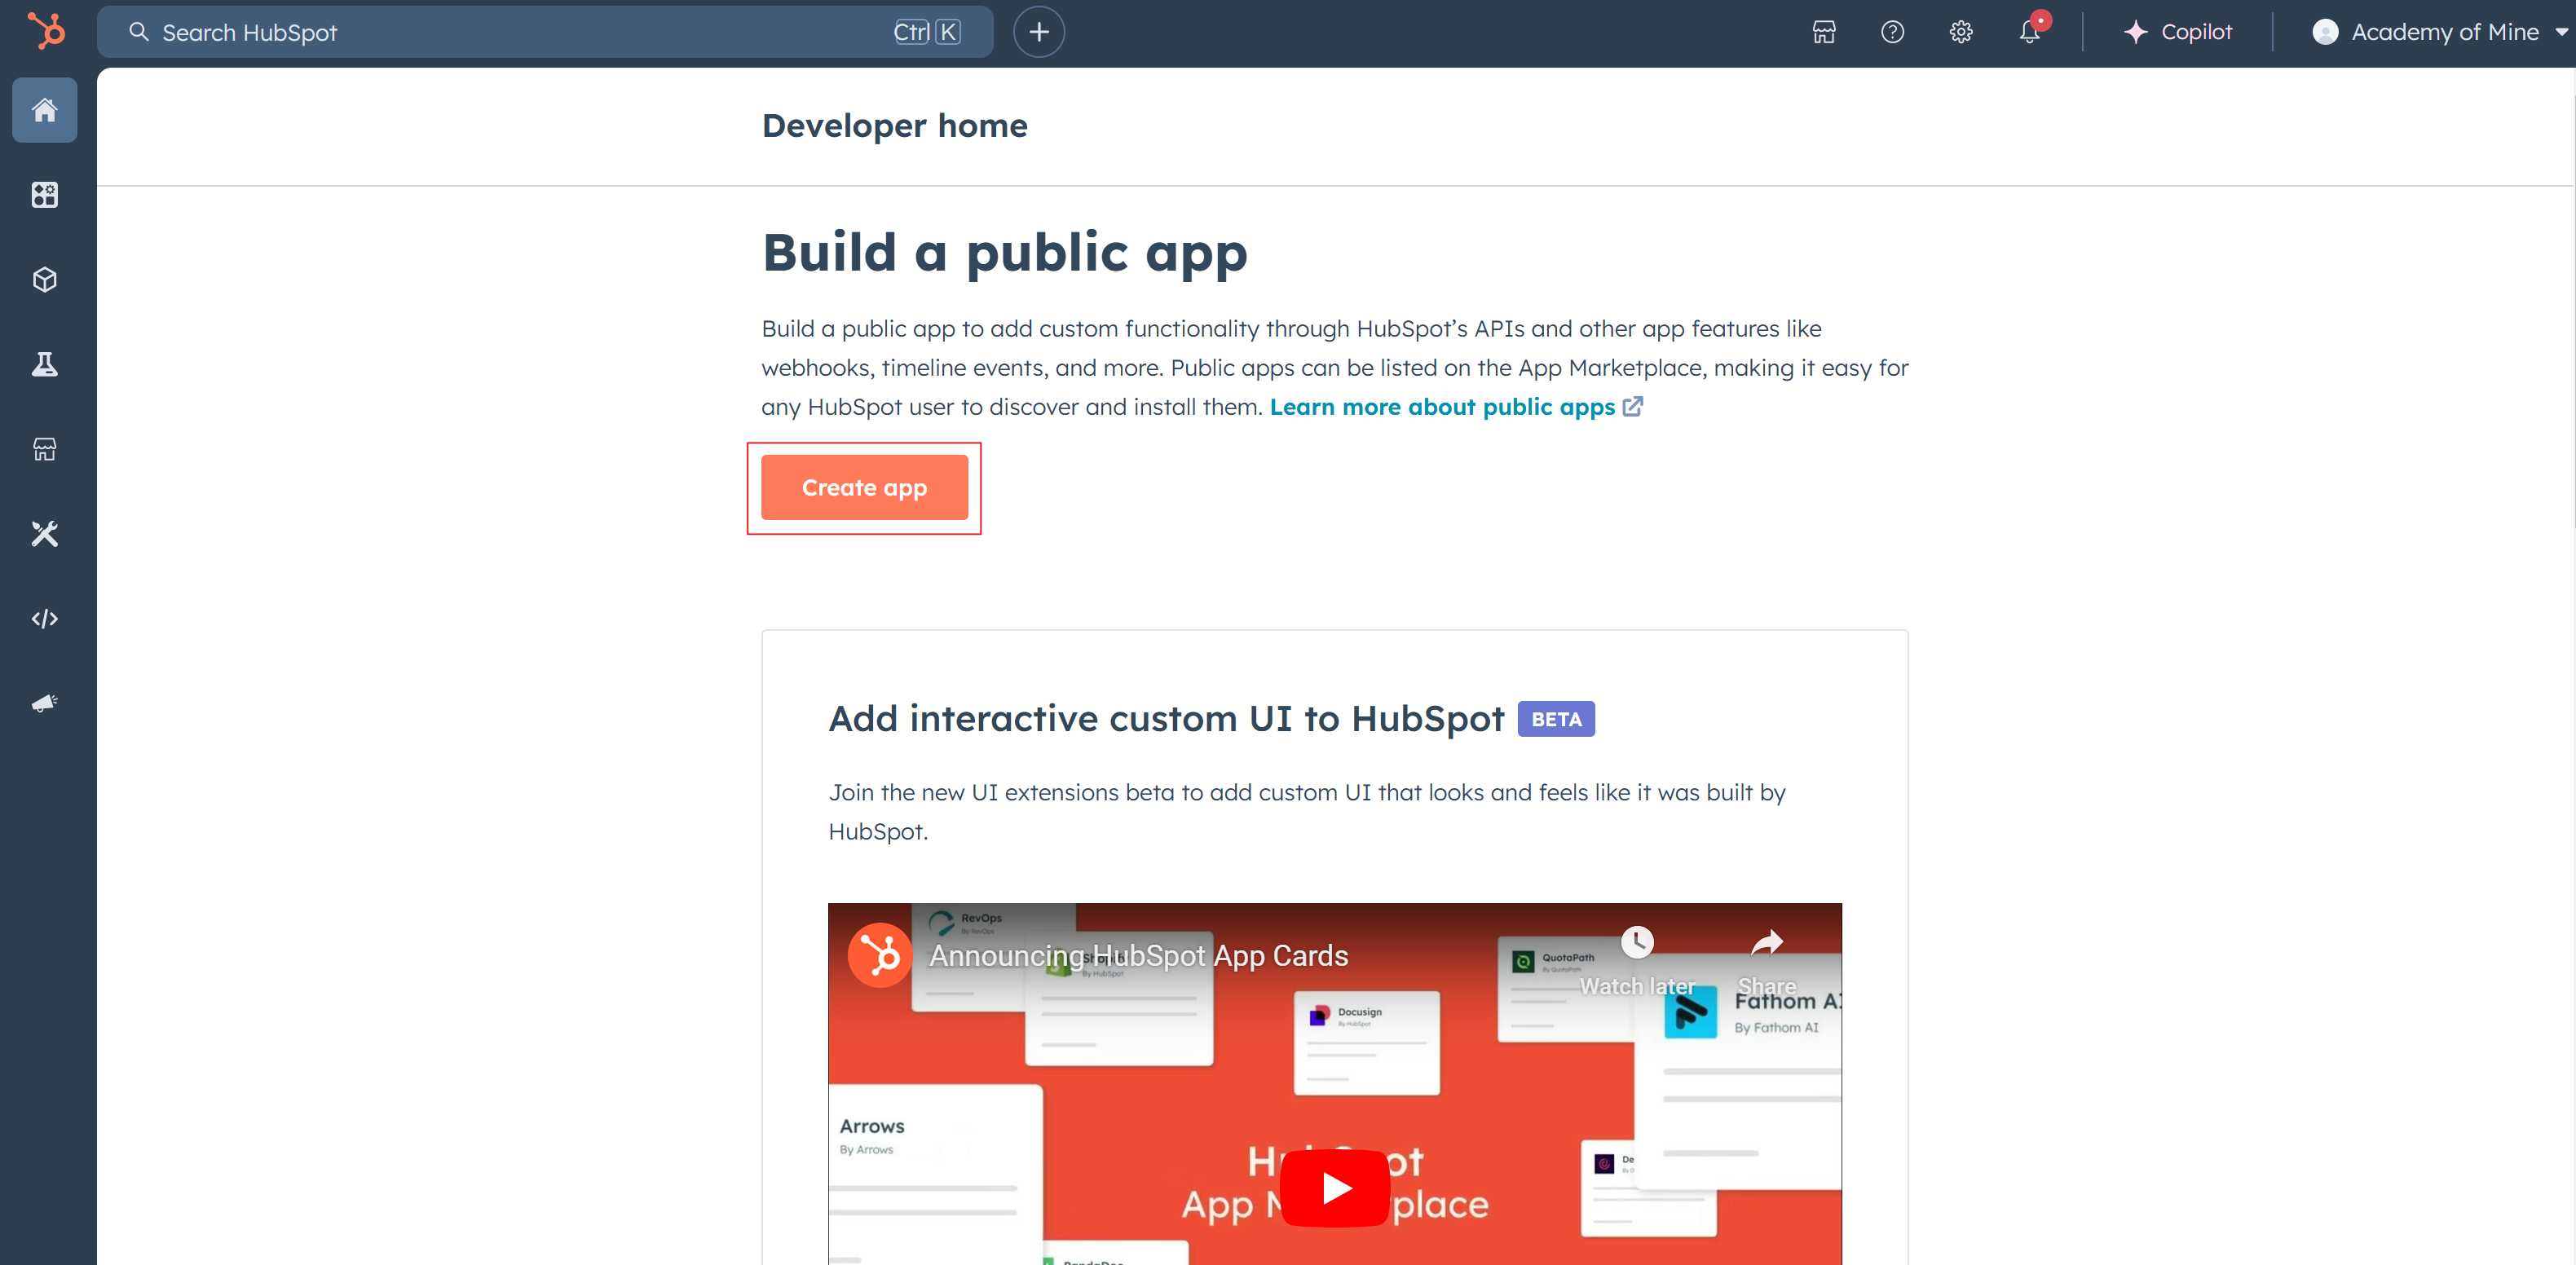
- Click Create app from the top right corner.
- The next step is to configure your app. Change the Public app name to any name you prefer.
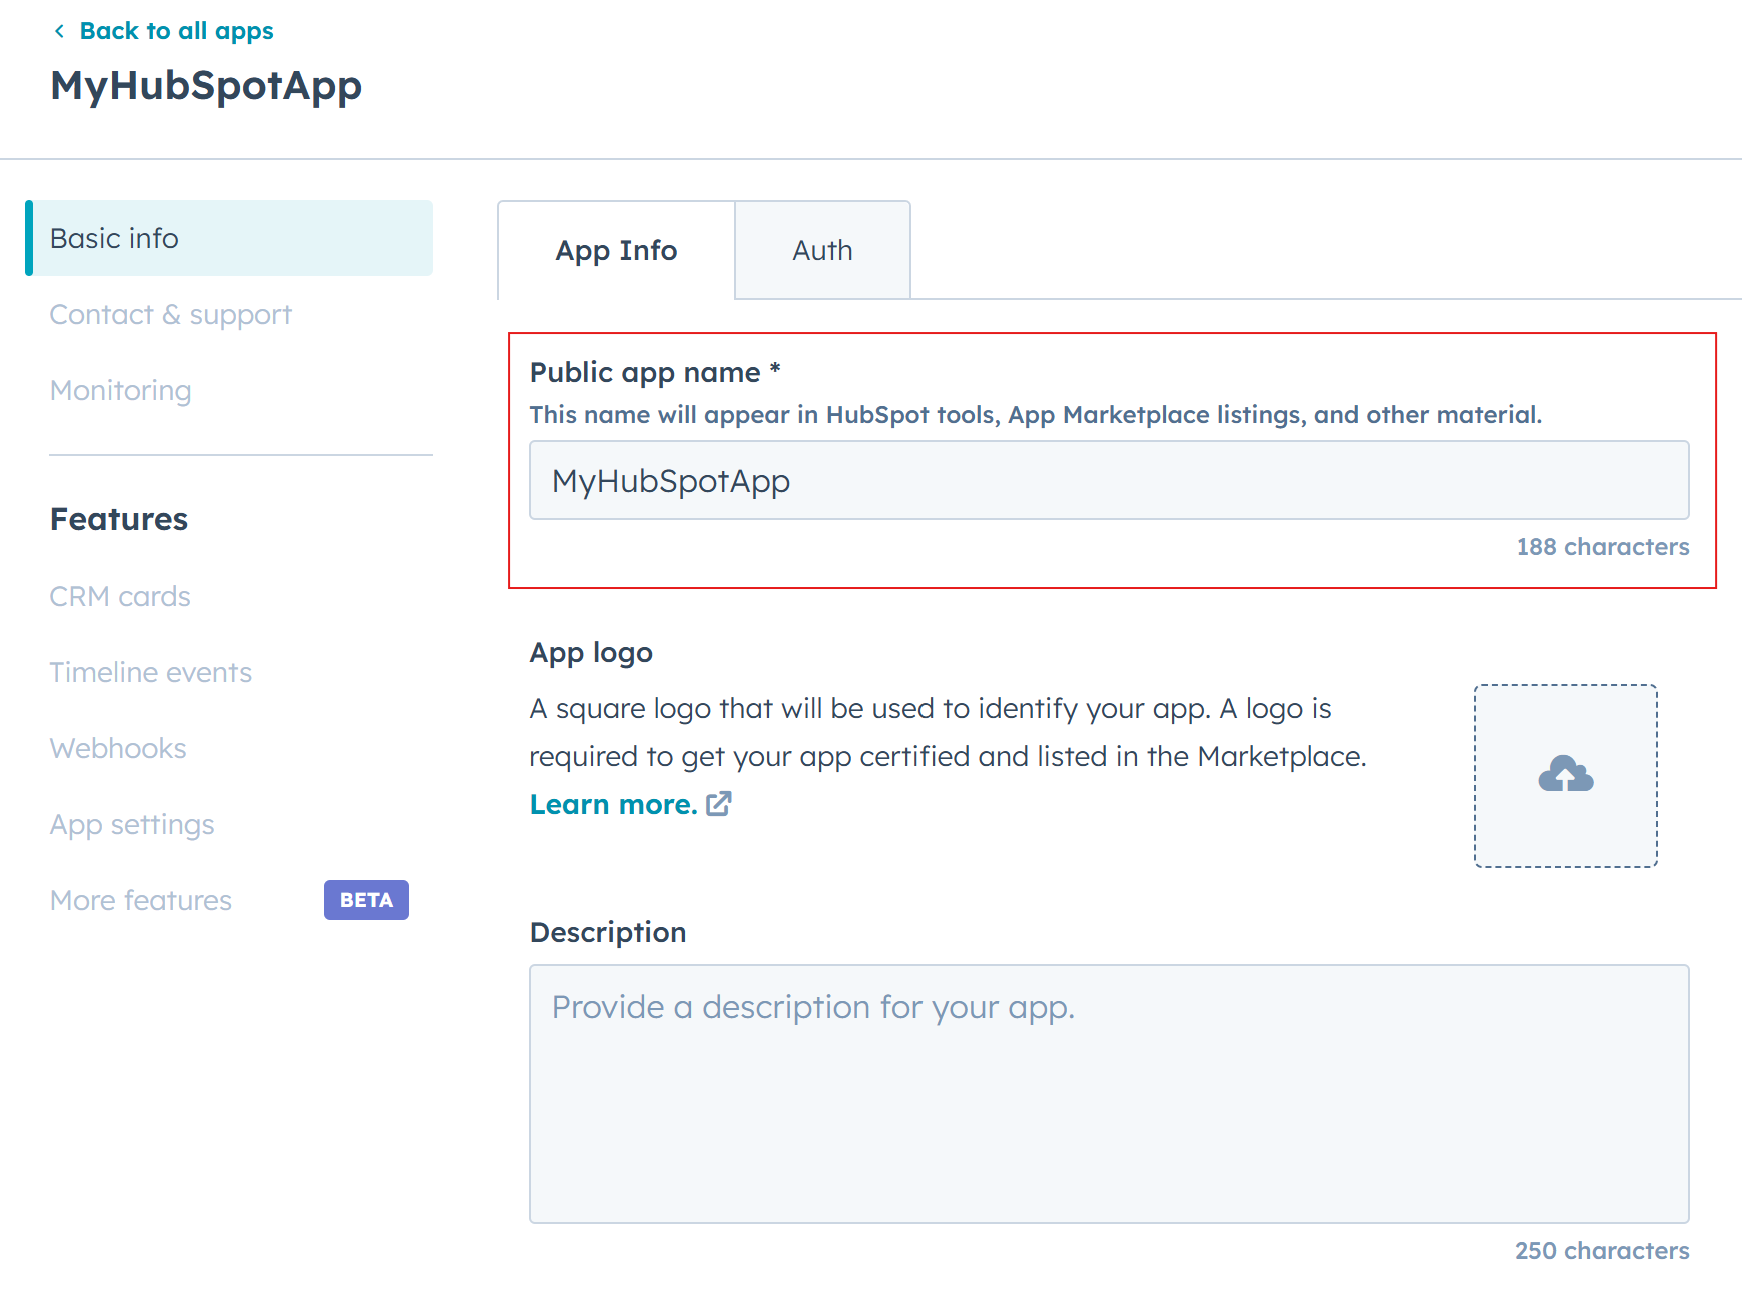
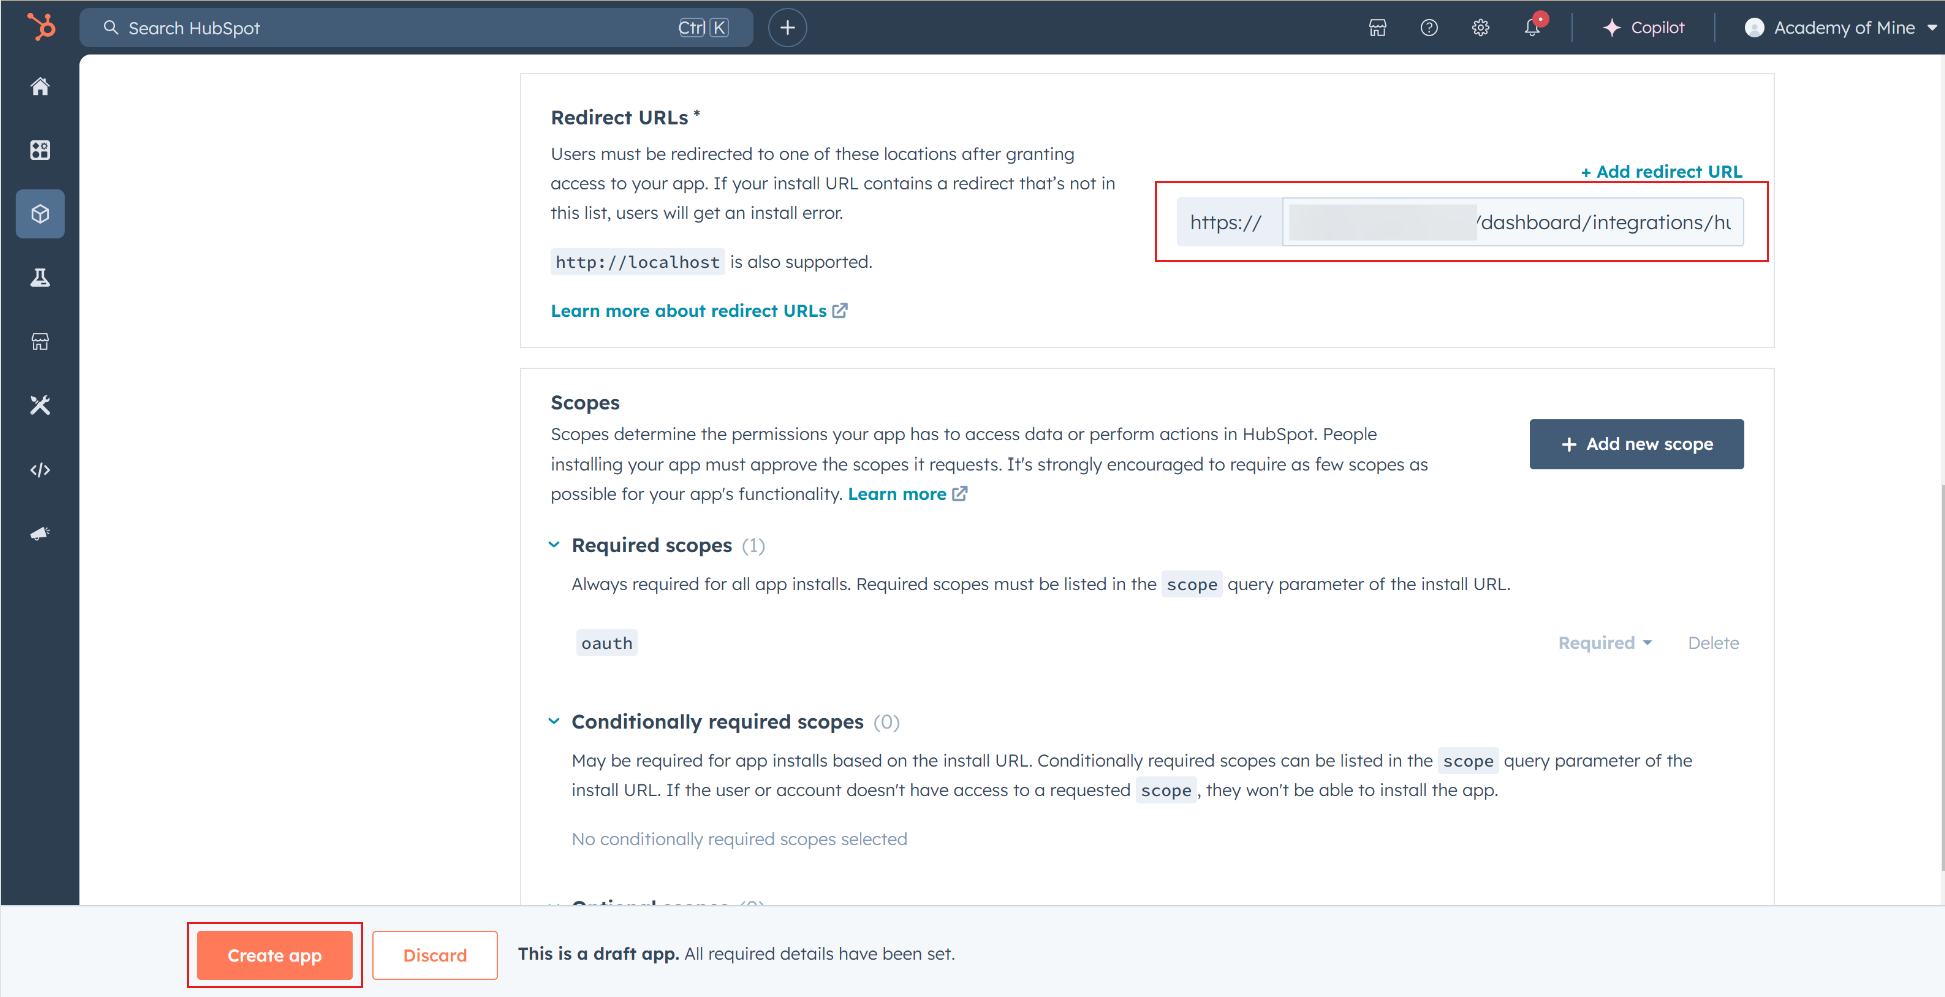
- Now you'll need to copy the Redirect URI from the same HubSpot Integration Settings page on the AOM LMS.
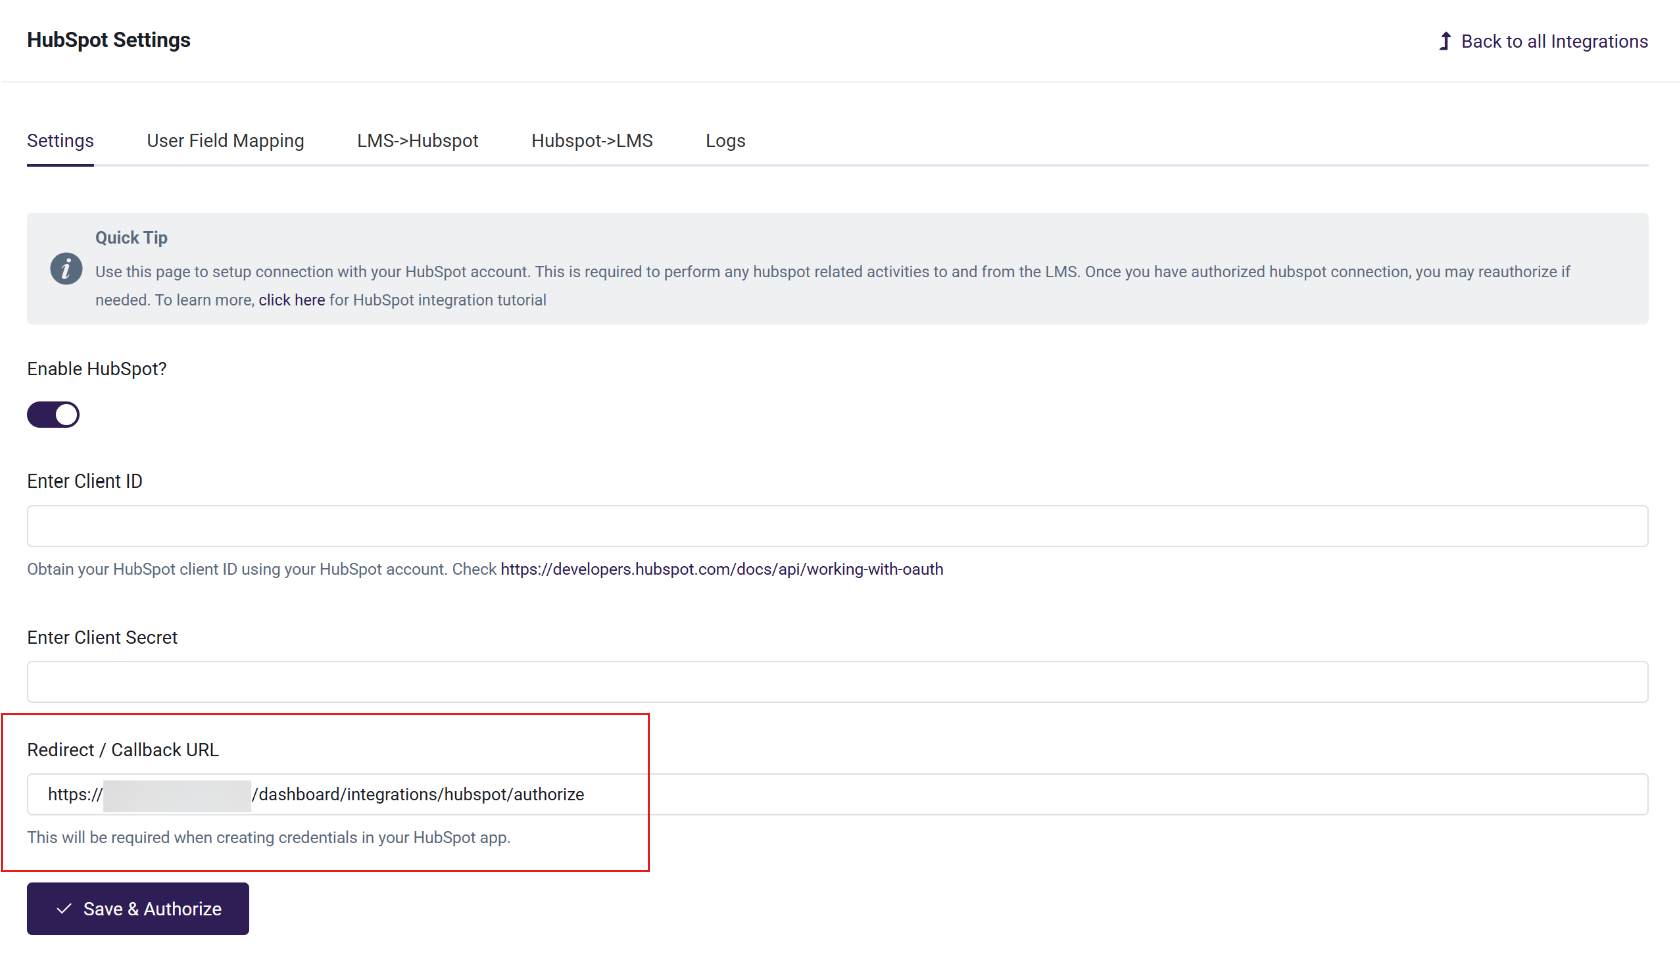
- Paste it inside the HubSpot App Configuration page. After doing so, click on the Create app button on the HubSpot App Configuration page.
- Go to the Auth tab and locate the Client ID and Client Secret. Copy both of them.
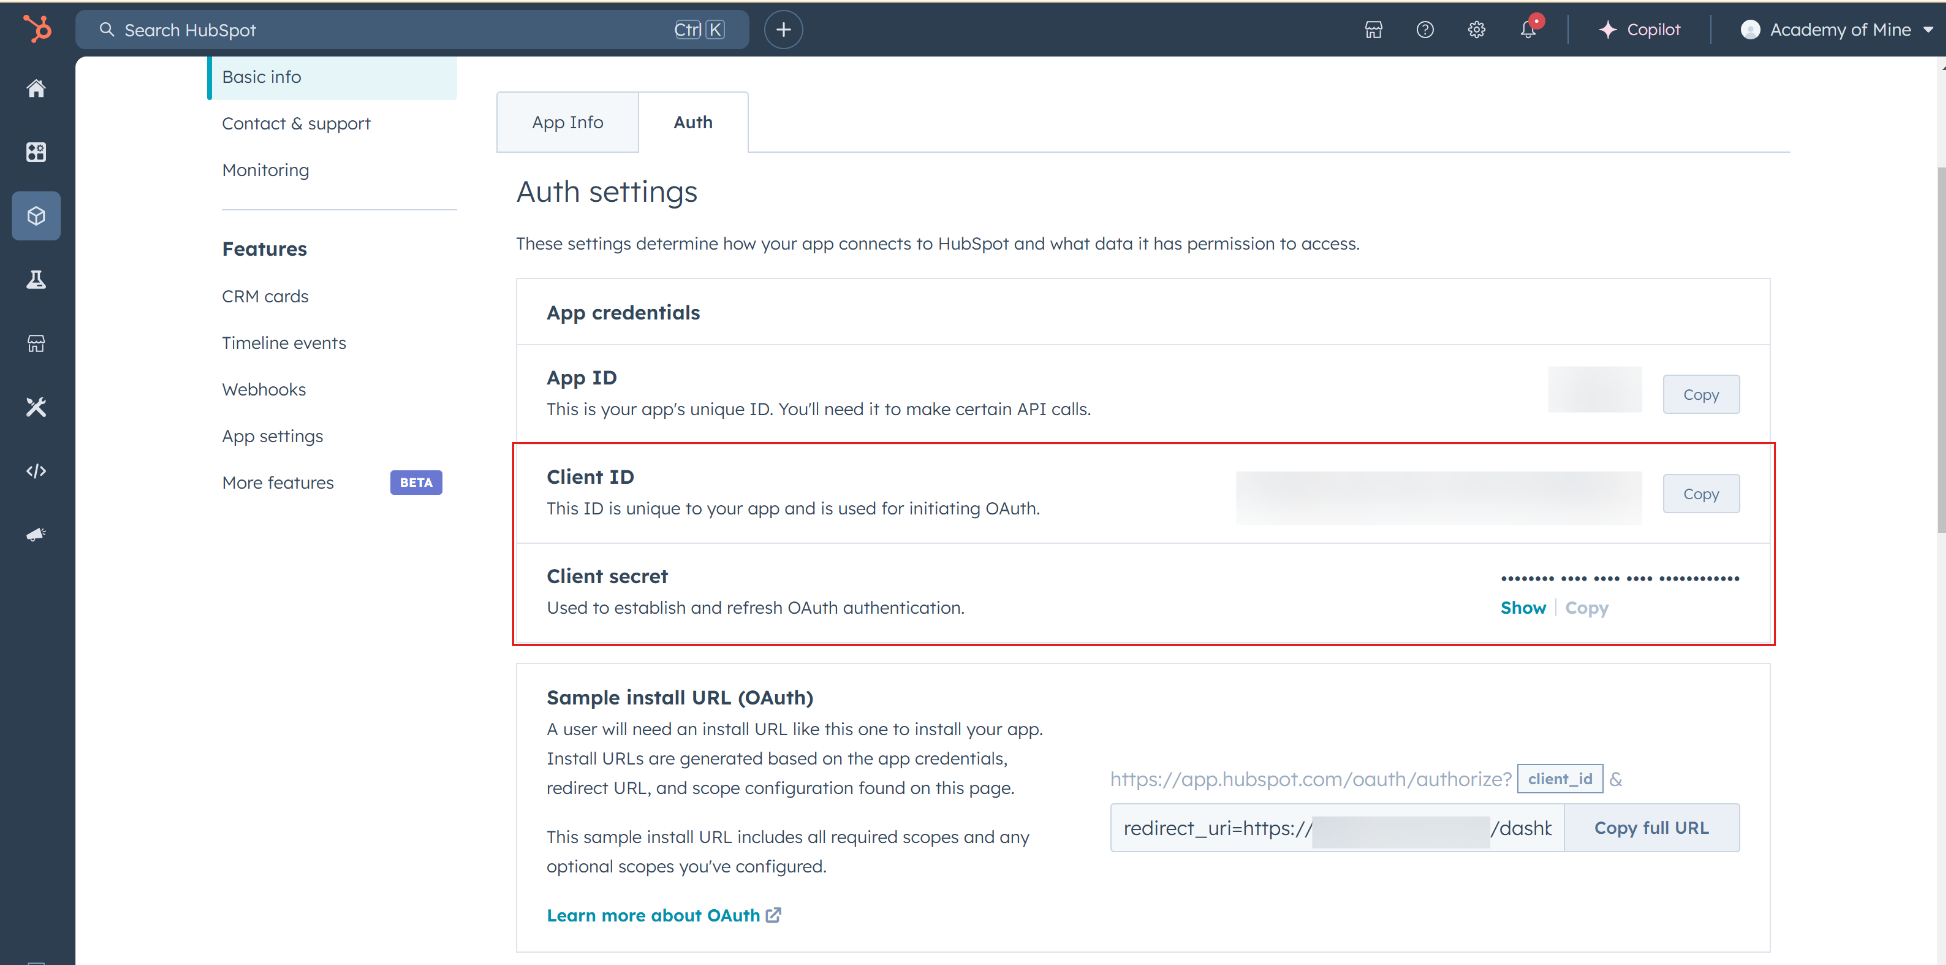
- Paste the Client ID and Client Secret into the appropriate fields on the AOM LMS HubSpot Settings page. Then, enable the HubSpot Integration by toggling the Enable HubSpot? switch.
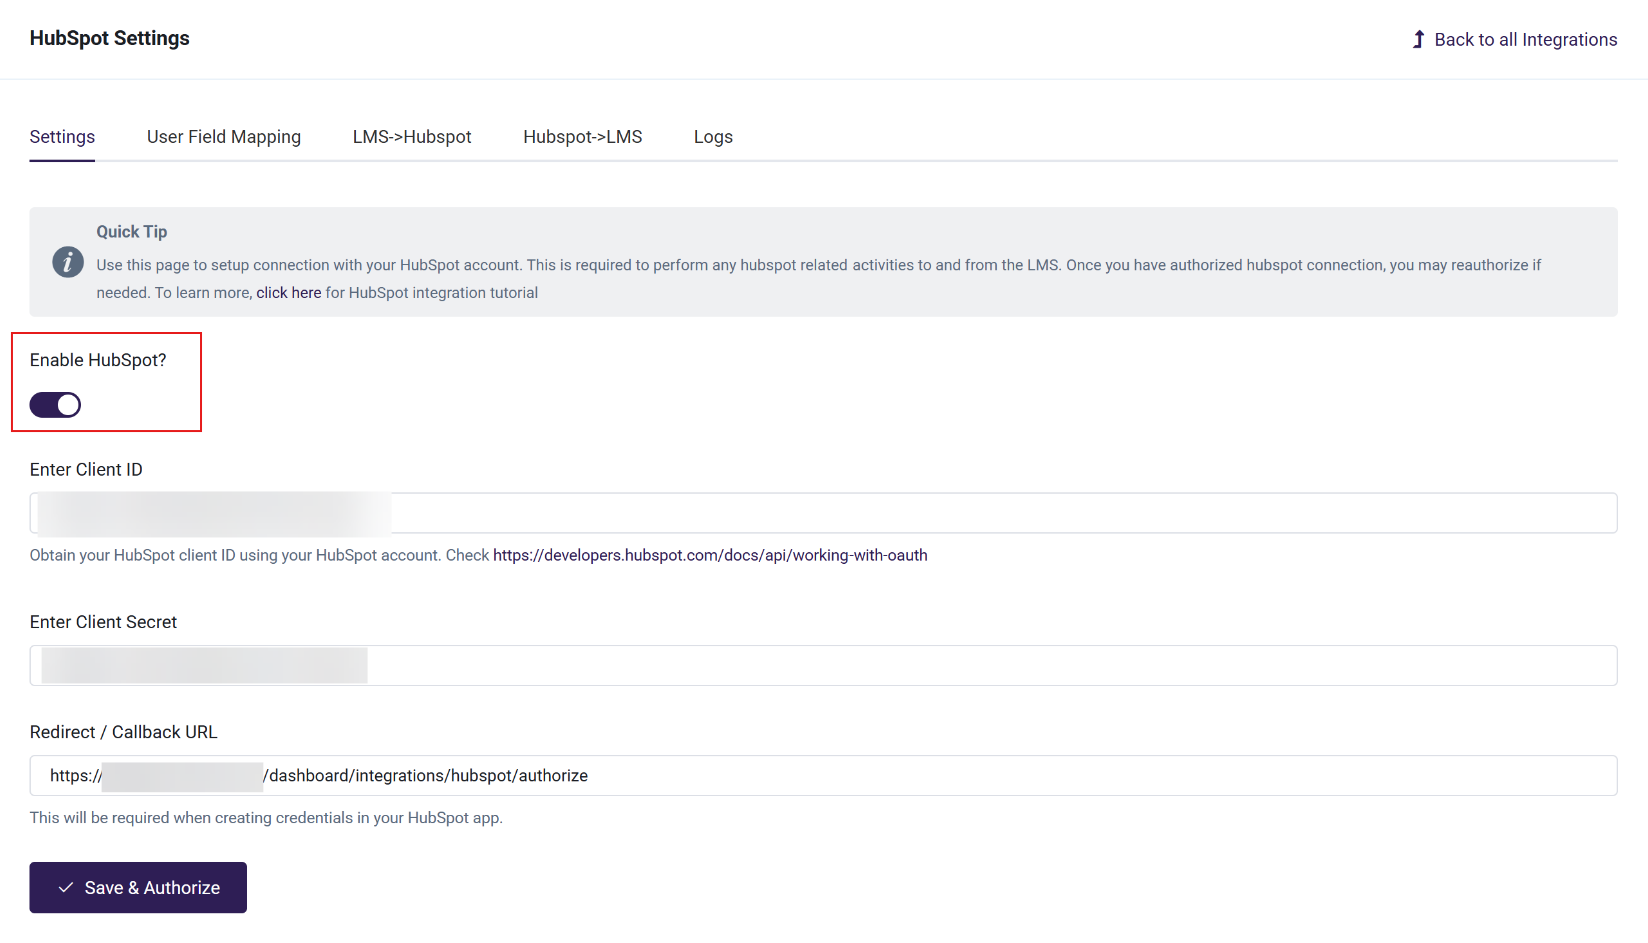
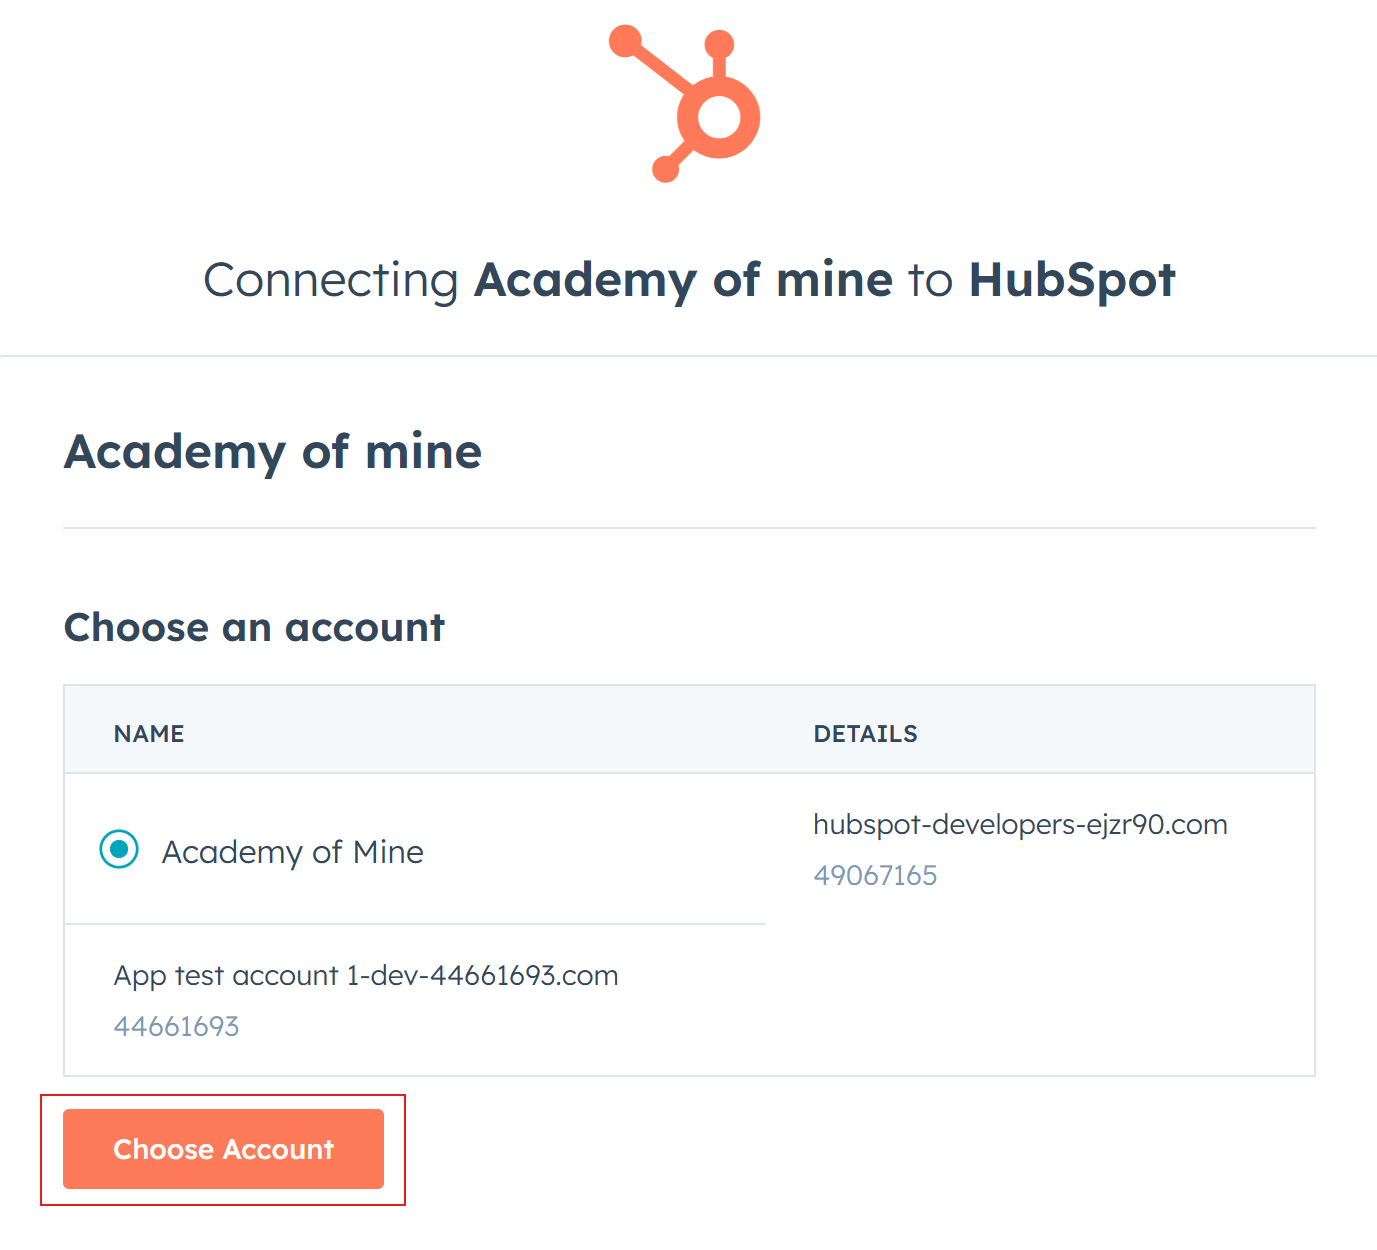
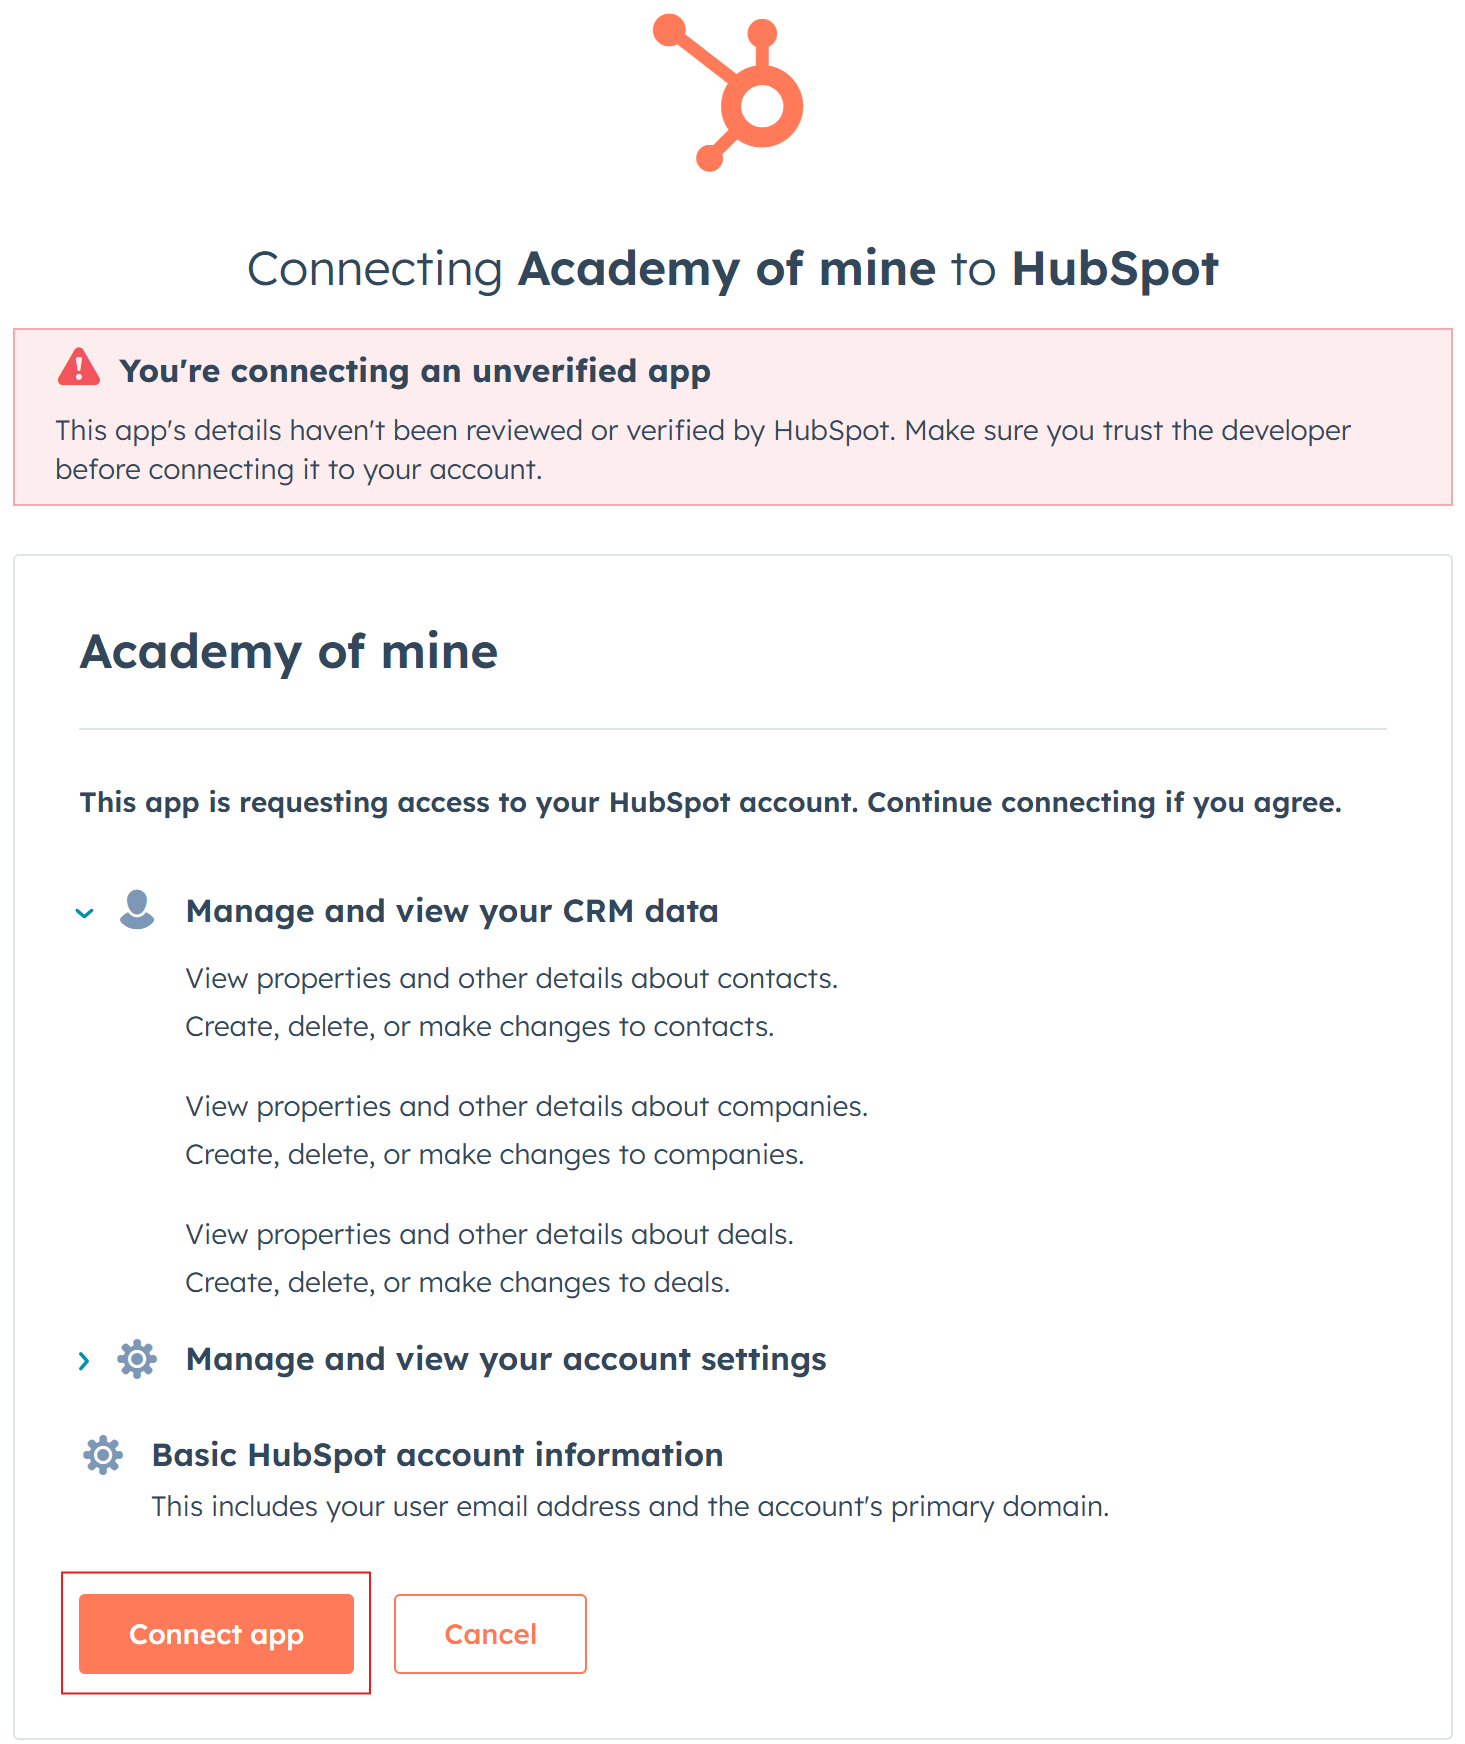
- Click the Save & Authorize button to connect your AOM LMS to HubSpot. This will redirect you to a HubSpot Connection Page. Select the non-developer account and click Choose Account.
- After that, you will see the Connect App page. Click Connect App and Confirm the authorization of the application.
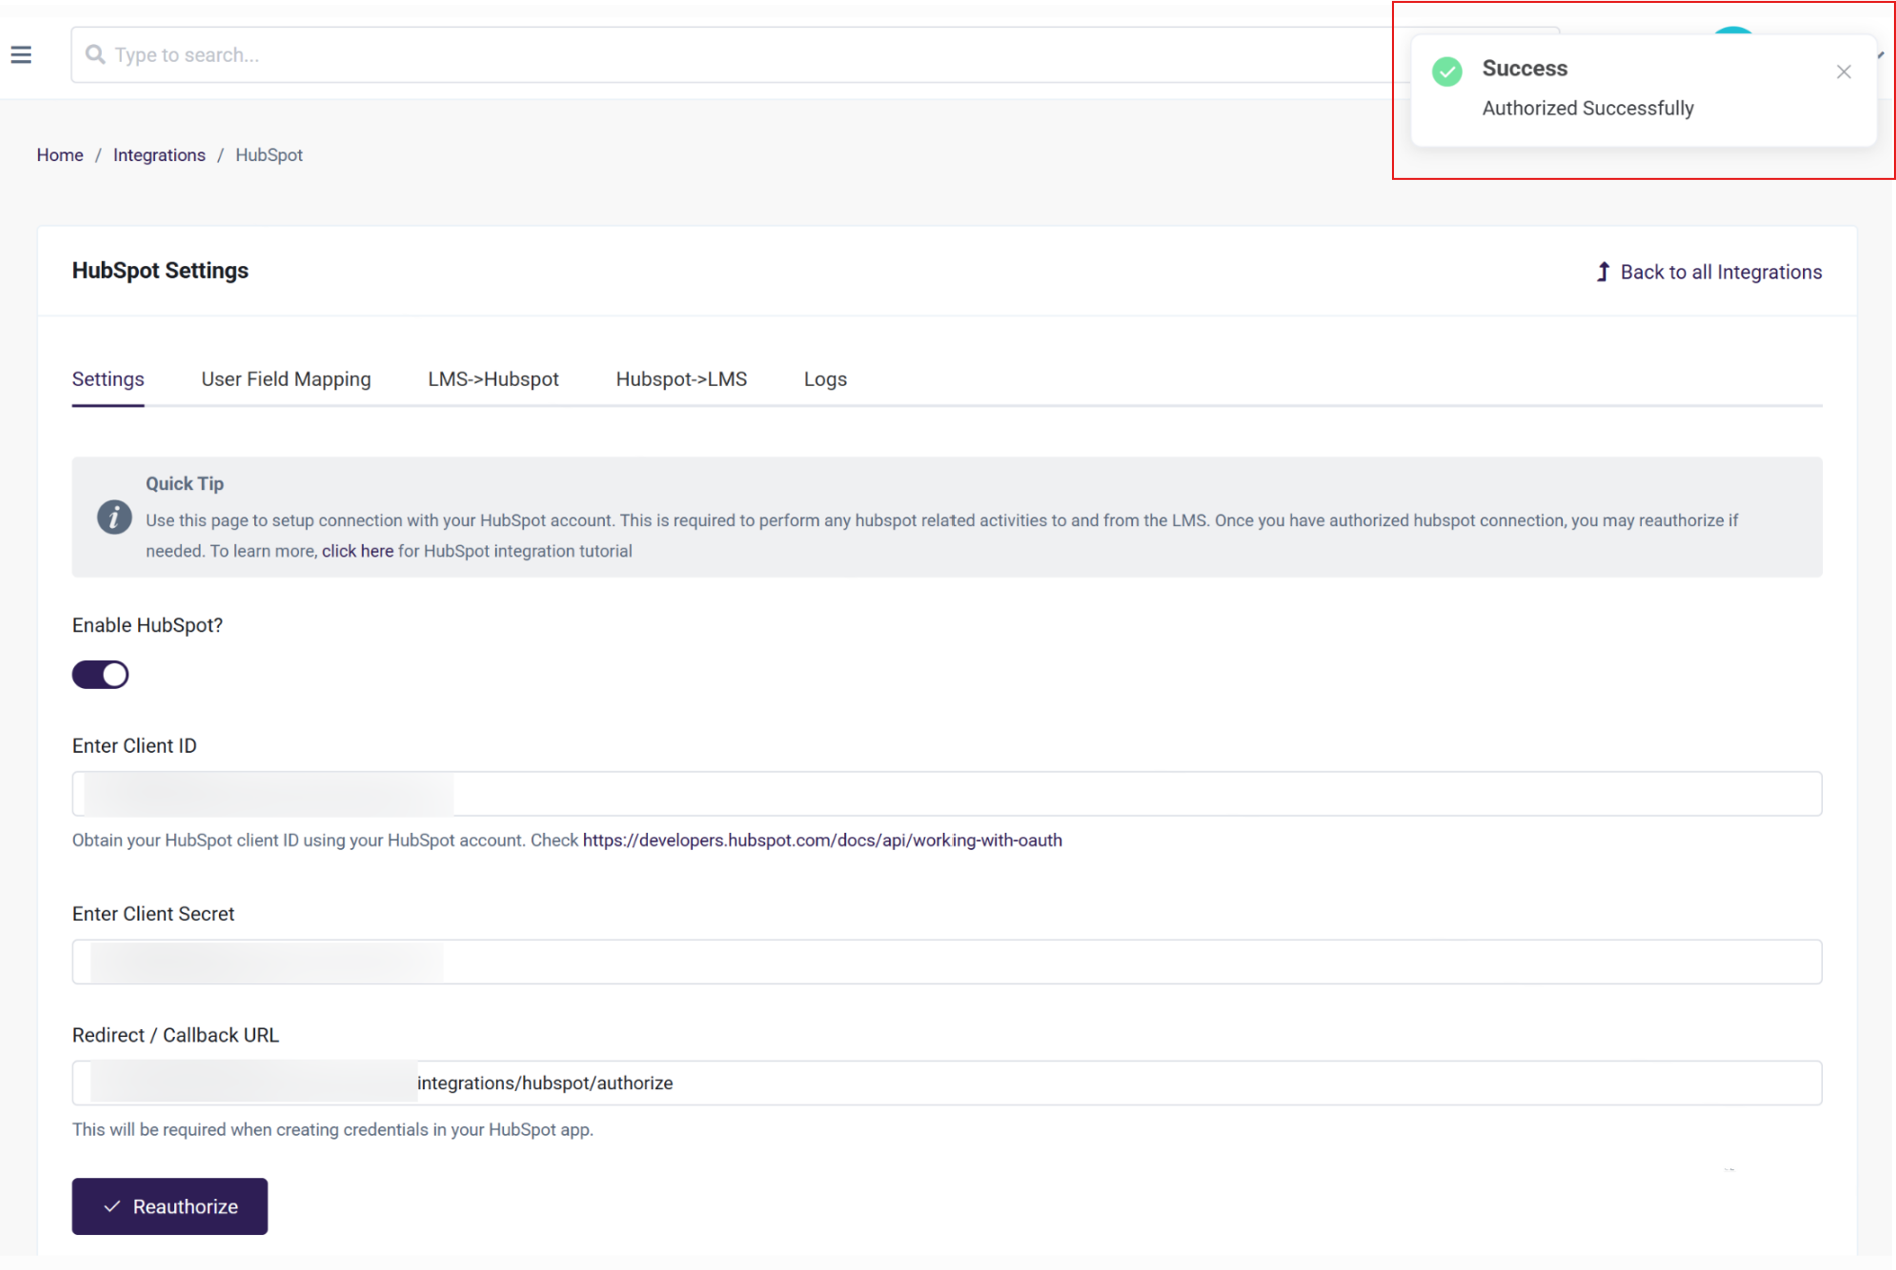
- You will now be redirected to your LMS and an Authorized Successfully message should show.
Step 3: Set Up Actions & Mappings
Now that the HubSpot integration is connected, let's move on to configuring the actions and mappings. Actions determine the different events that are going to trigger changes in HubSpot, and the mappings are how HubSpot is going to get updated when an event is triggered.
Set Up Mappings
To configure how HubSpot is going to get updated when an Event is triggered, we will need to set up the Mappings. This is what we will do here in the User Field Mappings tab. Without mappings, the user activity data is not going to be sent to HubSpot, so we will need to set it up carefully. It is what will allow HubSpot to understand what to do with the data that is coming in.
There are two types of mappings:
- a) Contact Mapping: Used to create and update HubSpot contacts.
- b) Deal Mapping: Used to update HubSpot Deals.
For example, you can add a first_name field in LMS mapping with firstname field id in HubSpot. Using these mappings, the data will be updated correctly. You must set this mapping for the integration flow to work.
- Click on the User Field Mappings tab in the HubSpot Settings page on the AOM LMS.
- Click Contact Mappings to set up mappings for User Property and Course Property Mappings. Click + Add New to select the desired LMS property or Course from the dropdown menu and the corresponding HubSpot property.
These mappings should be laid out for user properties and can also be provided for course field mappings. Note that mapping course fields is optional.
- Click Deal Mappings to set up Deal Identifier Property Mapping and Course Property Mapping that will be associated with HubSpot deals. This mapping will determine what is identified as a Deal in HubSpot. Click the Add New button, select the type of LMS object we are looking to get data from, select the specific property of that object, and finally the HubSpot property that we want to map it to.
NOTE: If the Identifier Property Mapping is wrongly configured, the Deal will not get updated in HubSpot.
- Click Save Mappings when you're done.
Set Up Actions
We will now set up the actions inside the LMS>Hubspot tab according to your needs. This is where you will determine the different events within the LMS that are going to trigger changes in HubSpot. It is essentially where you will determine when HubSpot data is going to be updated, and which thing we are updating in HubSpot (Contact or Deal). In the next step, we will add more details on how each HubSpot object is going to get created/updated but for now you will want to think about the different events that should trigger a change. For example, you may want to send Course progress or Course Completion events in LMS into HubSpot.
- Within the HubSpot integration settings in AOM, click LMS>Hubspot
- Click +Add New Event and choose desired events and actions from the dropdown menus.
- Click Save once you have chosen the event in AOM and the corresponding HubSpot update. Click +Add New Event again to add another action
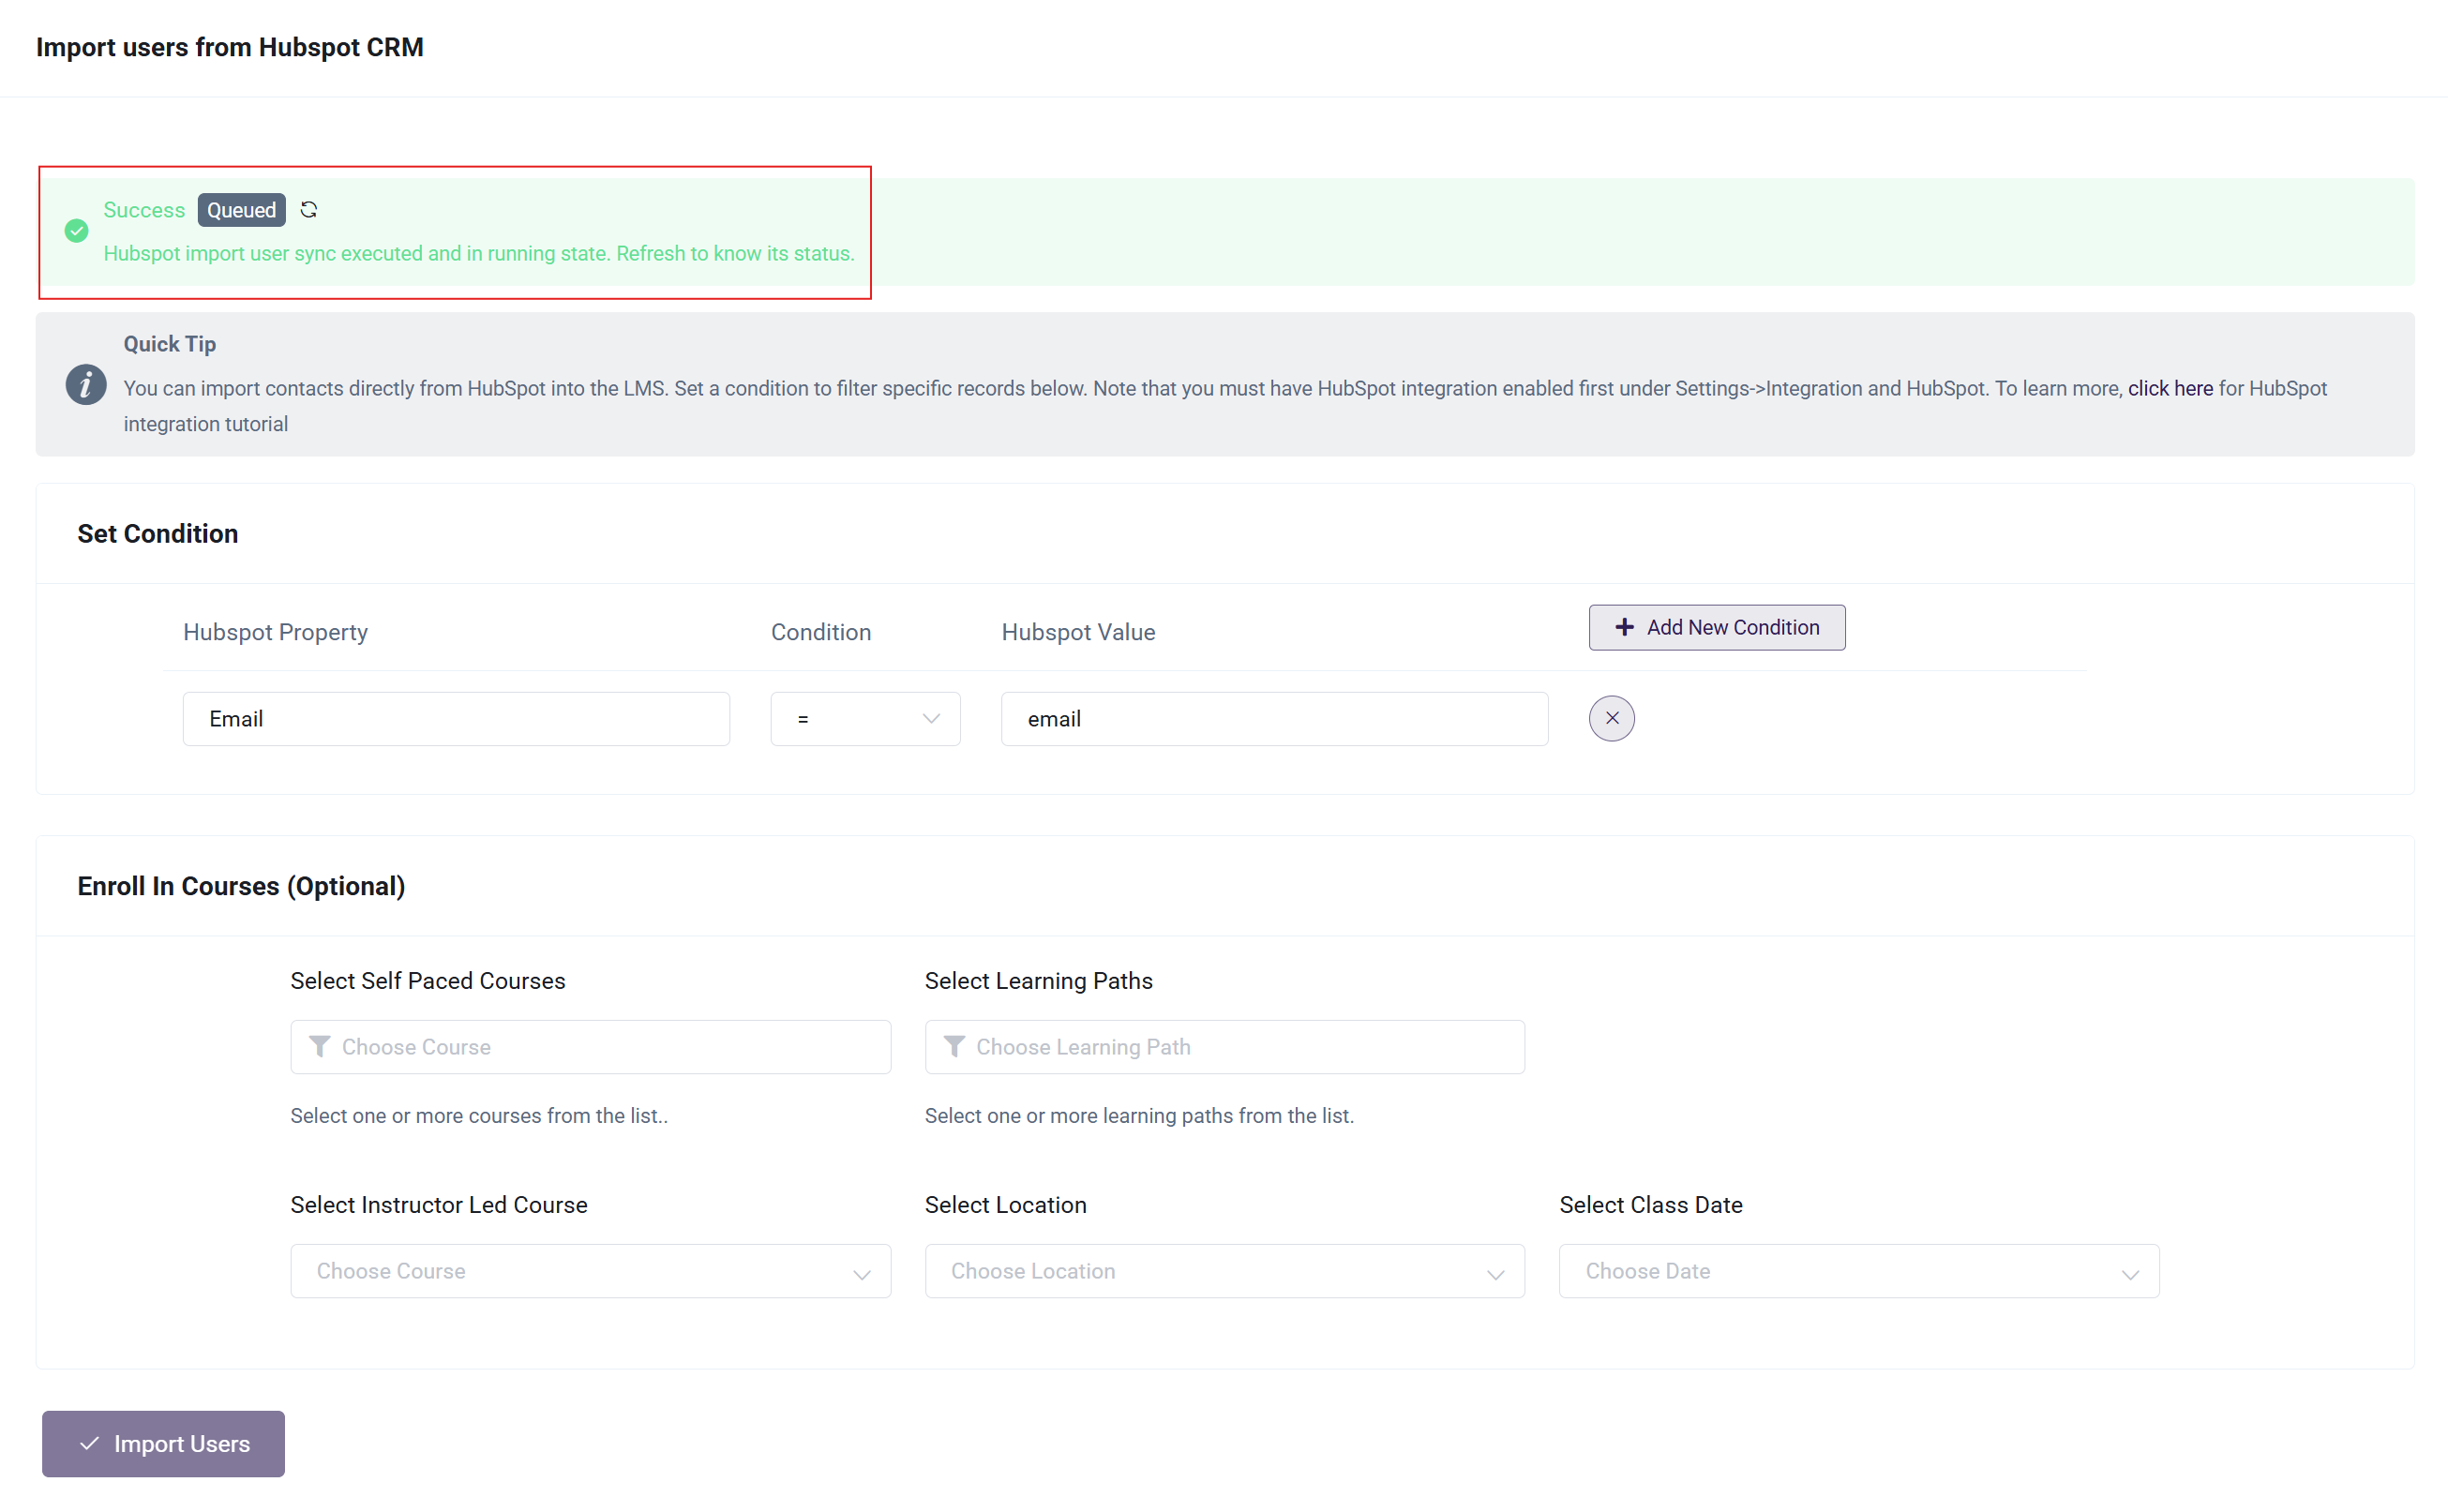
Step 4: Set Up Importing Contacts
If you would like to be able to import existing contacts from Hubspot into the LMS, you can set that up under the Hubspot>LMS tab. You can set some default conditions to filter records for import. This is useful if you capture leads in HubSpot directly and want them to be able to get access to LMS without manually creating a new account in LMS.
Once this is set up, you'll be able to import users under our Bulk Upload area. Note that you must have HubSpot connection established in “Settings” tab and “User Field Mapping” must be set as well that we've reviewed above.
- First, we'll need to set the conditions upon which a user will be imported. You will need to get the Hubspot property (which is the internal name and unique identifier of the property) directly from Hubspot using these steps:
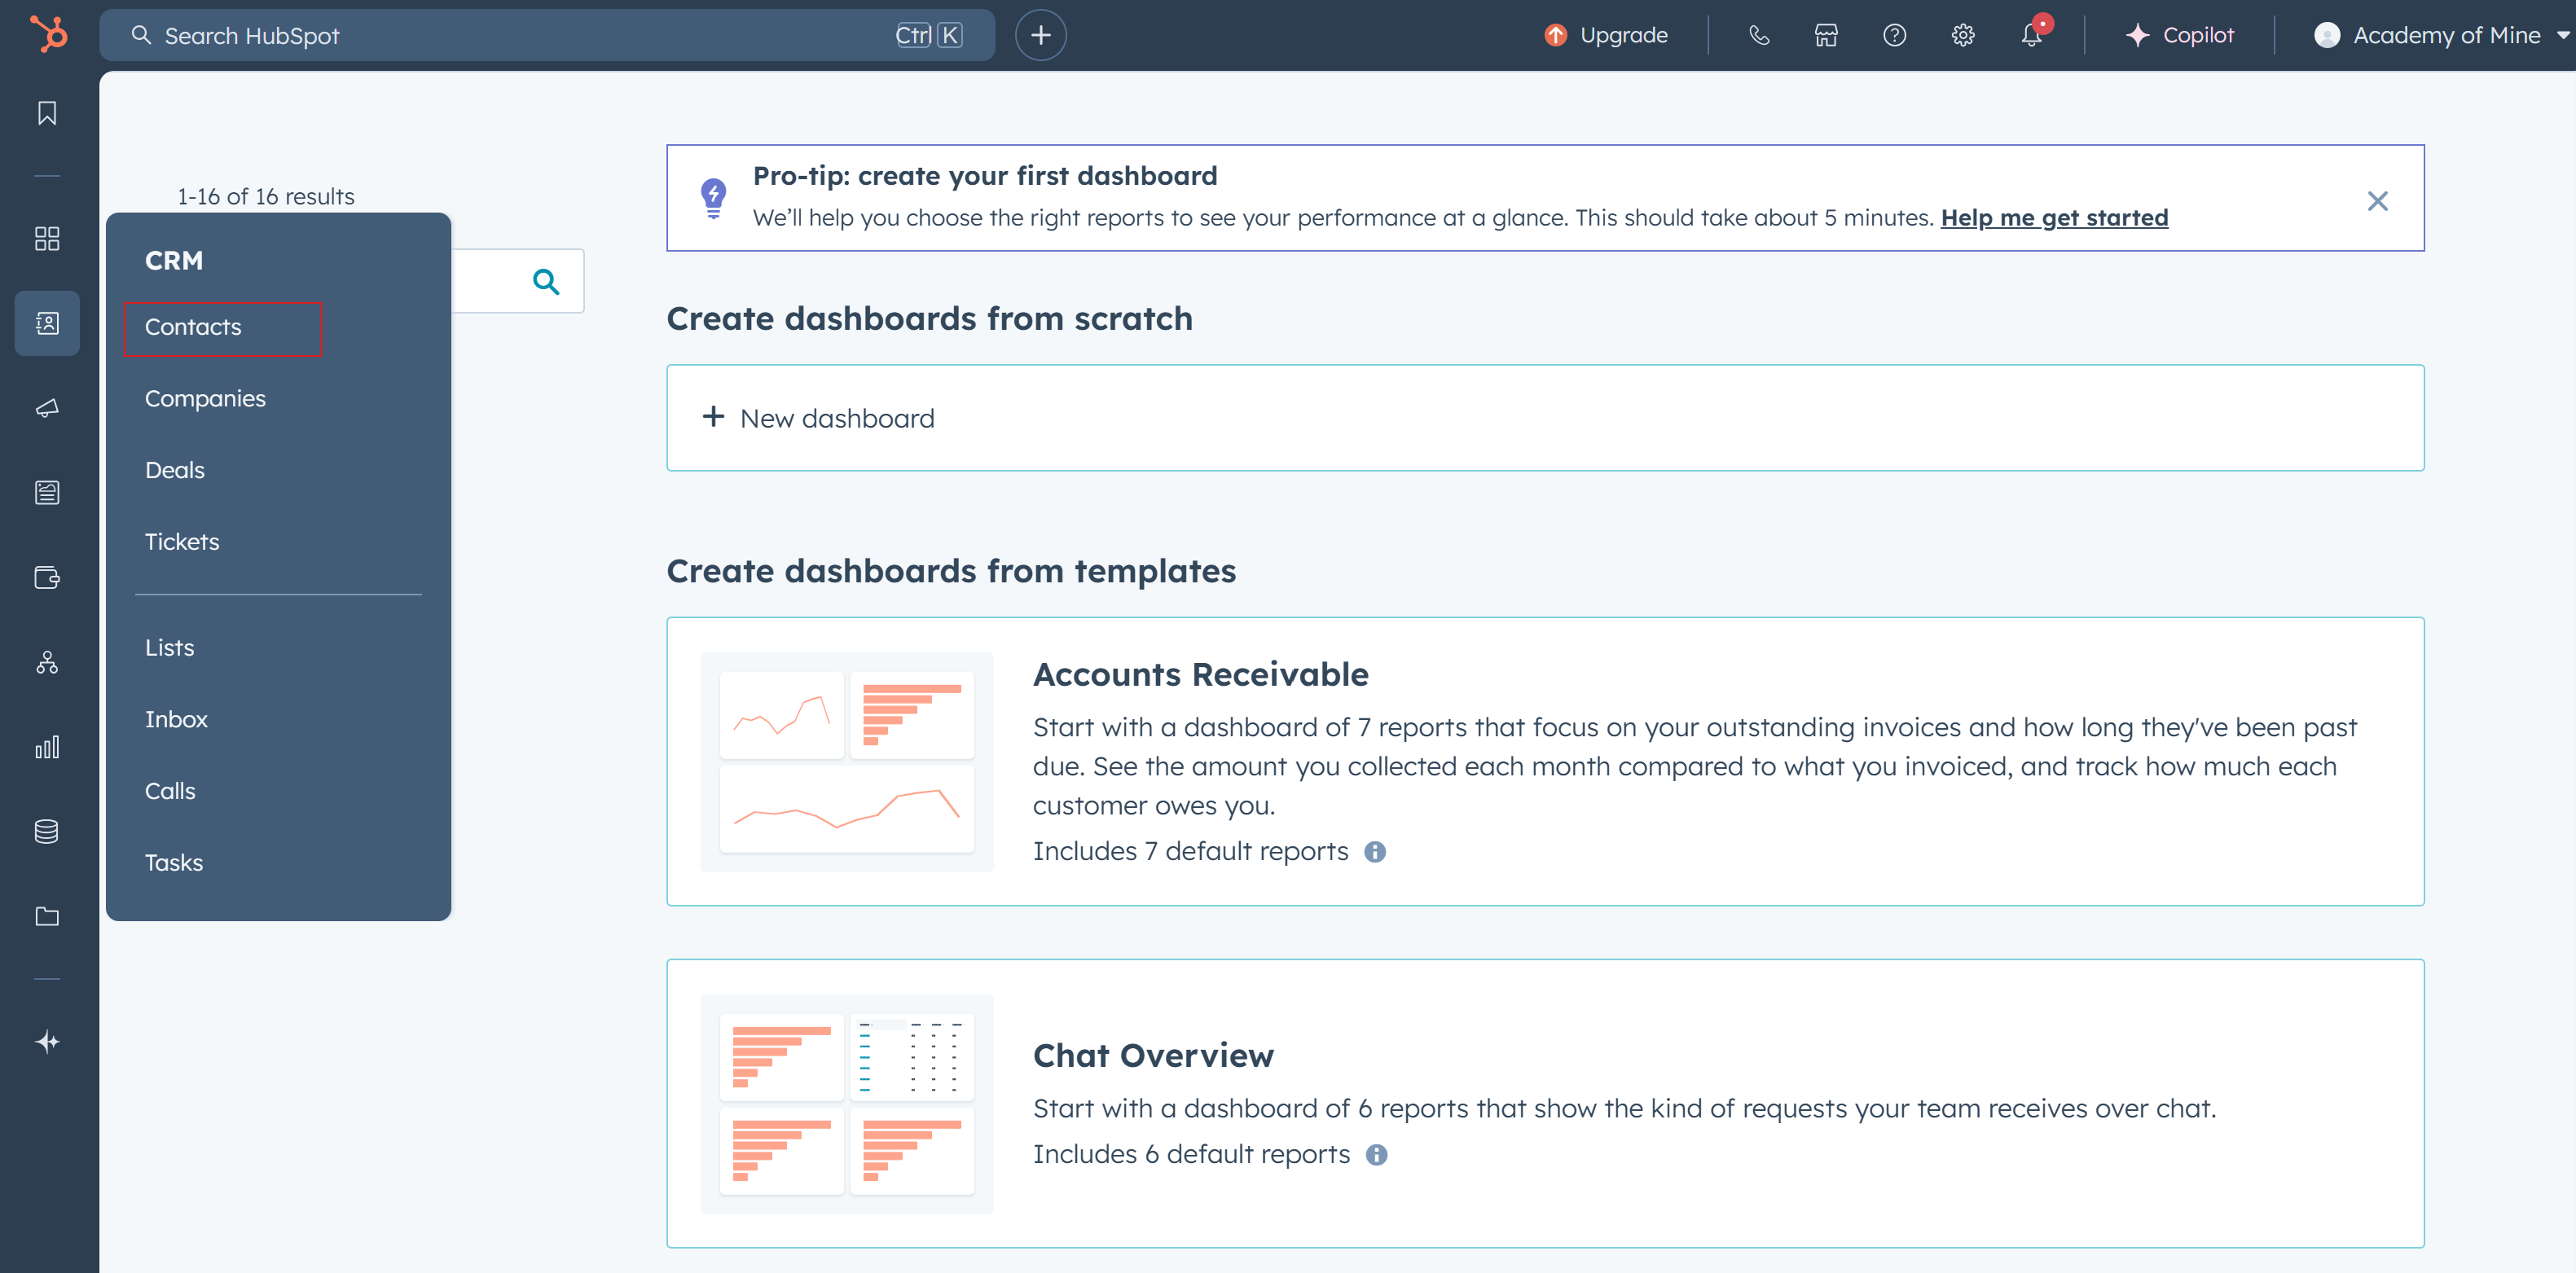
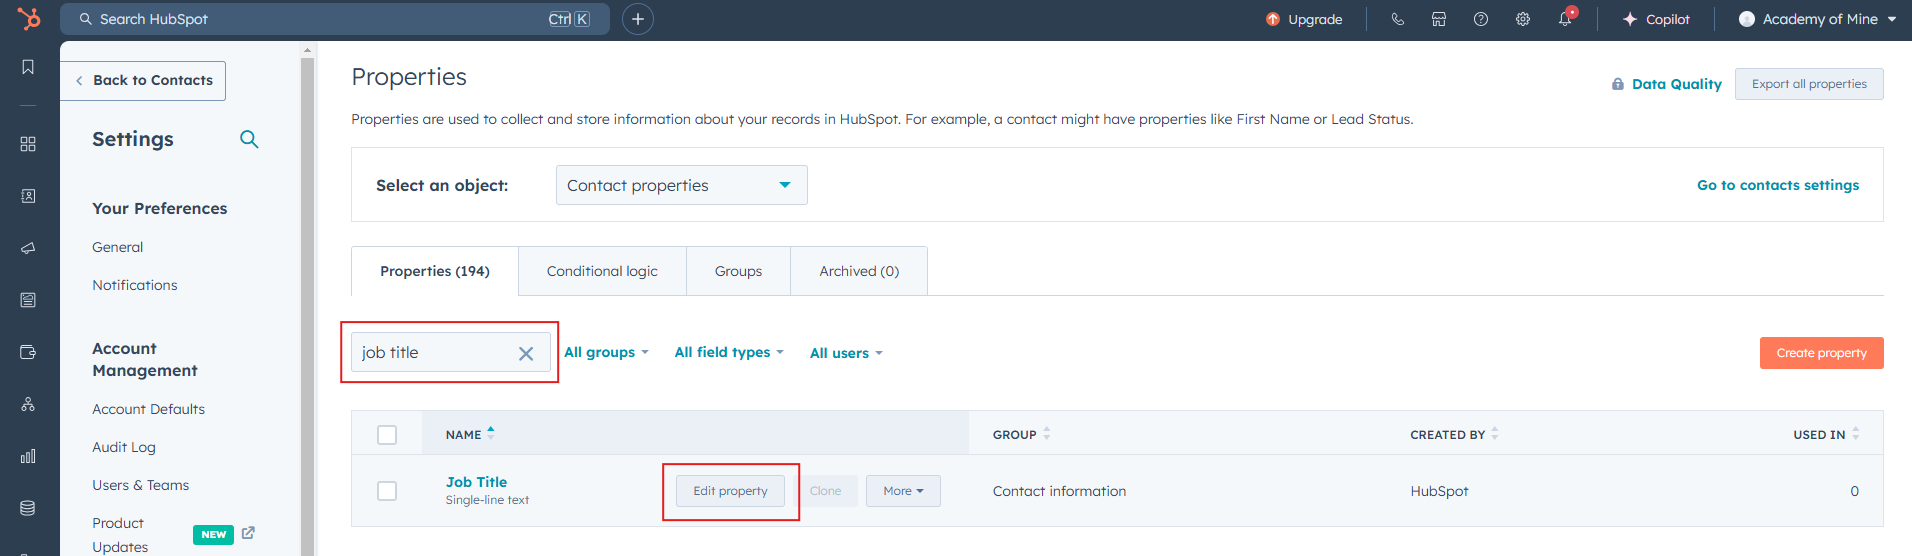
a. Under the CRM tab click on Contact
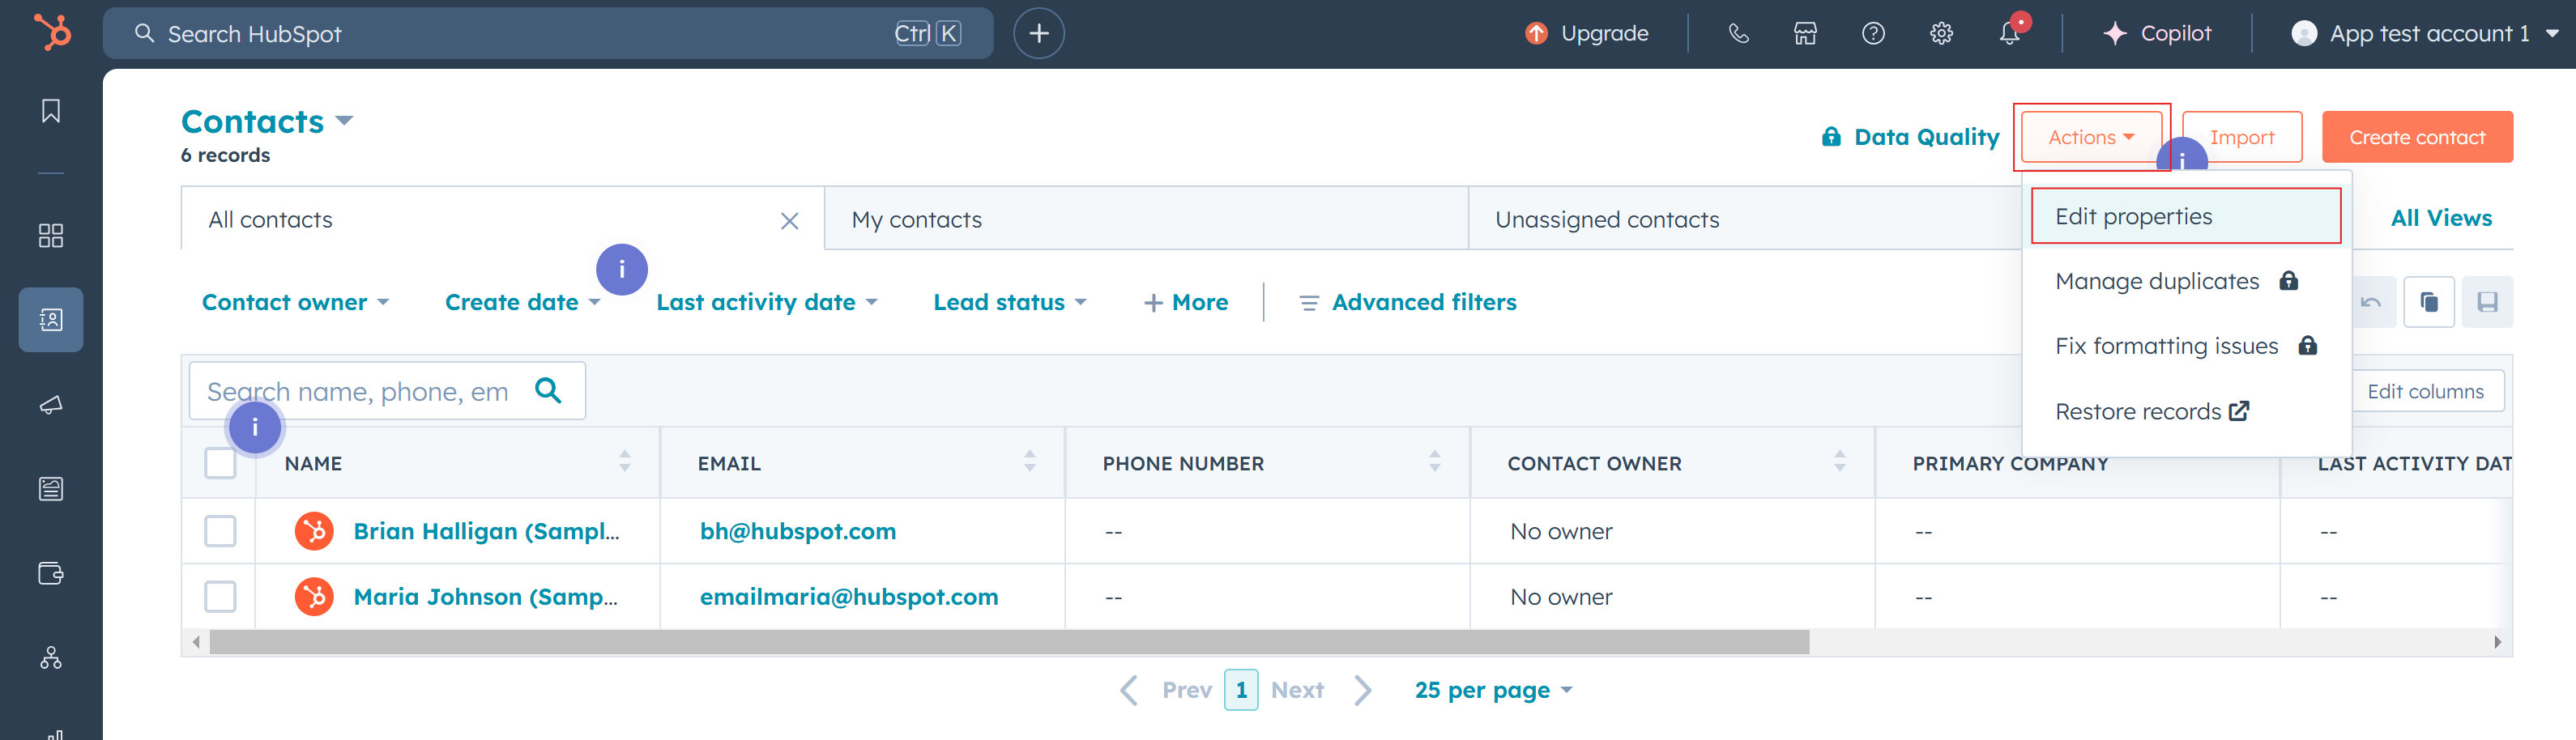
b. Click Actions and then Edit Properties.
c. Find the property that you want to add as a property condition to the LMS and click Edit property.
d. You can find the Internal name below the Property name.
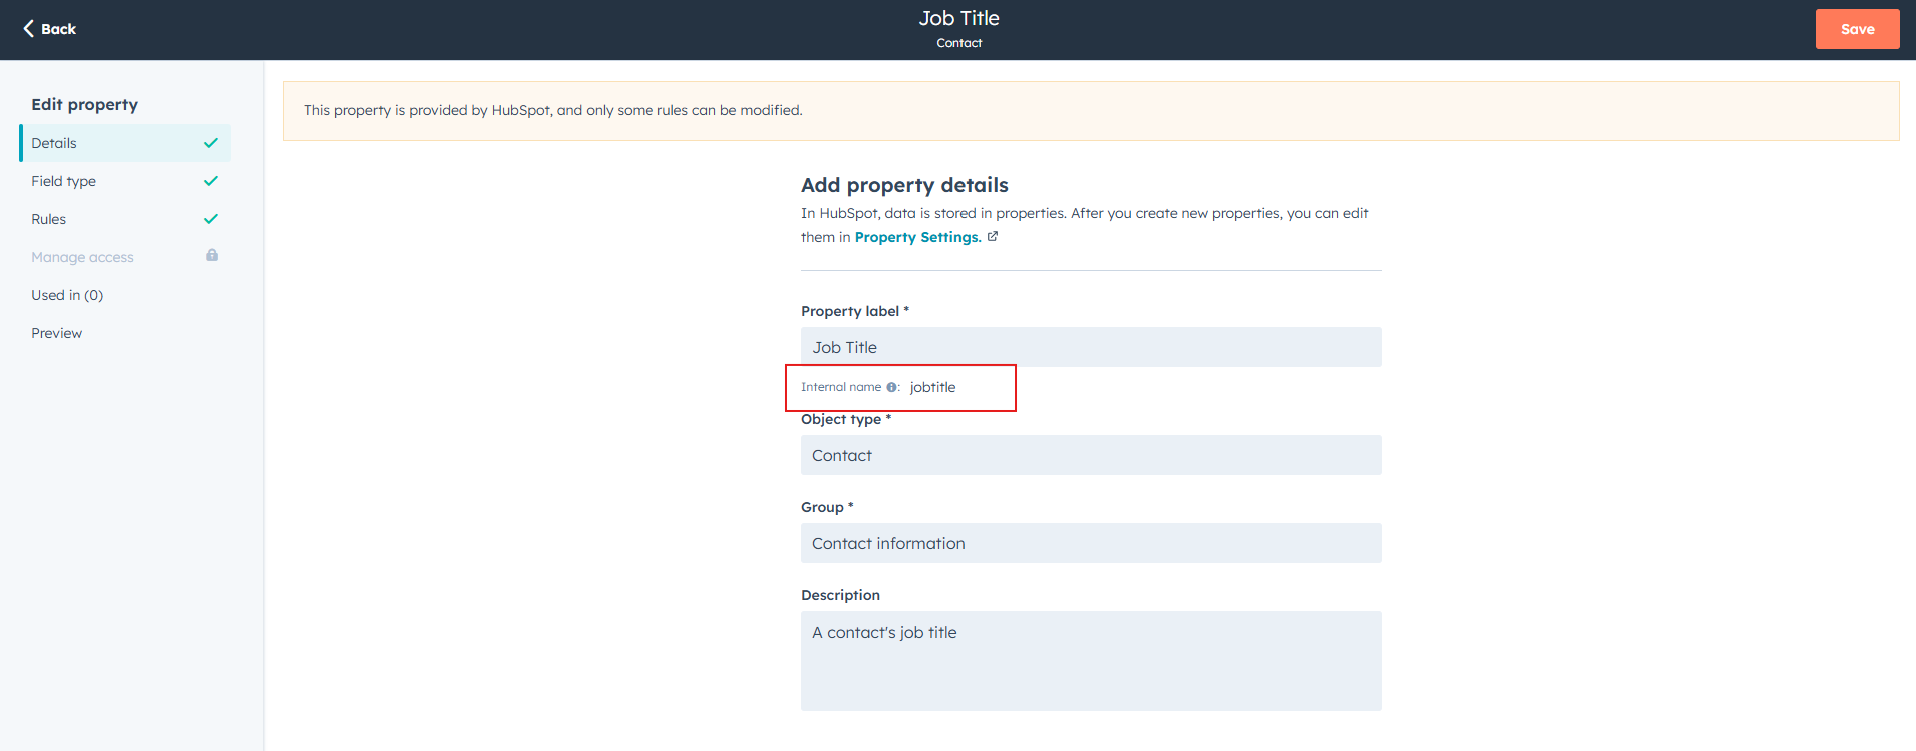
e. Copy the internal name to paste into the LMS
f. If you want, you can also create a new property in Hubspot-just be sure to select the field type as single-line text if you do!

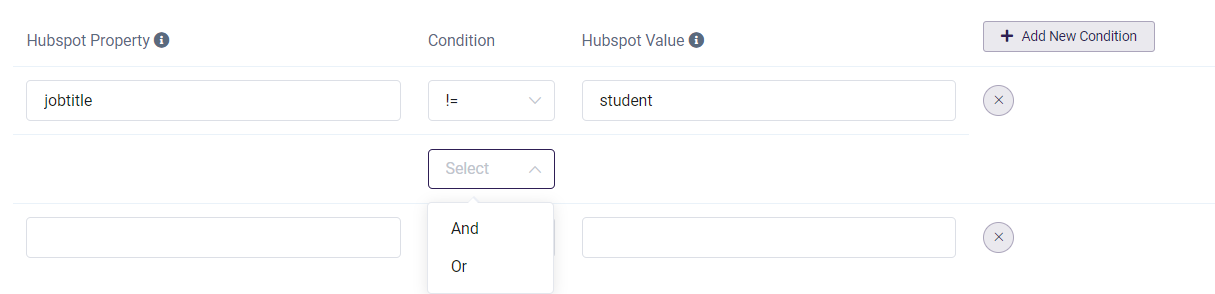
- Paste the internal name from Hubspot, choose the condition from the dropdown and then the Hubspot value that the property needs to be in order to be imported. For the example below, we want to import users based on the Hubspot Property of jobtitle, if the Hubspot value is equal to learner. Basically, you're setting up the parameters for what kind of contacts you want added to the LMS.

- If you want to add other conditions, click + Add New Condition and repeat the above process. You will also need to choose if the various conditions will be "And" or "Or" in relation to the other conditions.
- Click Save Condition when you're done.
Step 5: Importing Contacts
Once you have set up step 4 with the conditions for what Hubspot contacts you want to add to AOM, you can import them by following these steps:
- From the Admin Dasboard, go to Users>Import Users
- Click Import under the Hubspot option
- Choose the conditions for what contacts you want to import. You can also choose to add new conditions:
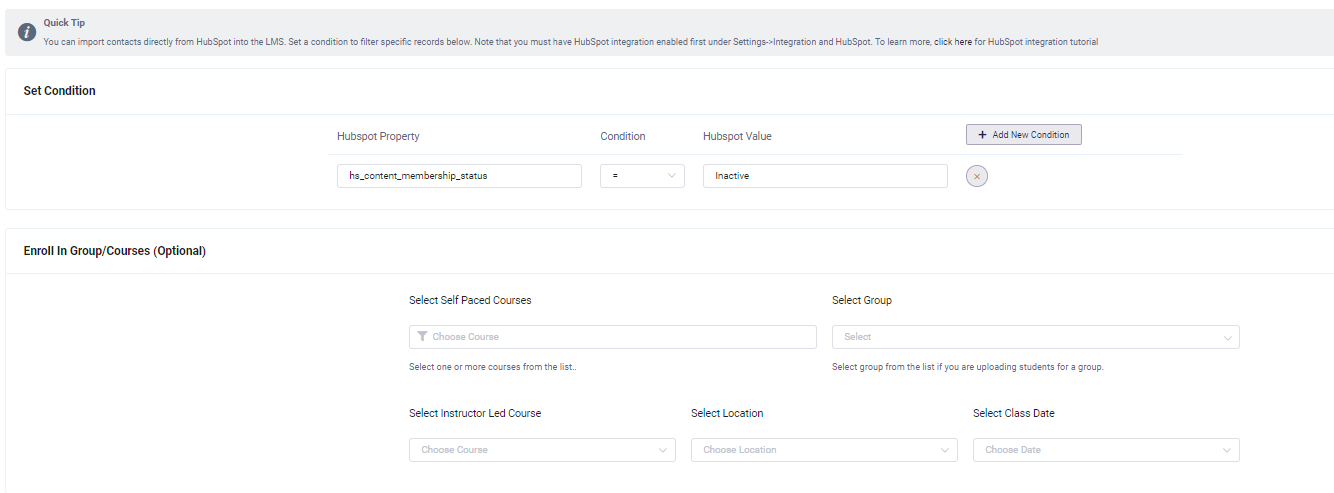
- If you would like to also enroll these contacts into courses at the same time, select courses from the dropdown list.
- If you want to add these contacts to a specific group, select the group from the dropdown menu. If no group is selected, they will simply be added to the account but not a specific group.
- Click Import Users. You will see a message that the user sync is in progress, and you can click the refresh icon like below to view the status
- The Hubspot contacts will be imported into the system and they will now be in the LMS. Note that you will see in the user list how the user was added to the system, whether they were added by an admin, self-enrolled or via Hubspot.

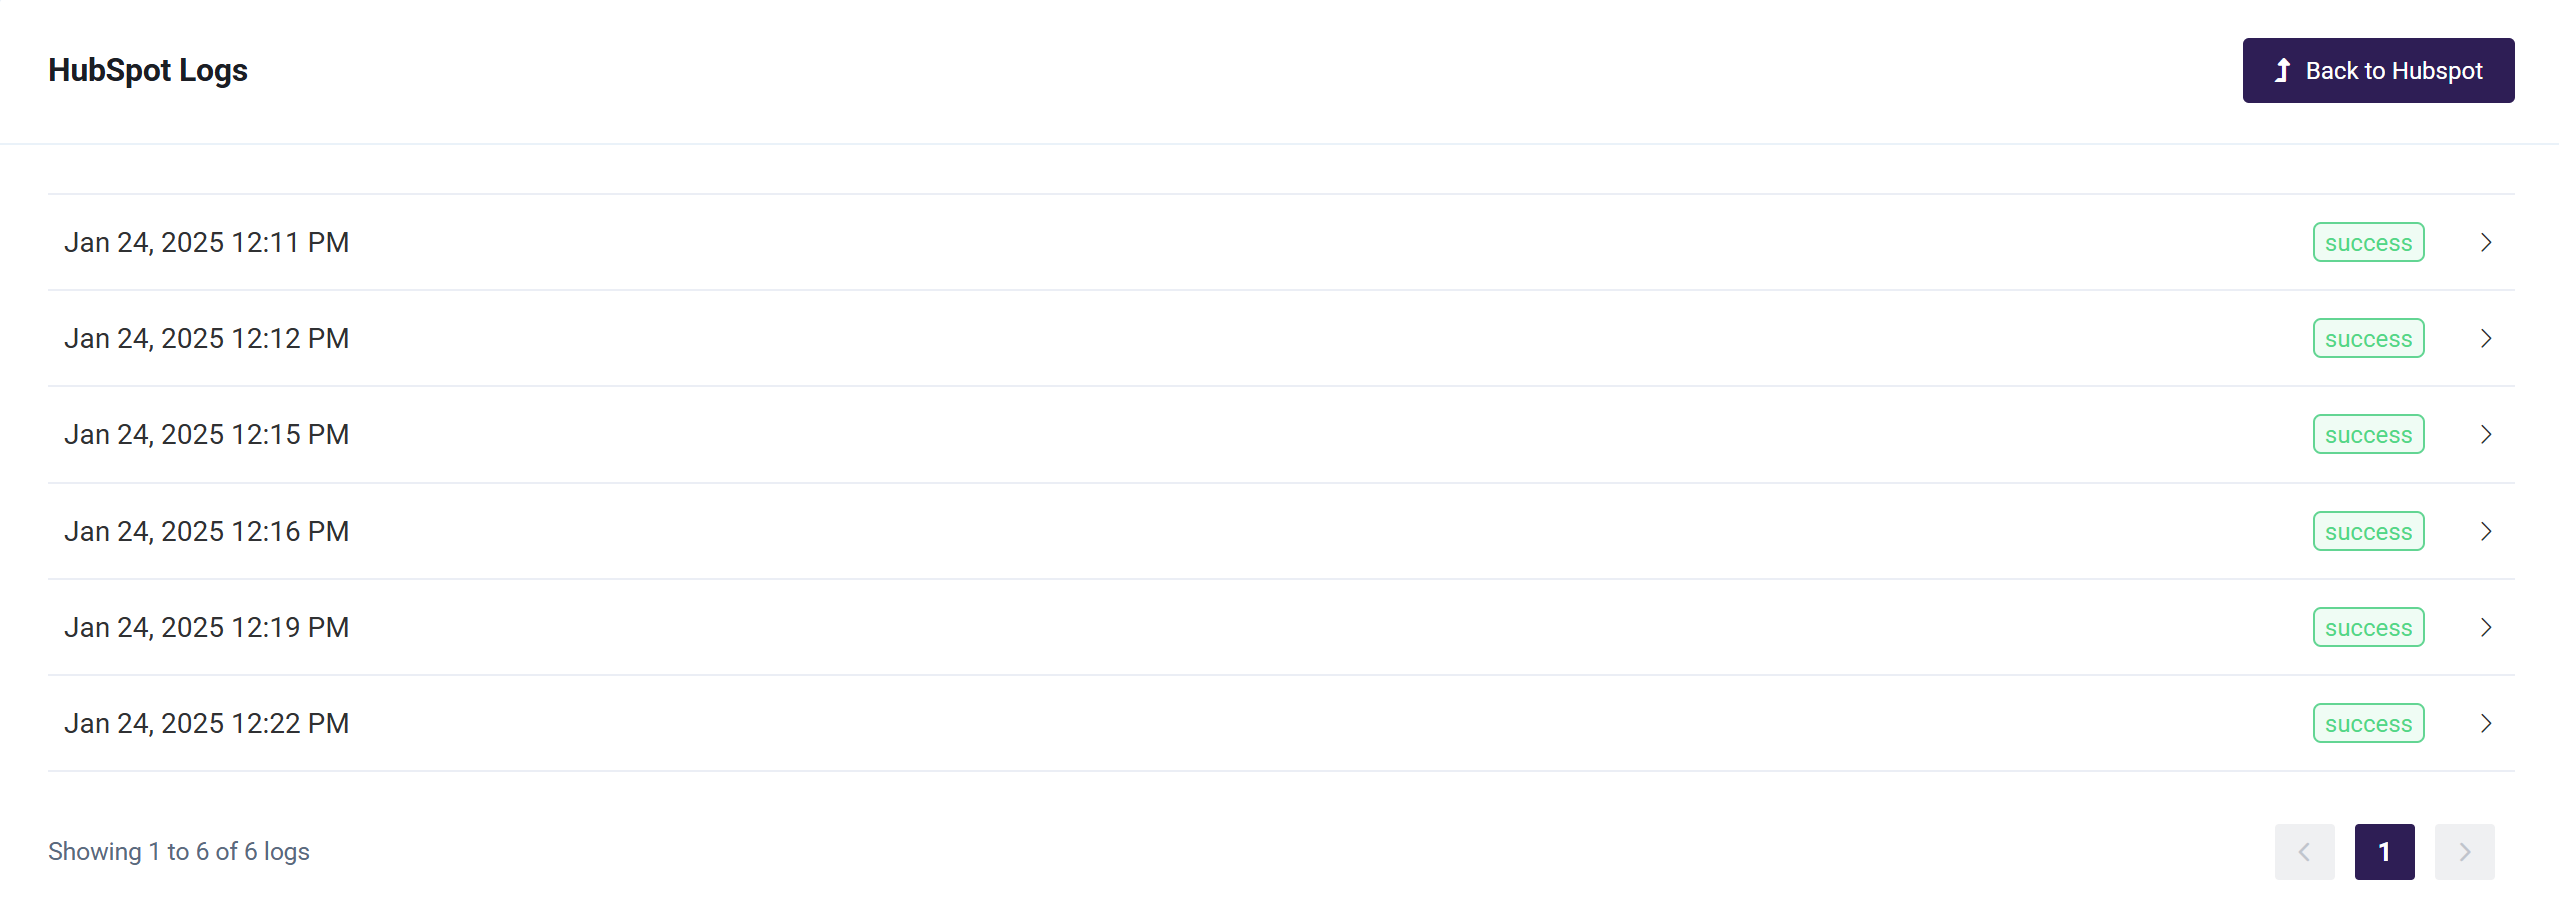
Step 6: Checking the Logs
You will be able to view the Logs for events that have occurred via the Hubspot integration in the Logs area of the Hubspot settings.
- Go to Integrations>Hubspot
- Click the Logs tab
- Here you will see a list of events, such as when users were imported or when objects were updated. Click the three dot action menu to view the log for a specific event more closely
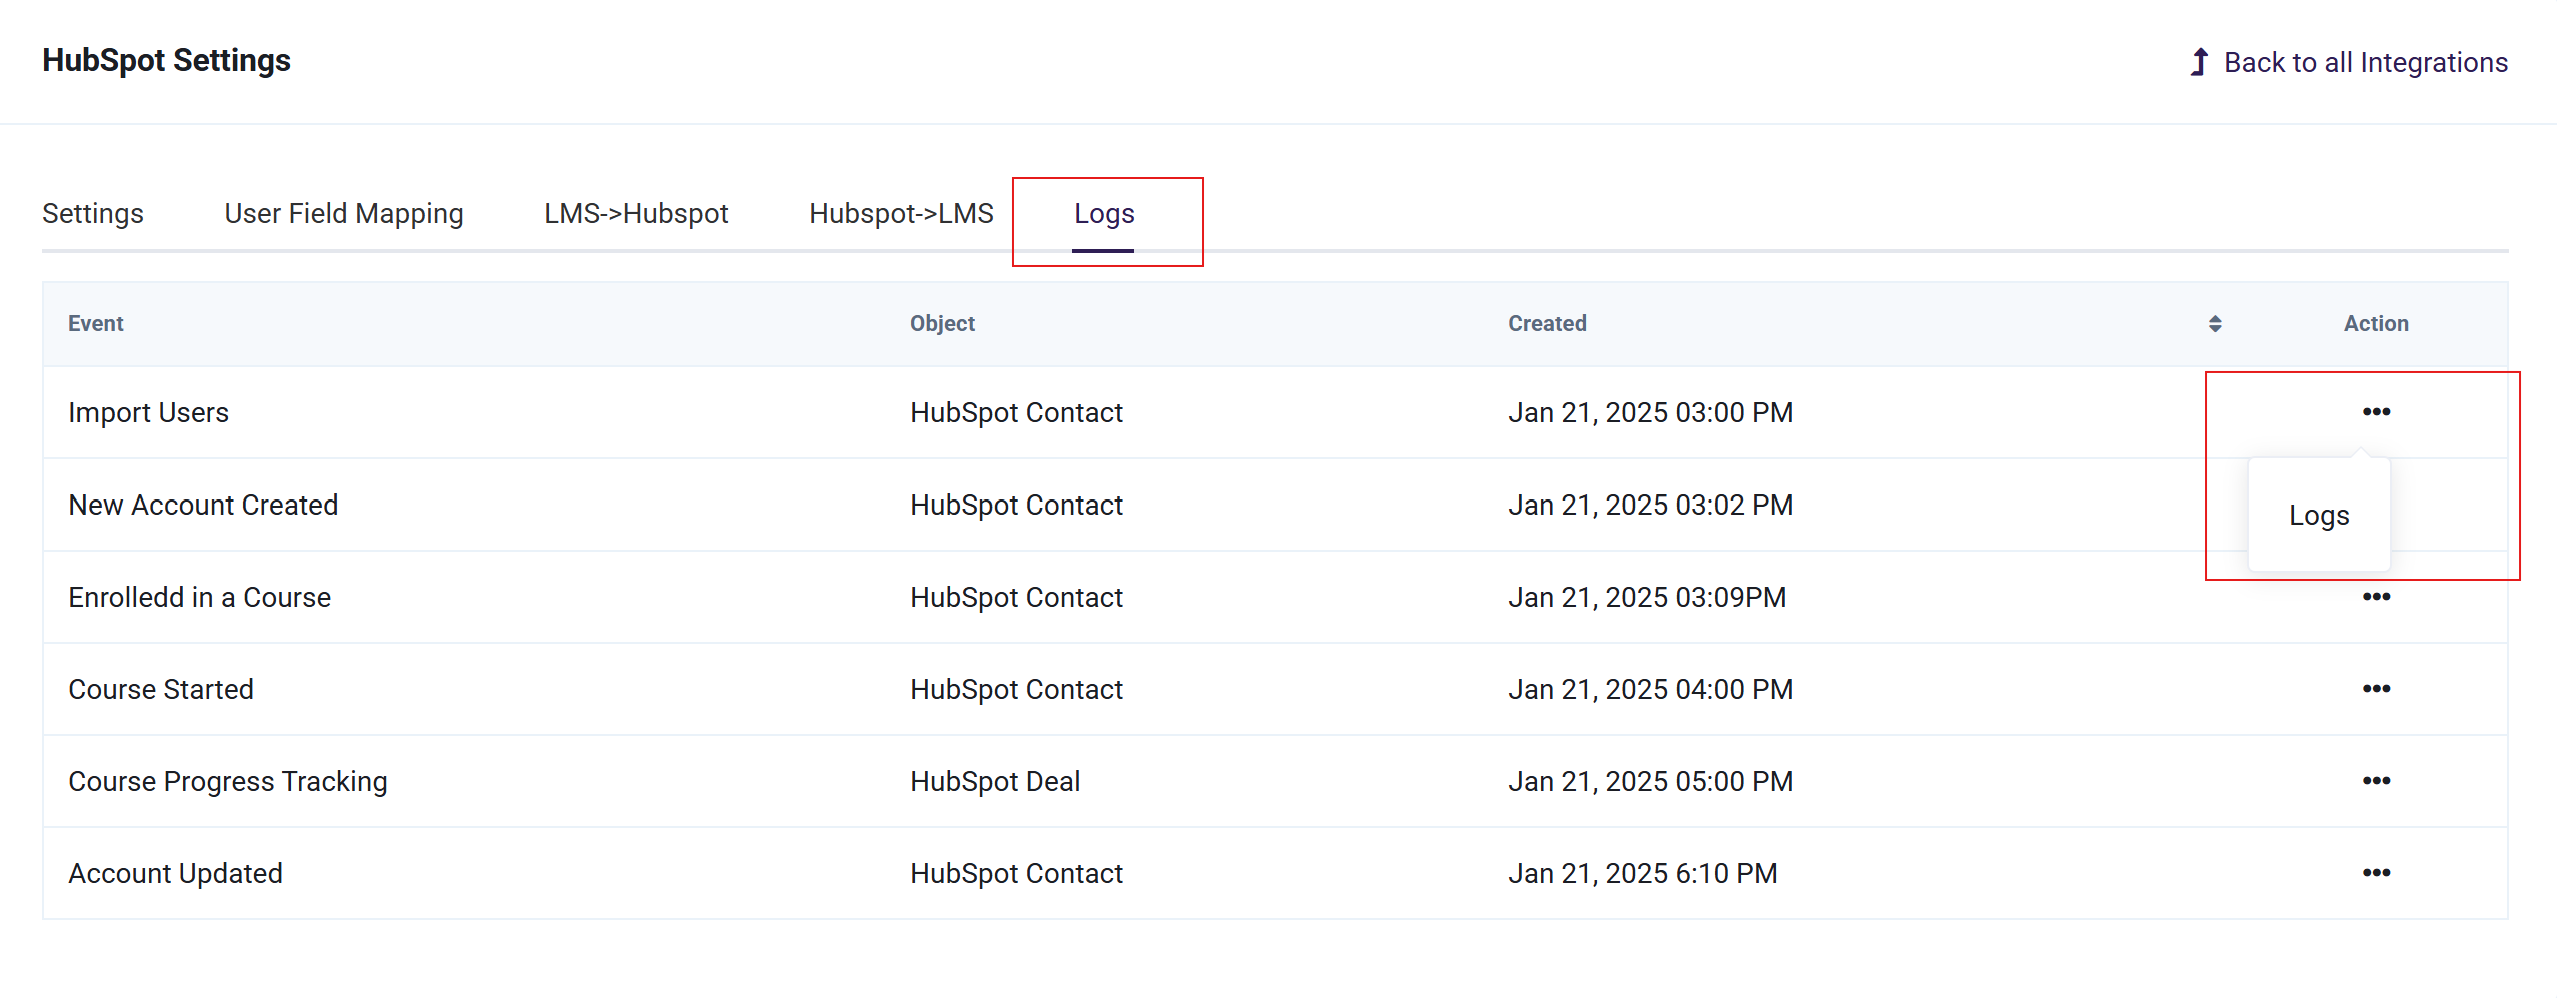
- Now you'll see more details and what specific events were successful or failed: