Setting up Google Single Sign-On (SSO)
We allow clients to integrate Google Single Sign-On functionality in the platform, making it possible to allow users (or specific subsets of users) to sign up and login with their Google Accounts. This can make for a seamless transition for users to access their courses.
In this guide, we will be reviewing the steps to be taken to activate and configure the Google SSO functionality. There are two main steps--setting up things in Google, and then setting up the integration in AOM.
Getting Keys from Developers Console
The first step is to get the Client ID and secret keys from Google.
- Open a new tab and navigate to your Developers Console on Google. This is where we are going to configure the keys needed for the fields on the settings page.
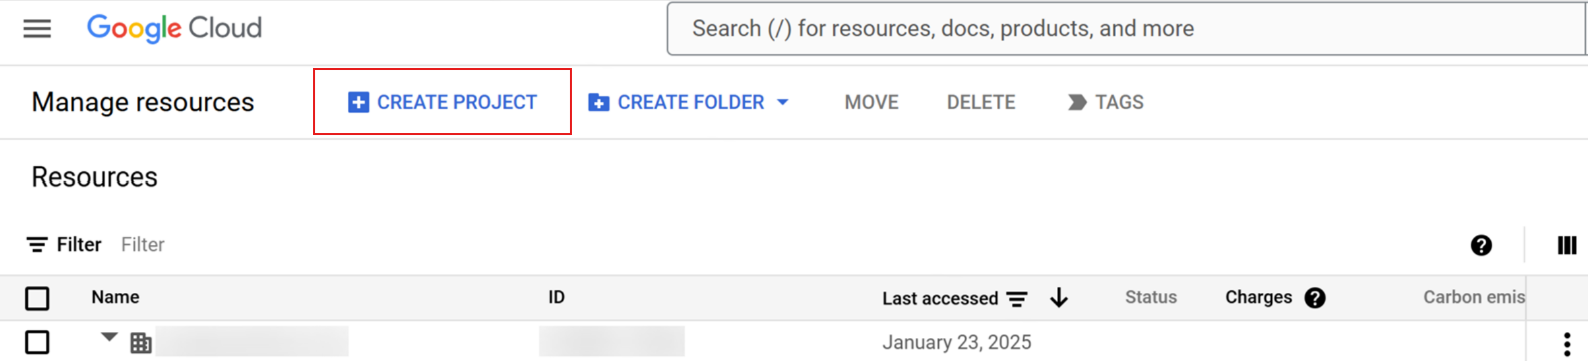
- If you do not have a Project set up yet inside the Developer Console, click the Create Project button.
- Configure the project details on the next page.

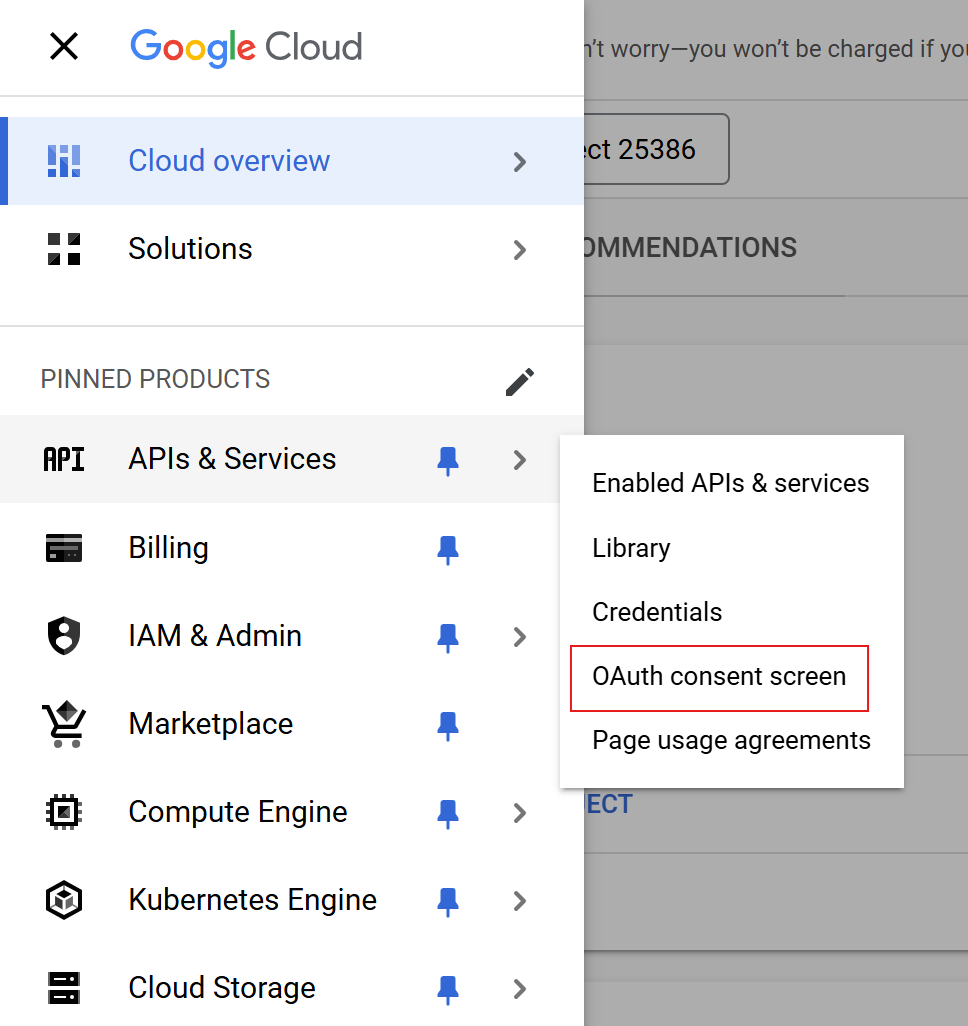
- Navigate to the APIs & Services - OAuth consent screen which can be found in the sidebar (hamburger menu in the left top).
- First, you can specify whether you want all users to be able to use the Google SSO or whether you want to limit it to users that are part of your Organization.
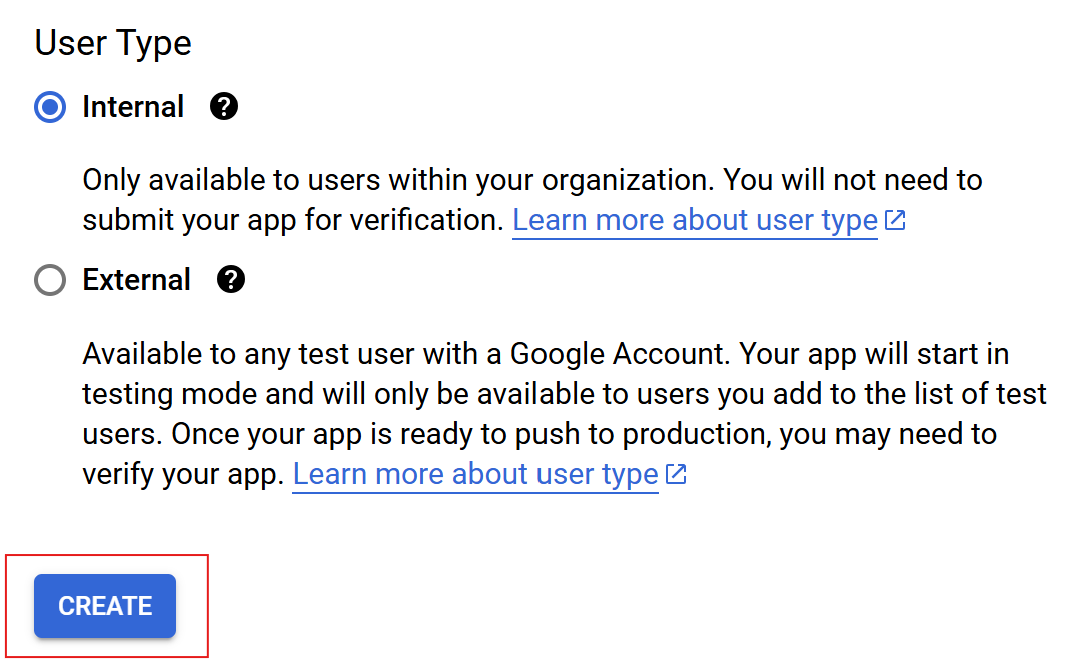
- On the more elaborate Consent Screen you can provide more details on the application that is going to be using the key such as the name, company logo, and more importantly, the authorized domains. The latter should be set to the domain name of your platform for example companyname.aomlms.com. Click Save.
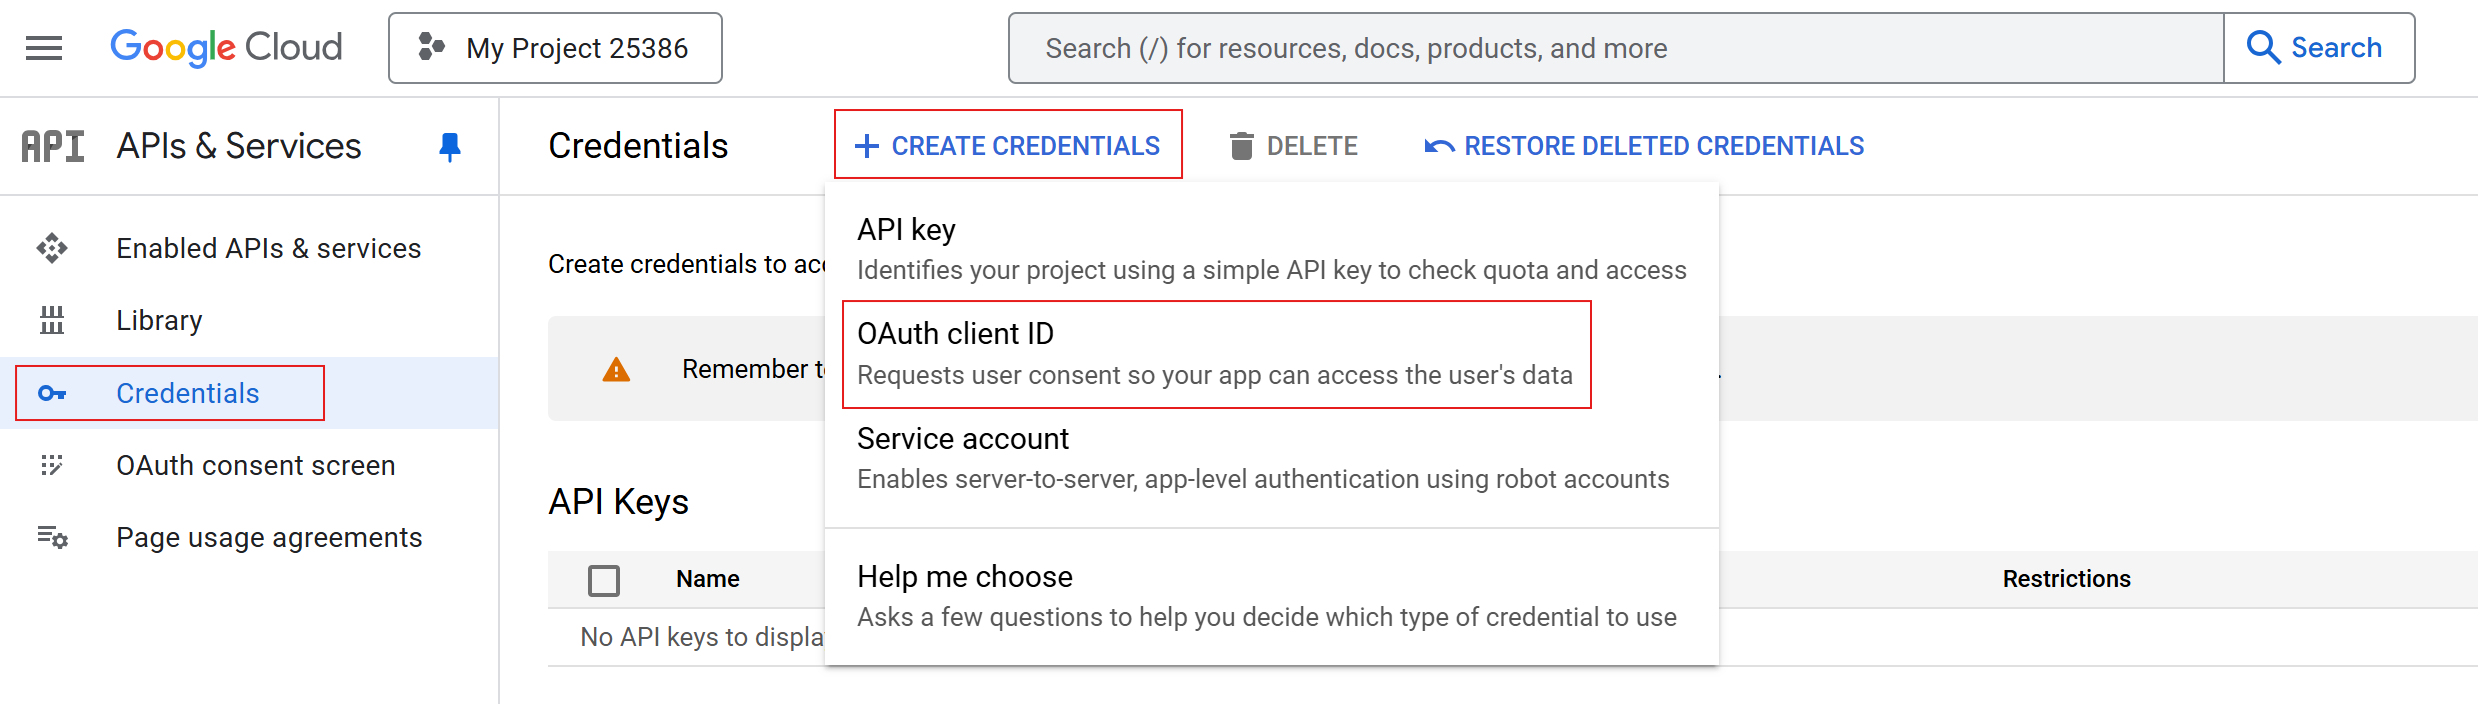
- After the settings have been saved, navigate to the Credentials page which can be found in the sidebar on the left of the Developer Console, and select the project you have set up earlier.
- Click the Create Credentials button located at the top, and select the OAuth client ID option.
- Select Web Application as Application Type and provide the name for the application.
- Under Authorized Redirect URIs, be sure to provide the following domain: /gsuit-sso-callback
- Click the Create button.
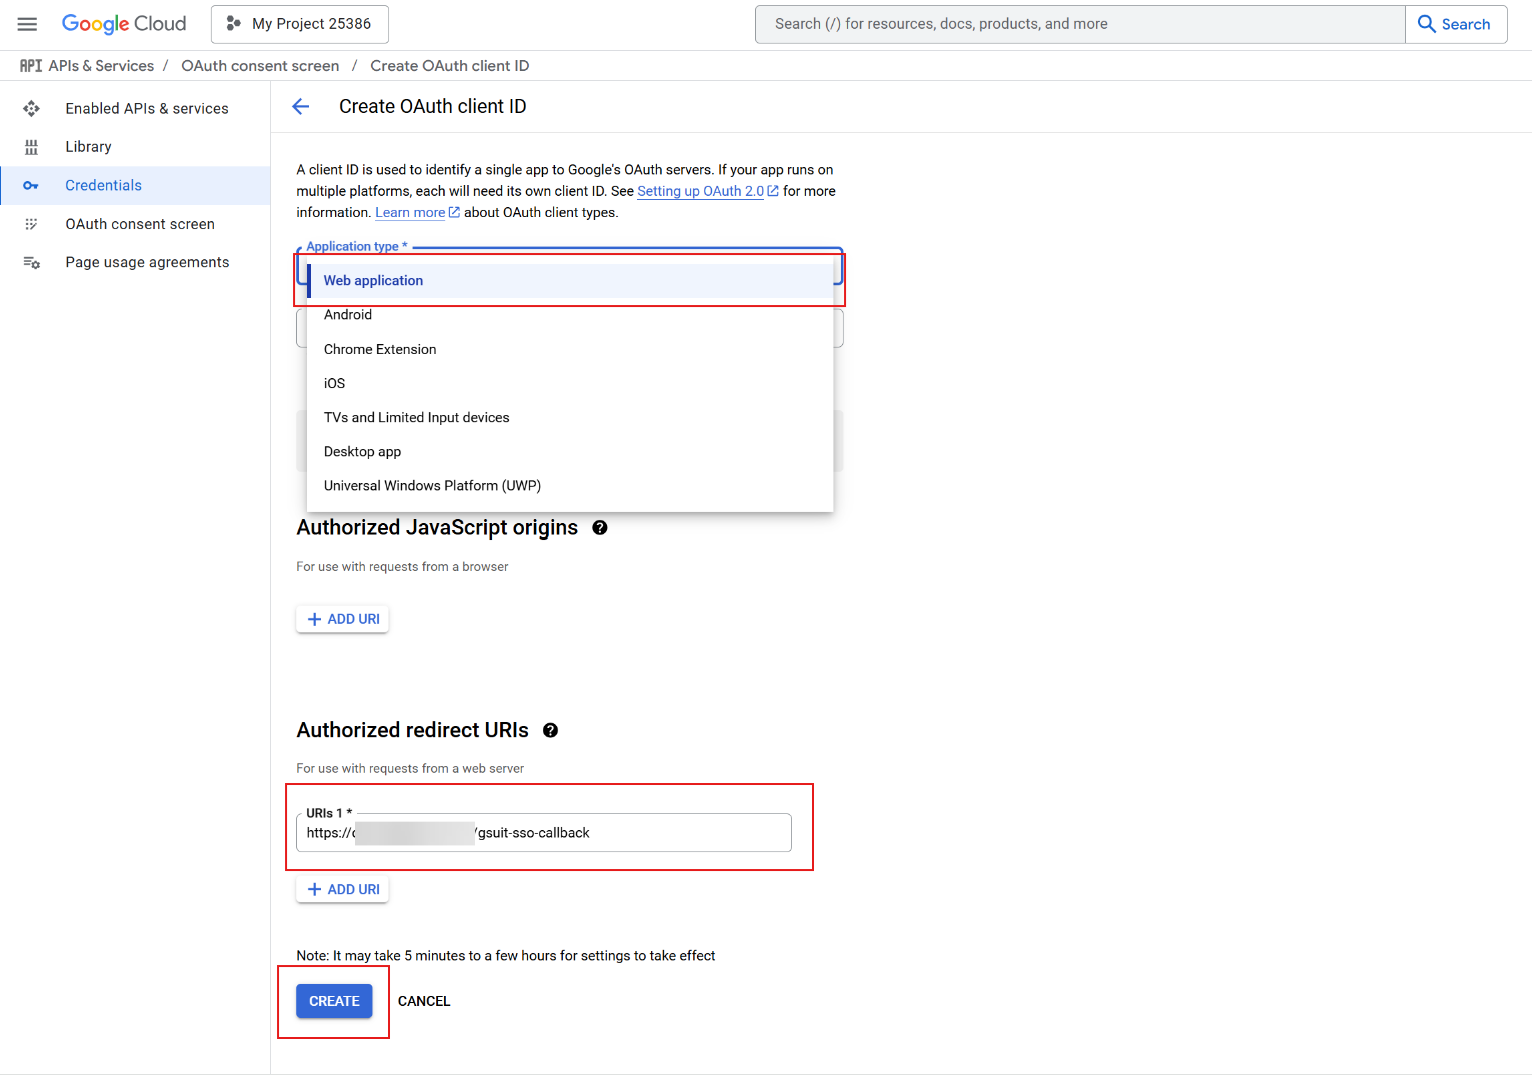
- A pop up will show which provides you the Client ID and Client Secret Key that you can copy and provide on the Google SSO settings page in your LMS.

Adding Keys & Setting Up Integration in AOM
Now we can add those fields into AOM and complete the integration.
- In another tab, go to your AOM account and login
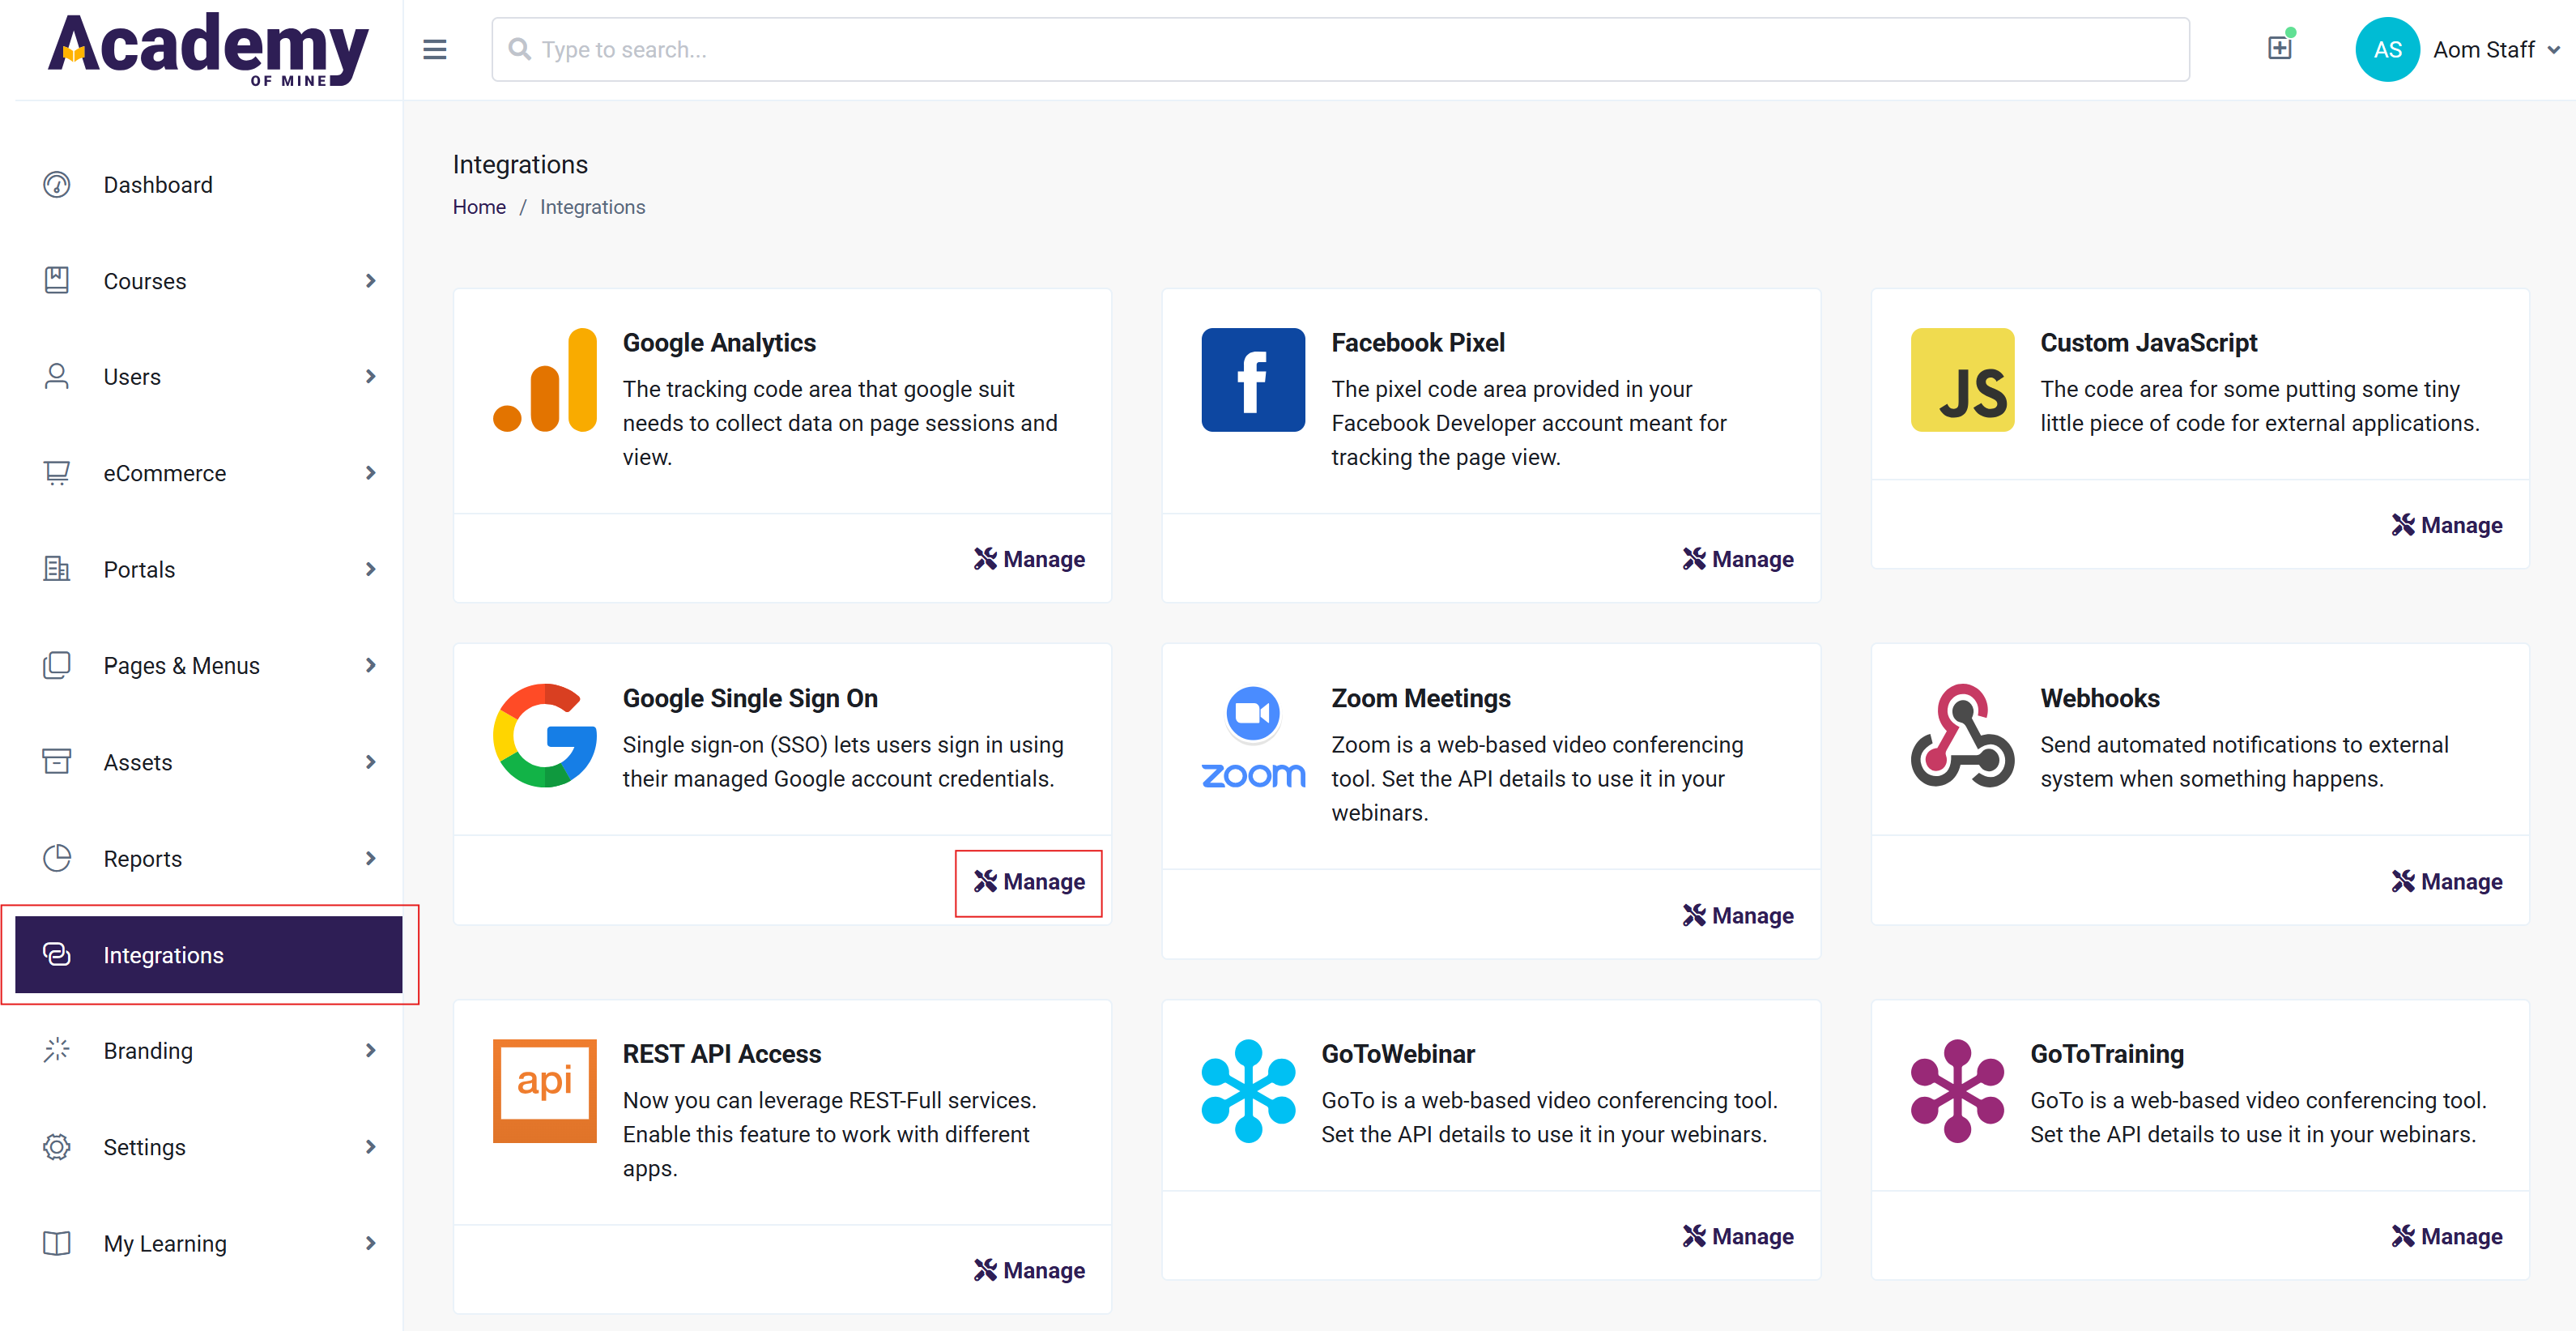
- From the Admin Dashboard, navigate to the Integrations tab
- Locate the Google Single Sign-On integration on the list and click on the Manage button to configure the settings for that integration
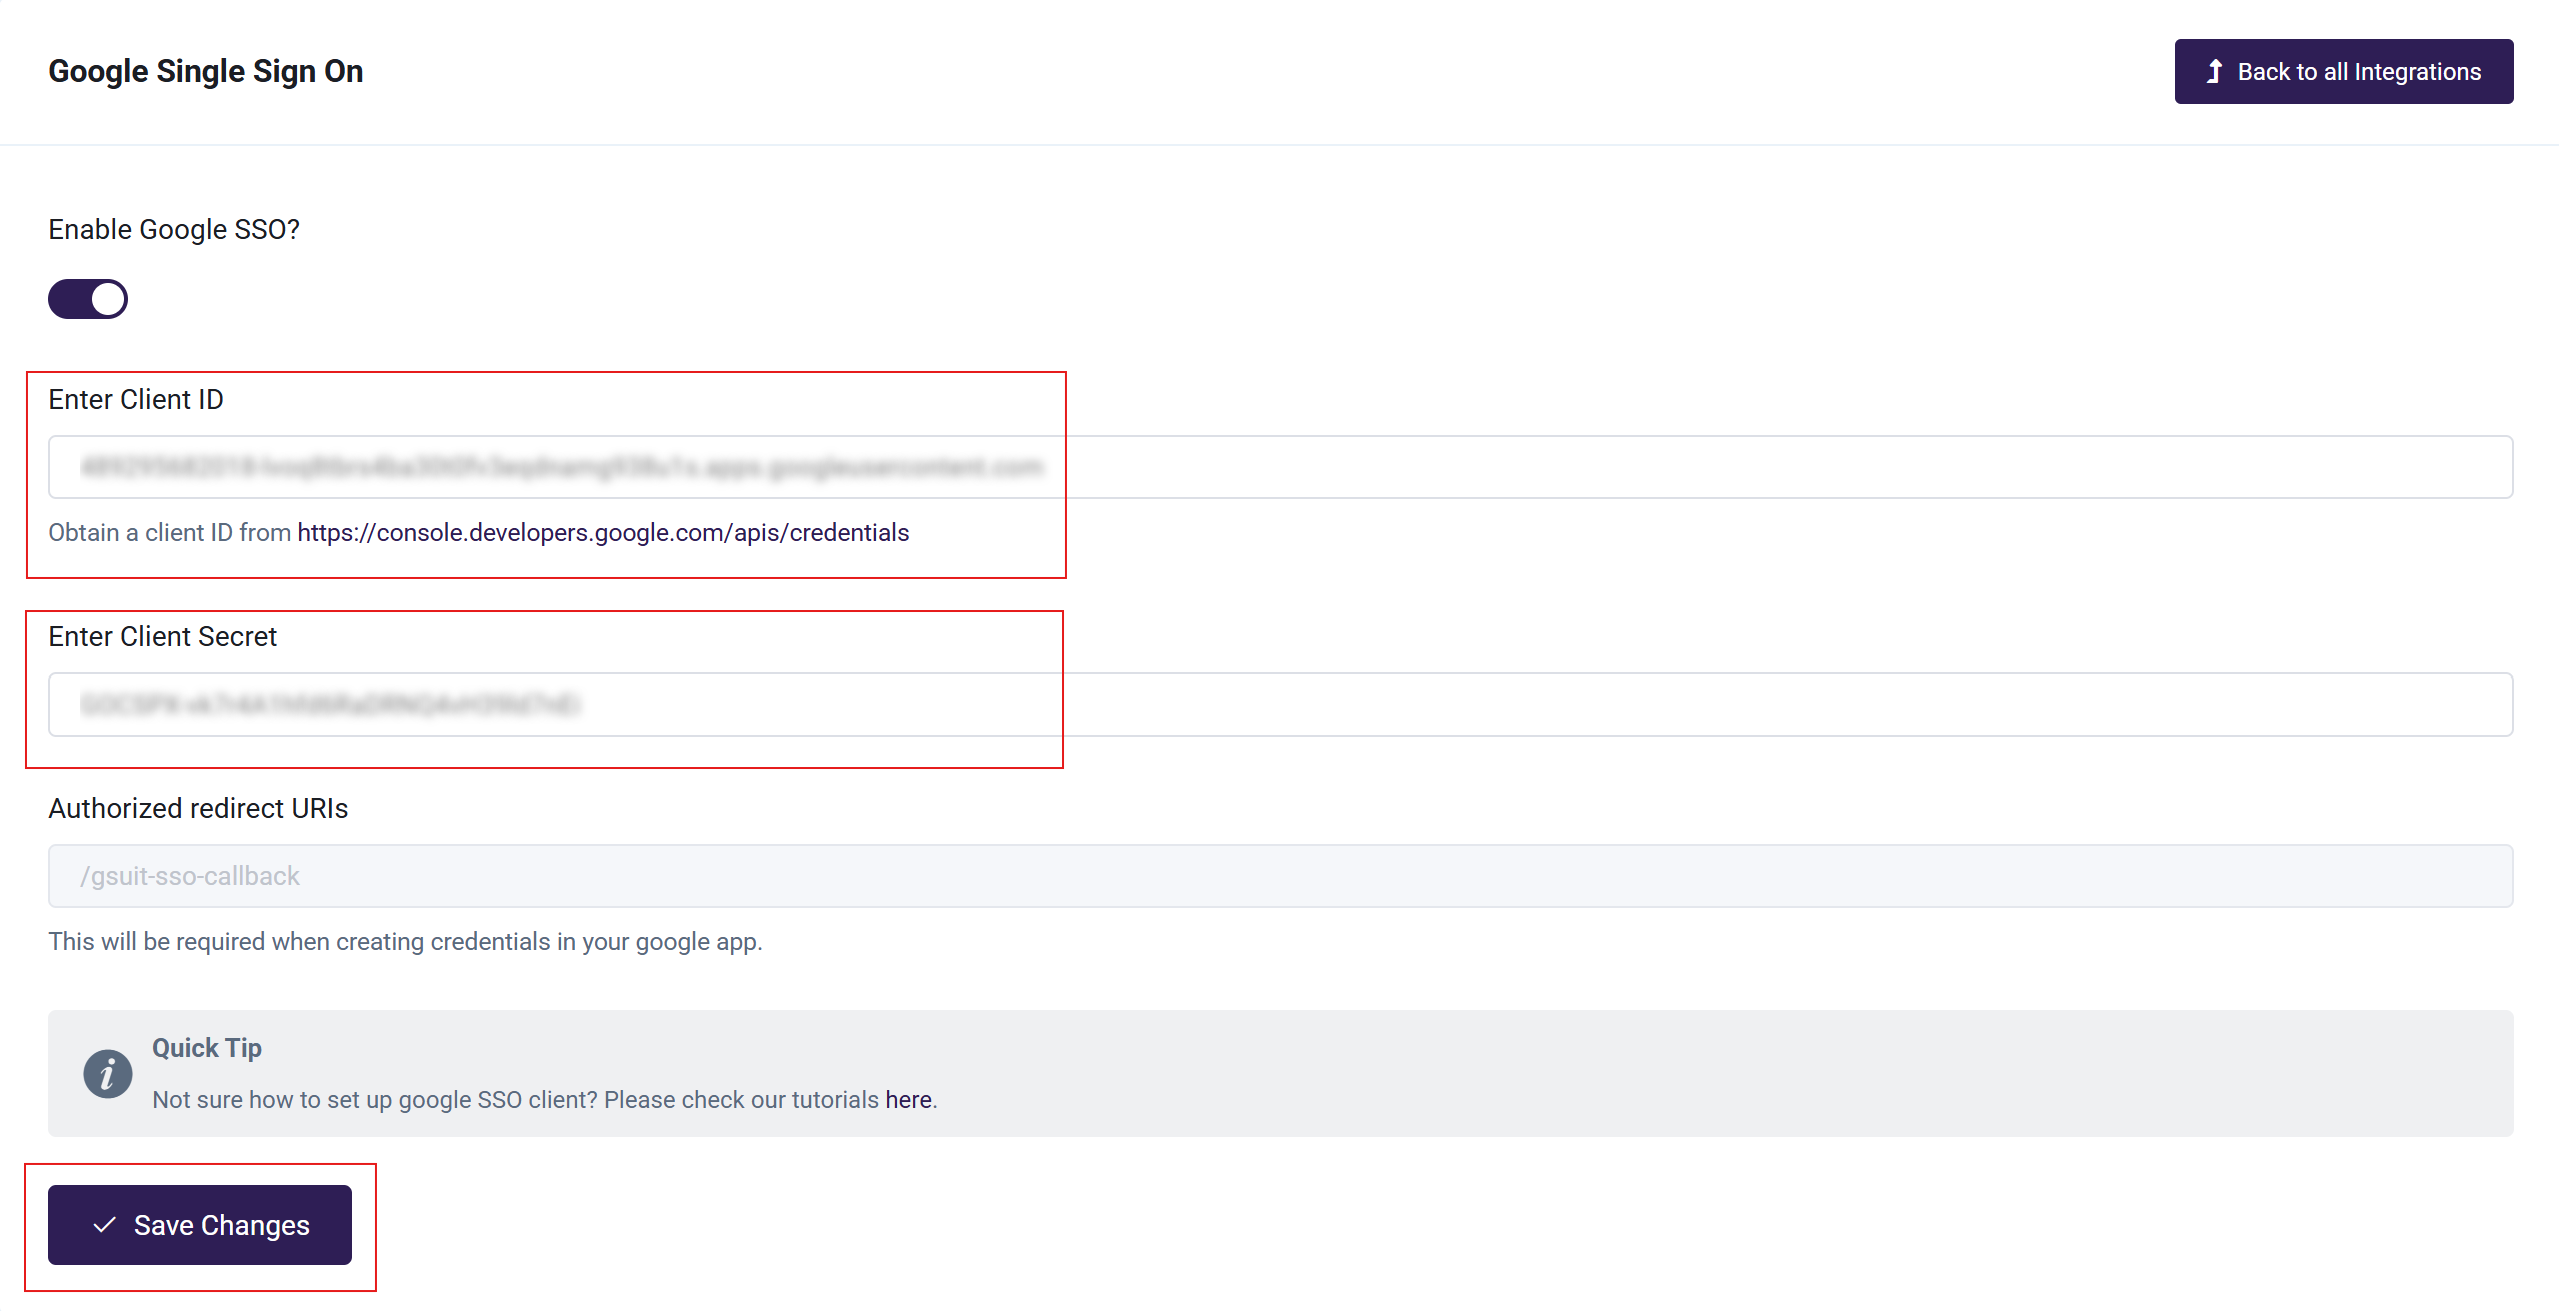
- Paste the keys into the fields
- Enable Google SSO via the toggle.
- Click Save Changes**.** Google SSO will now be activated, and can be used to log in from the Login screen of your platform.
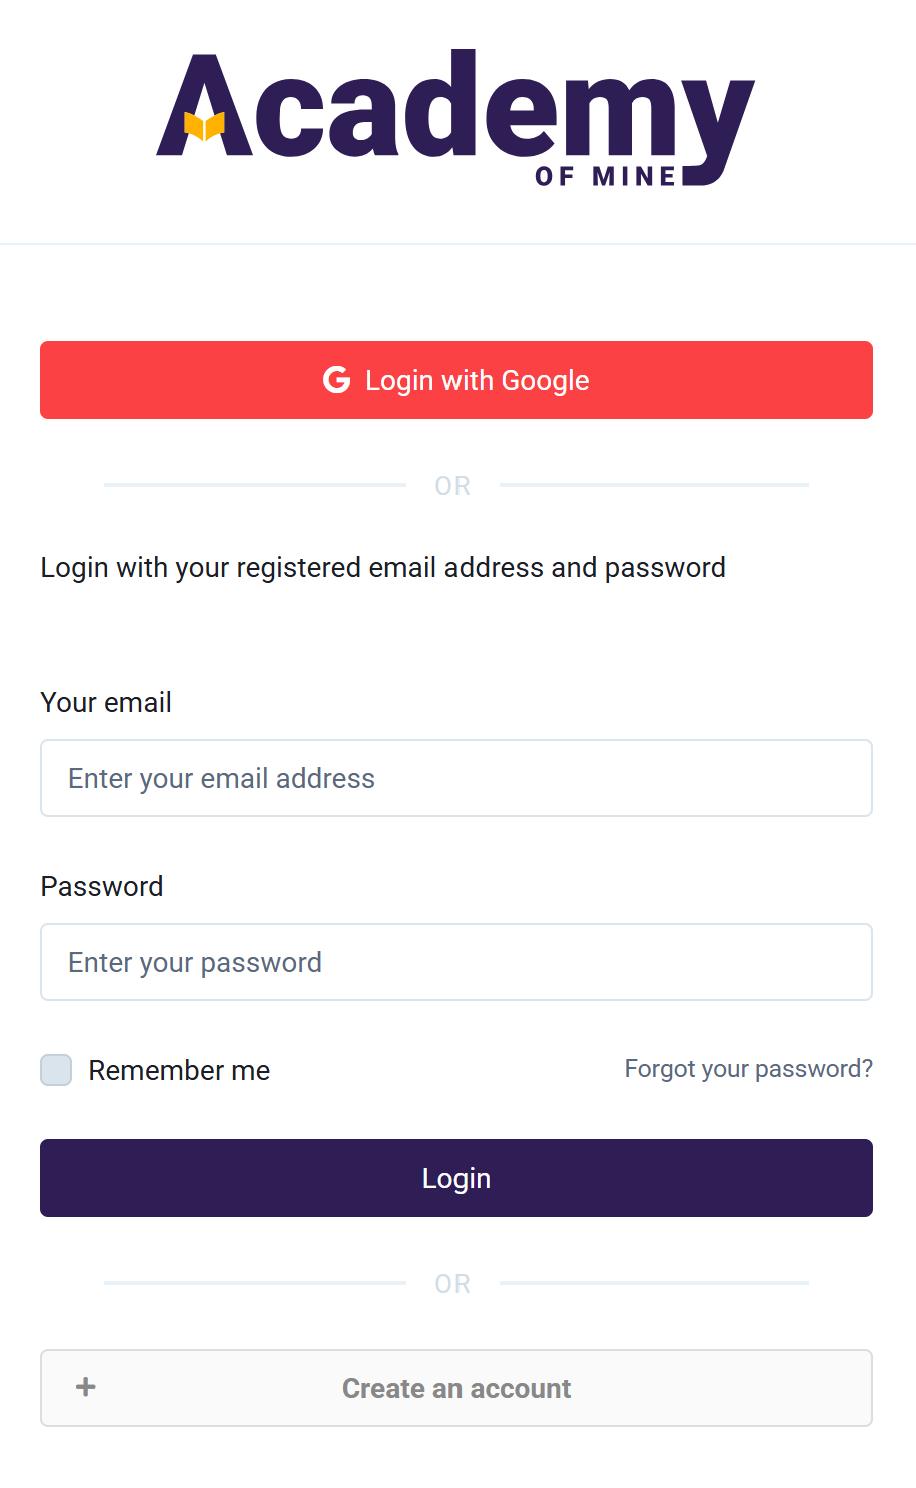
Here’s how it appears on the Login screen: