SAML 2.0 Single Sign On (SSO) with Salesforce
Single Sign On (SSO) is an authentication process which enables a user to securely authenticate with multiple applications and websites by using just one set of credentials. This streamlines user access and removes the need for users to memorize passwords or sign in with a different account, and can make for a seamless transition for users to access their courses. AOM offers a Single Sign On (SSO) integration with any Identity provider that supports SAML protocol--in this case, we will be going through how to set up SSO with Salesforce as the Identity Provider.
AOM LMS provides both IdP-initiated SAML SSO (for SSO access through the IDP portal which in this guide is Salesforce) and SP-initiated SAML SSO (for SSO access directly through the AOM LMS web application). You can configure AOM LMS for either or both types of SSO. Now there are two sections of this tutorial: the first one deals with a Service Provider (SP) initiated flow and the other is the Identity Provider (IdP) initiated flow.
Service Provider Initiated Flow with Salesforce as IdP
Below are the steps required to activate and configure the SAML 2.0 SSO functionality using Salesforce as the Identity Provider (IdP) and the flow is Service Provider(SP) initiated.
- From the Admin Dashboard in AOM, navigate to the Integrations tab
- Click on the Manage button for the Single Sign On (SAML 2.0) section to navigate to the settings page.
- Open a new tab and navigate to your Salesforce Portal. This is where we are going to configure the keys needed for the fields on the settings page.
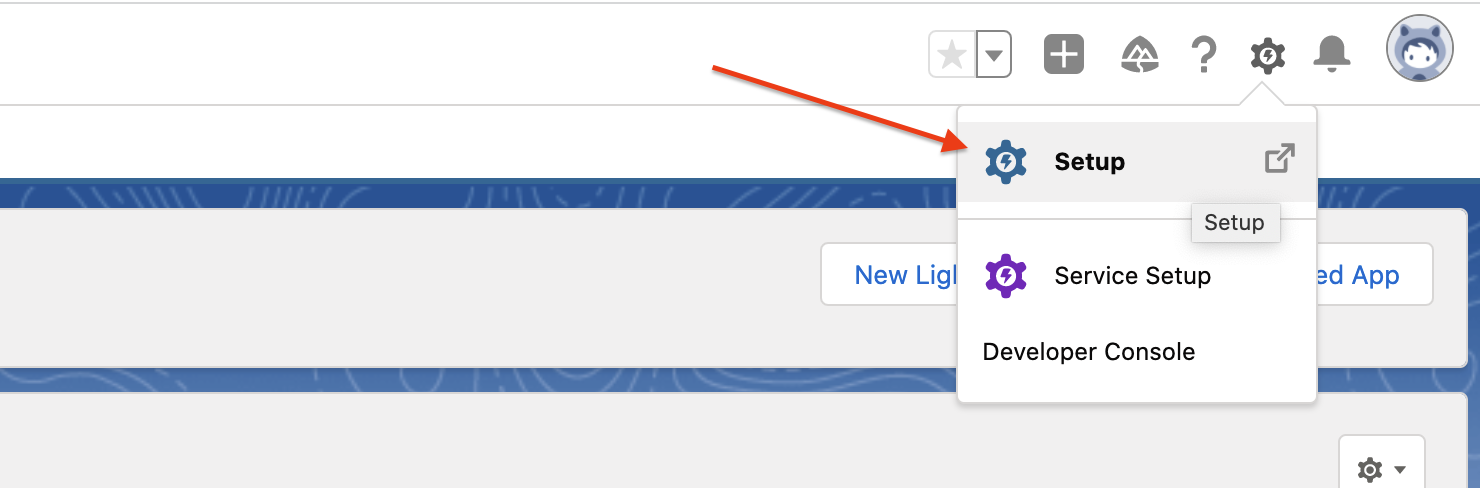
- You need to create an application in Salesforce. To create an application, switch to setup mode first.
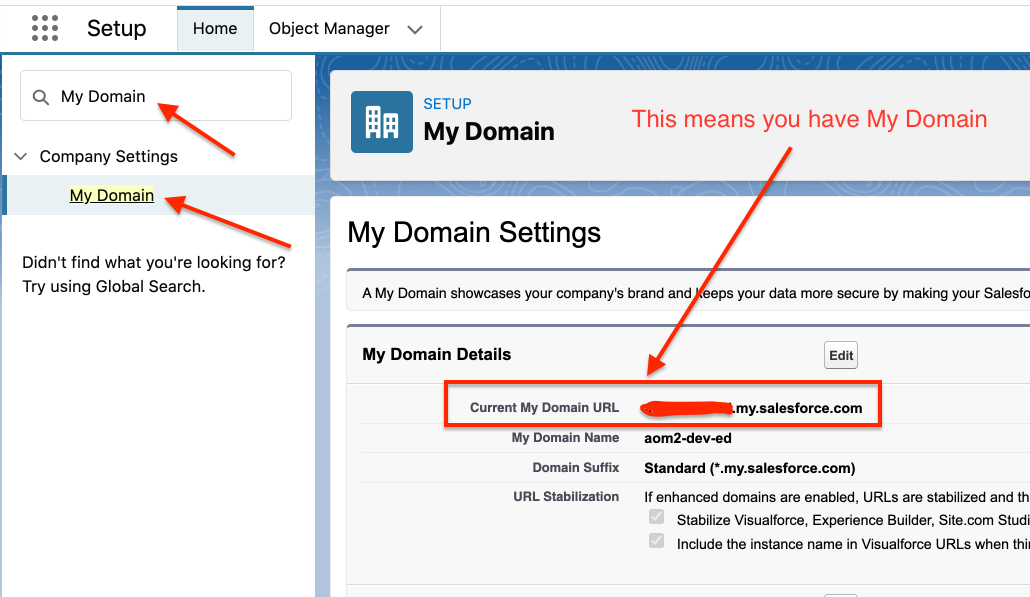
- But before you create an app, you need to make sure that you have "My Domain". Here is how to check if you have My Domain or not. You need to
create a My Domain if you don't have one.
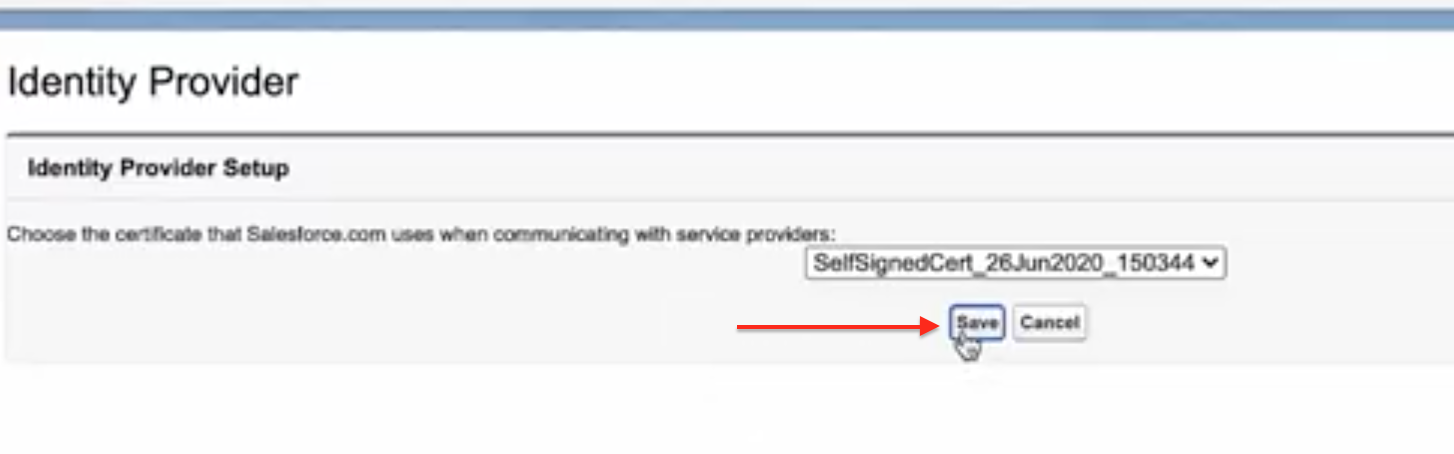
- Enable Salesforce as Identity Provider. To enable, use Quick find and search for "Identity Provider". Click on the Identity Provider and you will be redirected to Identity provider settings page. You just have to click on the enable button and then click on Save.
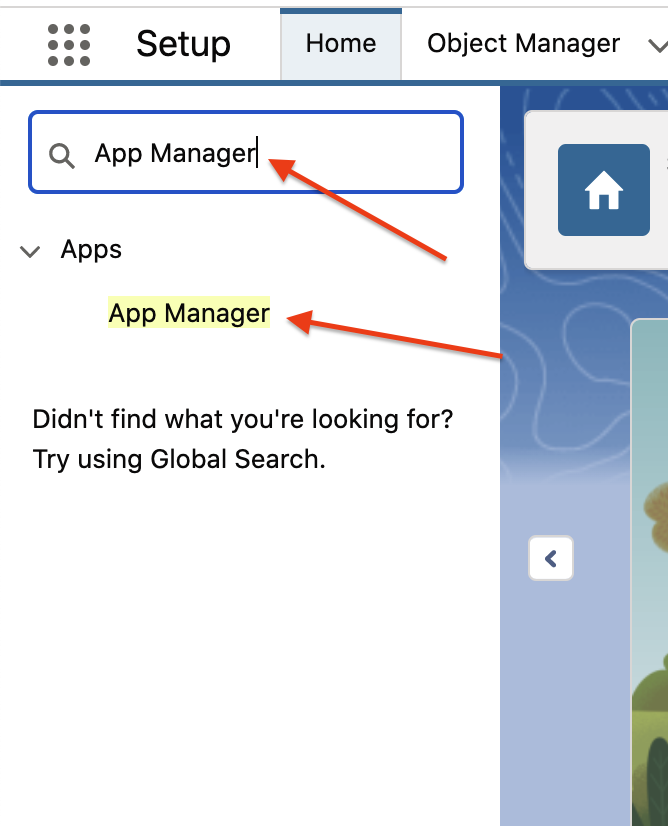
- Now you need to create an application inside App Manager > Connected app. To create an application, search for "App Manager" using Quick Find and click on it
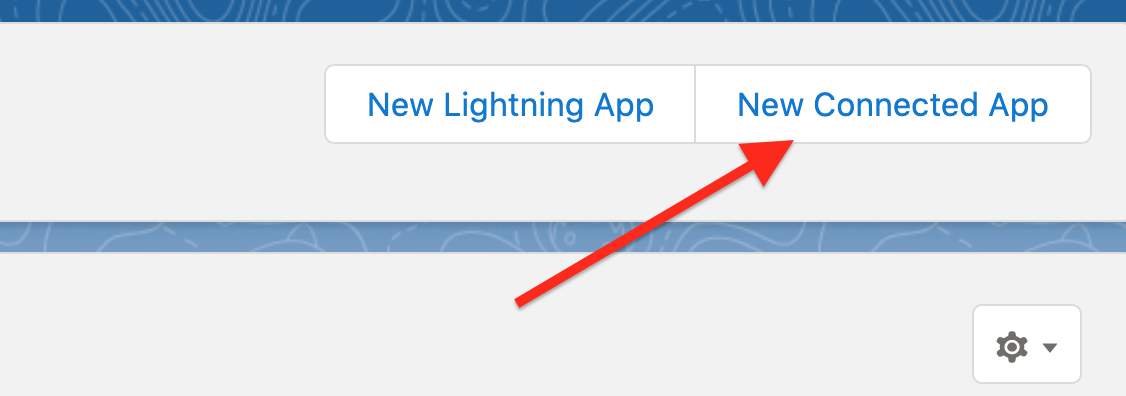
- Now you will be redirected to App Manager page where you have to click on "New Connected App" button.
- Now you are in "New Connected App" page, you need to fill the form and click on save button.
Connected App Name : Name of the application
API Name : It will be auto-populated using Connected app Name
Contact Email : Your email
Entity Id : You can get the entity id from the LMS SAML manage page
ACS URL : You can get the ACS URL from the LMS SAML manage page
Subject Type : You need to select "Username"
Name ID Format : It should be "urn:oasis:names:tc:SAML:1.1:nameid-format:emailAddress"
Issuer : It will be auto-populated
IdP Certificate : Keep the Default IdP Certificate

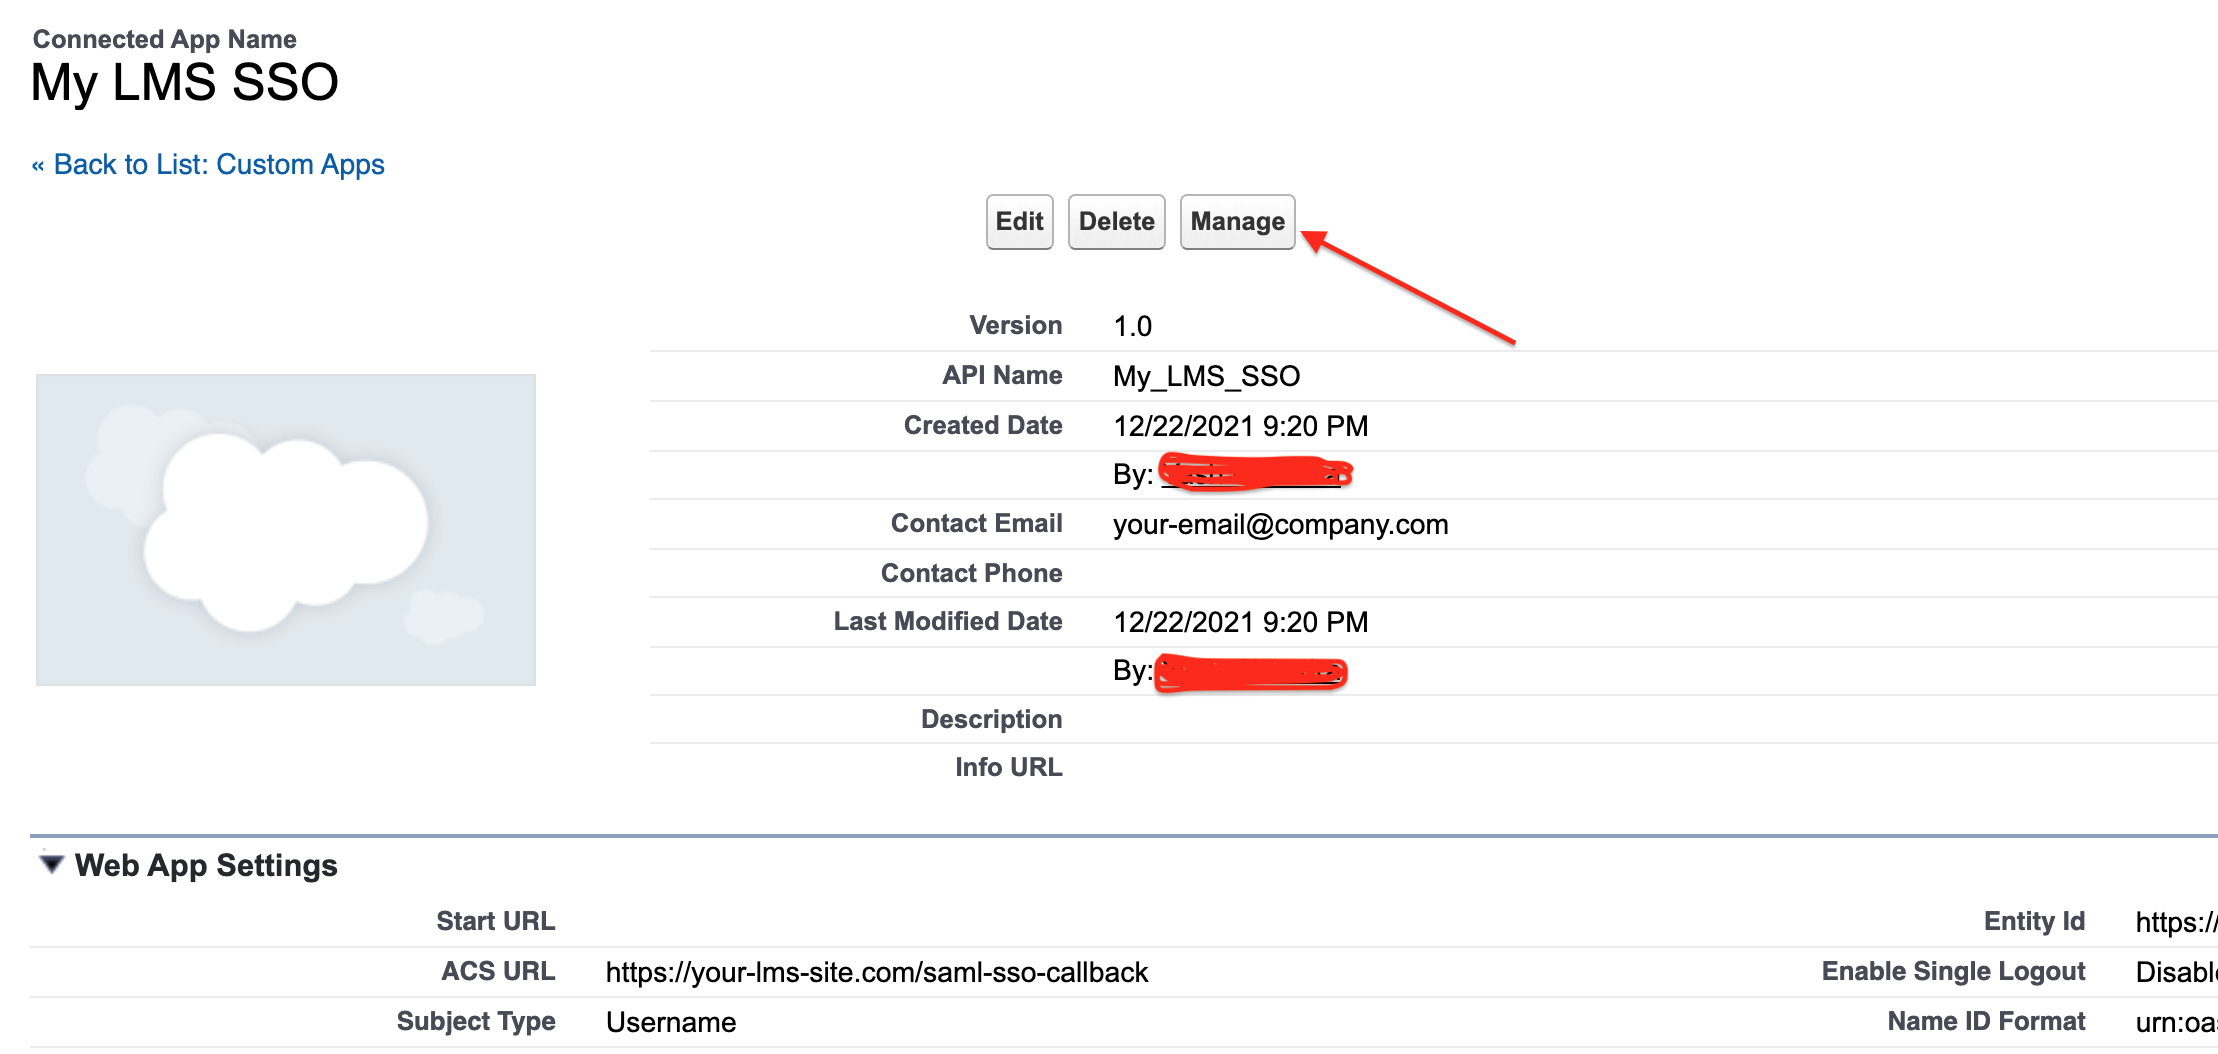
- You have created the application for your SSO successfully. Now you will be redirected to the "Manage Connected Apps" page. Click on manage button to get the connection credentials to connect Salesforce with AOM LMS.
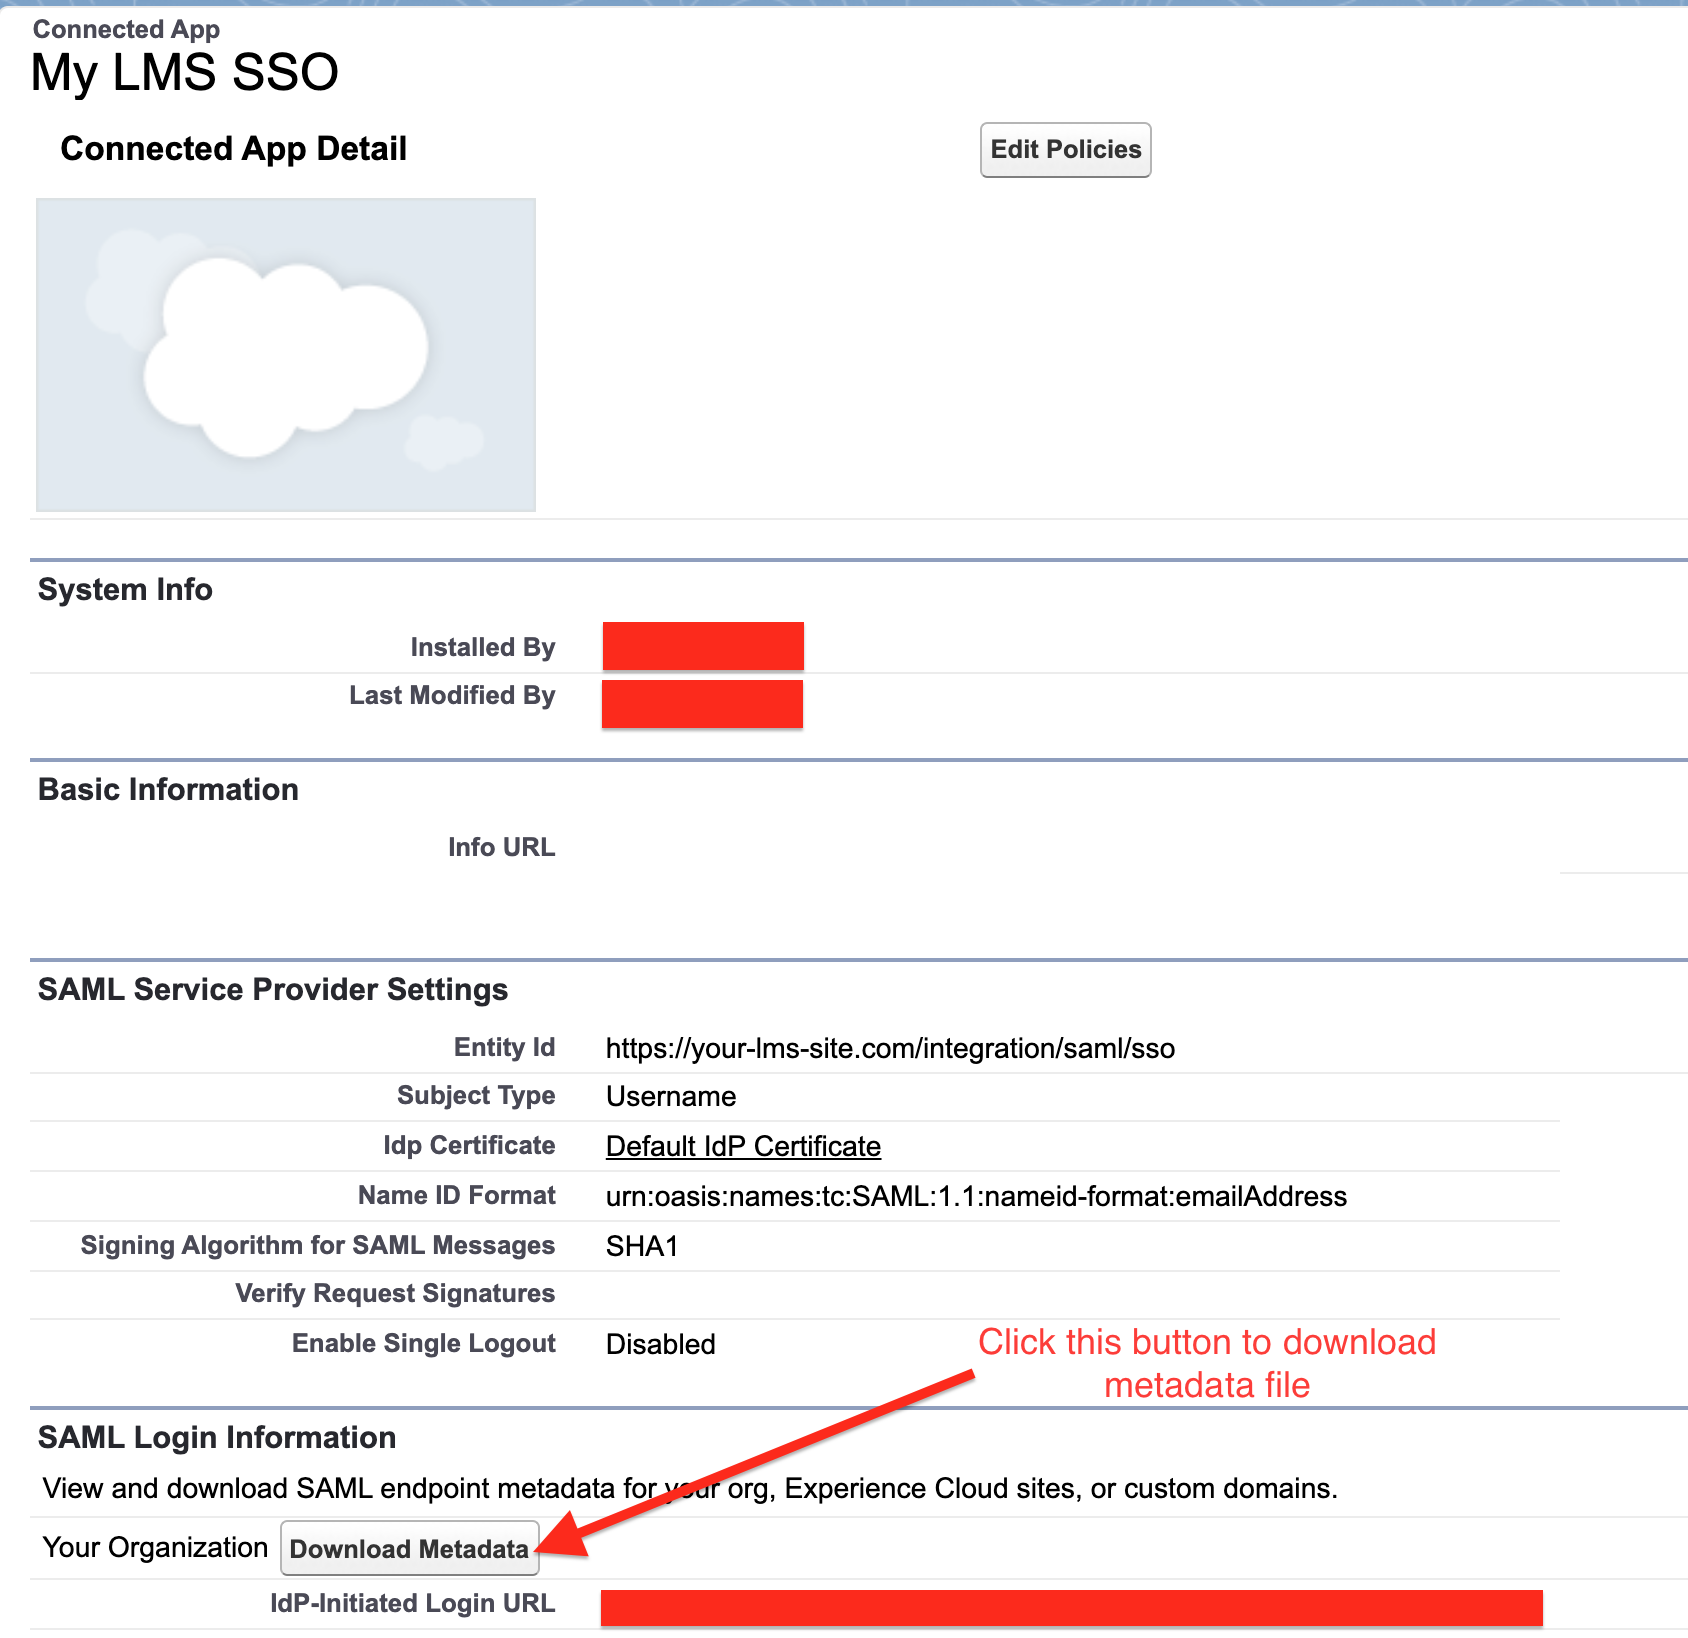
- You will be redirected to "Connected App Detail" page. Here you have to download the metadata file, which needed to be uploaded in AOM LMS later.
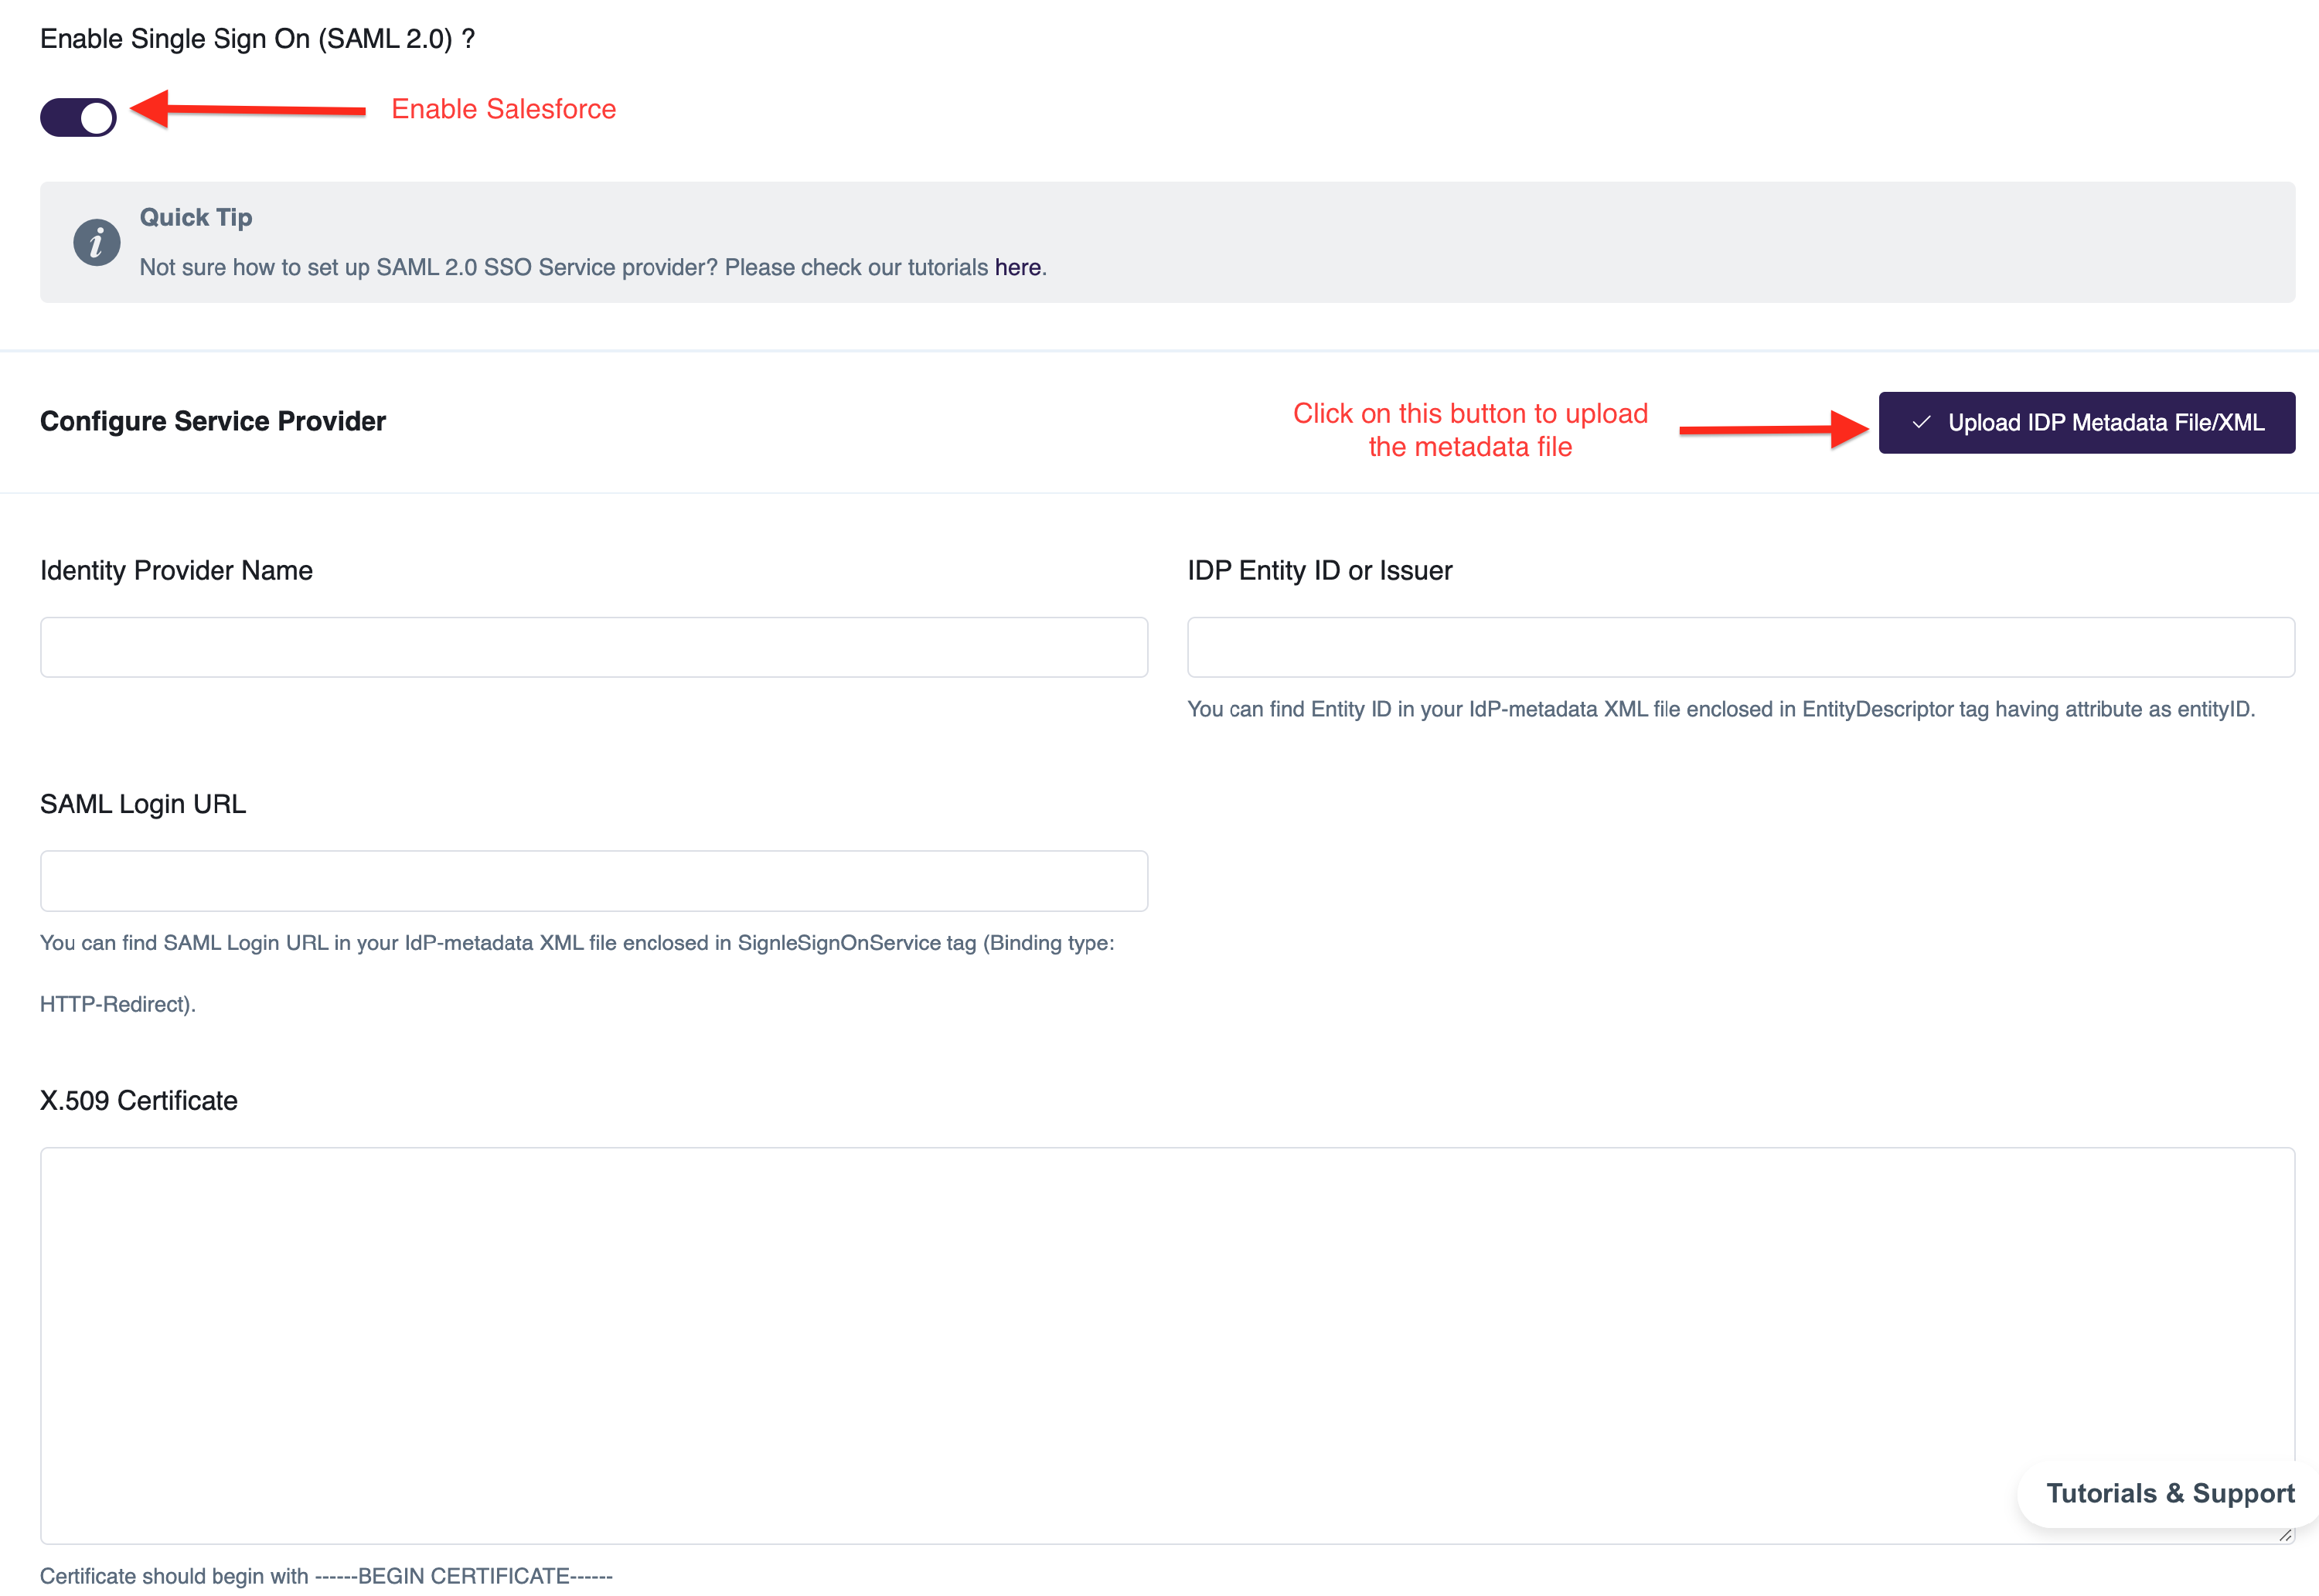
- Now login to AOM LMS and open SAML SSO manage page as mentioned in Step 1 and 2. You need to enable SAML and upload the metadata file which you have downloaded in step 11.
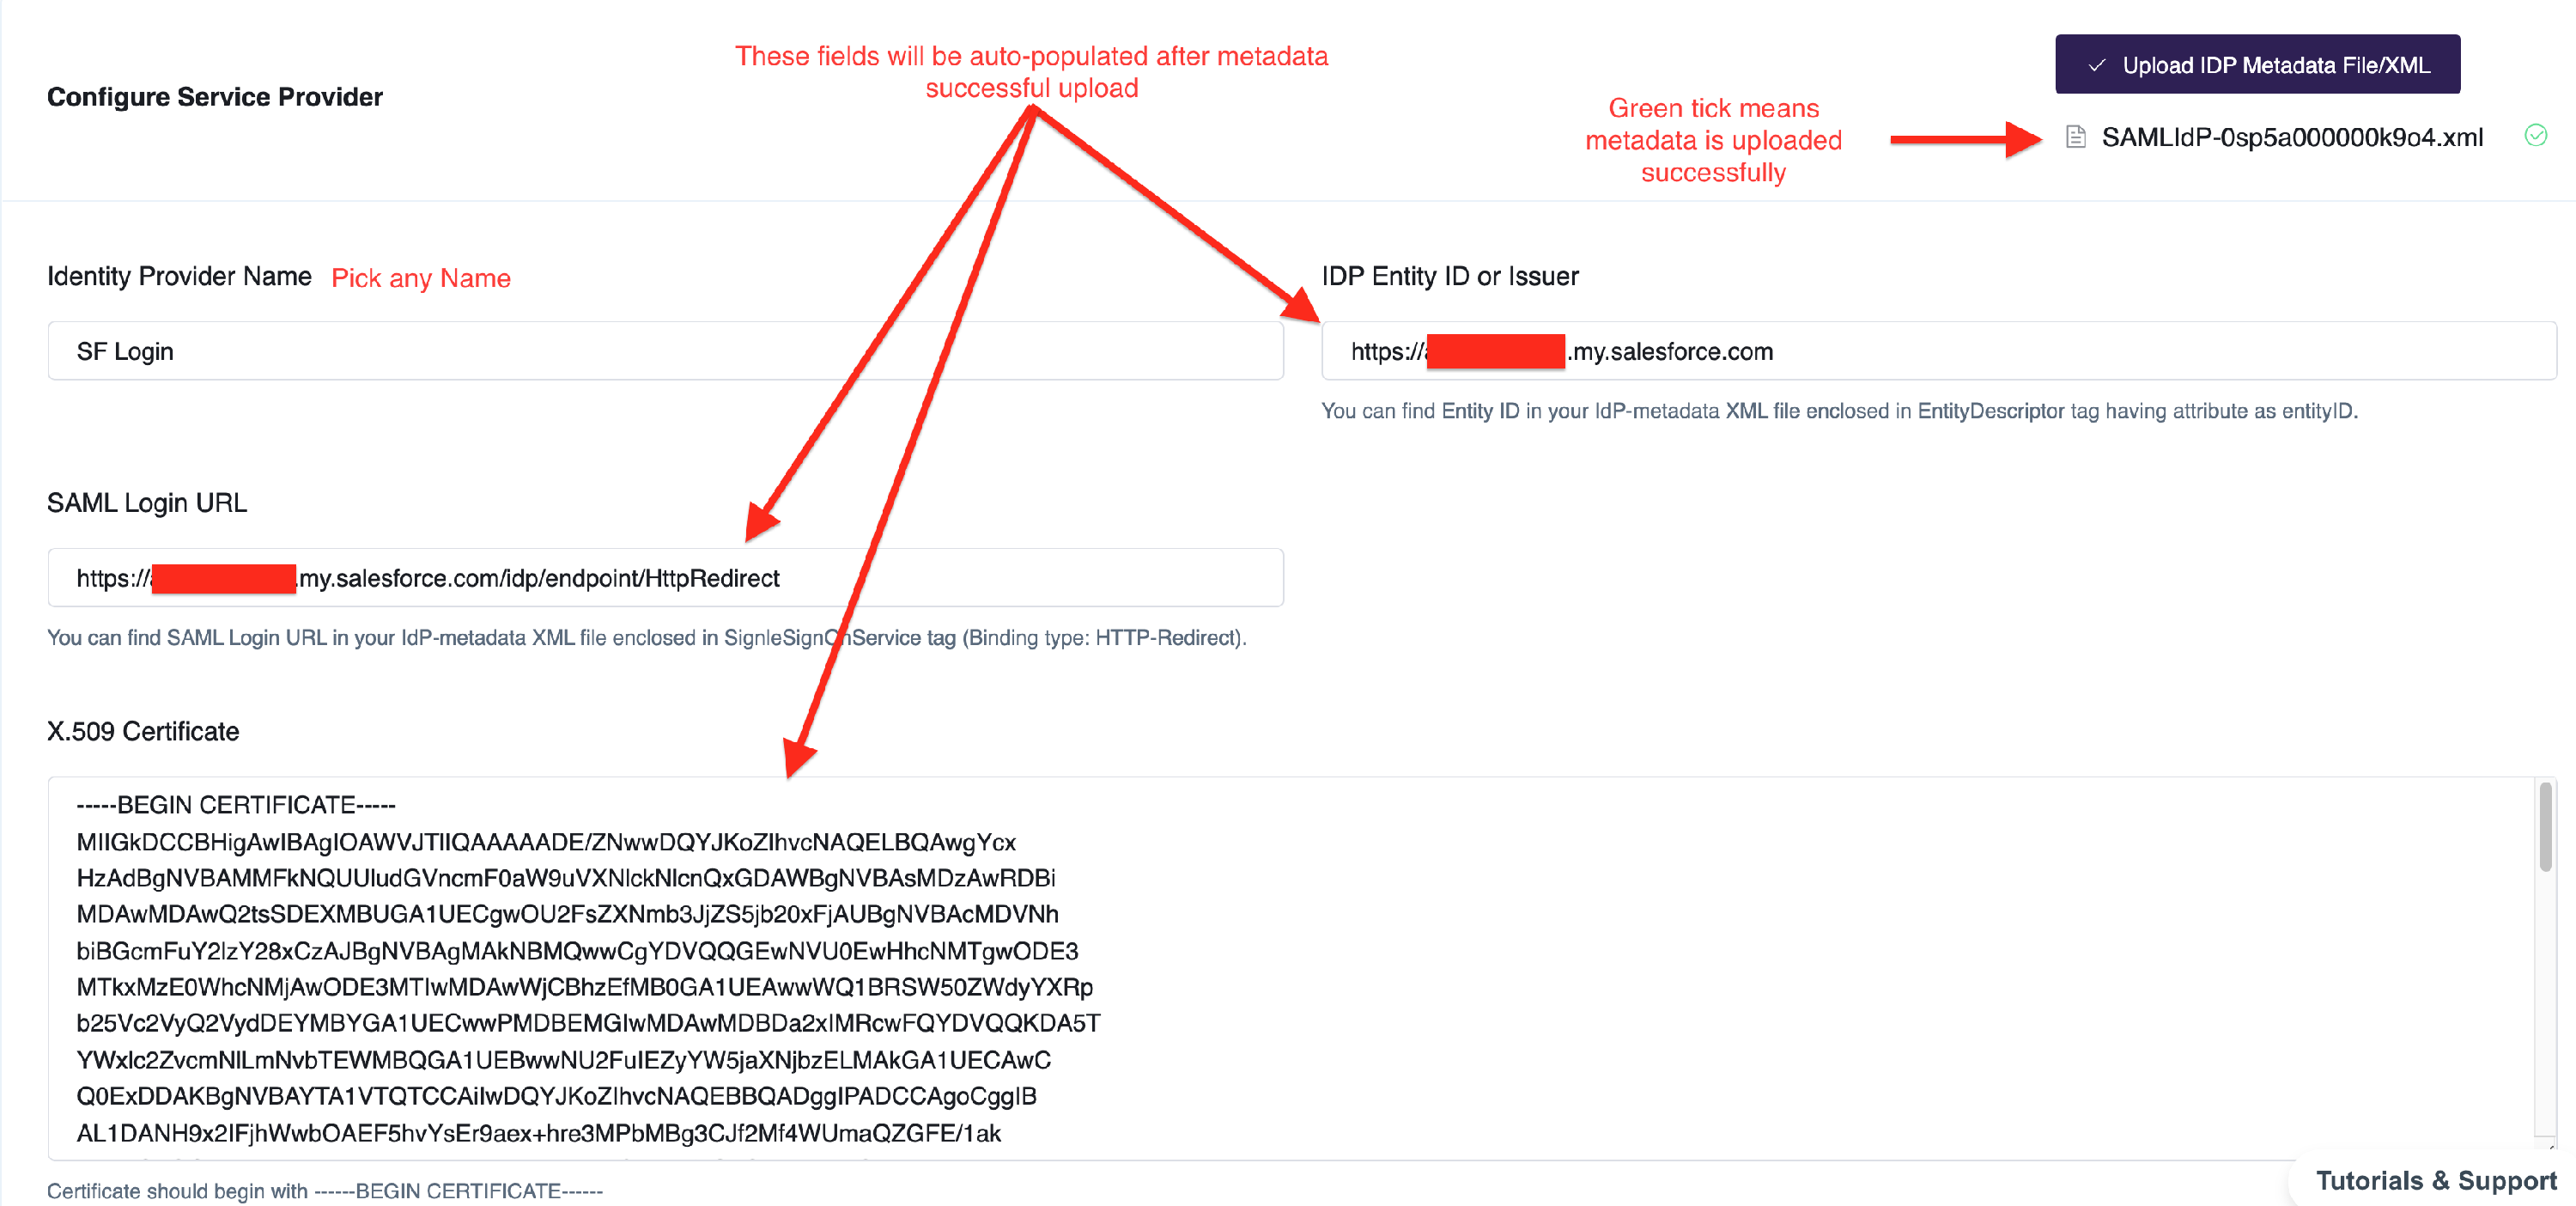
- You should see below screen after successful upload.
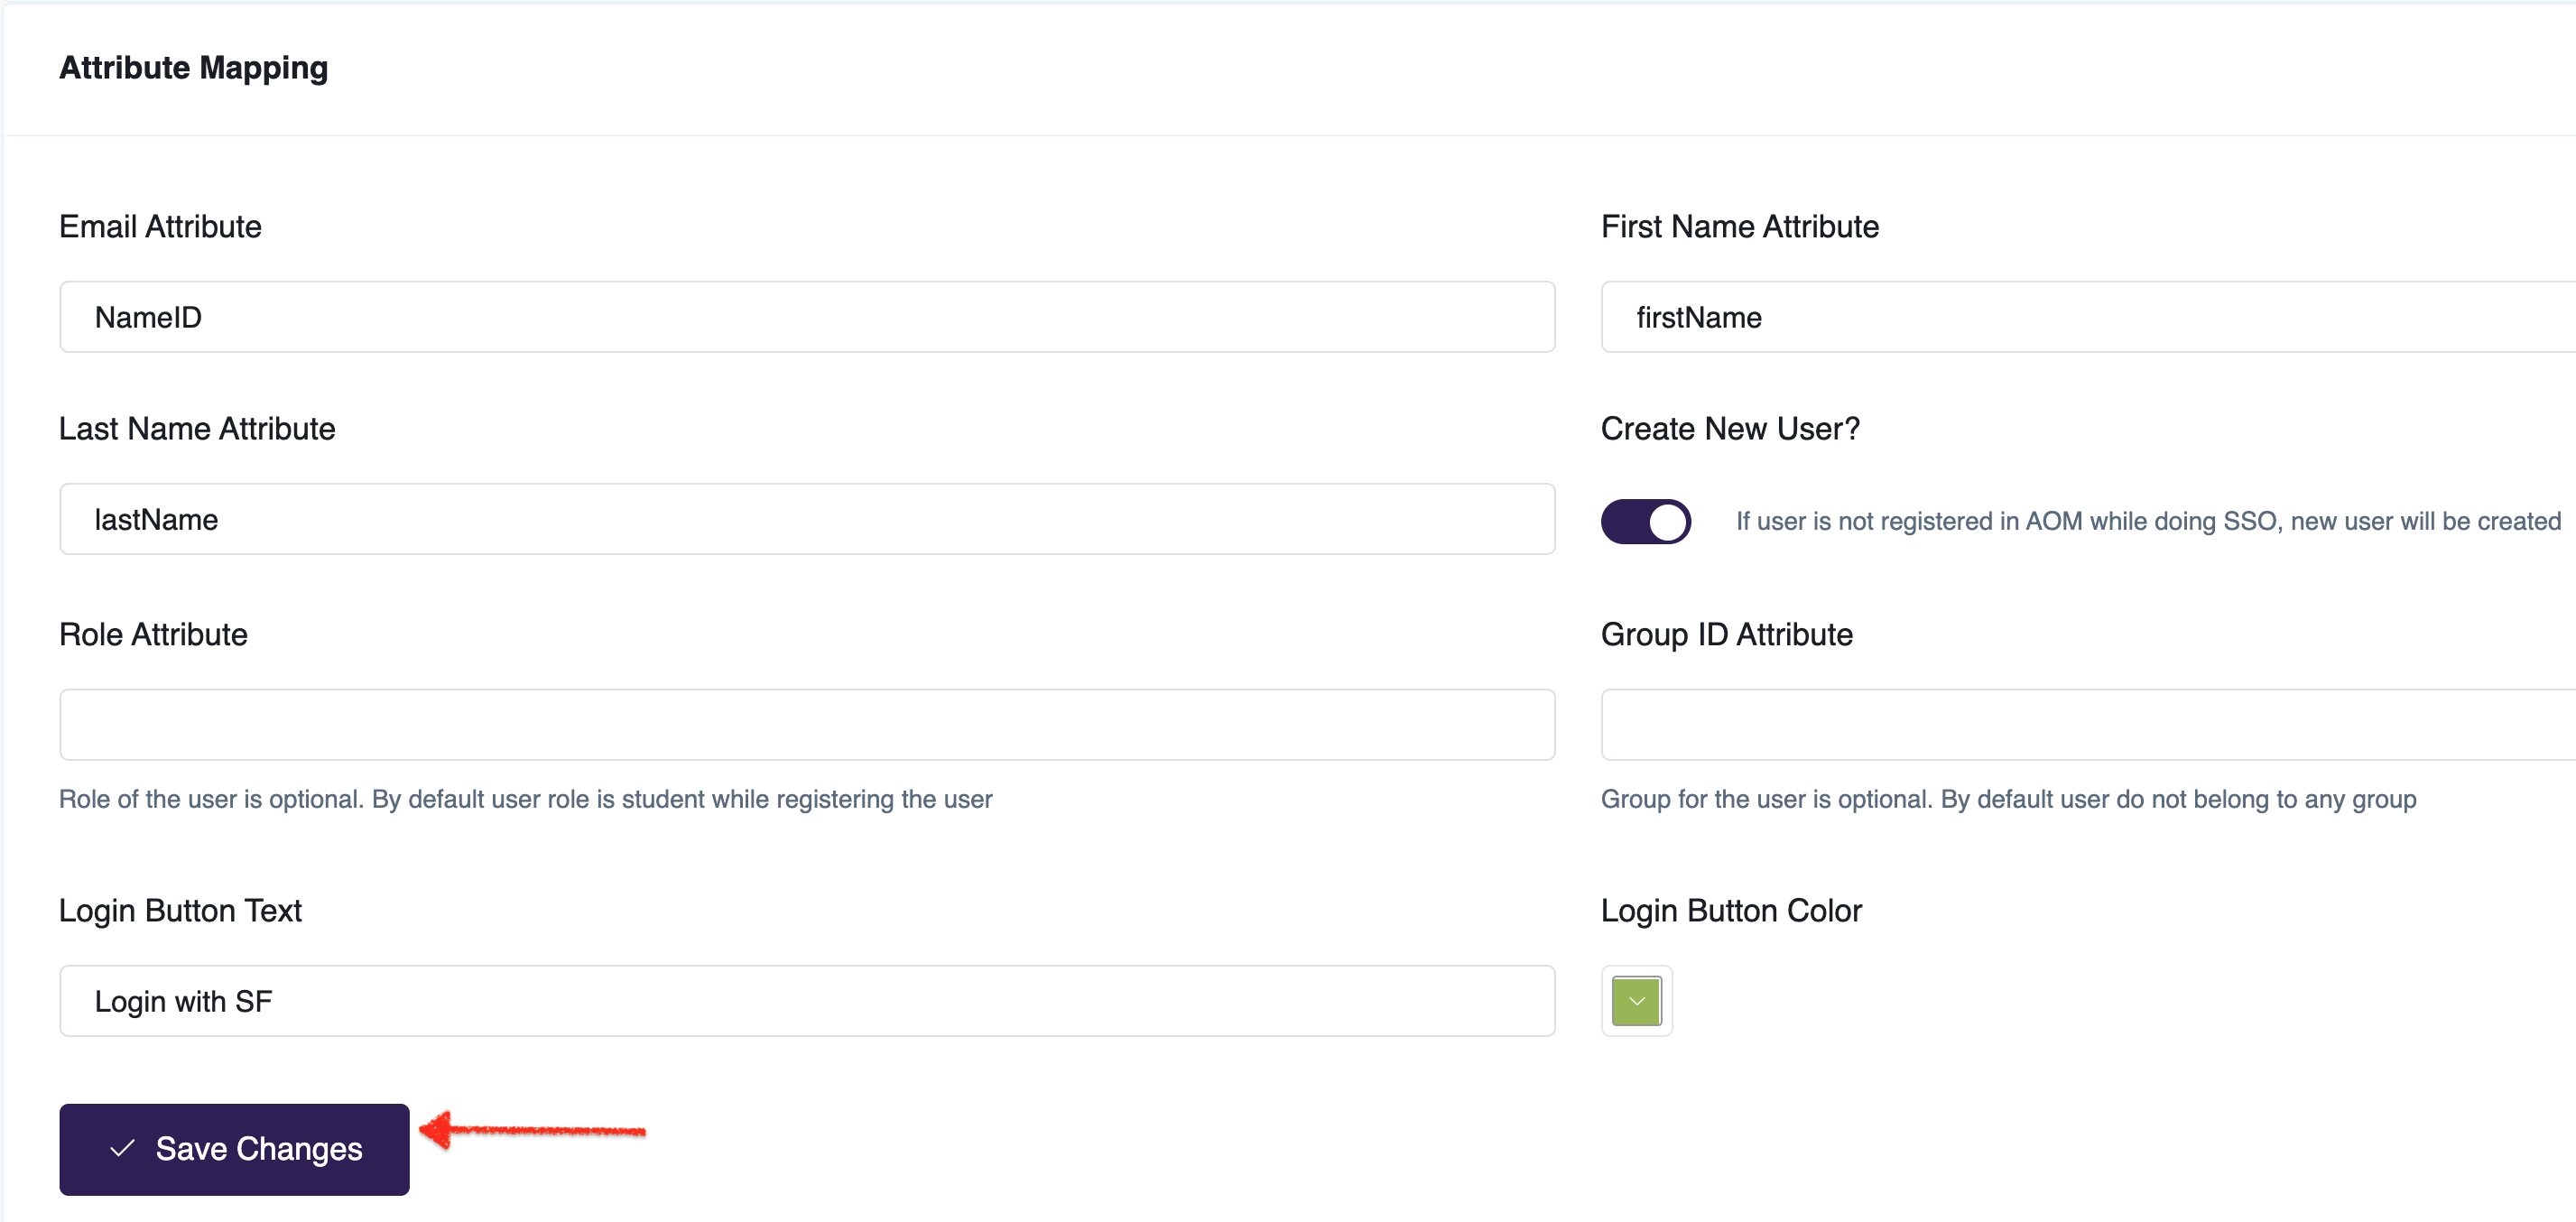
- Now you need to map the user attributes so that AOM can read the data from Salesforce SSO response.
There are few fields which you need to fill.
**Email Attribute =>**NameID
**First Name Attribute :**firstName
**Last Name Attribute :**lastName
Create New User? : Enable this if you want a new user to be created in AOM LMS if user is not already registered in AOM while doing SSO, otherwise disable it.
Role Attribute : This is optional. This determines the role of the user when a new user is being created. By default user role is student.
Group ID Attribute : This is optional. Your IdP can pass extra attribute in SAML response to determine a user belongs to which group while registering the user. By default user do not belong to any group.
There are some extra fields which you can setup for styling the login page of AOM LMS.
Login Button Text : Login with button text. You can pick any name you want, like for this case the ideal text would be "Login with Salesforce/SF"
**Login Button Color :**Login with button color. You can pick any color you want as per your company's branding.
Finally click on Save changes, and you are done.
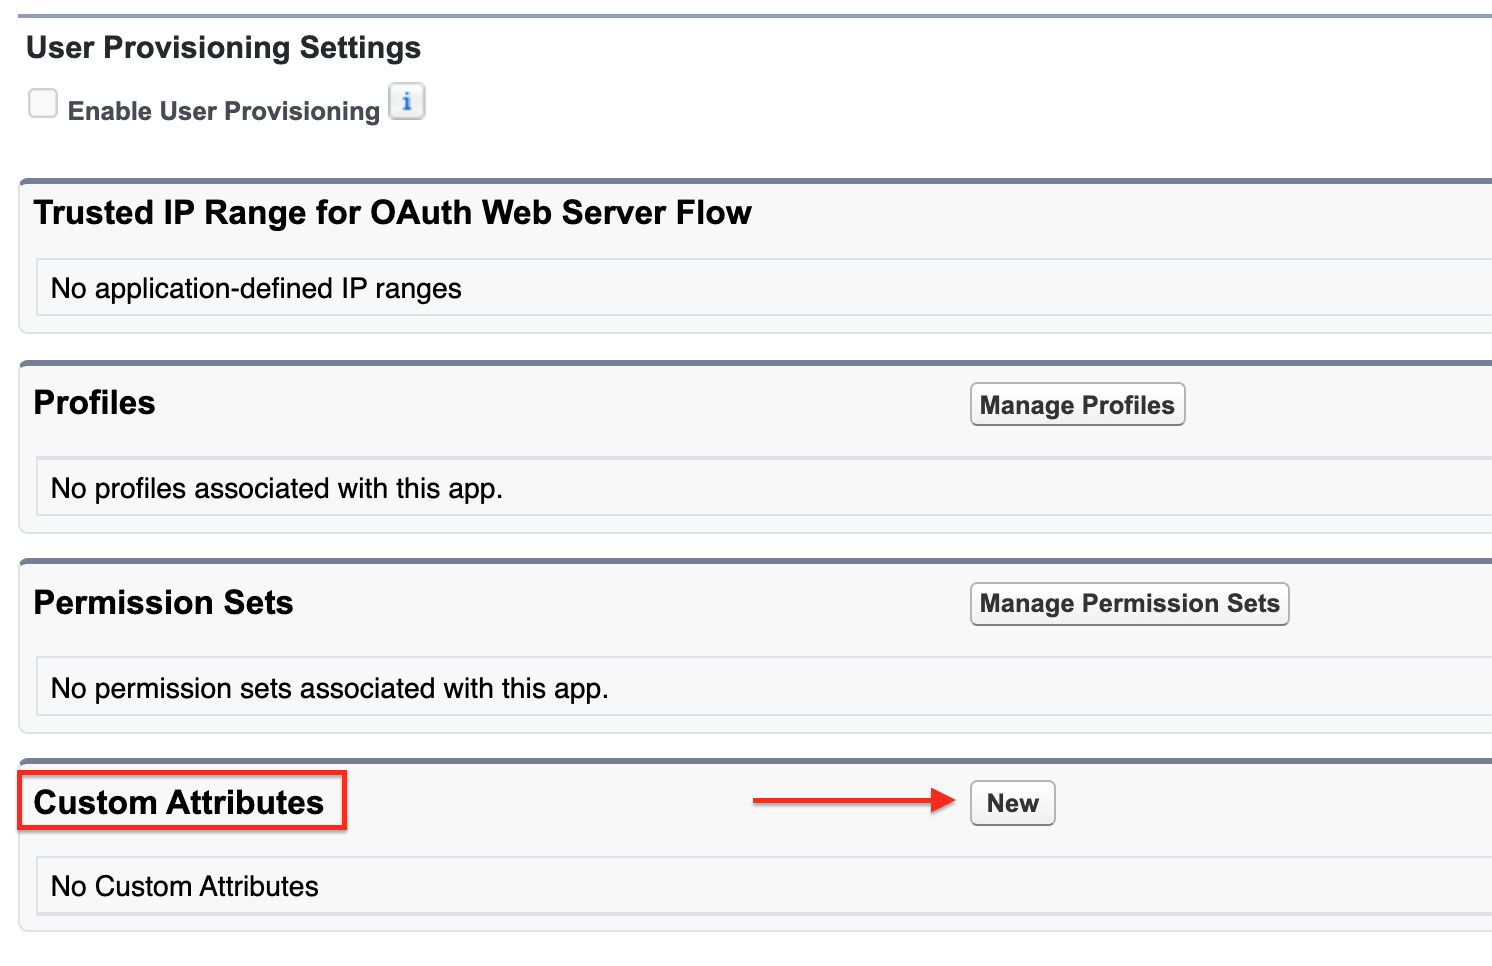
- Now that we have saved the user attributes, you have to add "Custom Attributes" in your salesforce app so that AOM LMS can read these attributes values and can connect to Salesforce easily.
We have setup first name, last name and email attributes in above step (step 14), so now we have to create custom attribute for them. No need to create custom attribute for email because salesforce already send it in their response while making the connection between Salesforce and AOM LMS.
Go to Connected App Detail page (as mentioned in step 10 and 11) and search for "Custom Attributes" section. Click on New button to create a custom attribute.
Now you will be redirected to Create Custom Attribute pagewhere you will be creating attributes for firstName and lastName. You can create attributes for user role as well but it's optional.

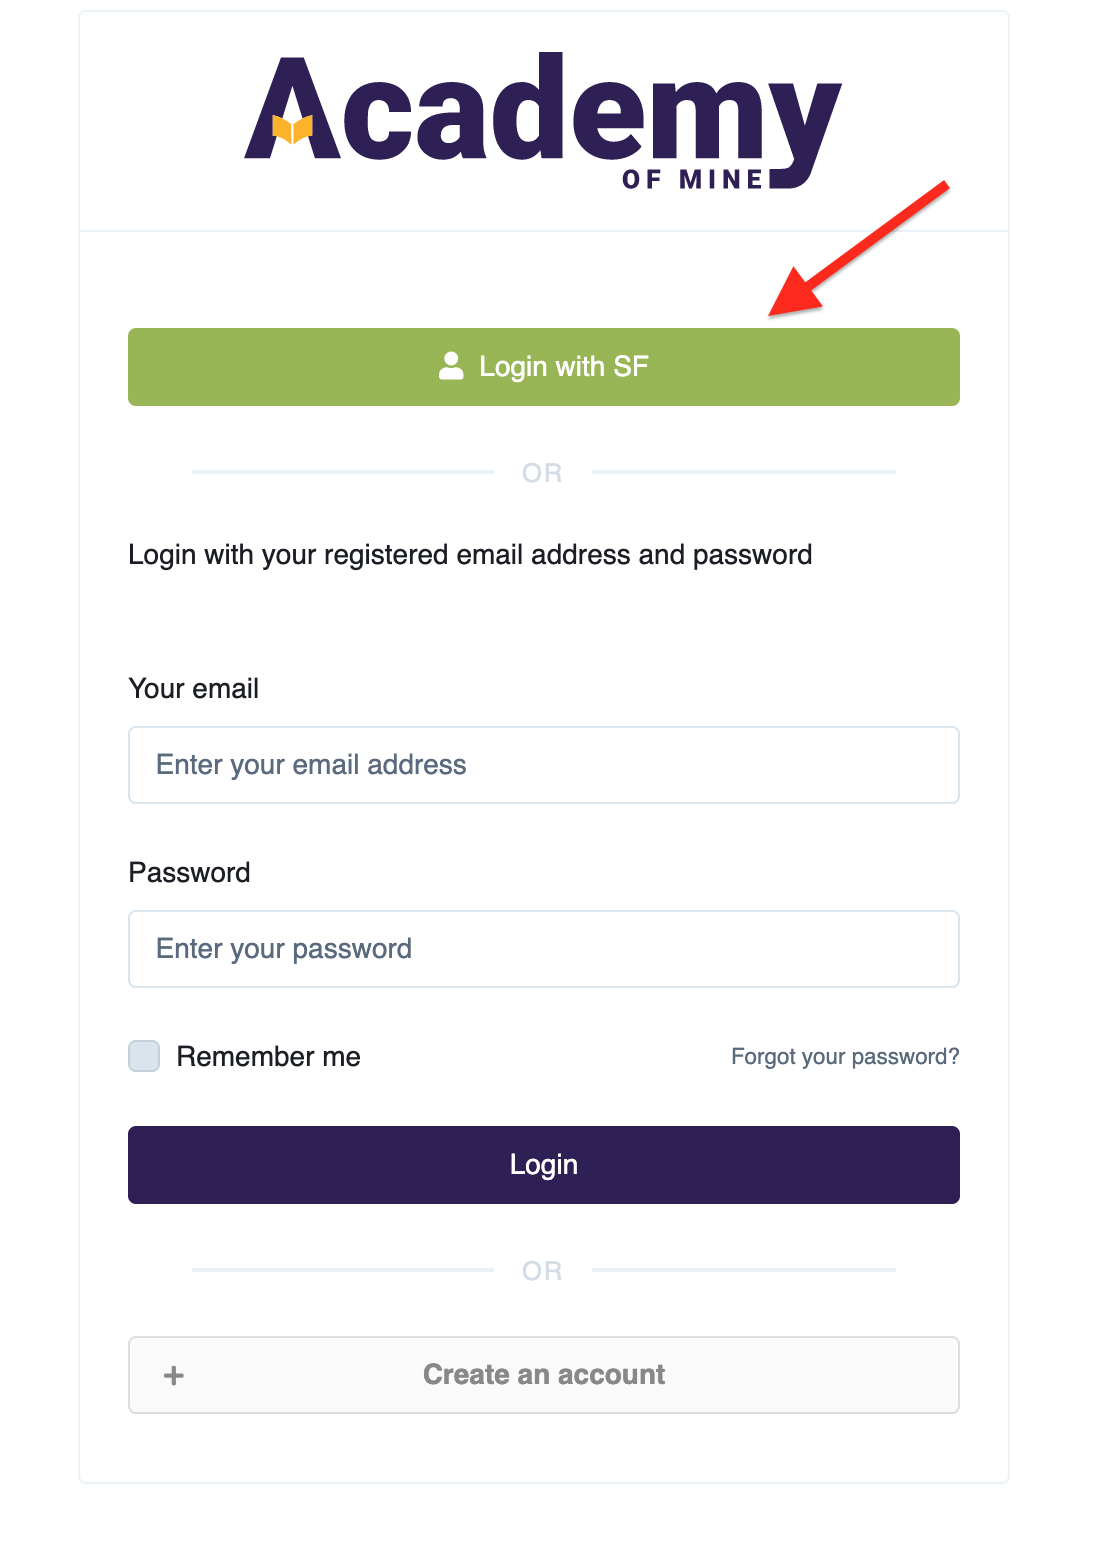
- Now if you go to your AOM platform login page, you should see one extra
Login with Button for SAML 2.0 SSO login.
Identity Provider Initiated Flow with Salesforce as IdP
Below are the steps required to activate and configure the SAML 2.0 SSO functionality using Salesforce as the Identity Provider (IdP) and the flow is Identity Provider(IdP) initiated.
- Follow all the steps of SP initiated flow above
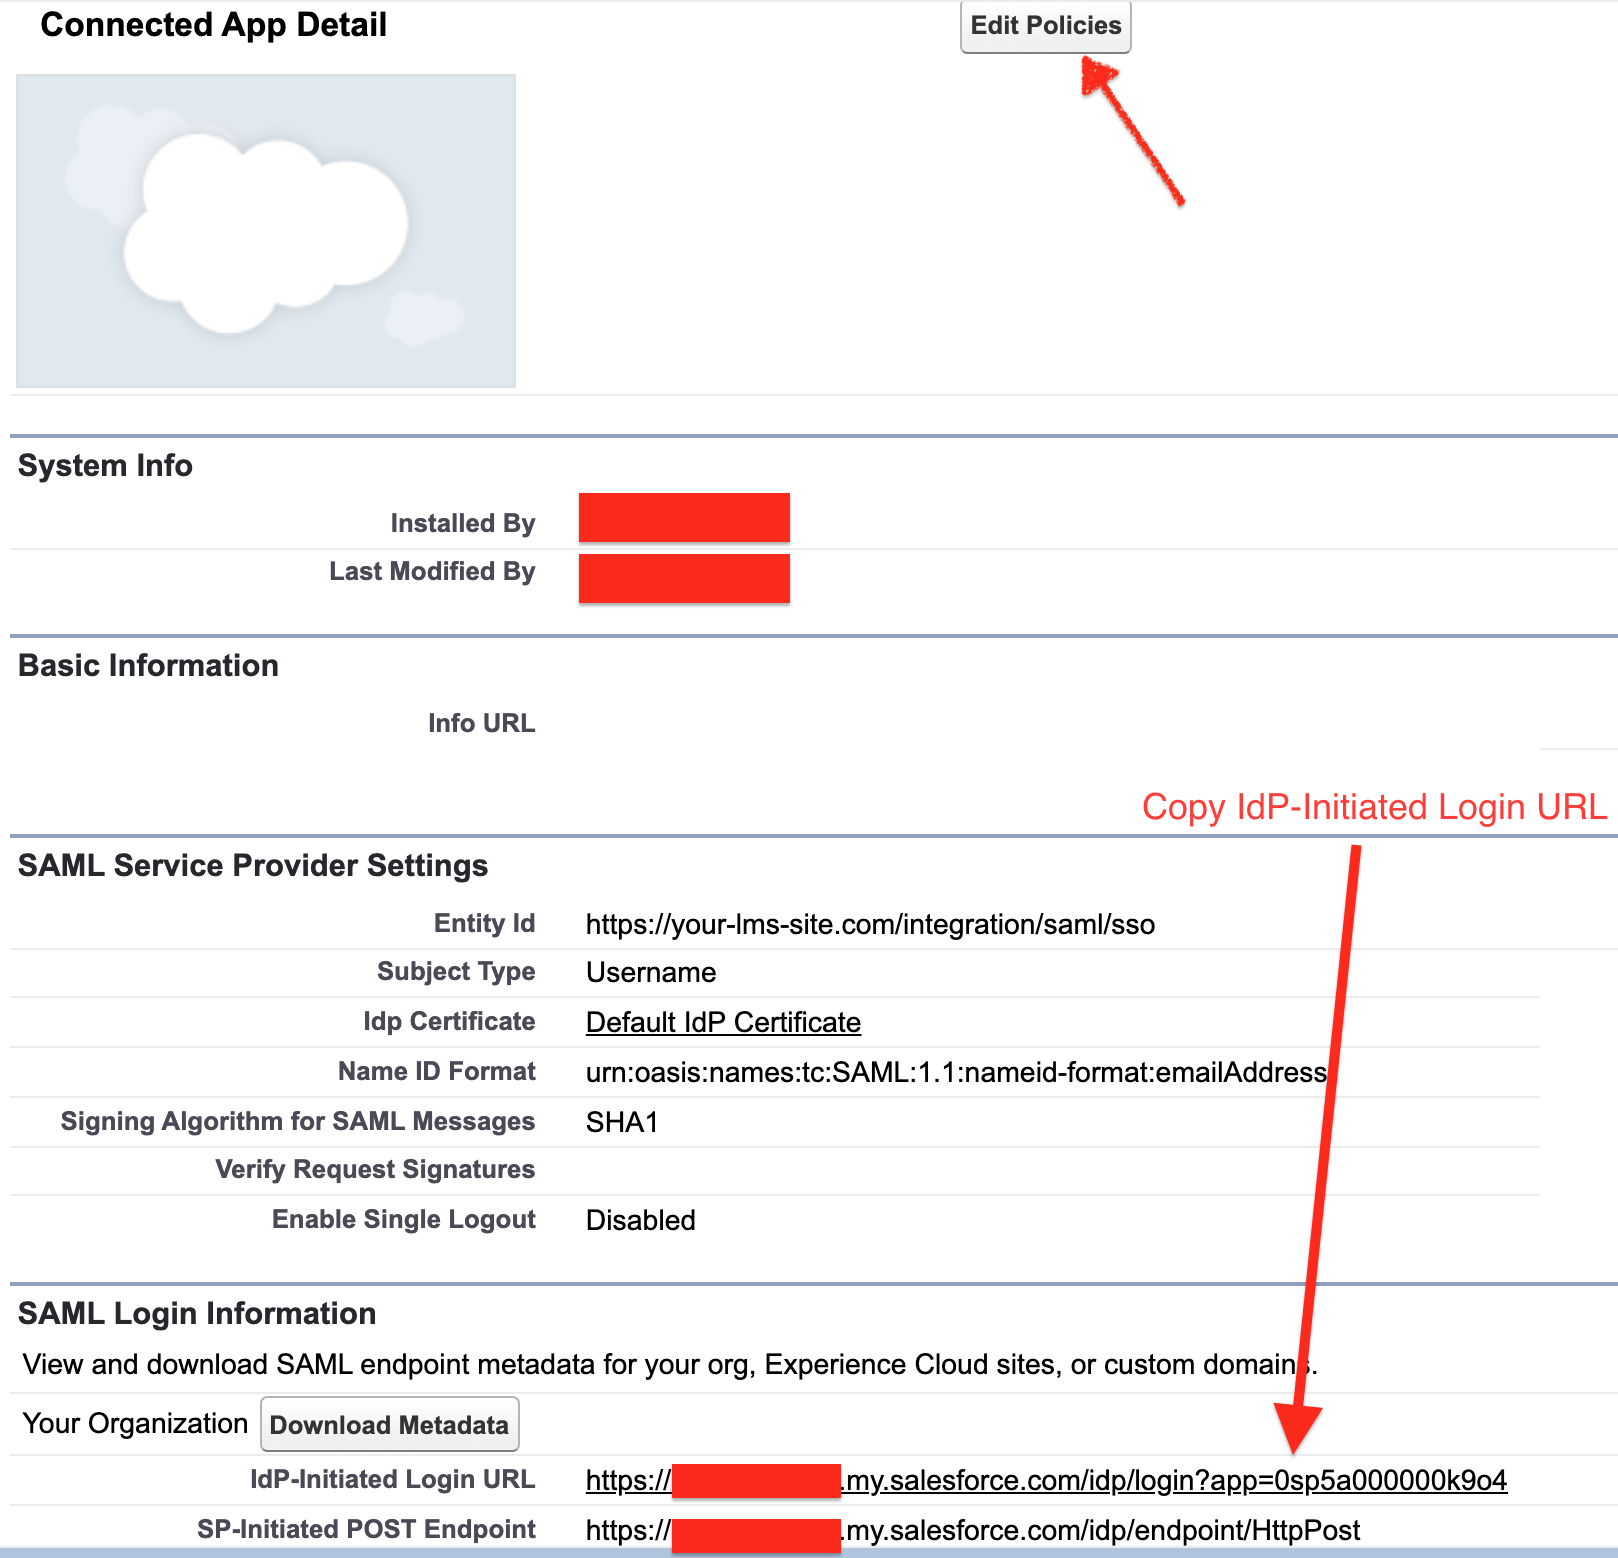
- Now you need to go to "Connected App Detail" page as mentioned in step 10 and 11 in SP initiated flow.
- You should see the IdP-Initiated Login URL in the Connected App detail page. Copy it and keep it handy.
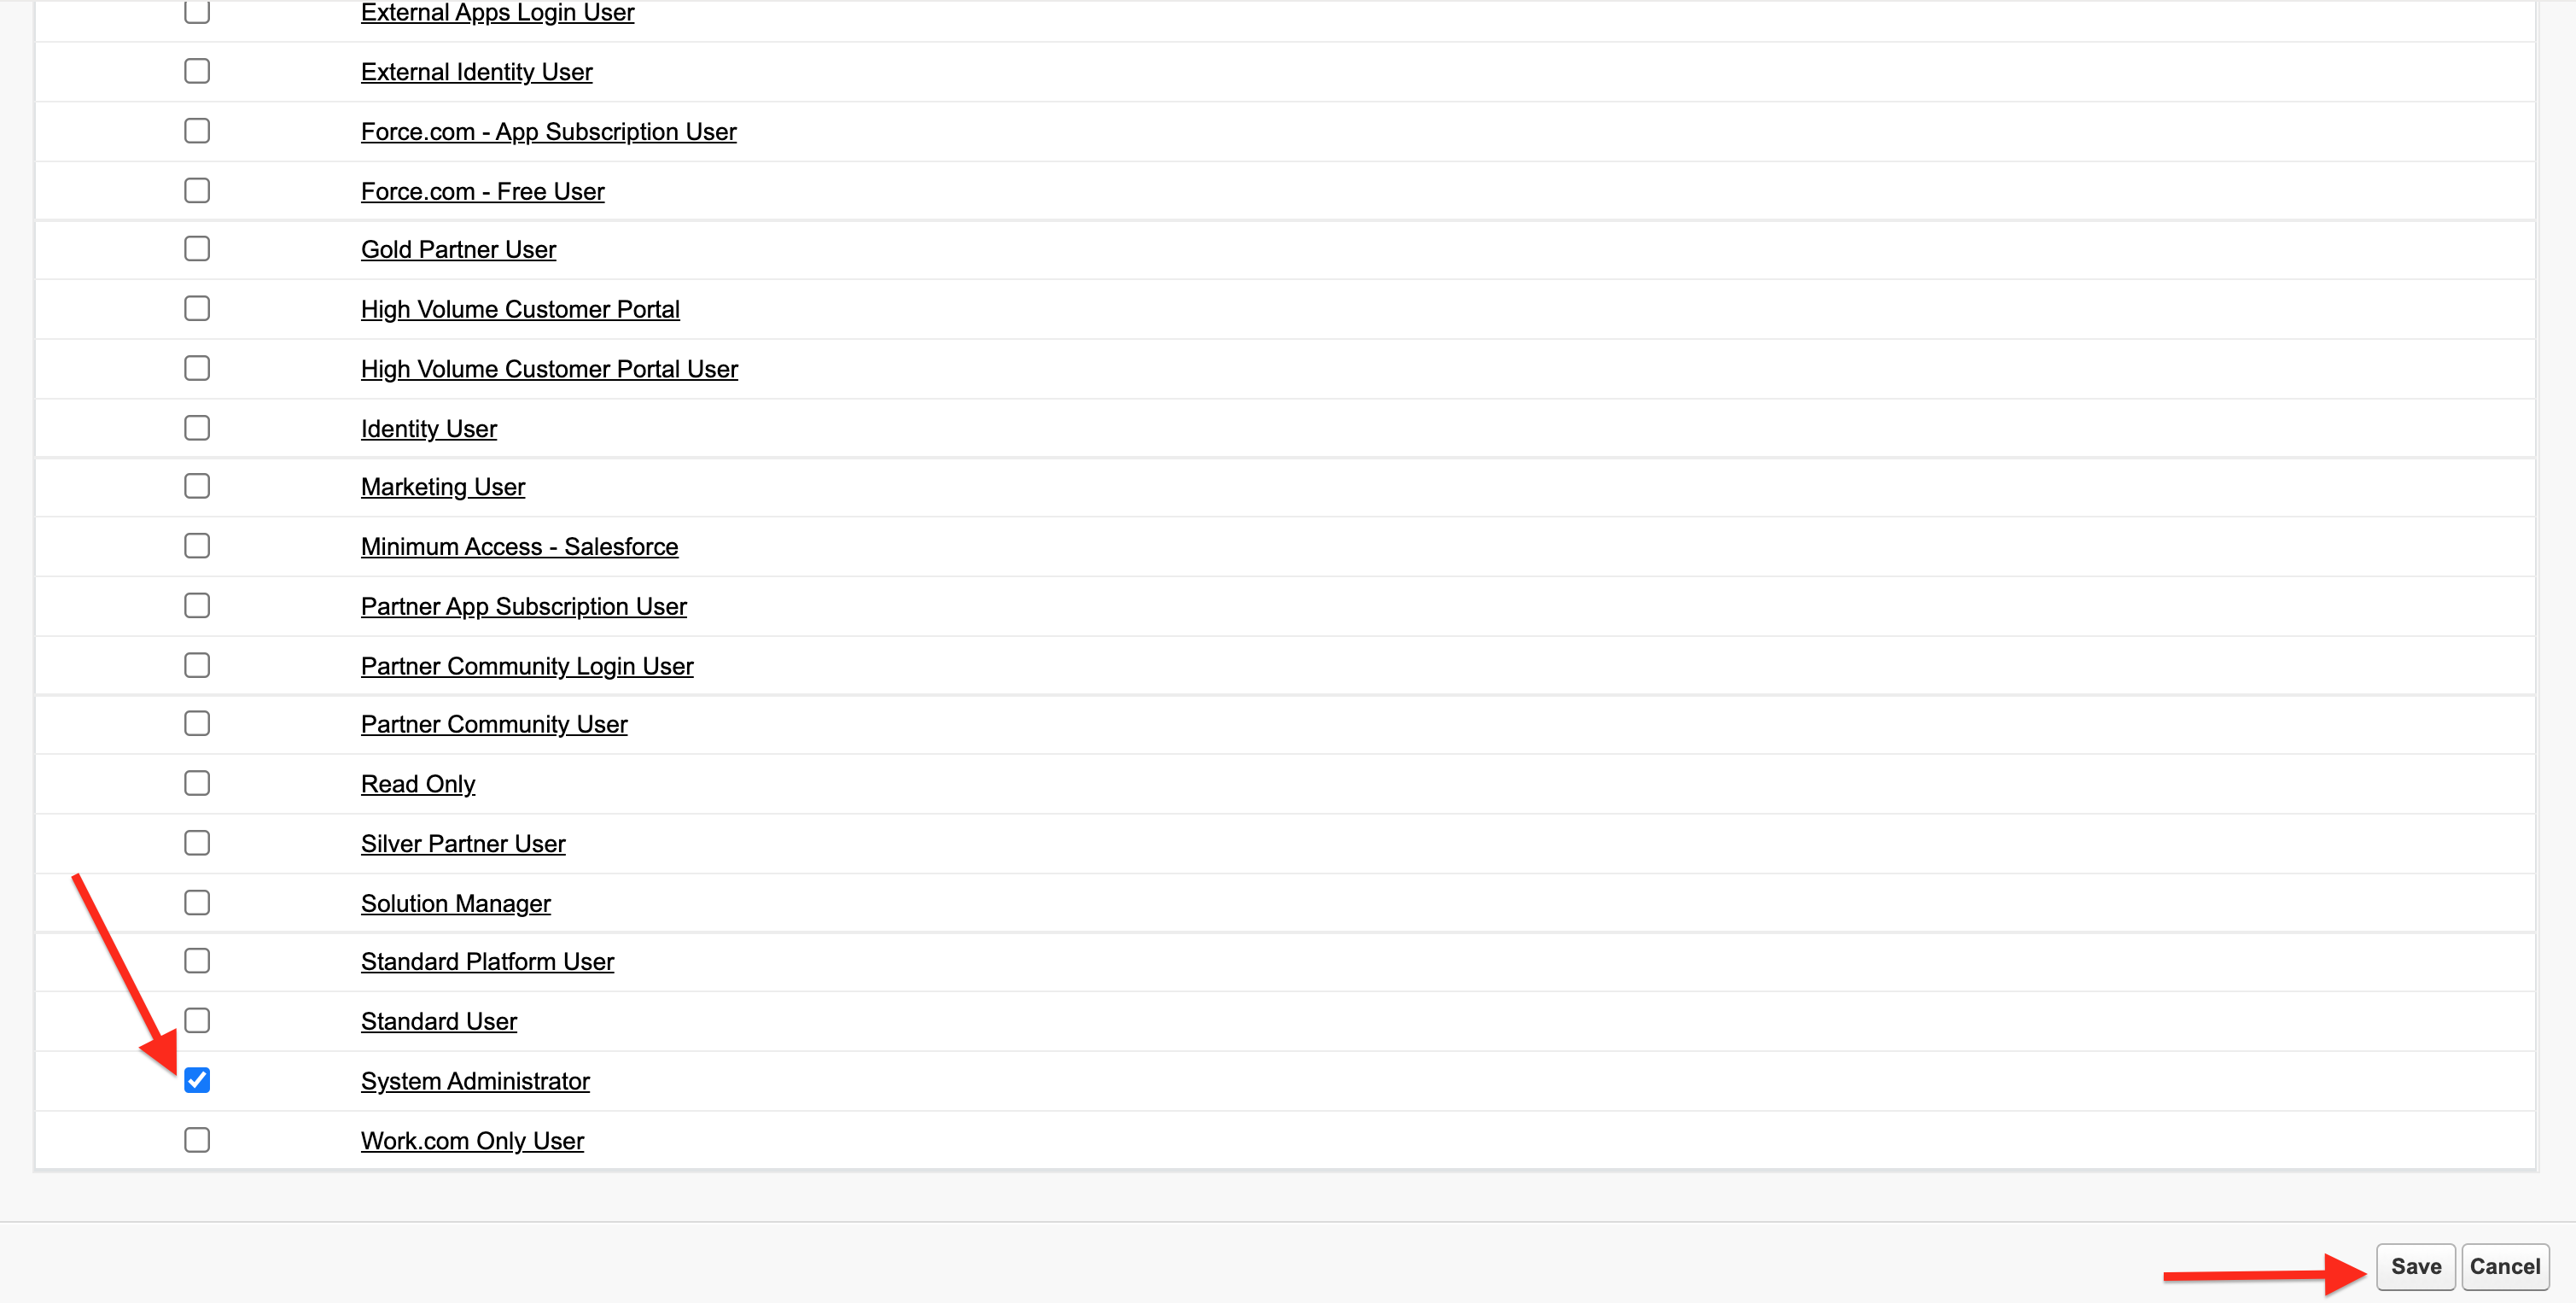
- Now you have to associate some user profiles to this application so that your user can login to AOM LMS from Marketing home page.

- You will be redirected to "Application Profile Assignment" page where you need to select profiles. Let's just select "System Administrator" and click Save button
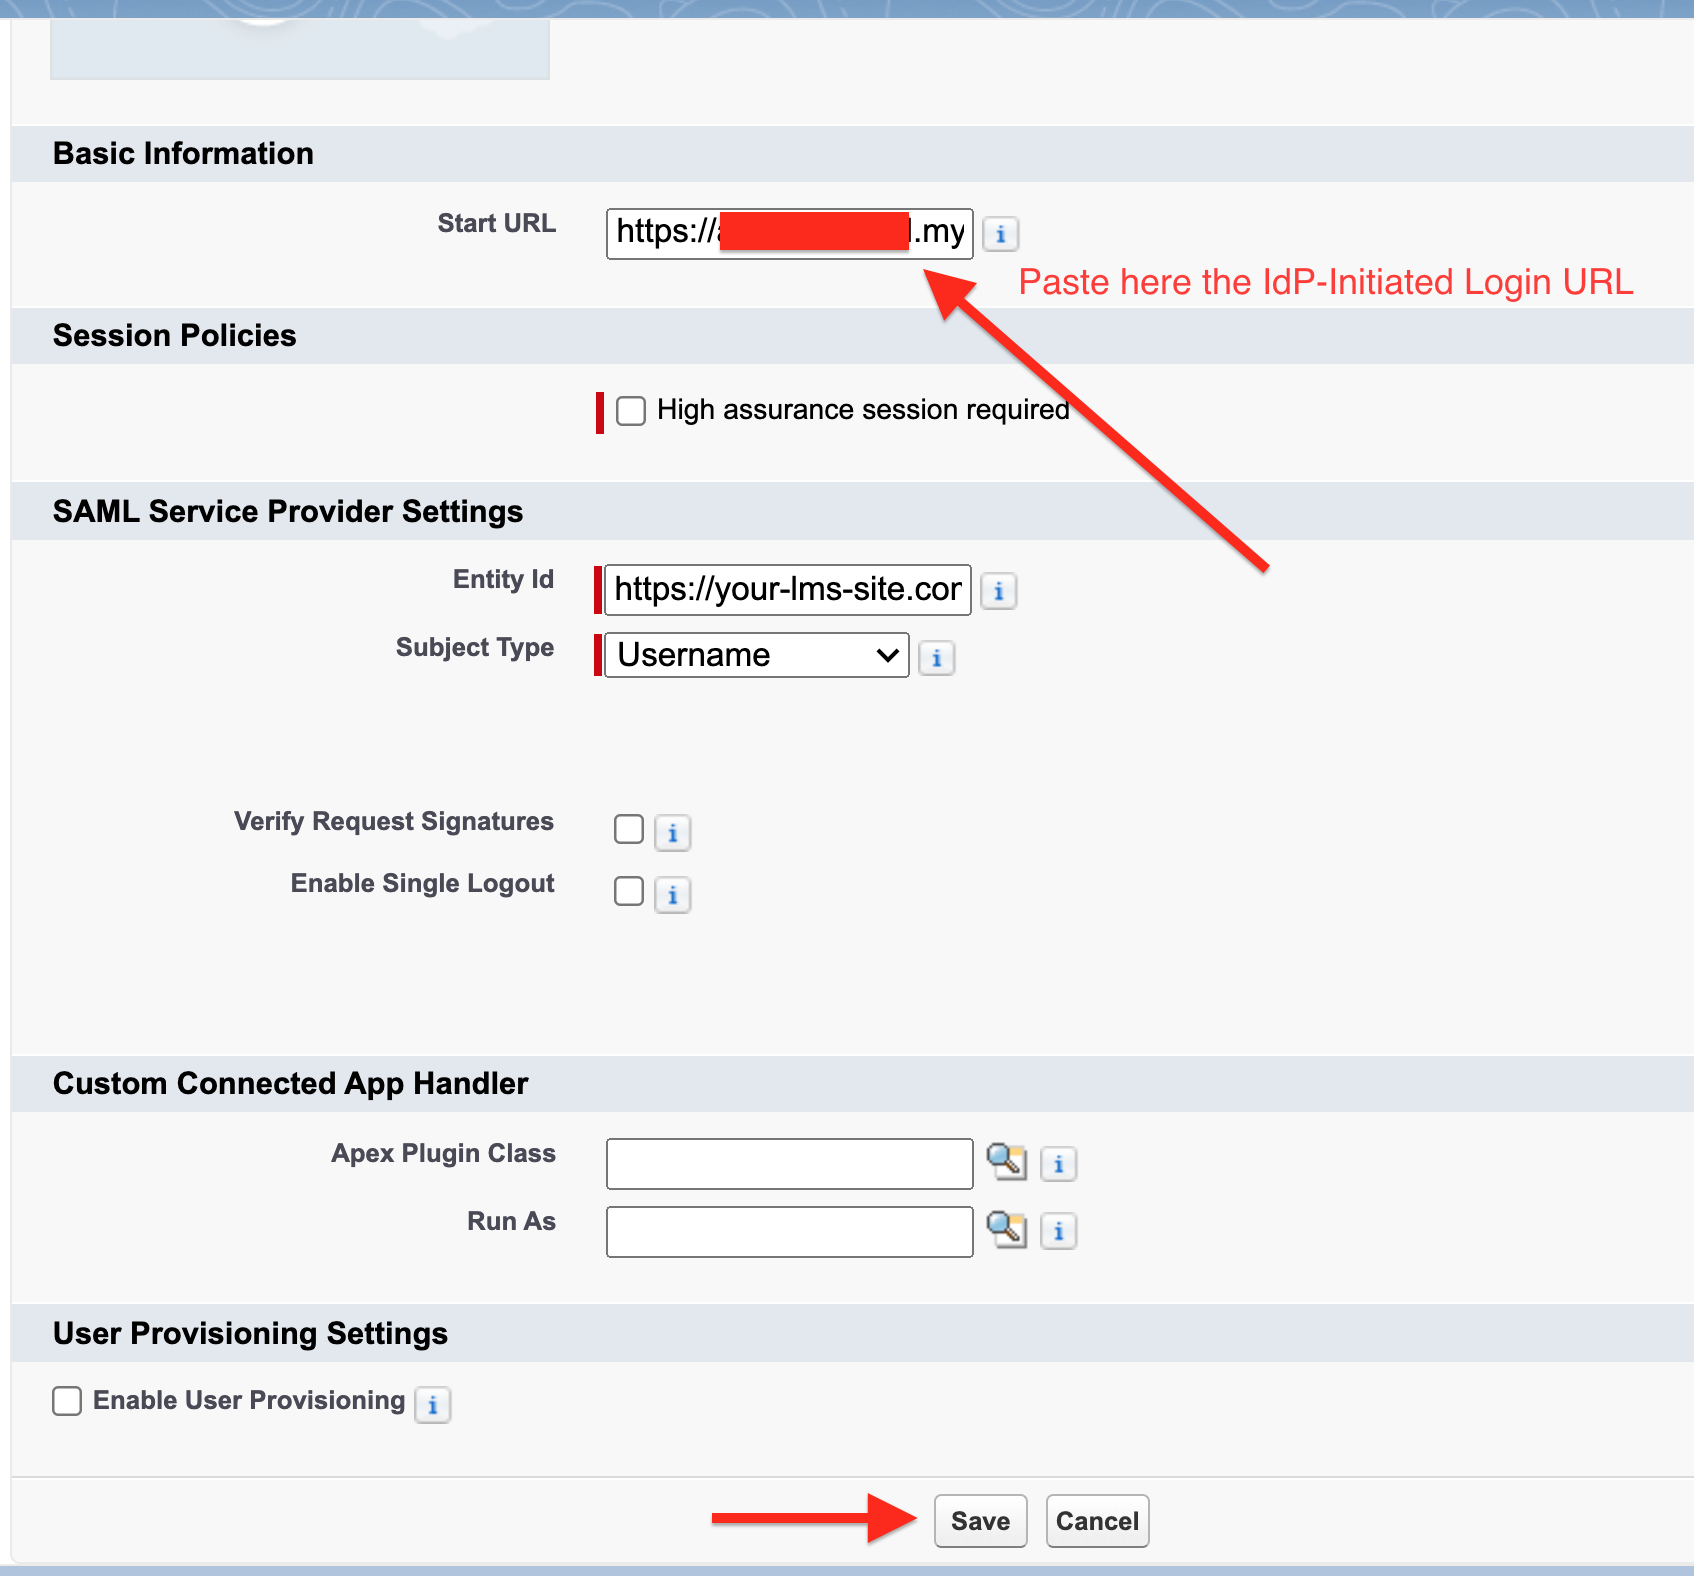
- Now you have to click on "Edit Policies" button as mentioned in step 3. Once you are redirected to edit page, you should see "Connected App Edit" form. Inside this form under "Basic Information" you will find "Start URL". Paste the IdP-Initiated Login URL here which you have copied in step 3 of IdP Initiated flow and click on Save button.
- Now switch back to your Marketing Home page to search for your newly created app.
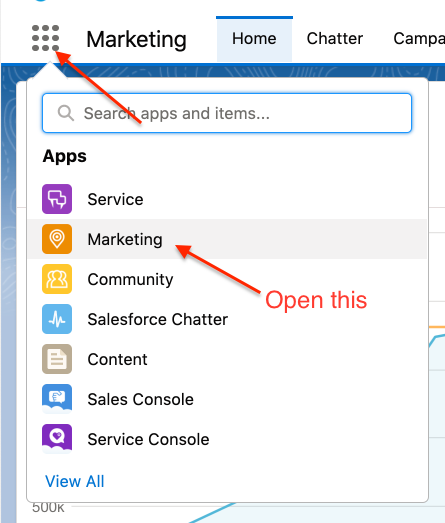
-
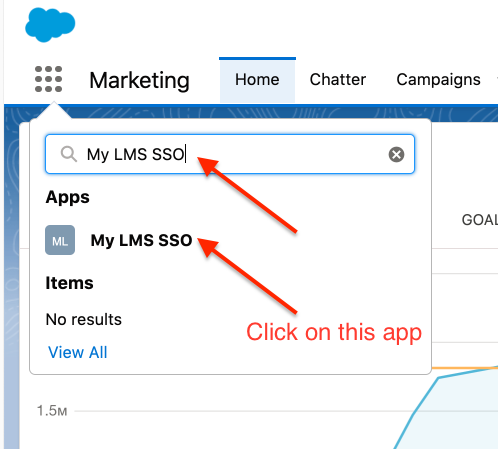
That's it you're done. Now to test this flow all you need to do is search the application using App Launcher.
-
Search for your app which you have created for SSO. In this case search for "My LMS SSO". Click on it and you will be redirected to AOM LMS dashboard.