Quickbooks Integration with your LMS
Automatically create invoices, customers, and products in your QuickBooks account with our QuickBooks integration.
The integration will recognize LMS events such as Order Created, Order Updated, Order Payment completed, Account Details Updated for the user who placed the order, and pass that data along to QuickBooks, allowing you to keep your orders synced.
In this guide, we will go through how to set up the QuickBooks integration with AOM. Each major step is broken down so that you can easily get it connected.
Create a Sandbox for testing
Step 1: Sign in to the QuickBooks Online developer platform
- Go to: https://developer.intuit.com
- Click on Sign In, and follow the prompts to log in to your account.
Step 2: Create a sandbox company
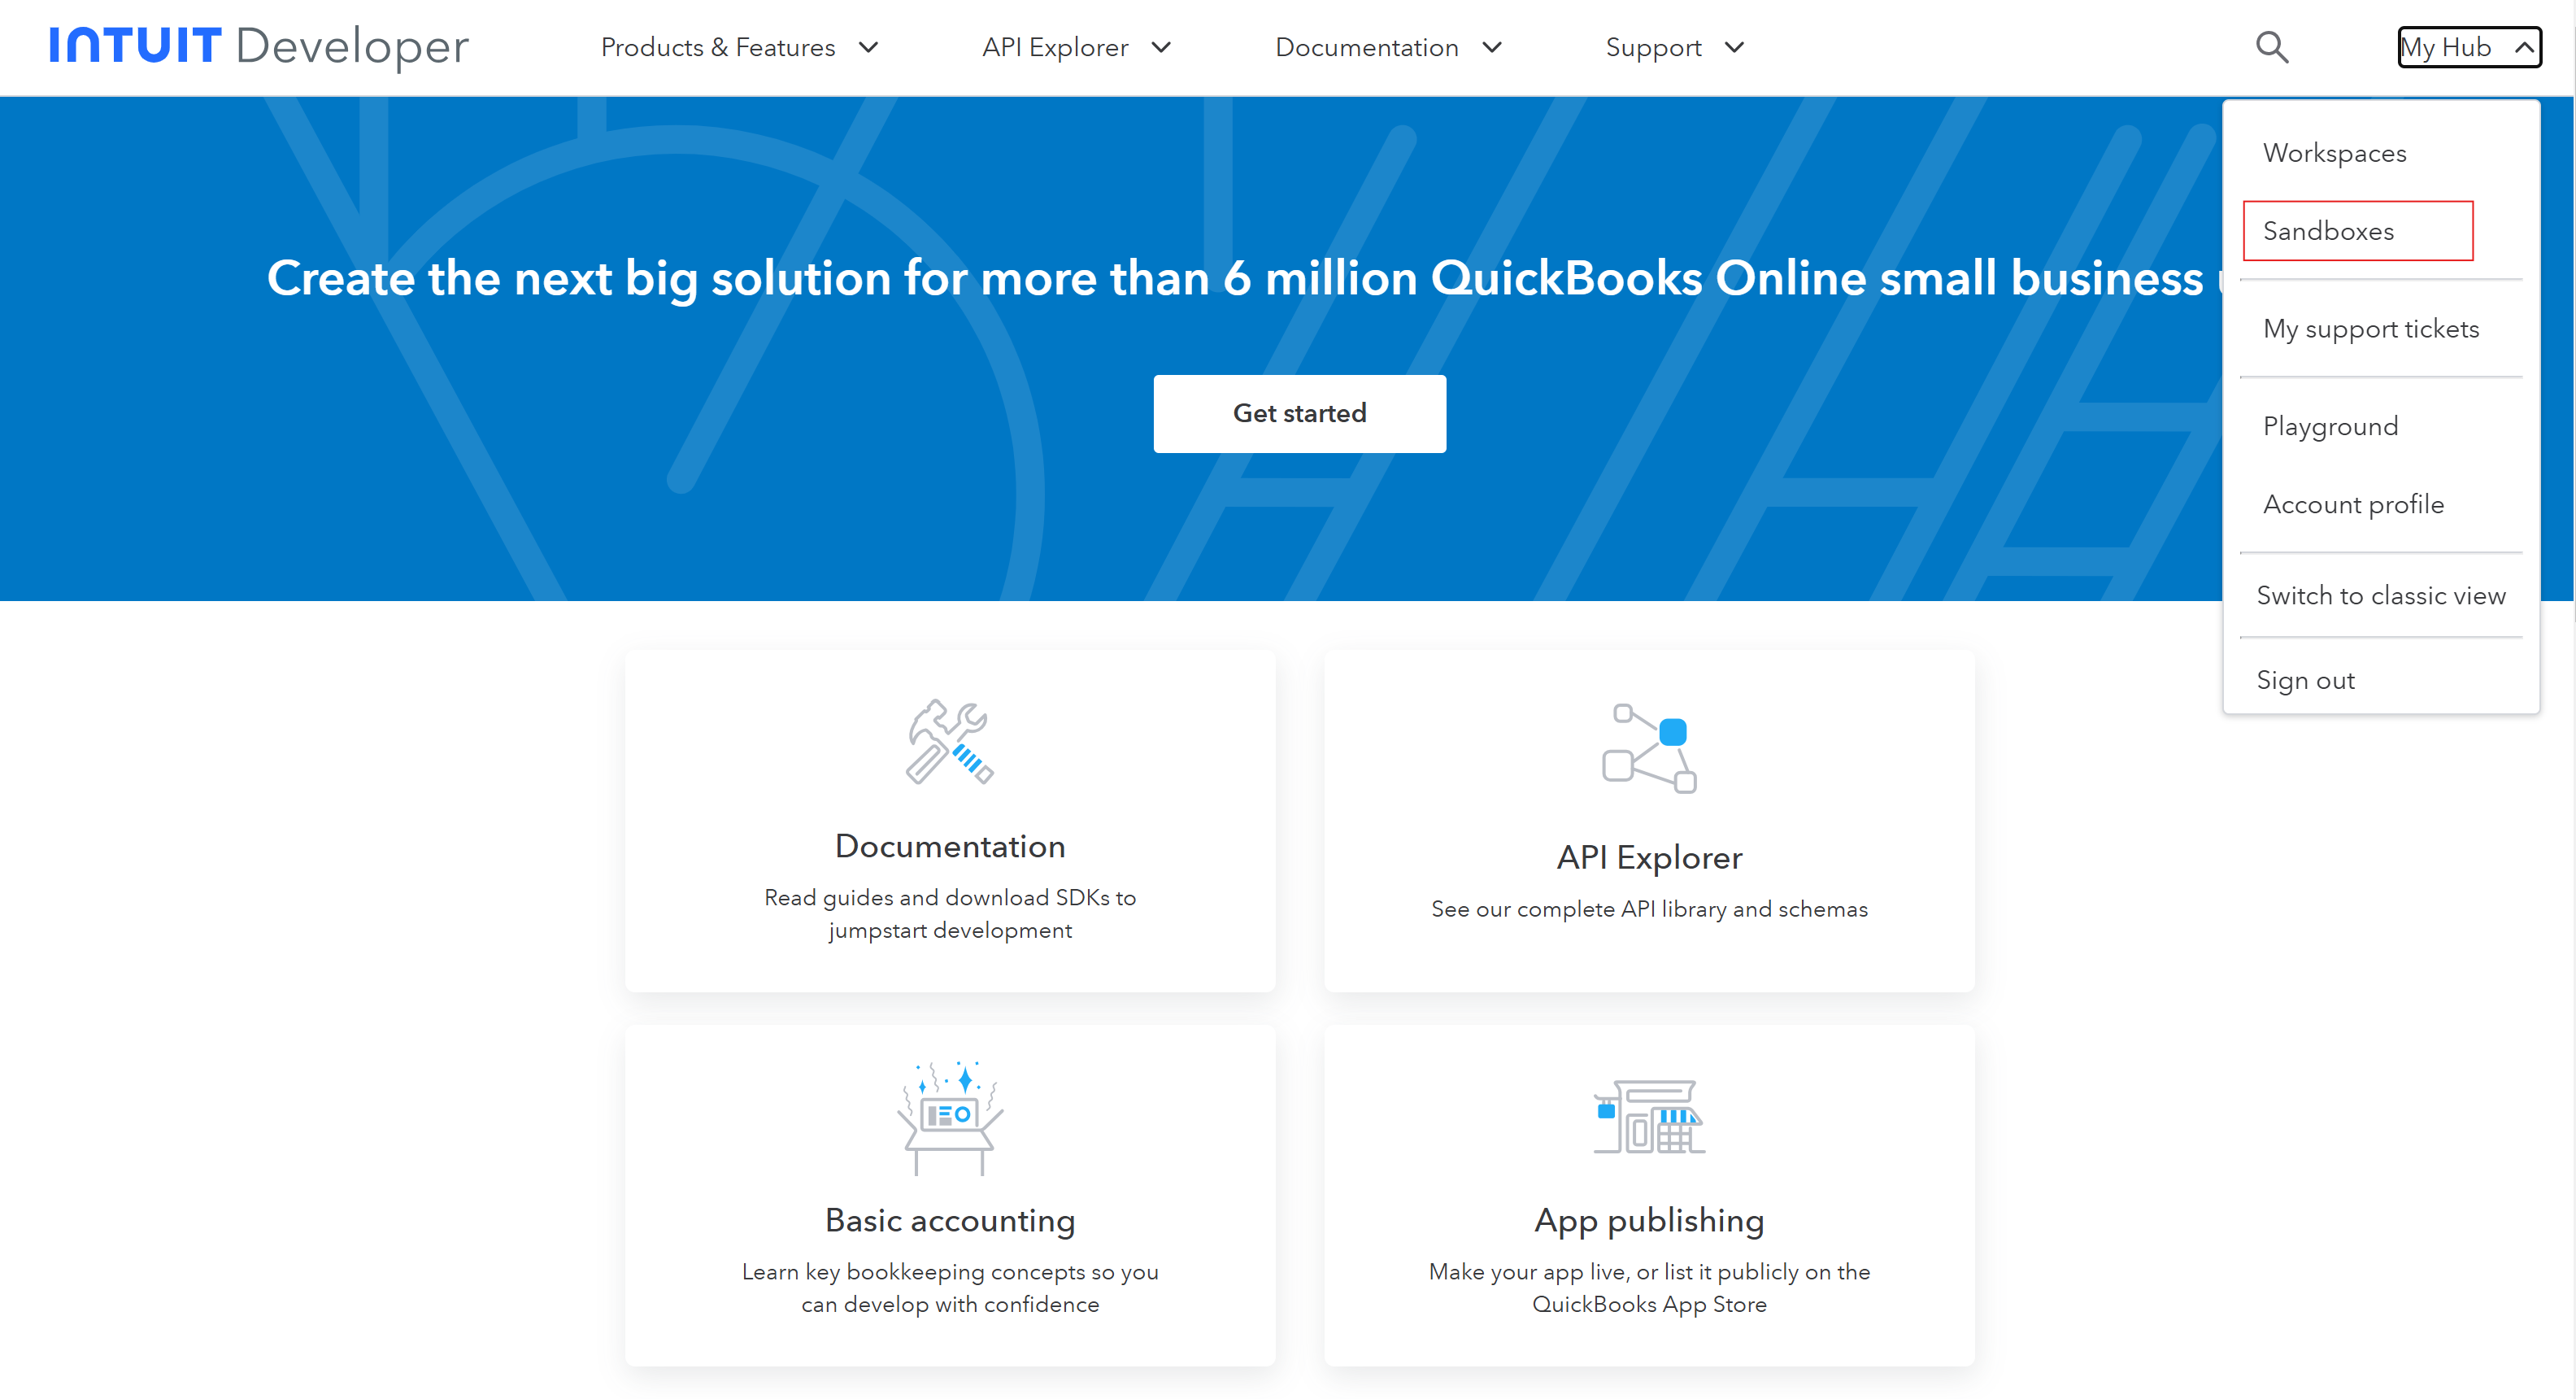
- Once logged in, click on My Hub > Sandboxes.
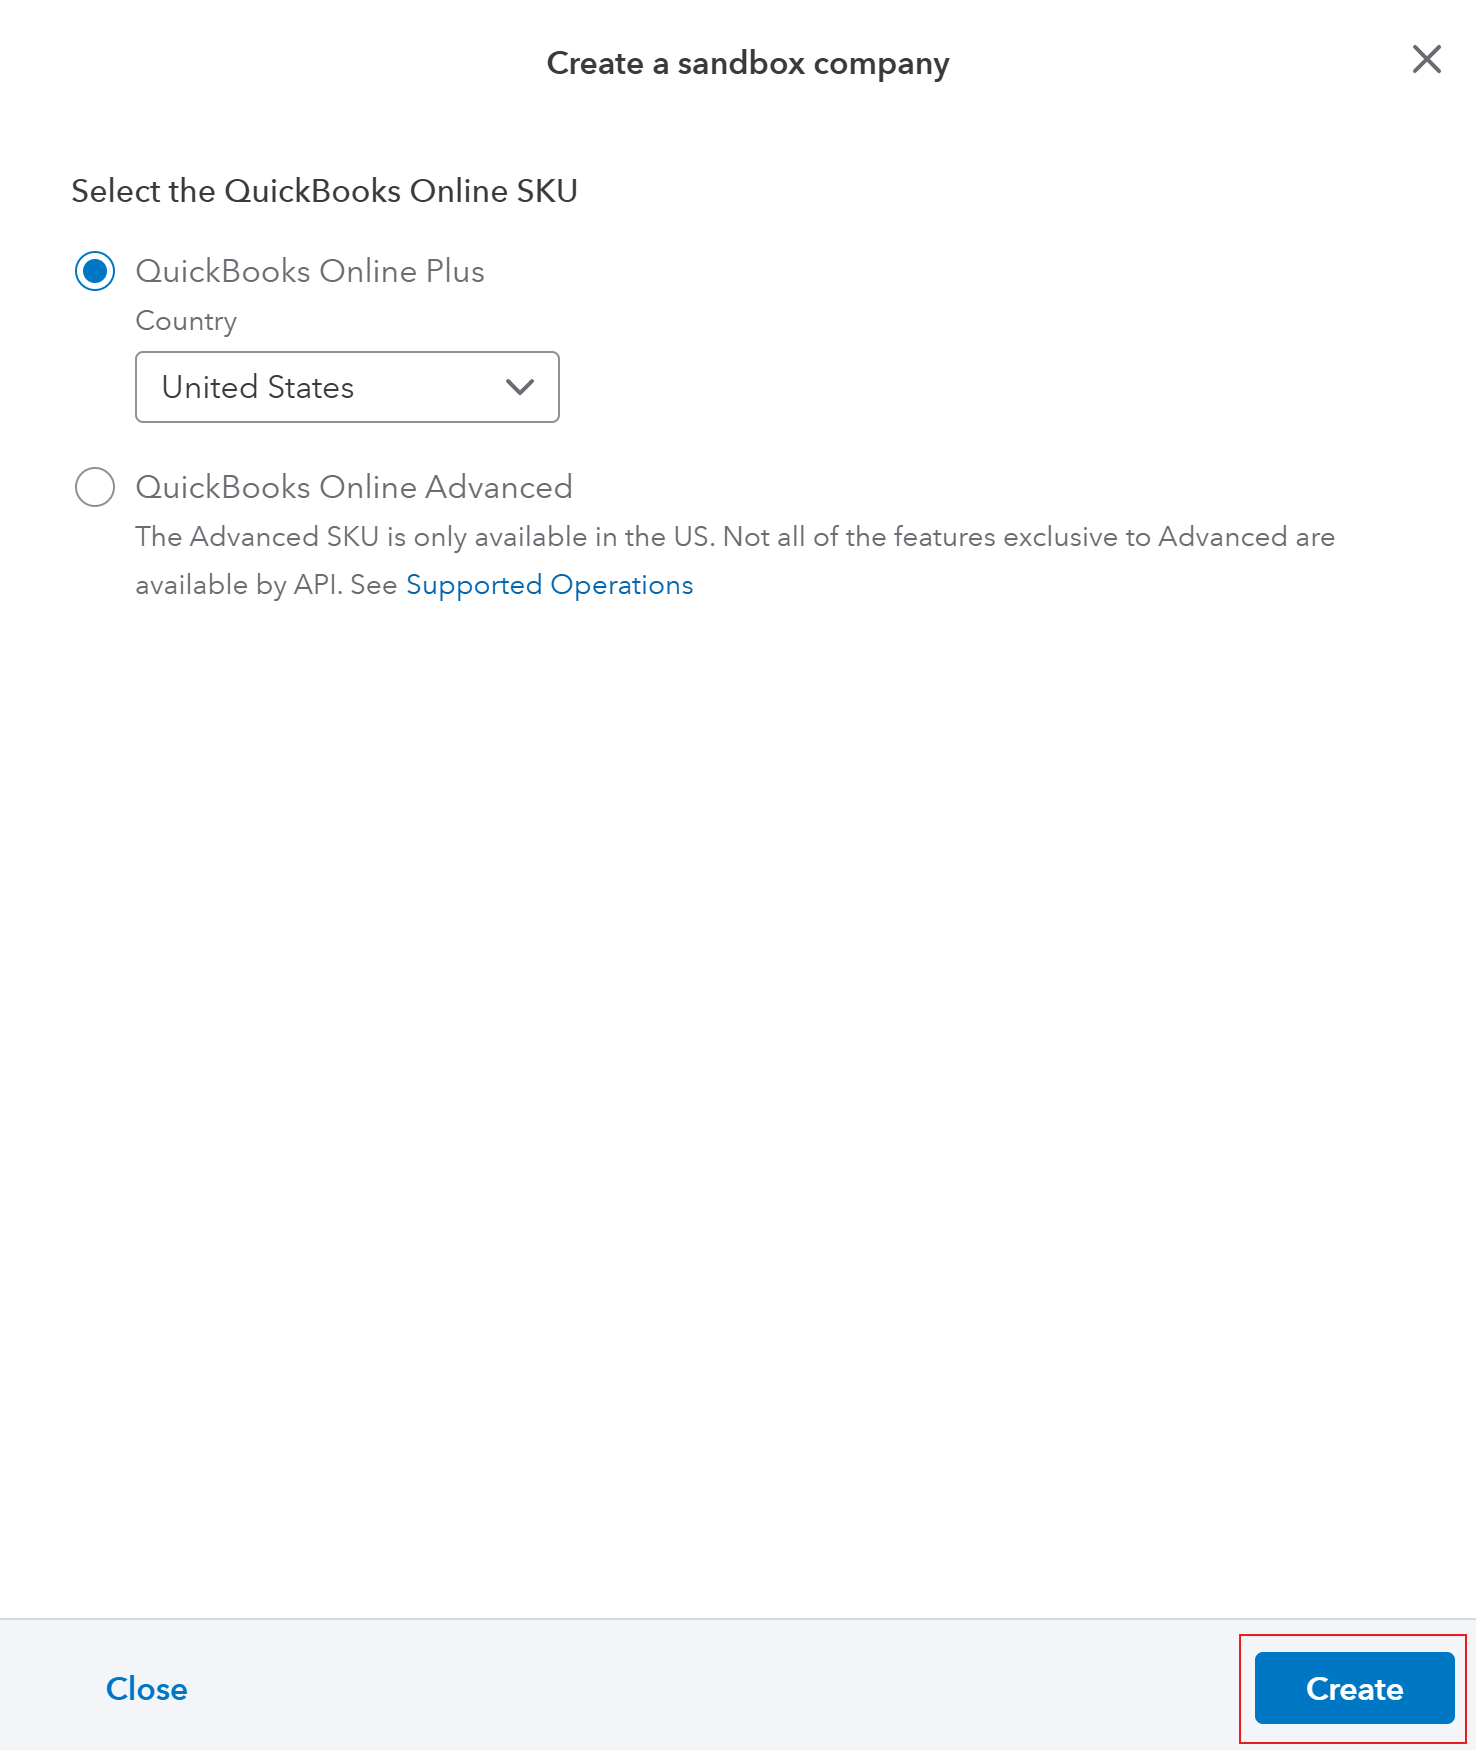
- Click on Add.

- Follow the prompts to create a new sandbox company.
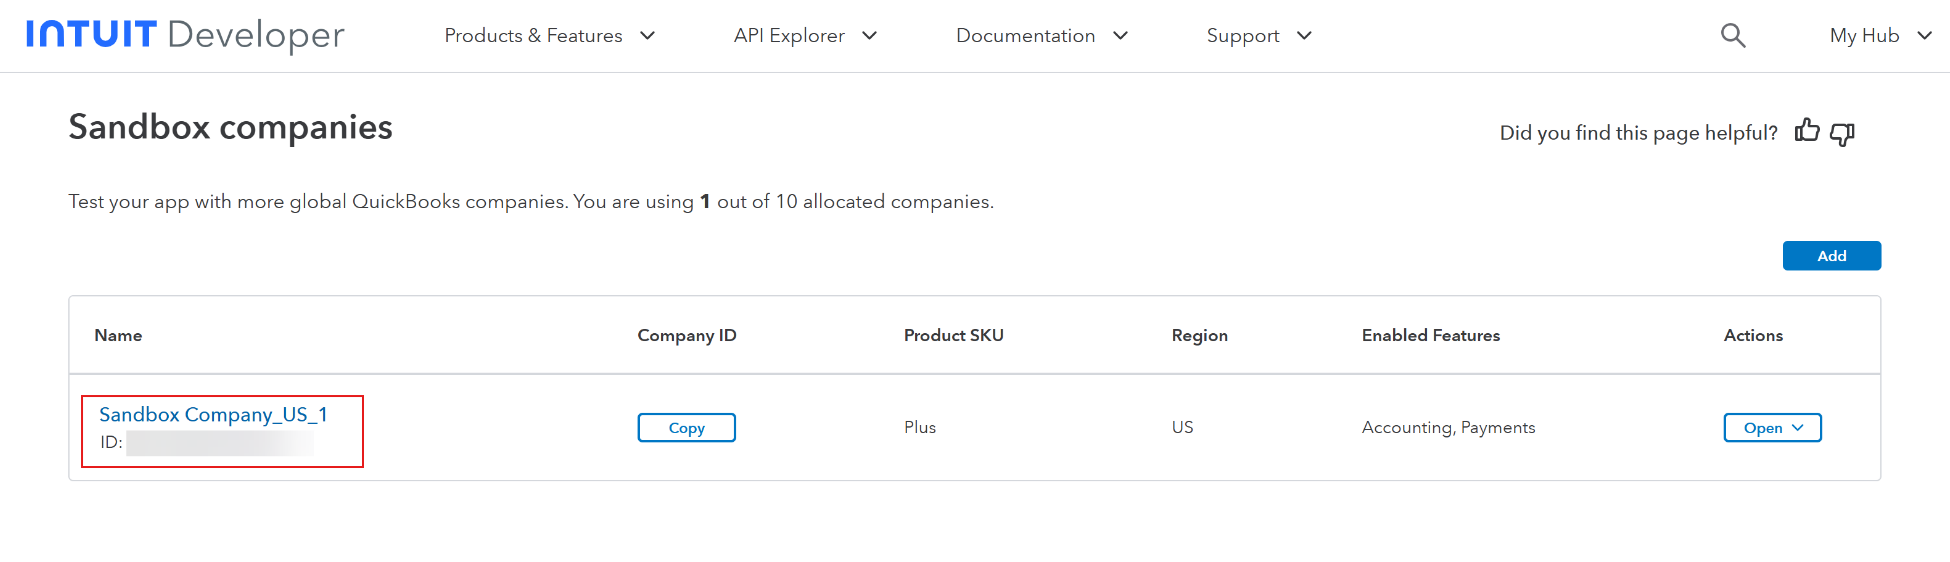
- Once created, note down the company ID (this will be used later).
Step 2 : Create a Workspace
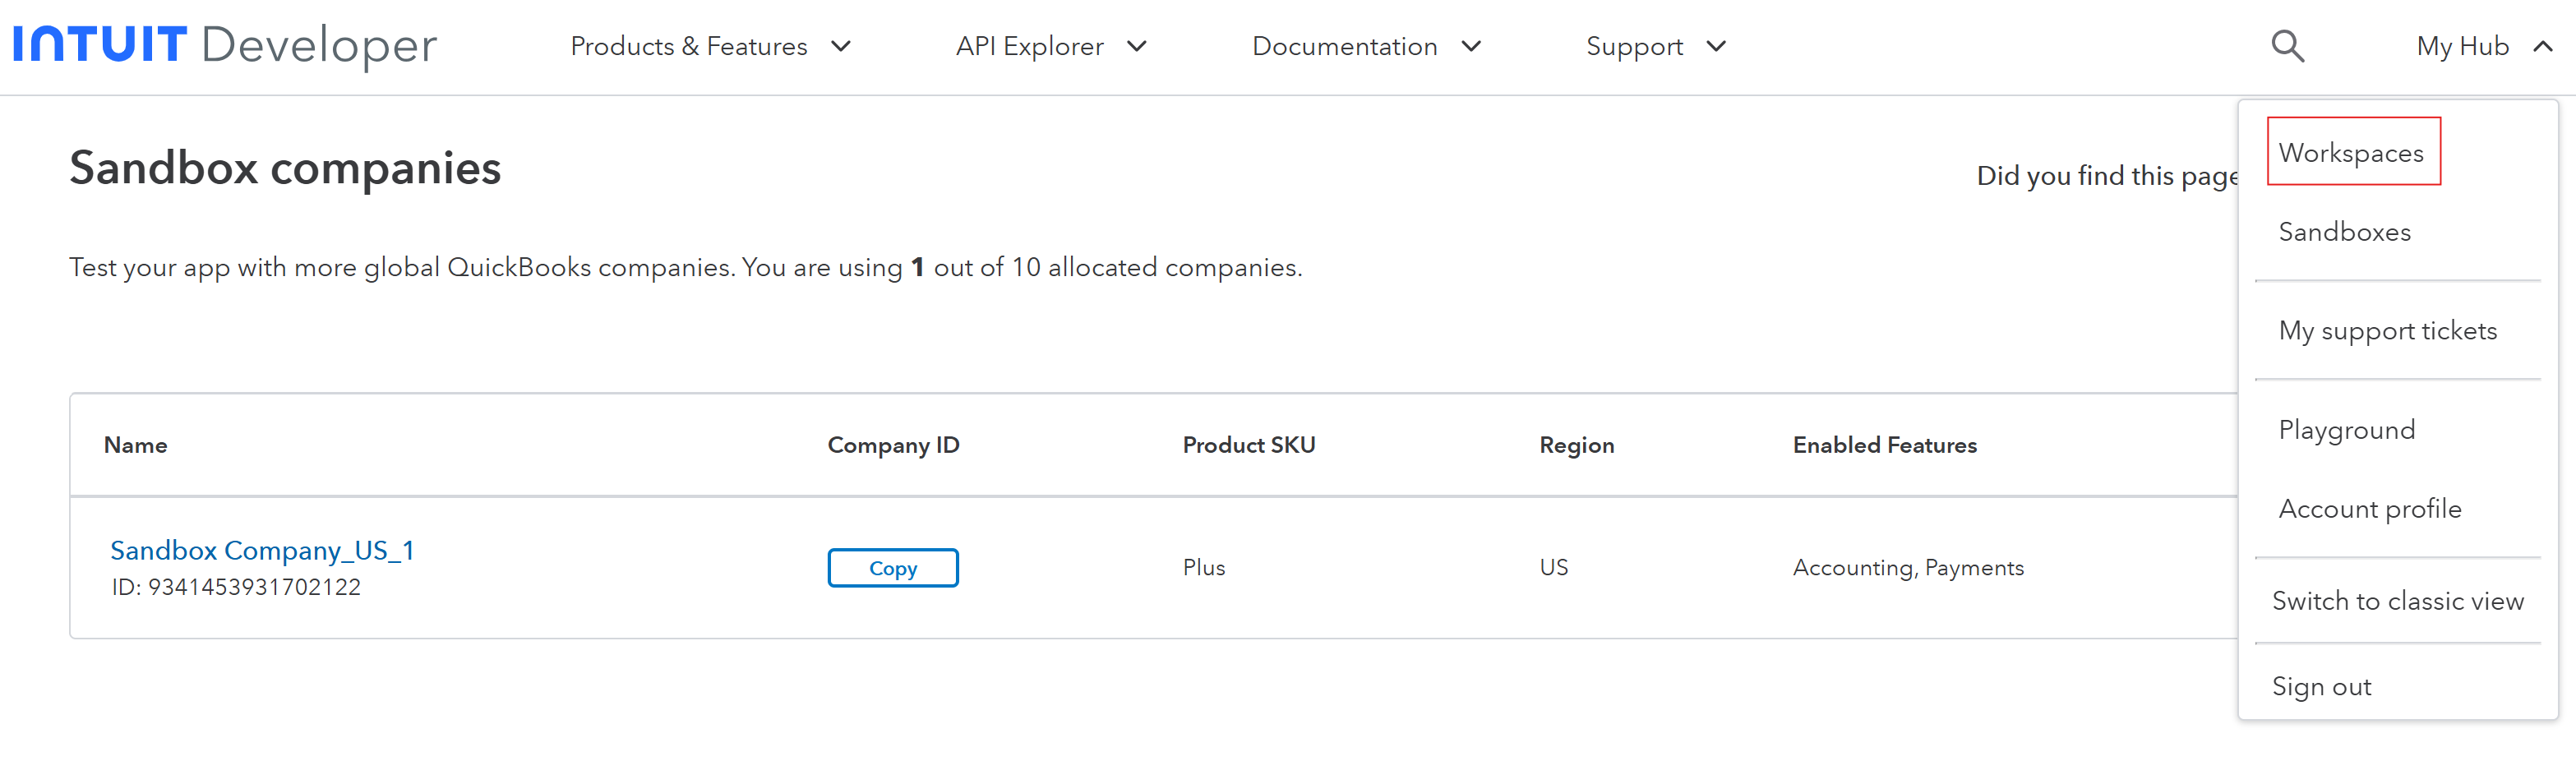
- From the top menu, click on My Hub > Workspaces.
- Click on + icon to create a Workspace.
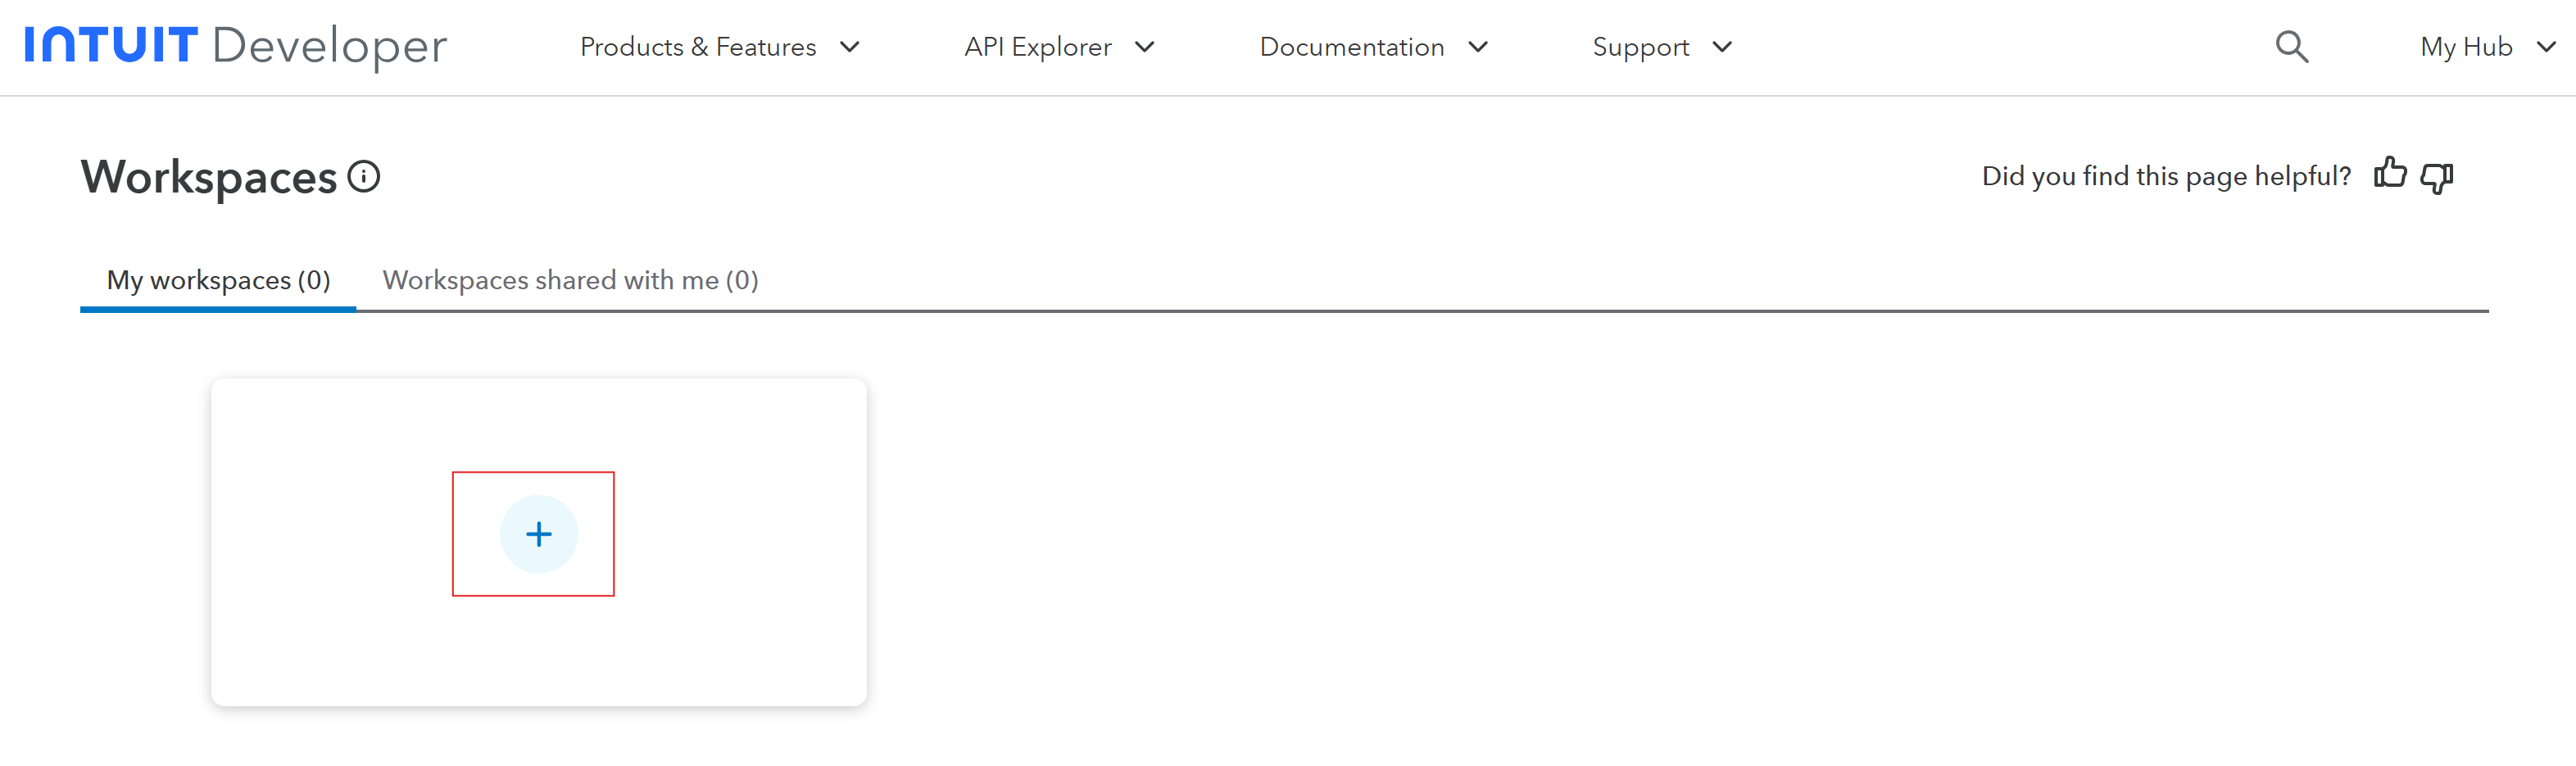
- Give the workspace a name (e.g., aom-integration), fill in the details, and click Next.
Step 3: Create an App
- From the top menu, click on Workspaces.
- Select your workspace.
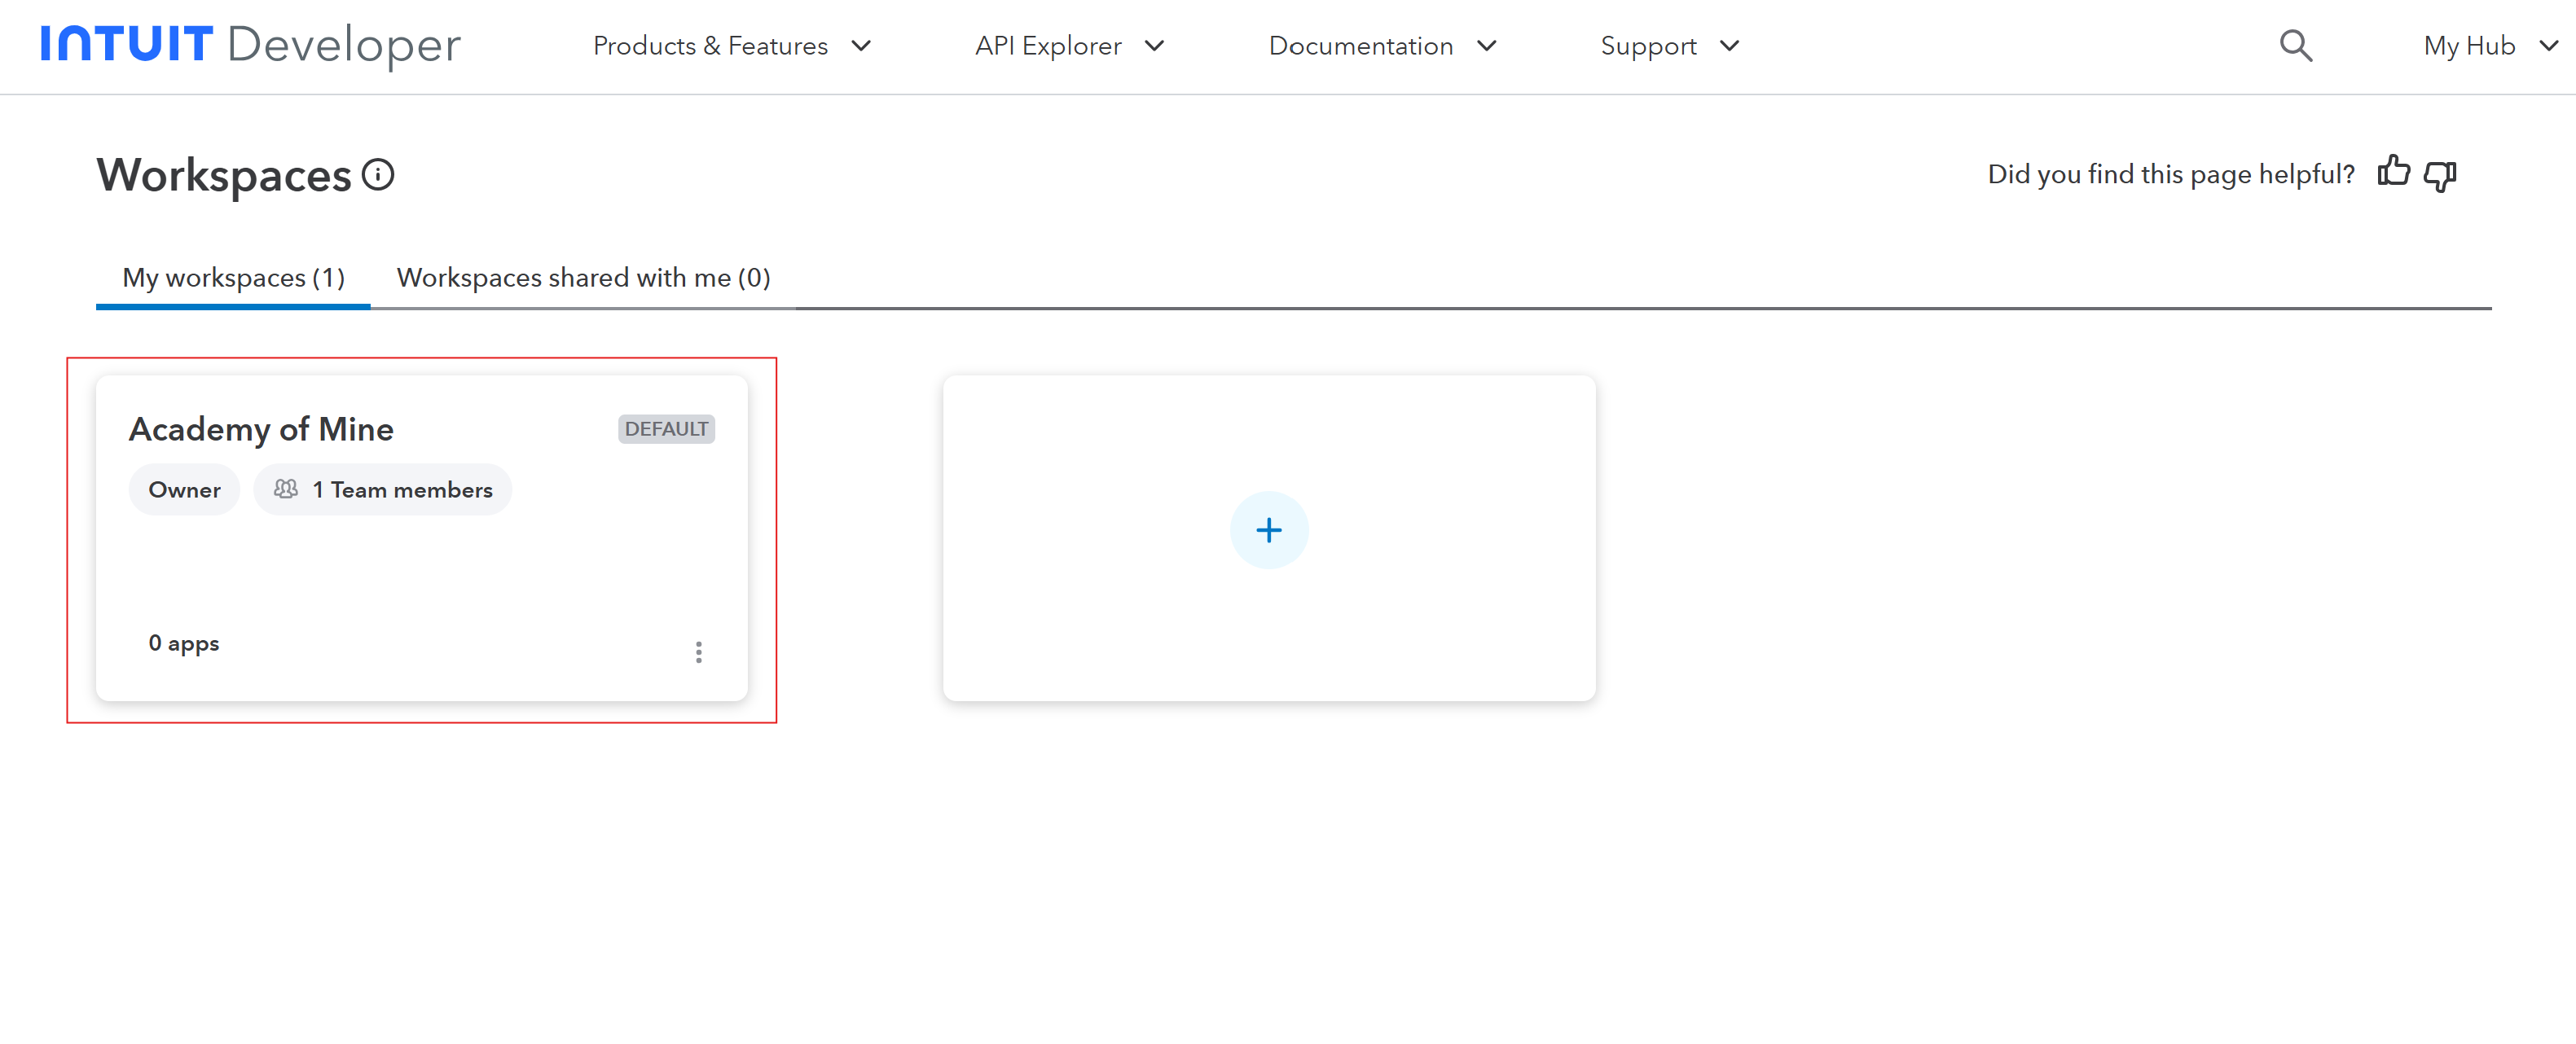
- Click on + icon to create App
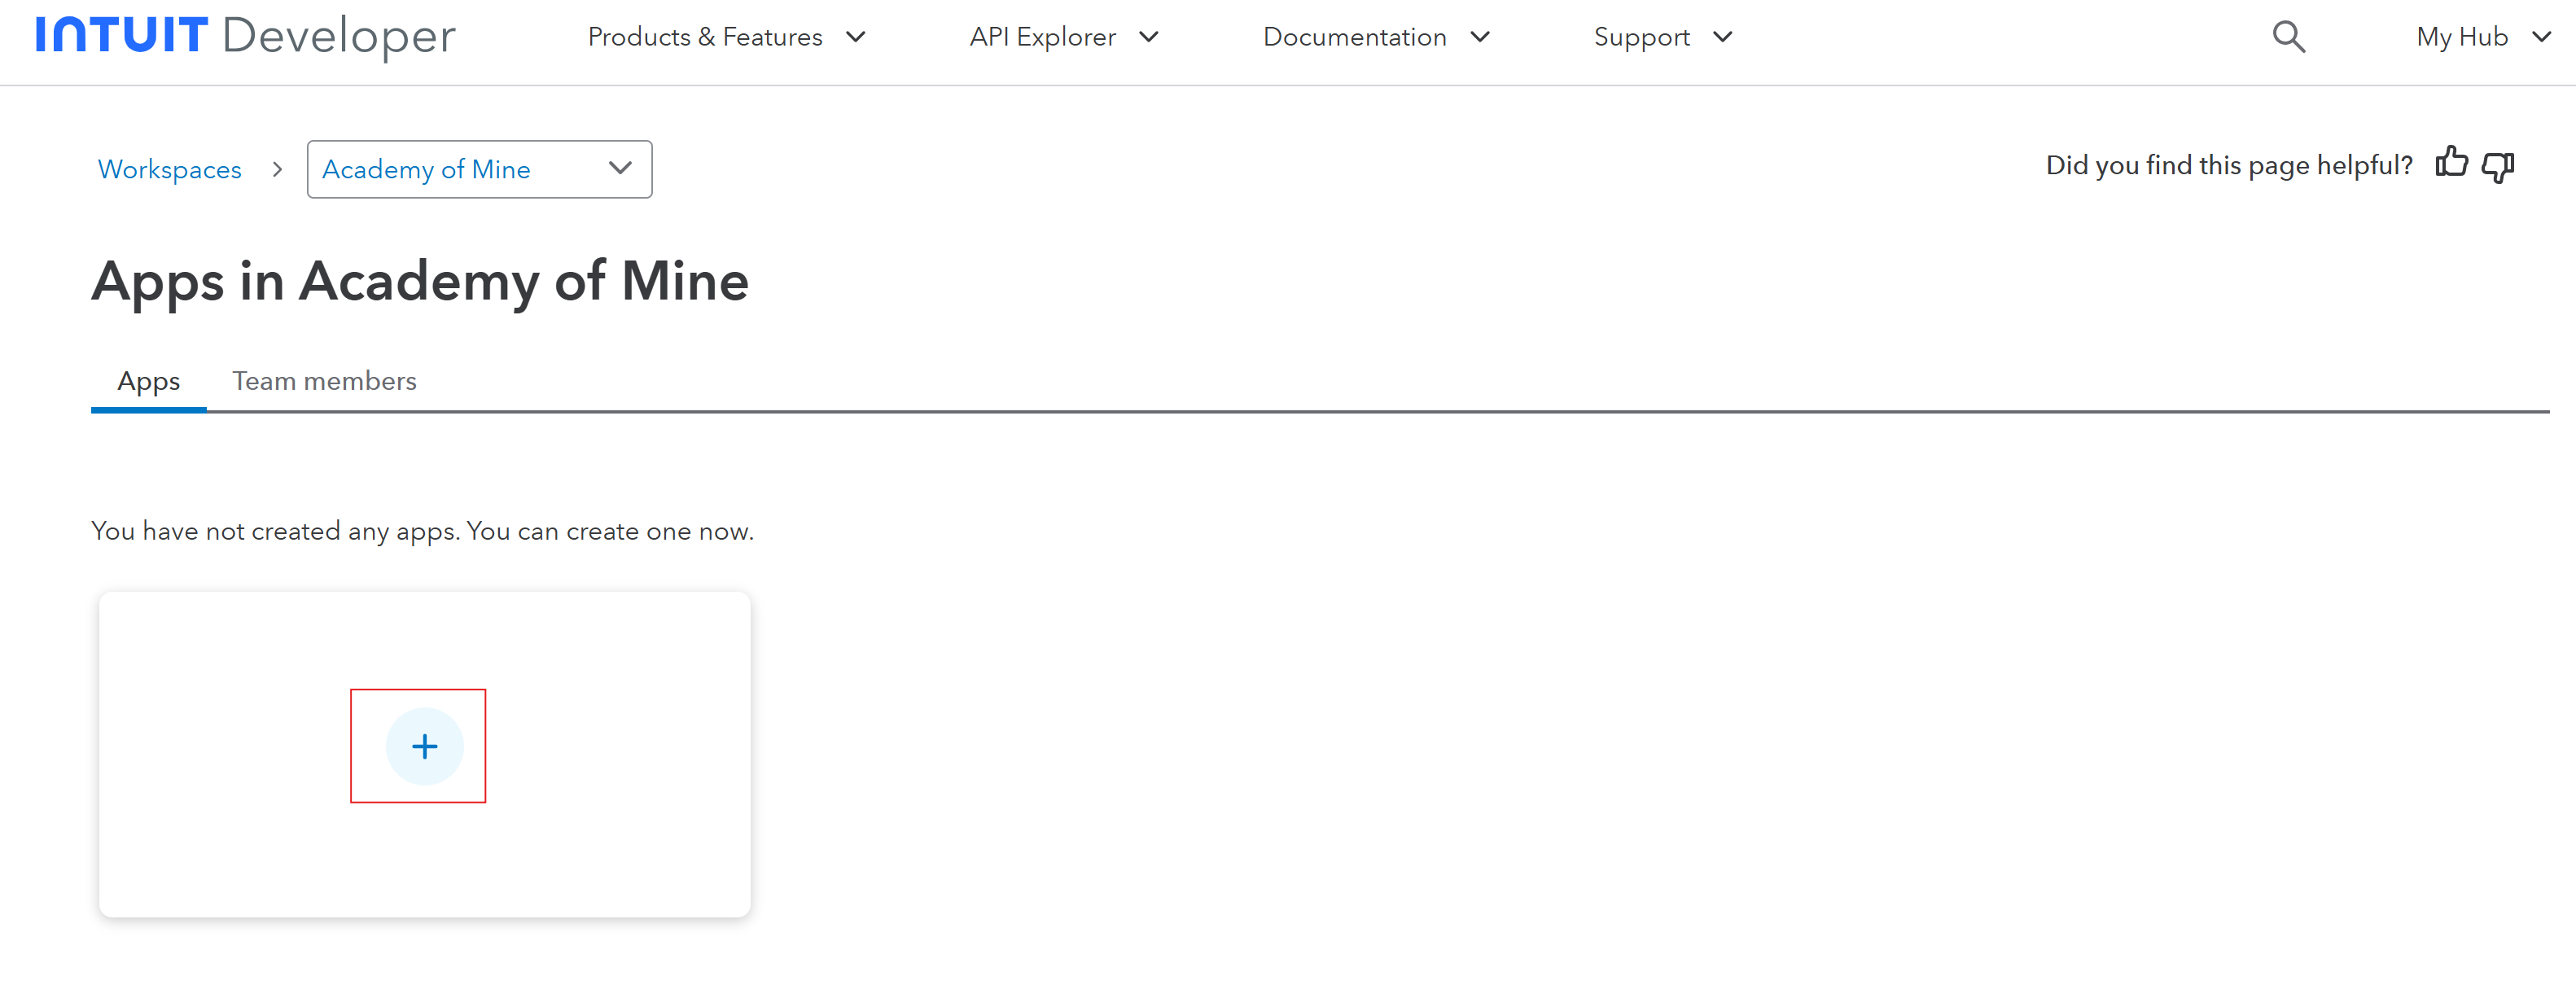
-
Select QuickBooks Online and Payments.
-
Give the app a name (e.g., aom-integration).
-
Provide the app with the following scope:
- com.intuit.quickbooks.accounting
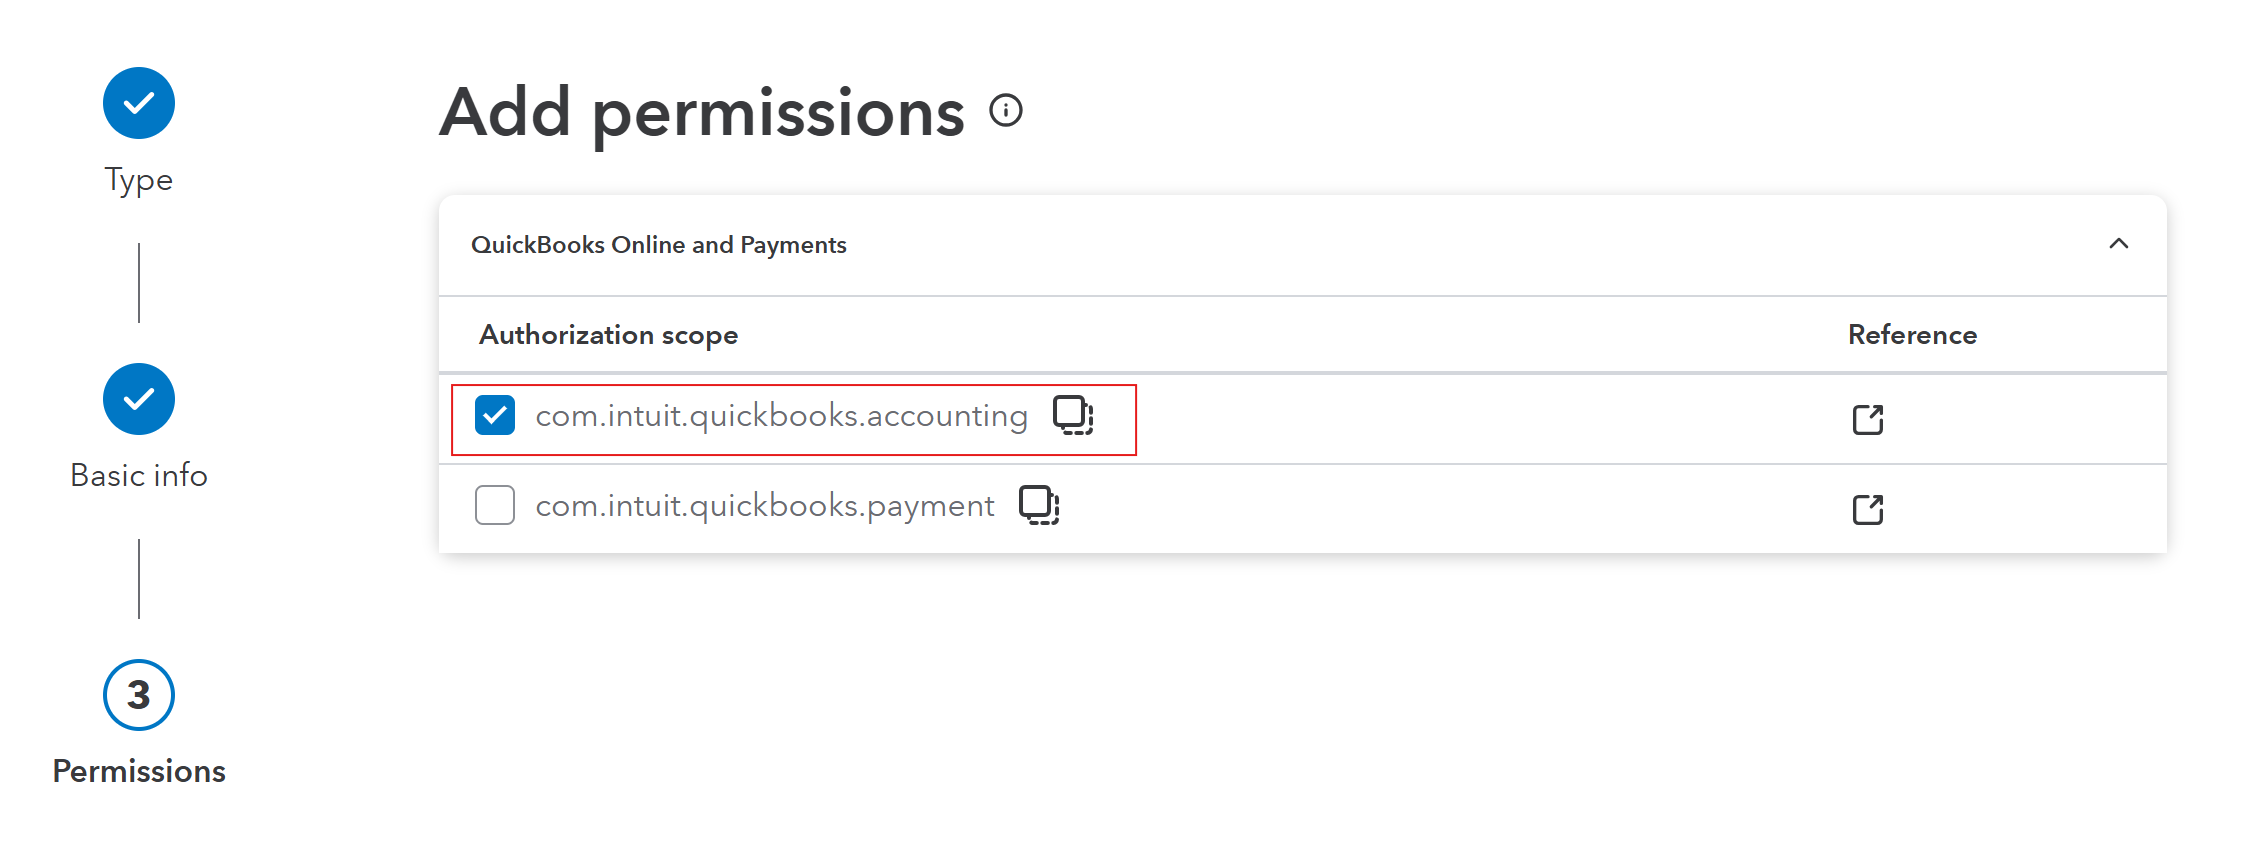
-
Click on Create app.
-
Once your app has been created, you should be automatically redirected to the app details page. If not, click on My Hub, and then in the App Dashboard, click on your Workspace and your app's name.
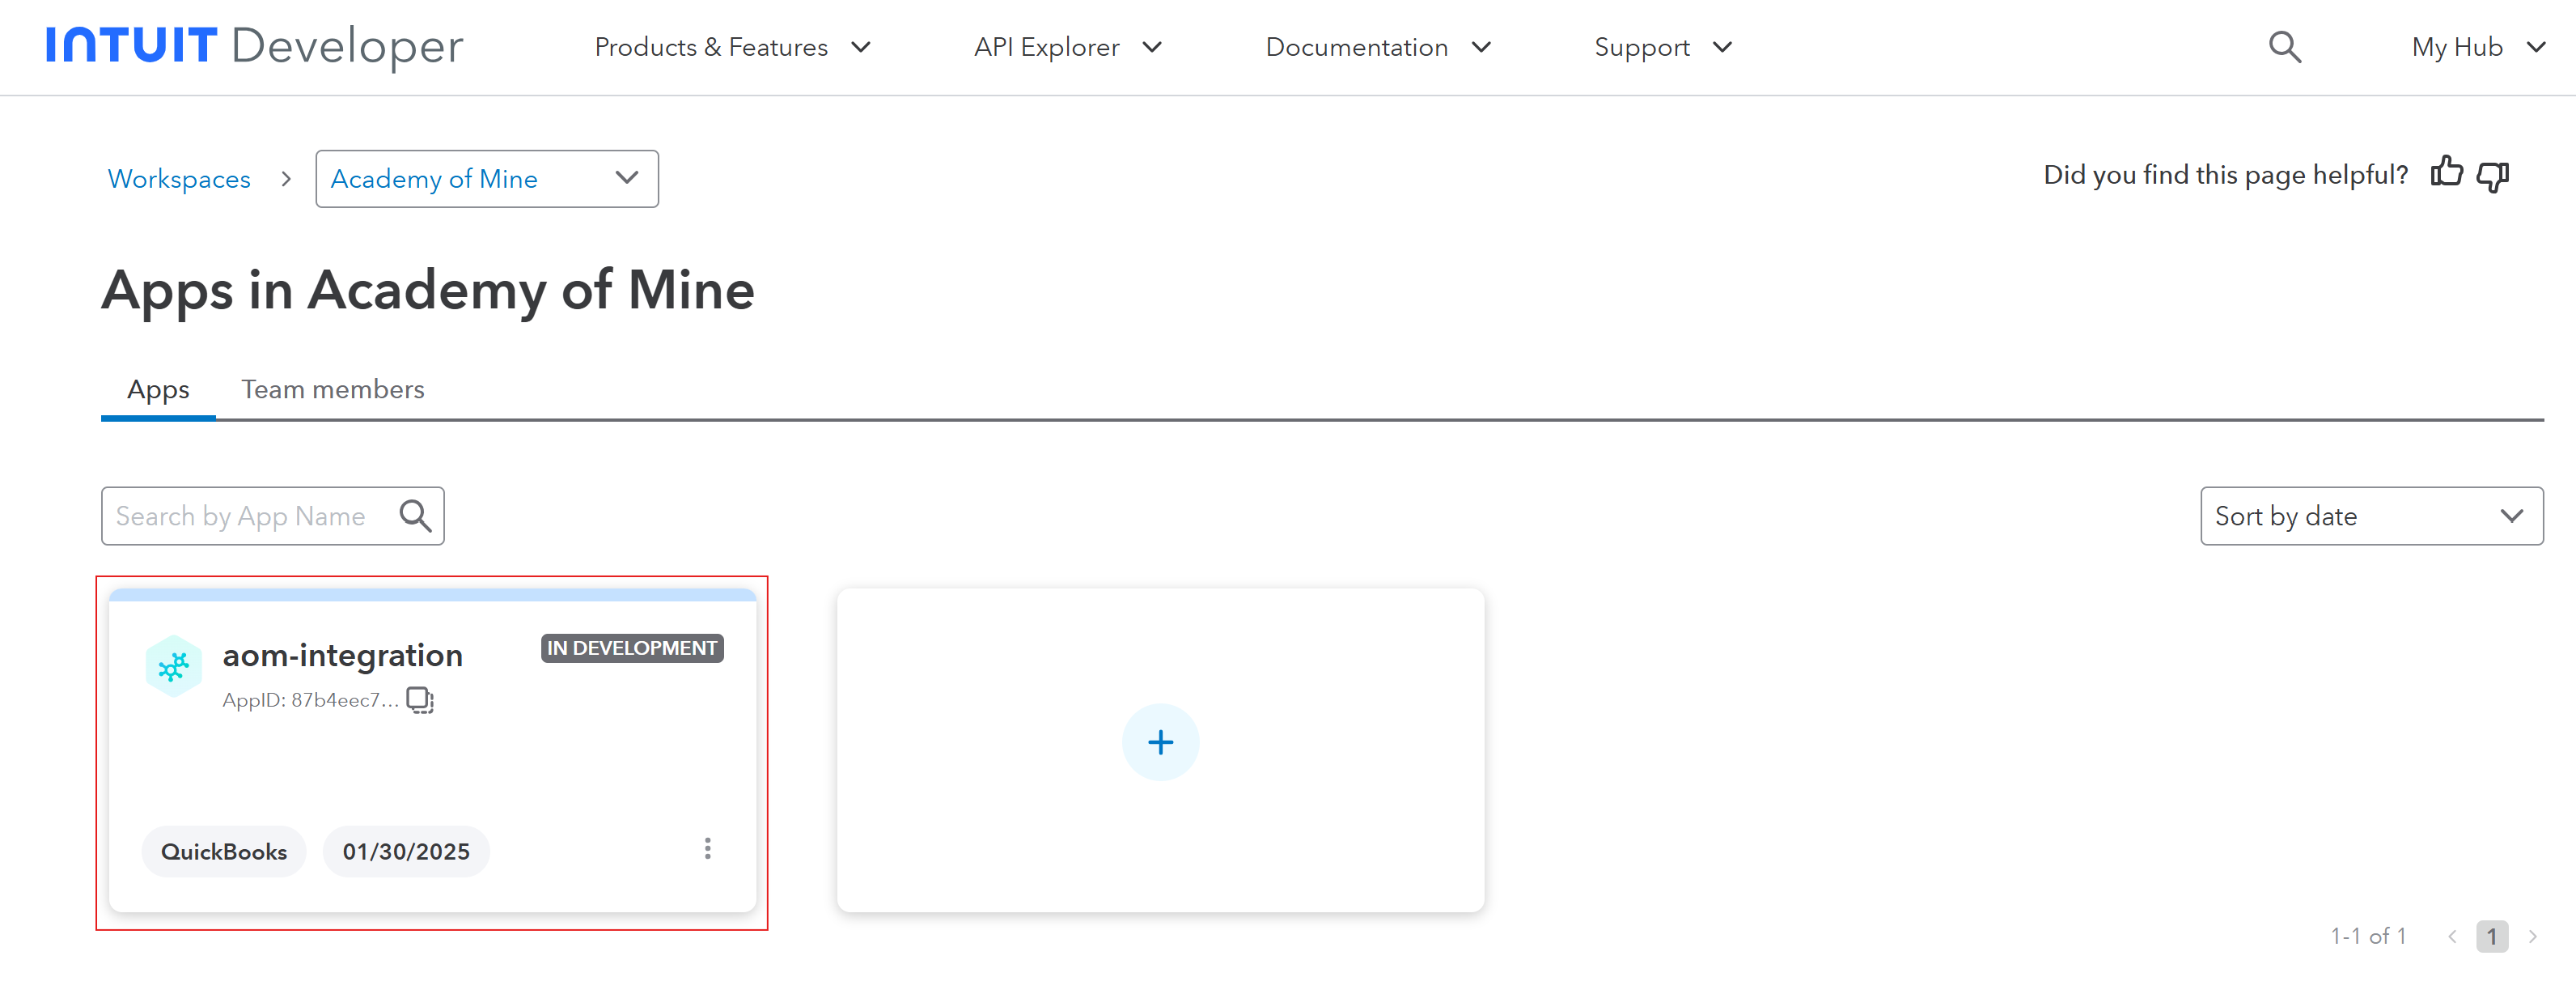
- Navigate to Keys and credentials.
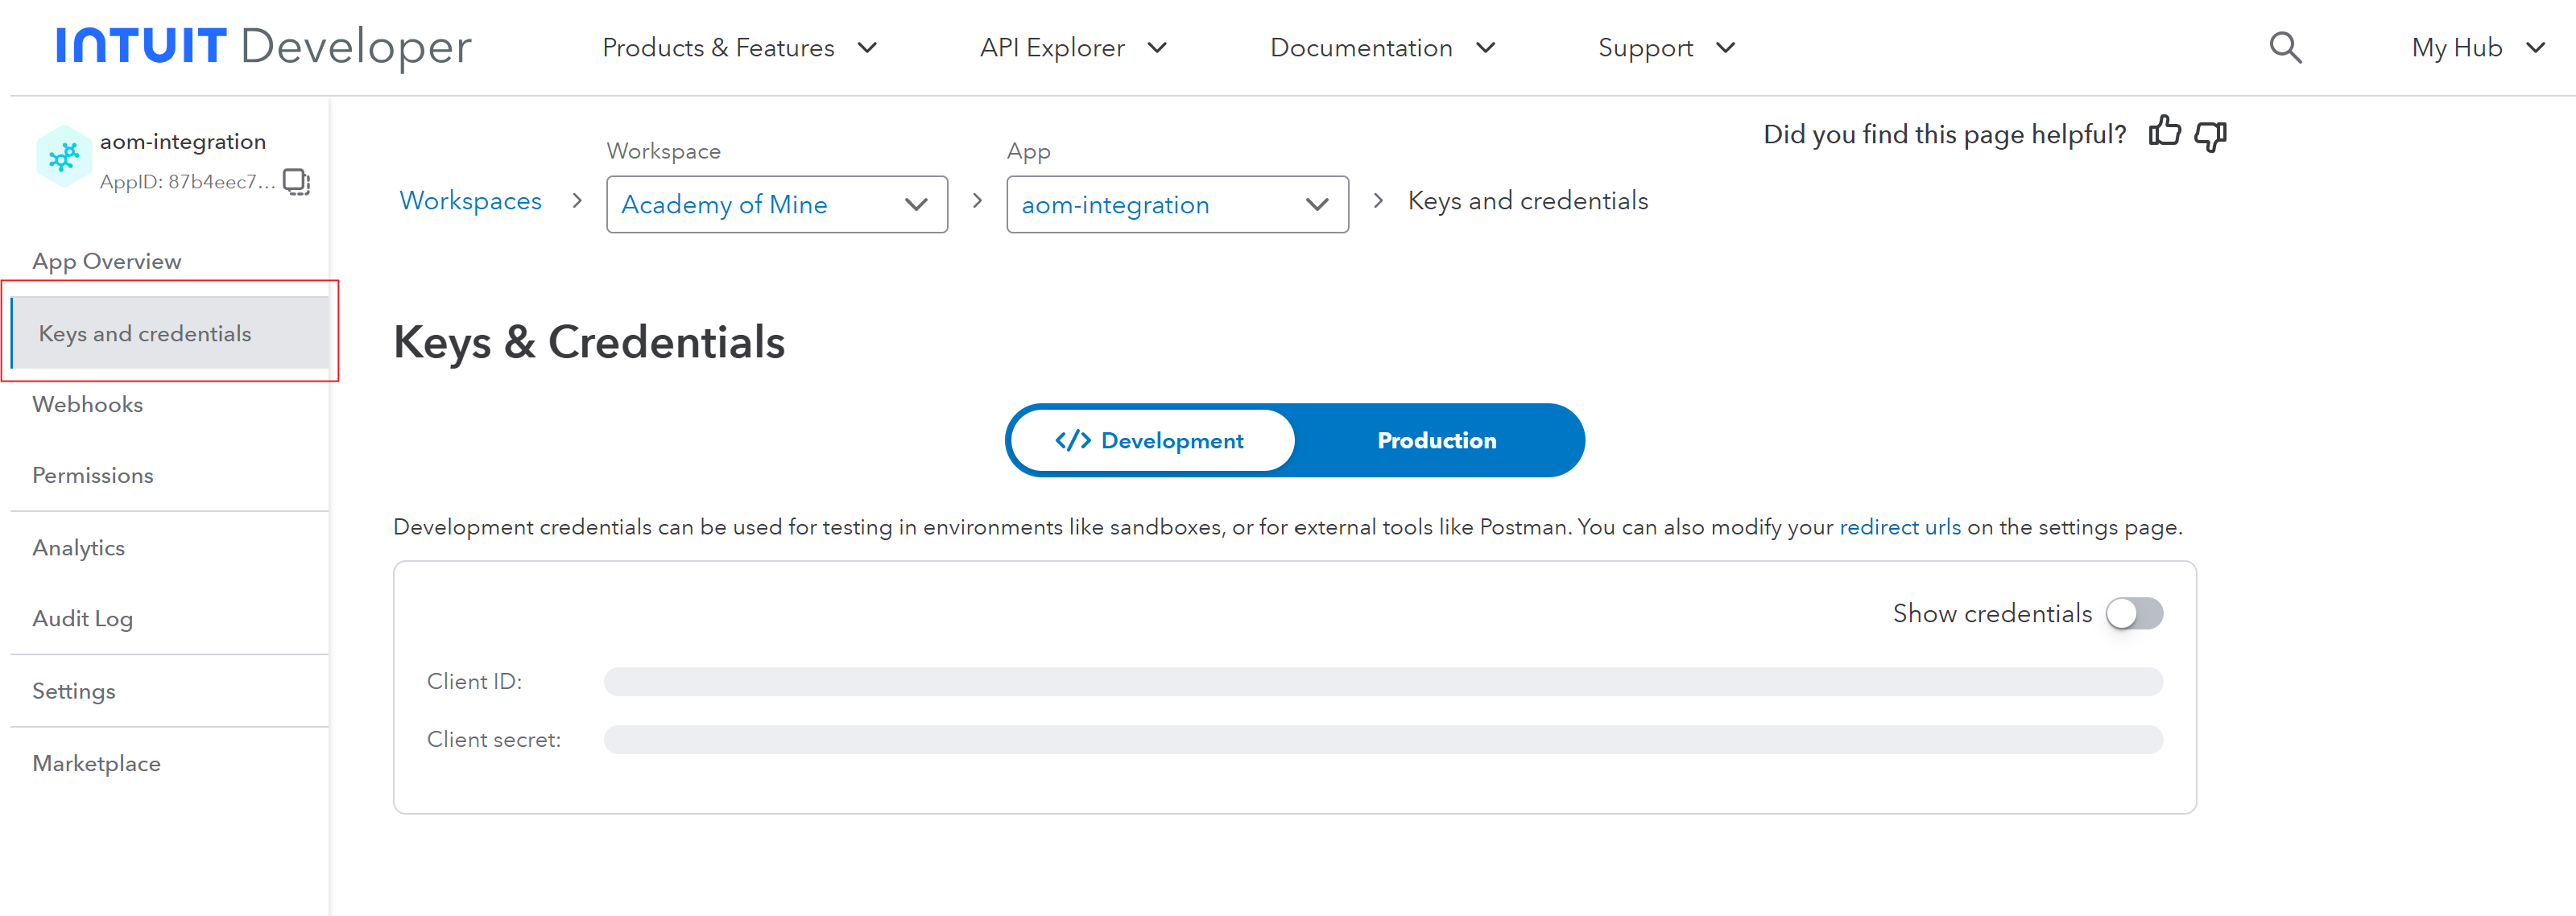
- In the Keys and credentials, Enable Show credentials note down your app's Client ID & Client Secret (these will be used later).
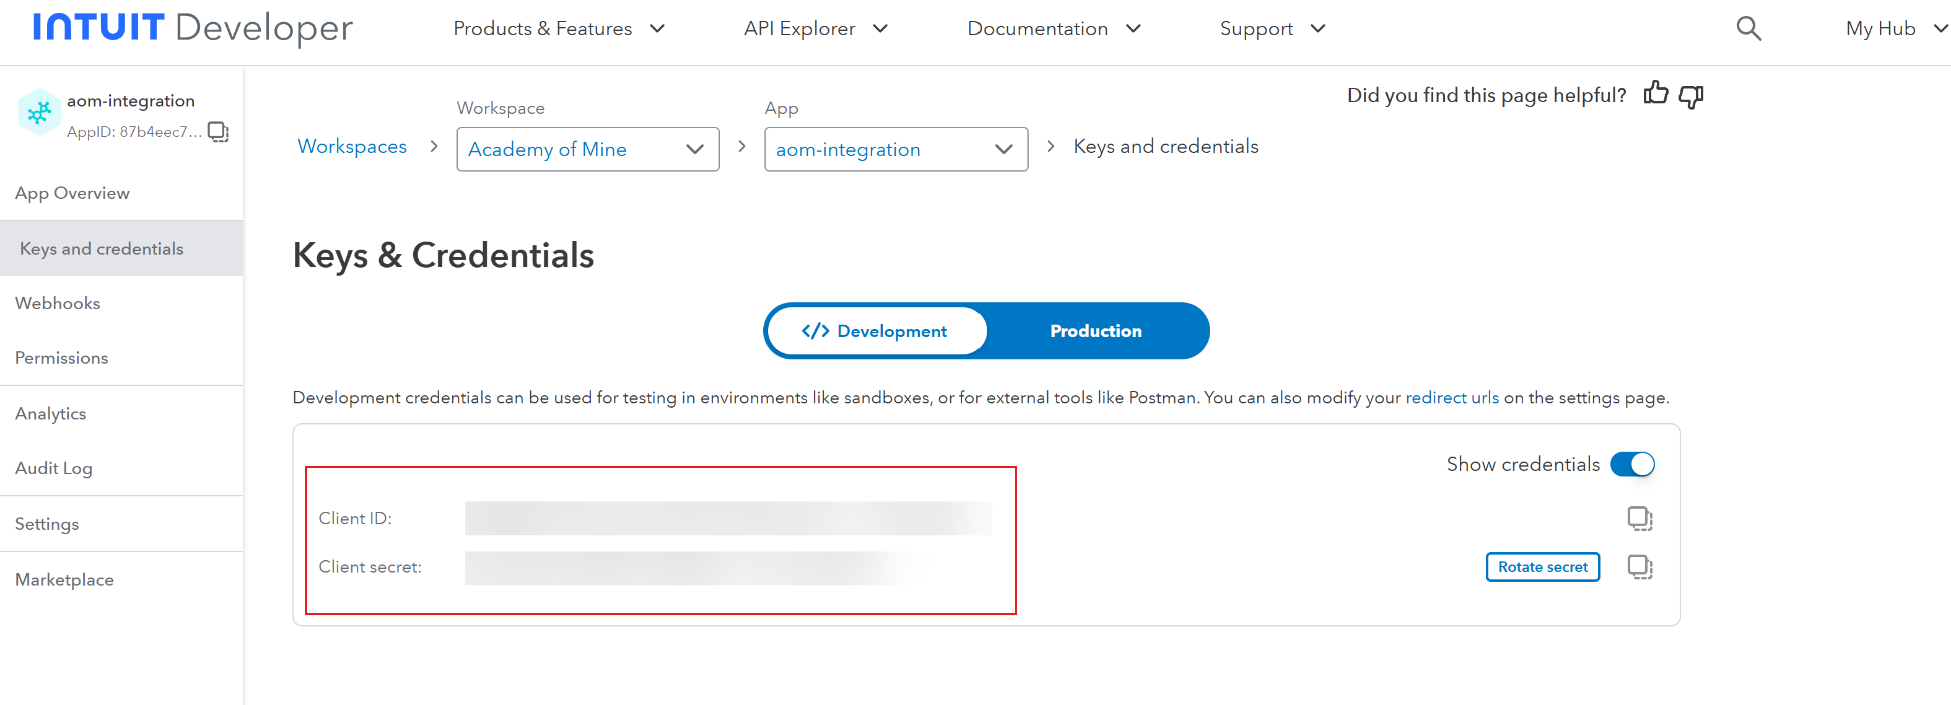
- Keep this page open, as we will be entering the Redirect URI later.
Step 4: Connect QuickBooks with your LMS
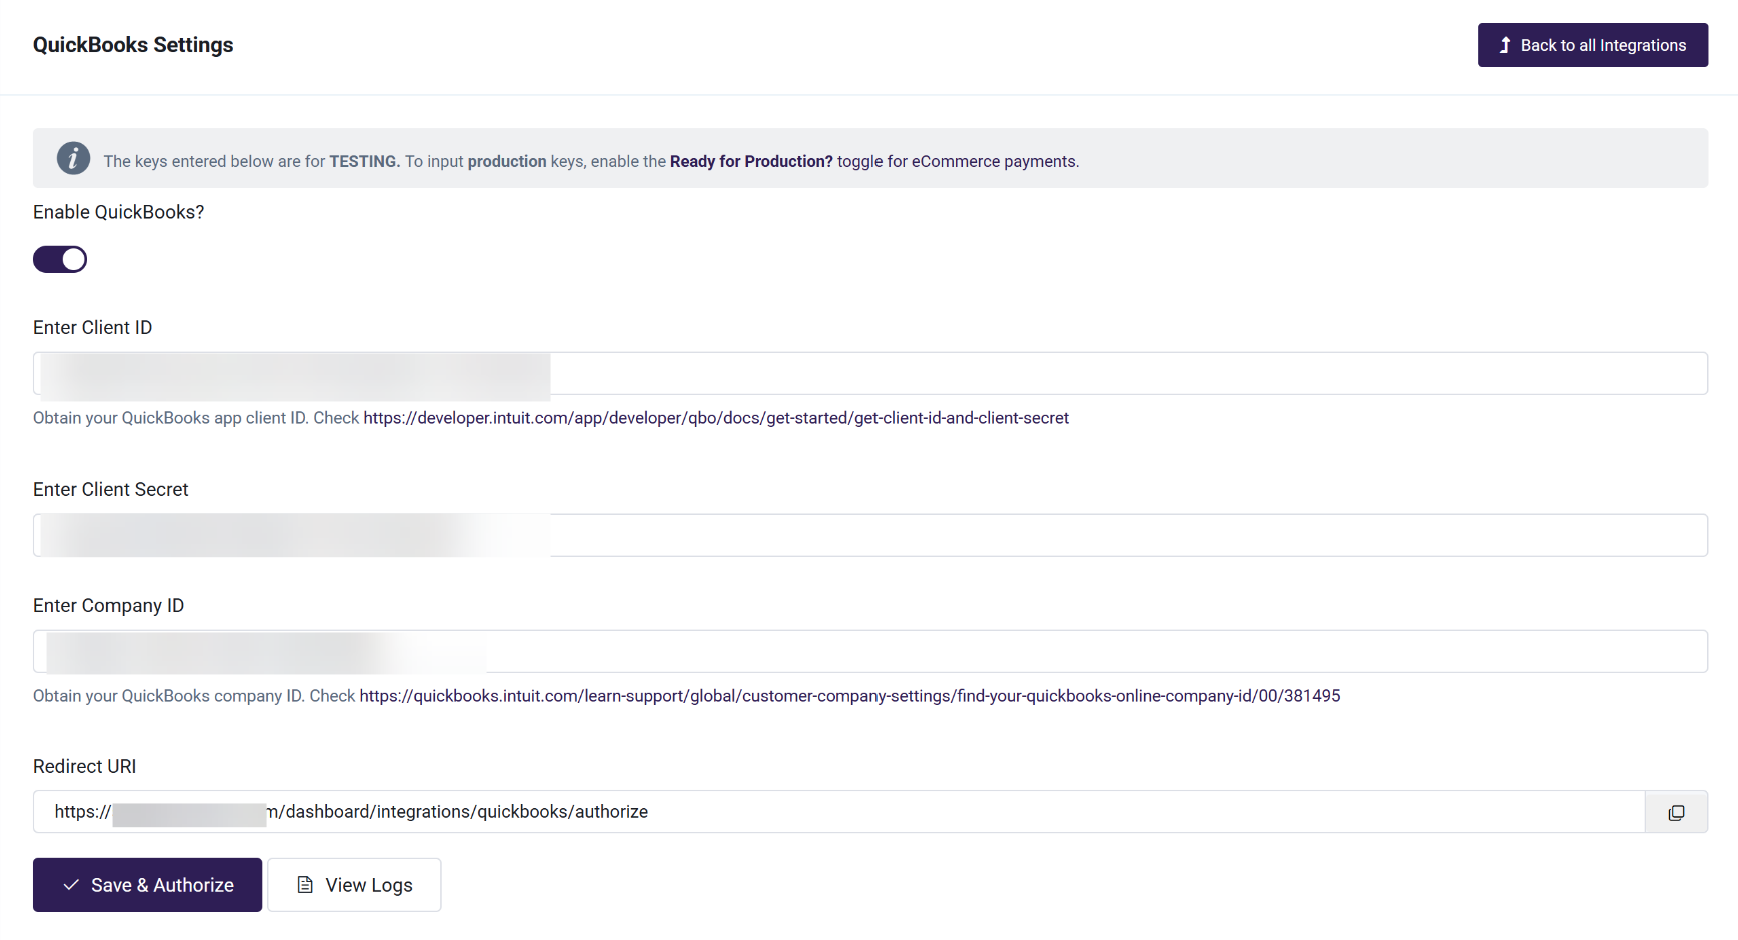
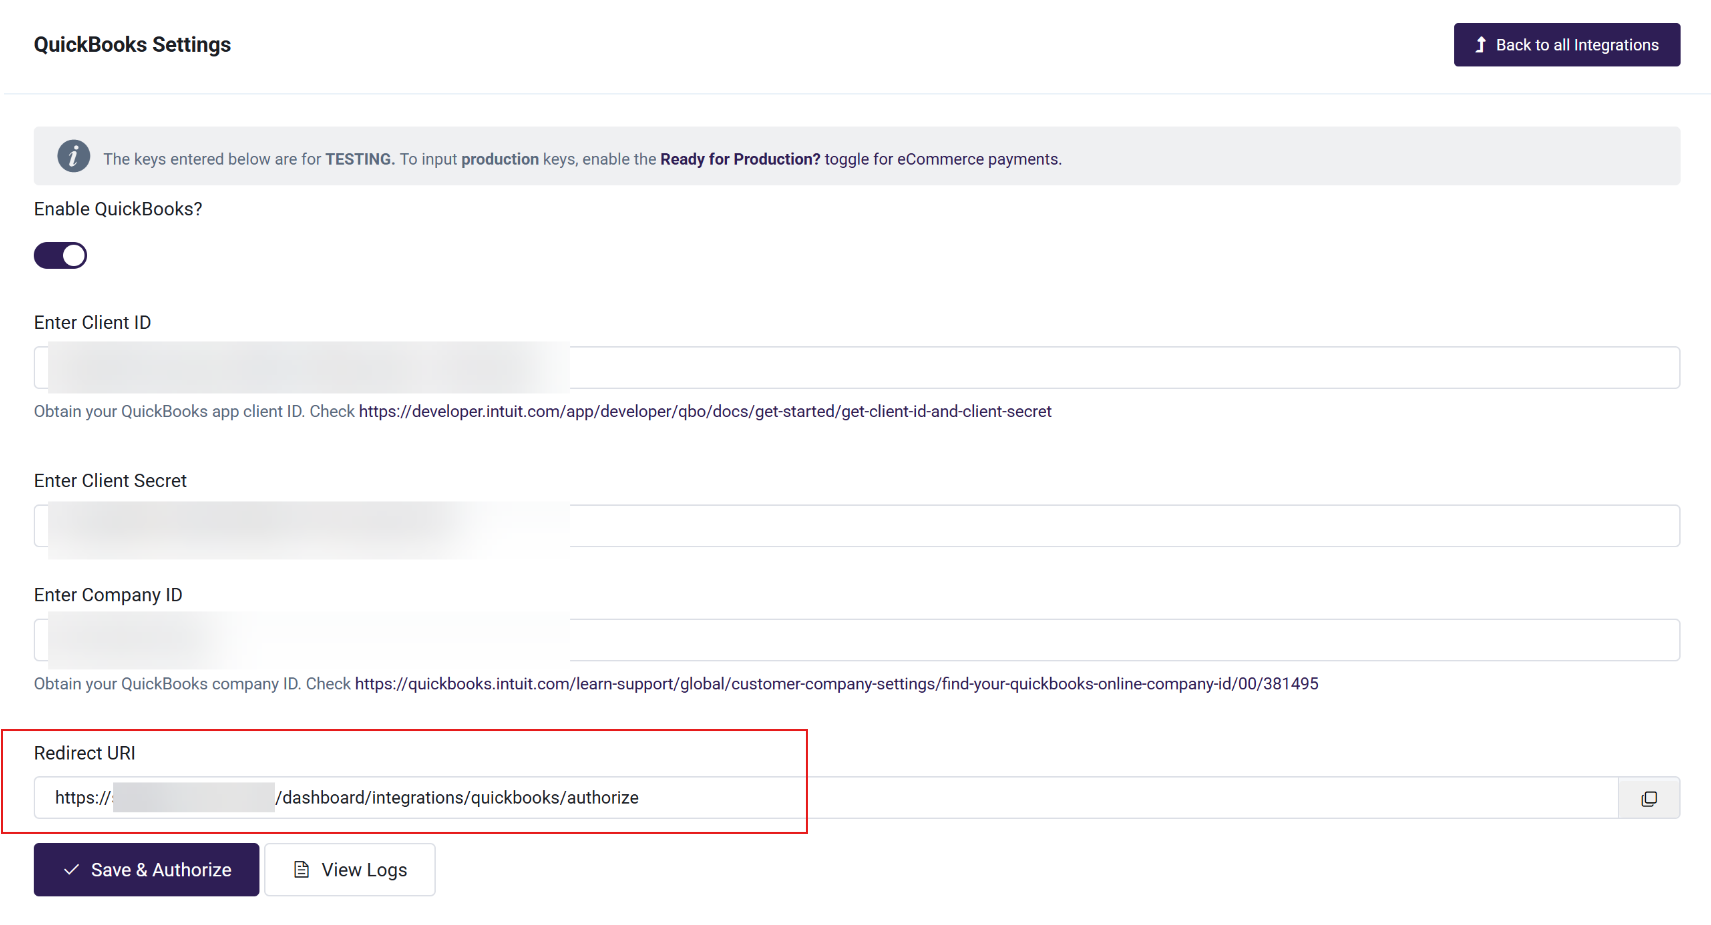
- Go to your AOM platform, and navigate to Integrations > QuickBooks > Manage.
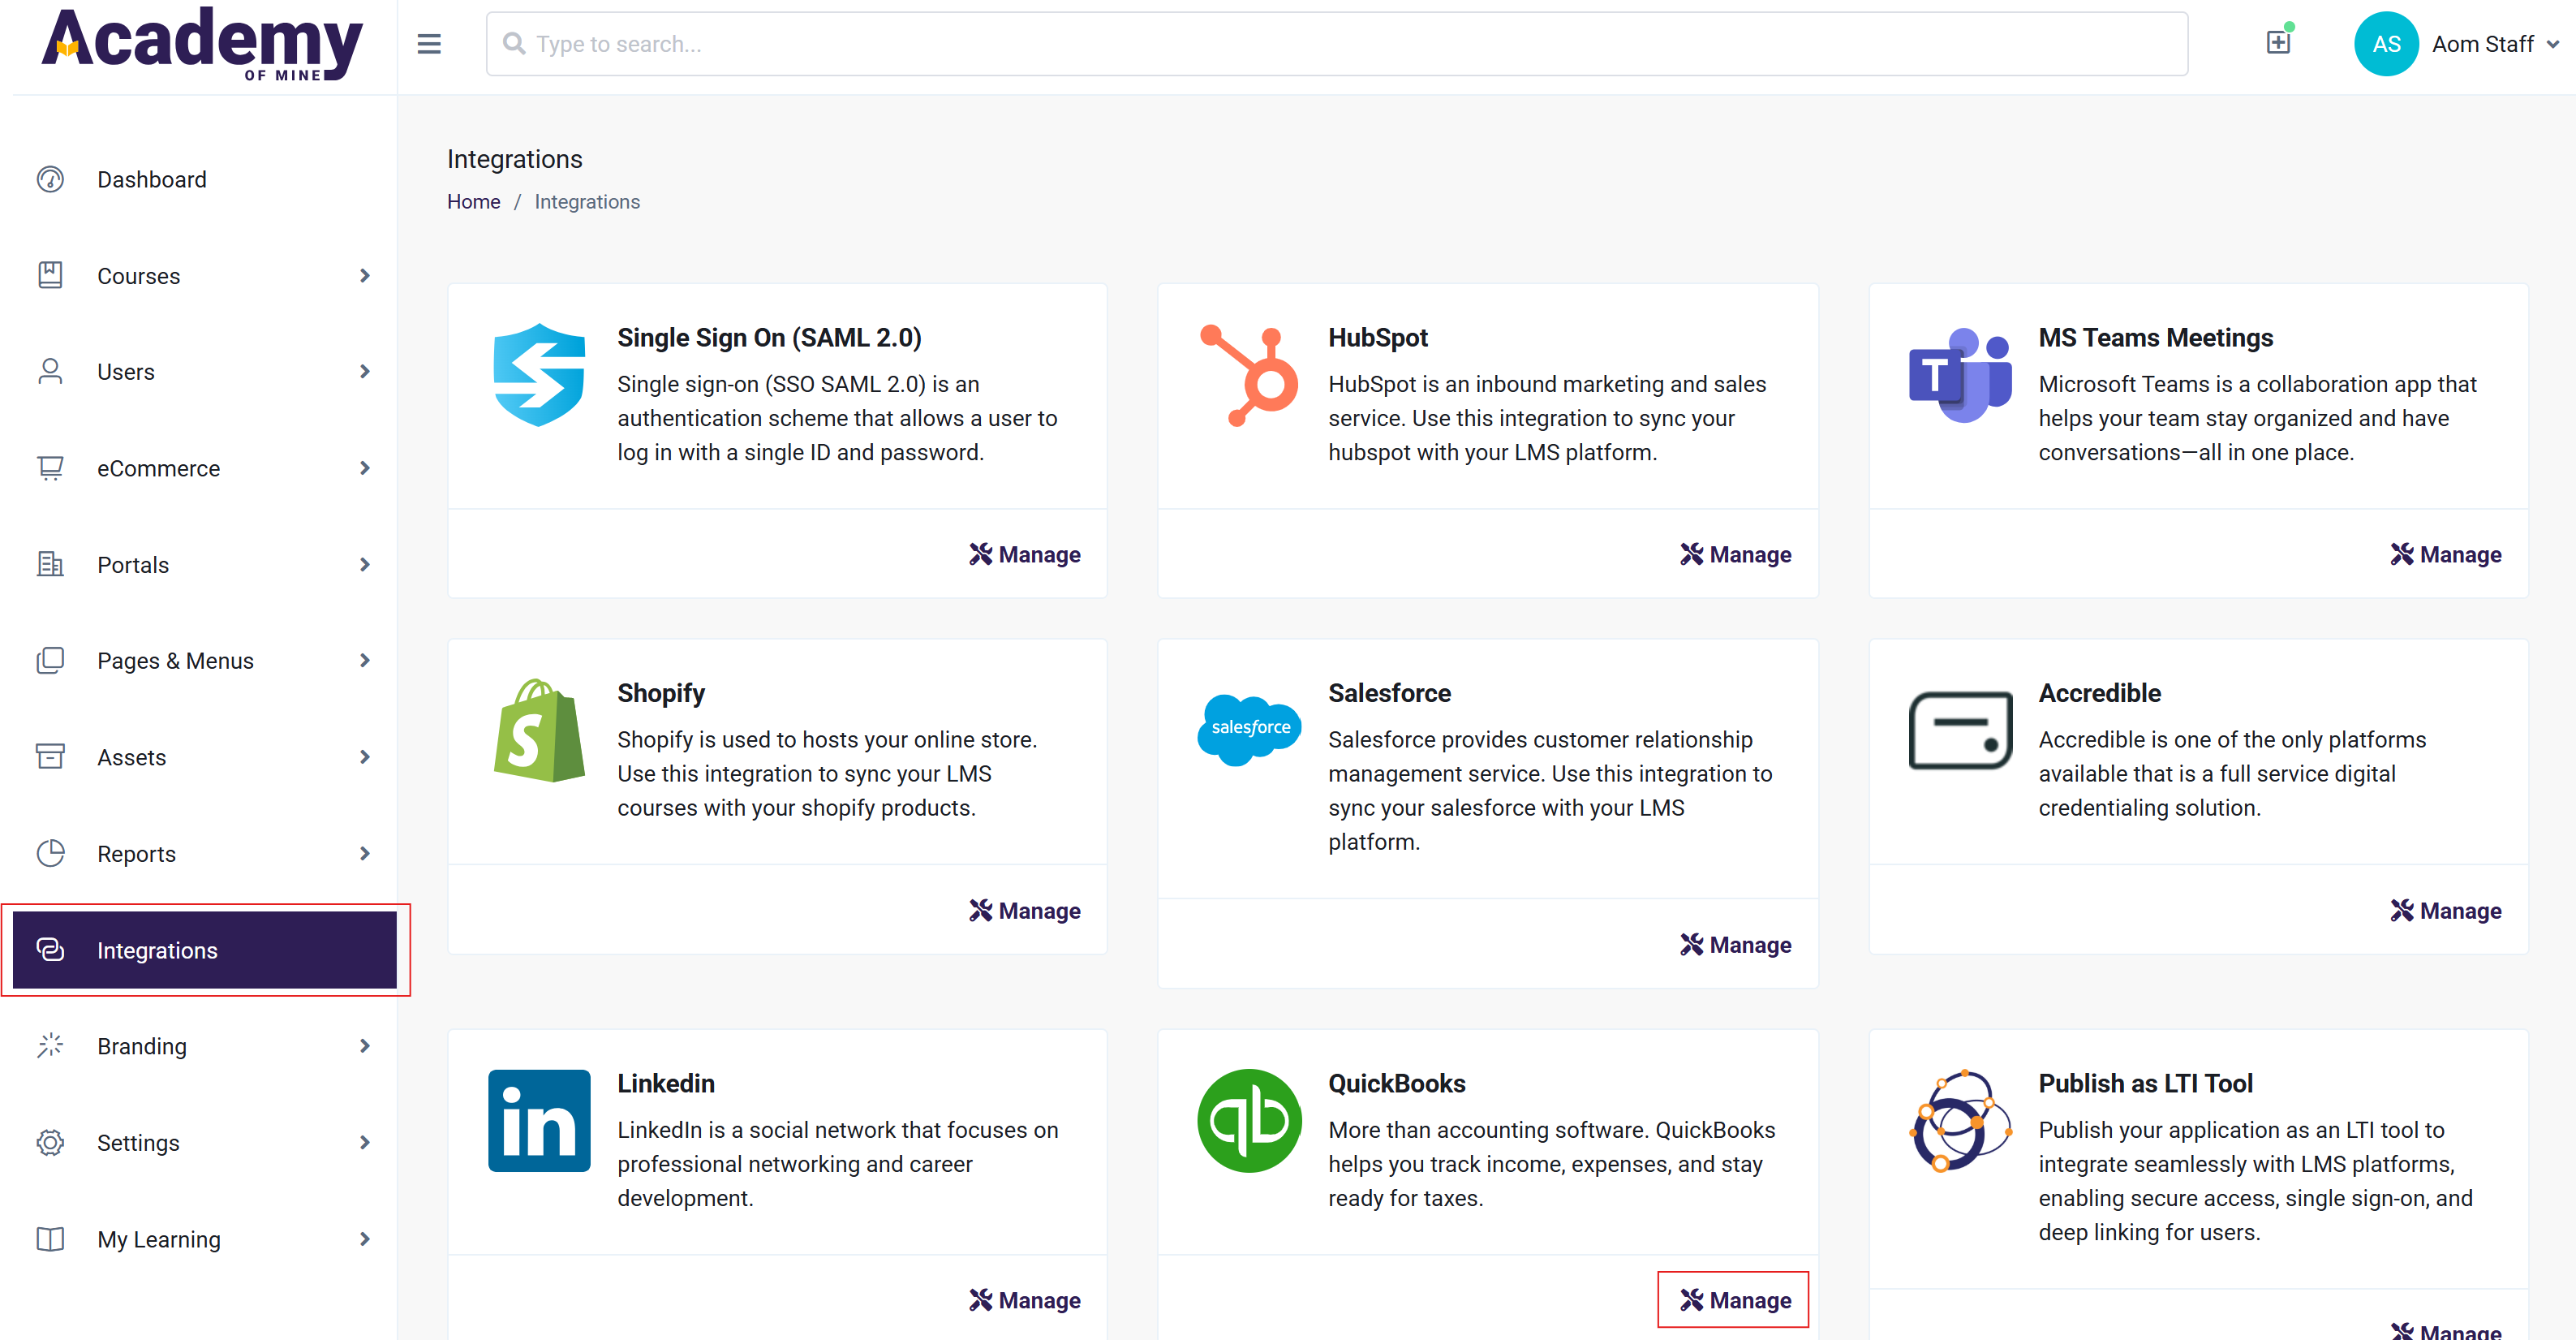
-
Click on the Enable Quickbooks? toggle to enable the integration.
-
Enter the Client ID, Client Secret, and Company ID that you noted down from previous steps.
-
Note down or copy the Redirect URI from the bottom of the page.
-
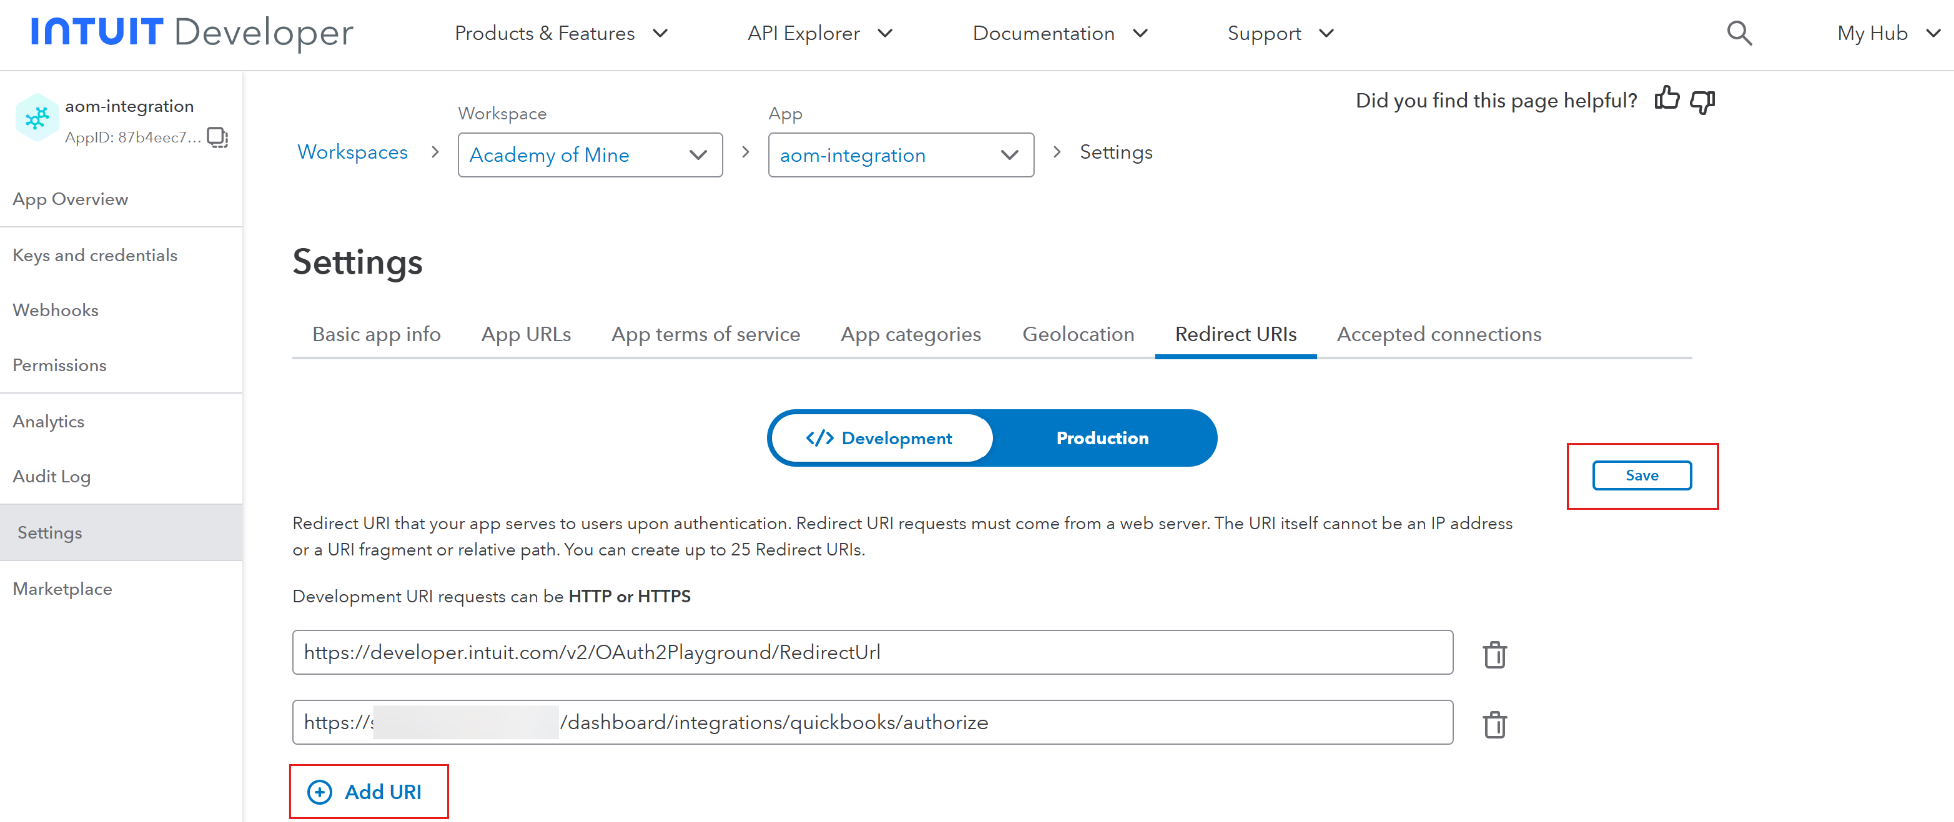
In the Settings tab of your app on Intuit Developer, go to Redirect URIs and click Add URI. Ensure that the Development tab is selected.
-
Click on Save.
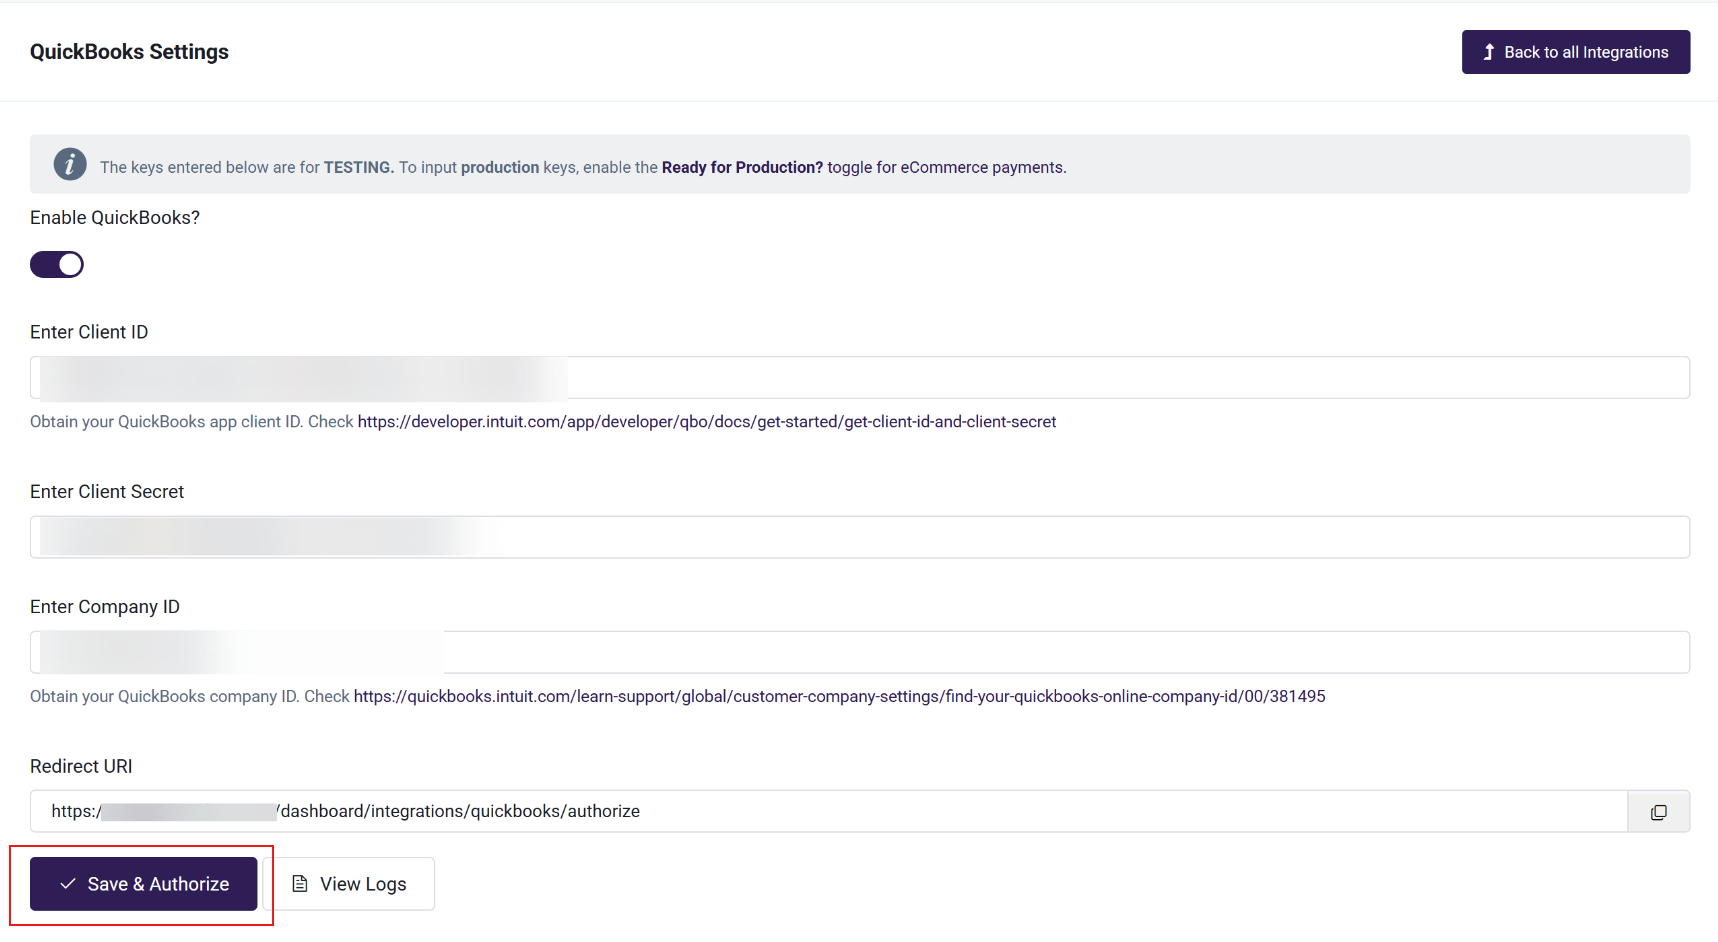
- Now, go back to your AOM QuickBooks integration page, and click on Save & Authorize.
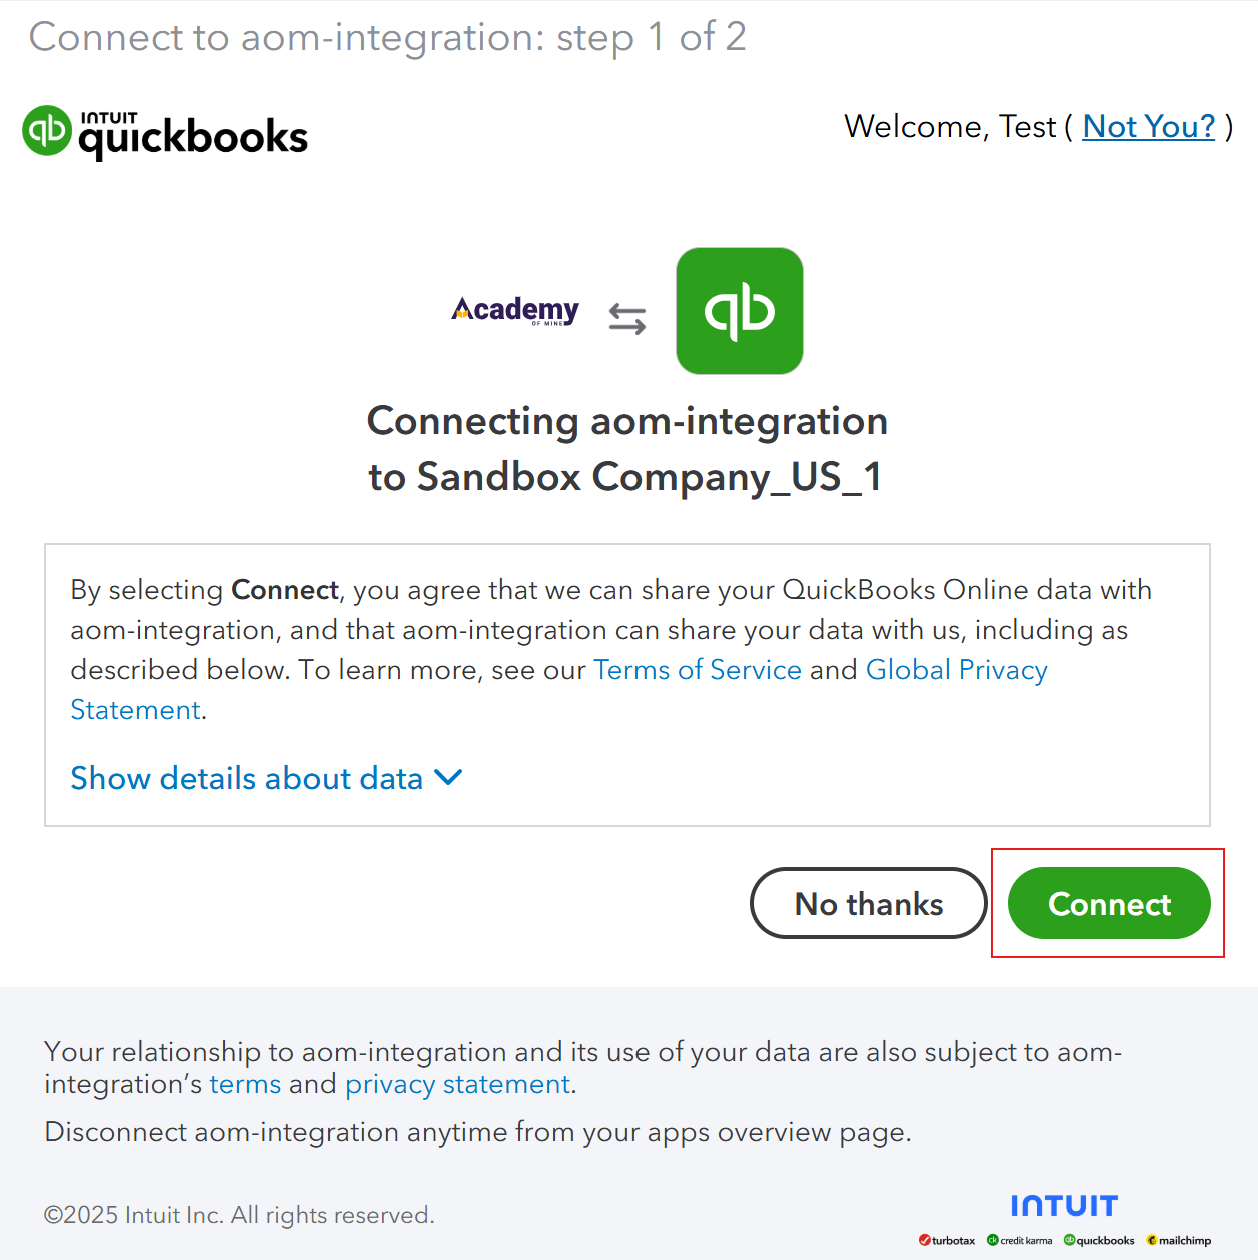
You will be redirected to QuickBooks. Select your sandbox company, and click on Connect.
- Your LMS is now connected to QuickBooks!
You can now create some test orders in your AOM platform, and they will automatically create invoices/customers/products/payments in QuickBooks.
To access the sandbox company you created:
- Navigate to https://developer.intuit.com
- Click on My Hub > Sandboxes.
- Click on the company name (e.g., Sandbox Company_US_1).
Connect with your production account
Step 1: Sign in to the QuickBooks Online developer platform
- Go to: https://developer.intuit.com
- Click on Sign In, and follow the prompts to log in to your account.
Step 2: Create an App
Please skip to Step 3 if you already created a Sandbox app
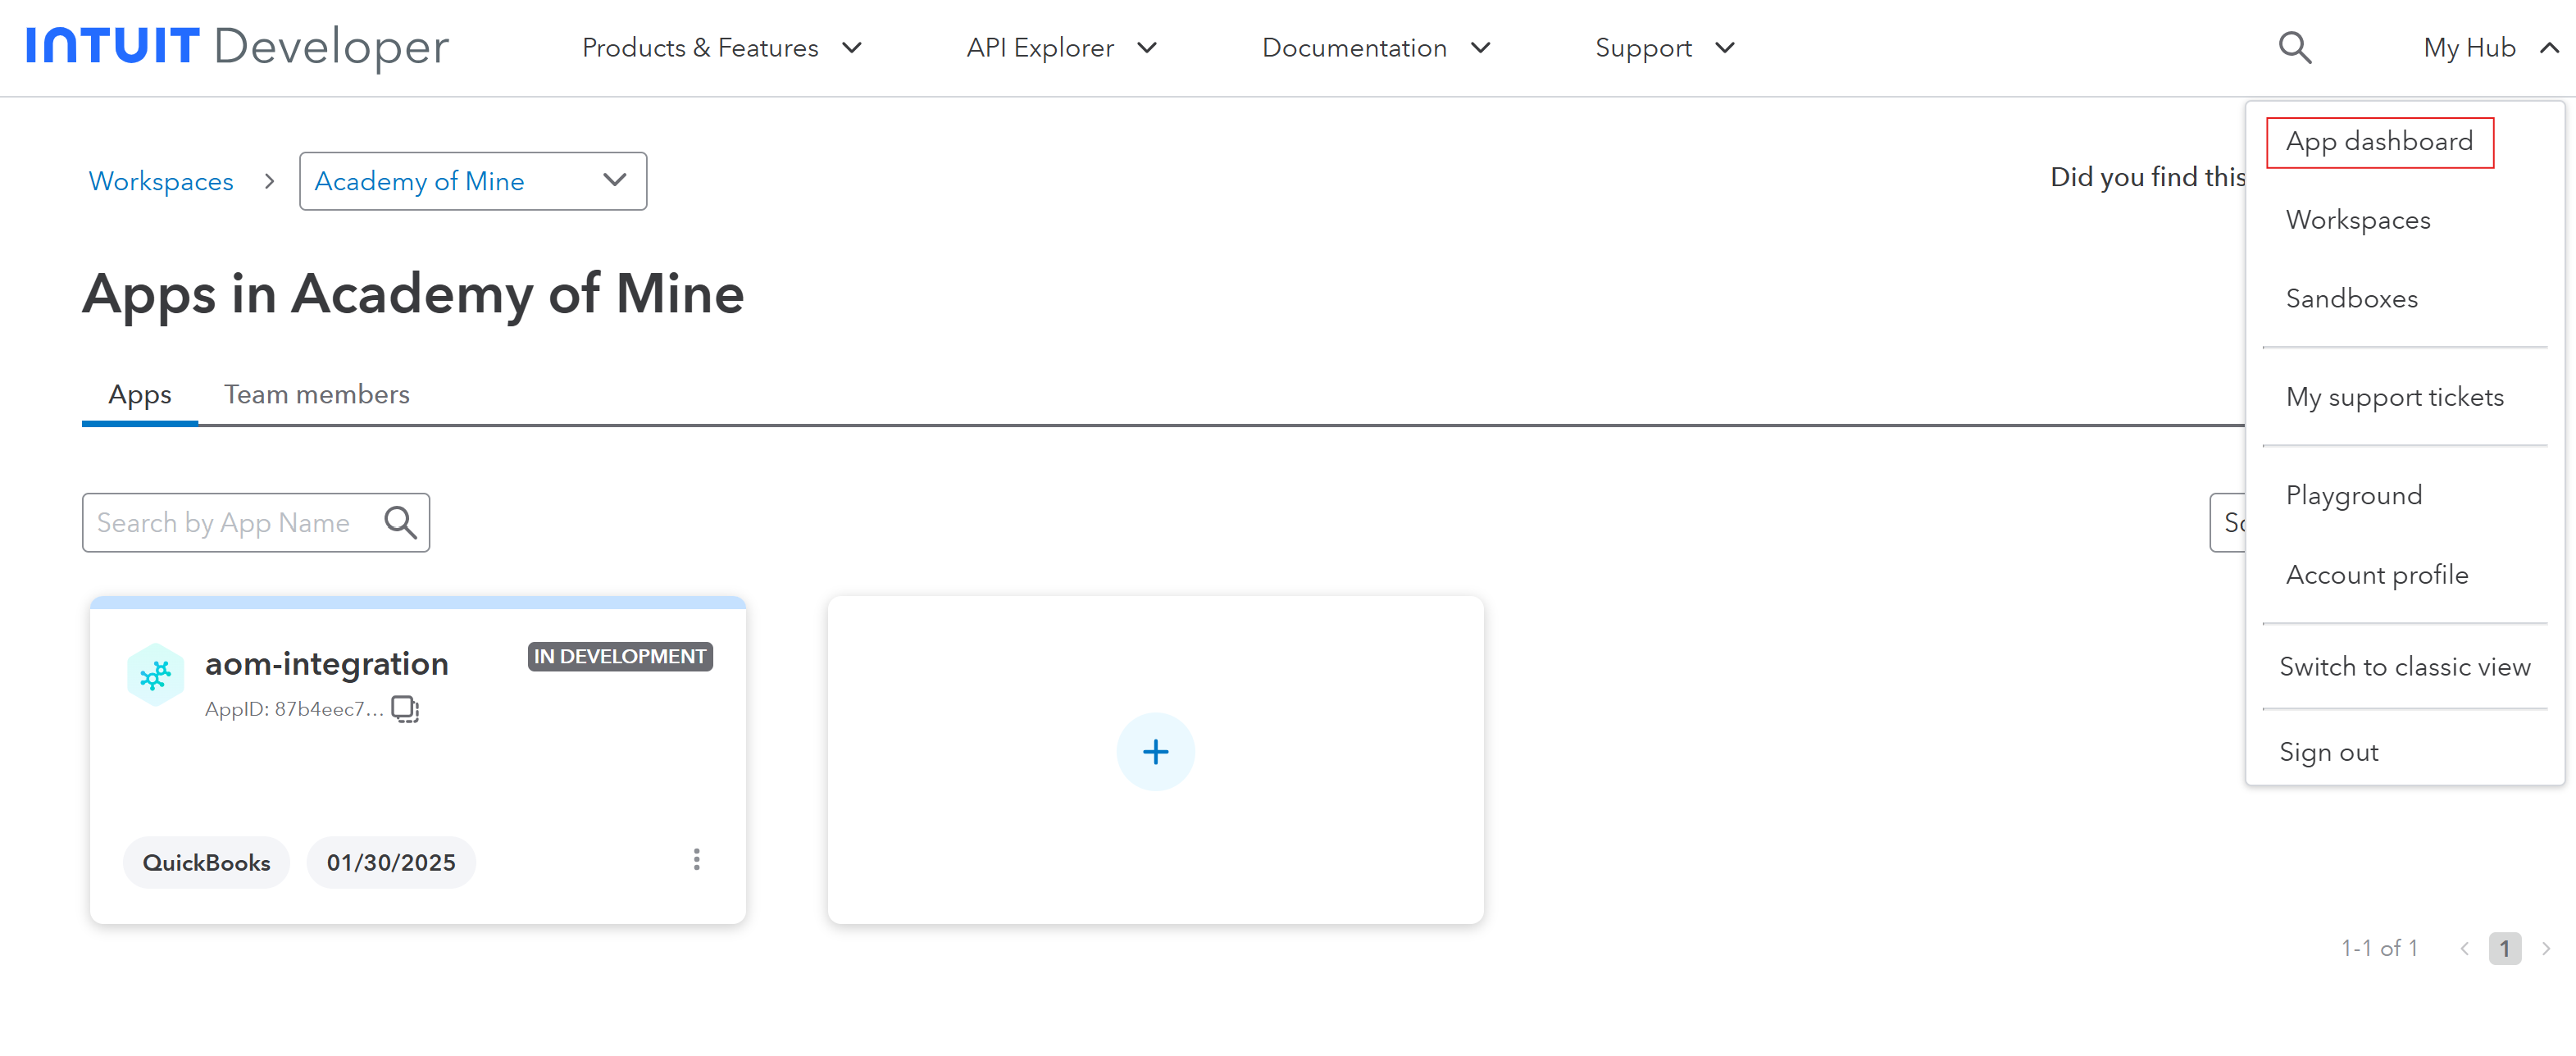
- From the top menu, click on My Hub to go to the App Dashboard.
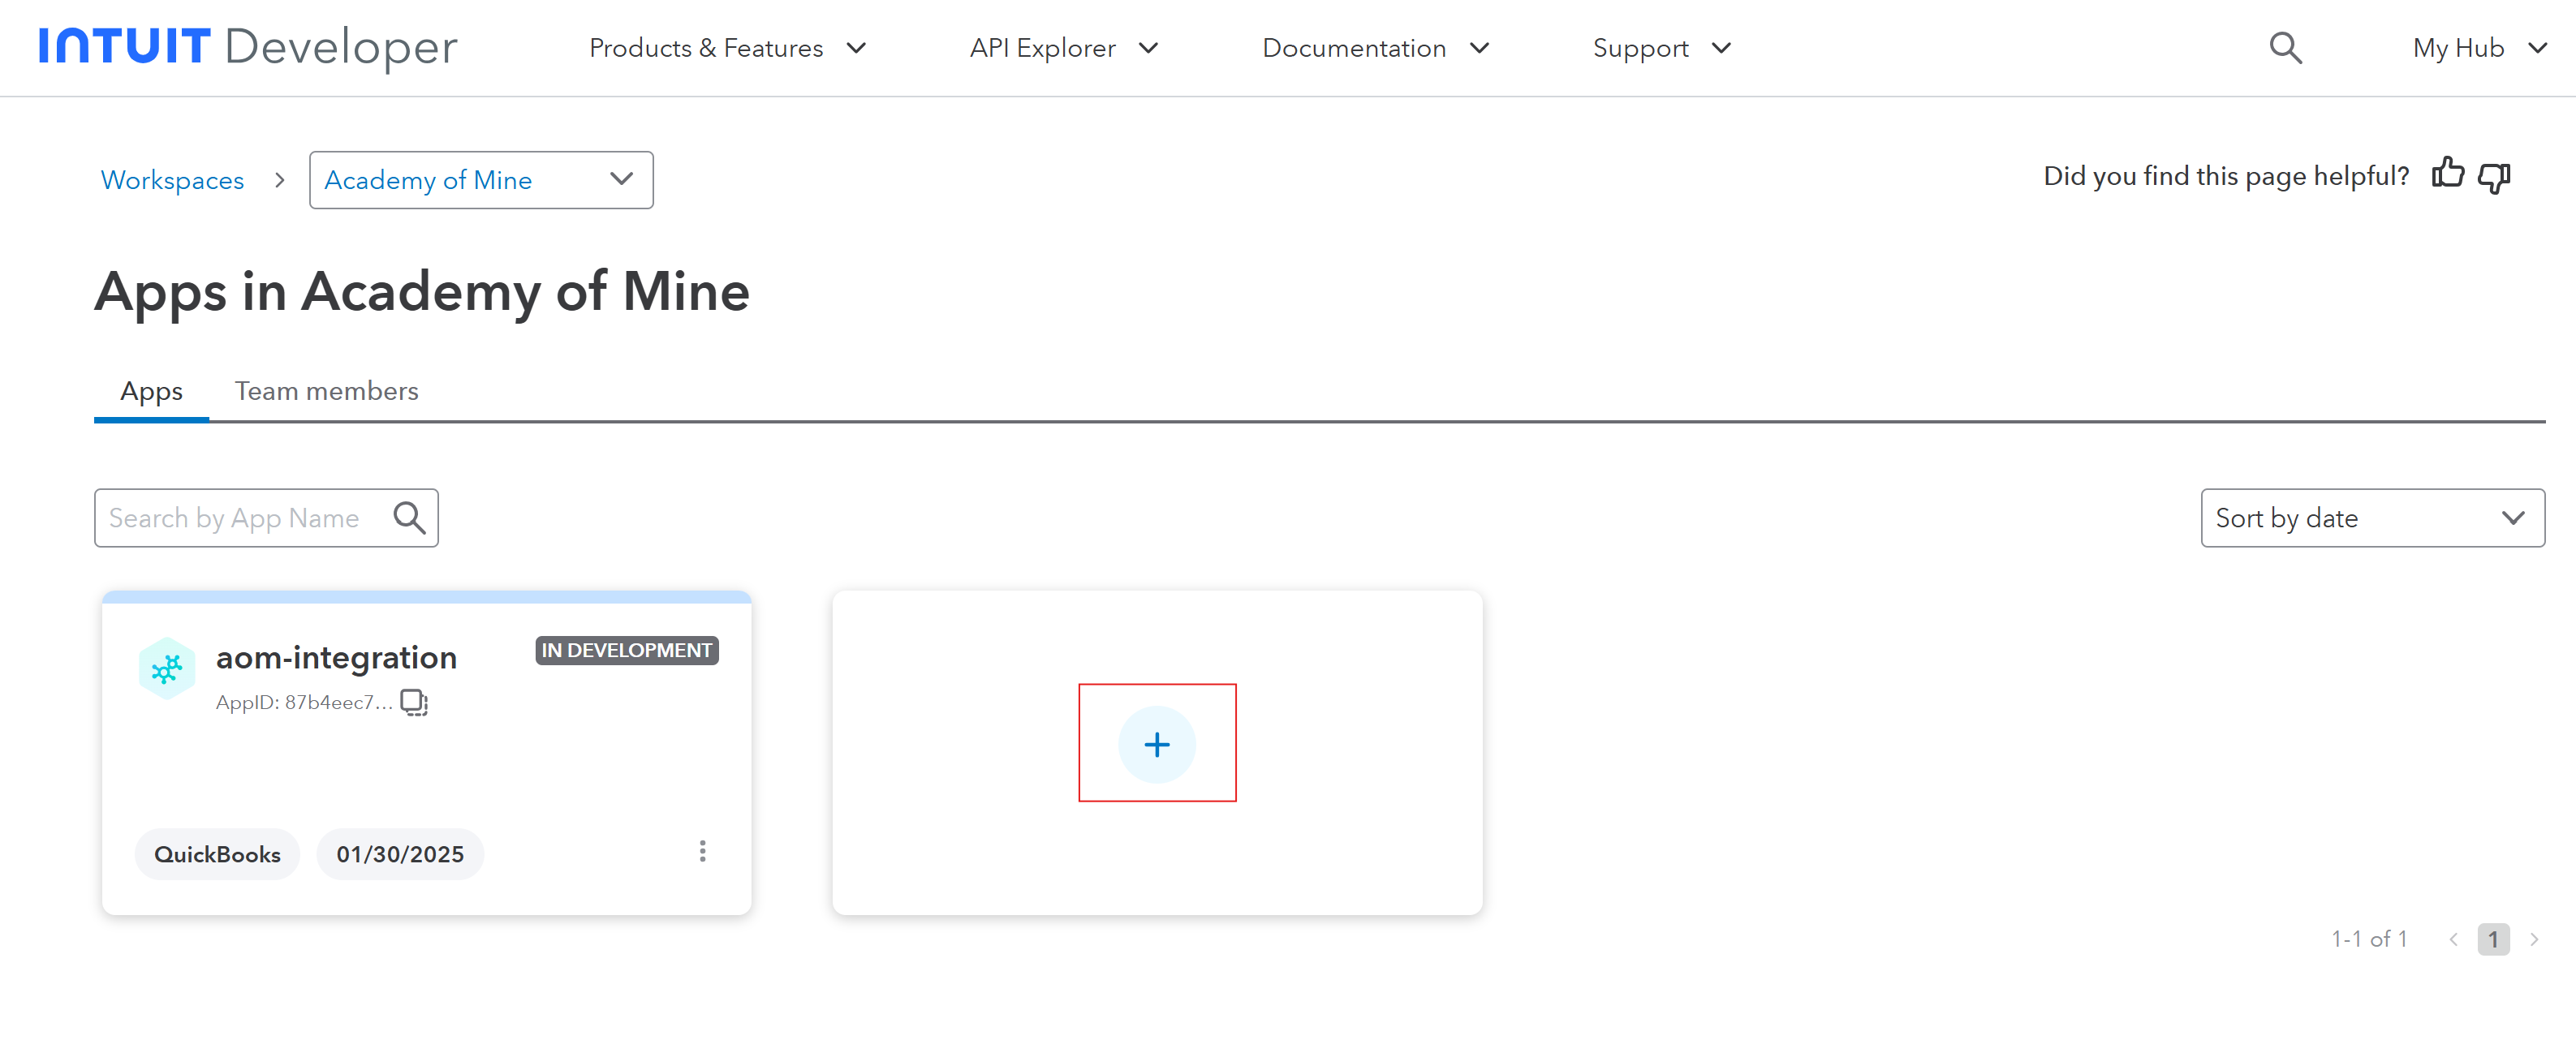
- Click on + icon.
-
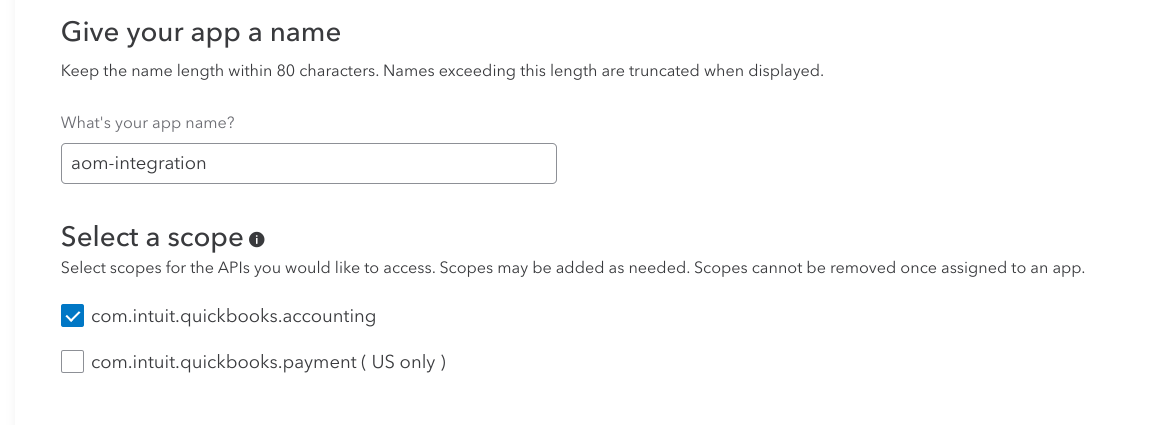
Select QuickBooks Online and Payments.
-
Give the app a name (e.g., aom-integration).
-
Provide the app with the following scope:
- com.intuit.quickbooks.accounting
- Click on Create app.
- Once your app has been created, you should be automatically redirected to the app details page. If not, click on Dashboard, and then in the App Dashboard, click on your app's name.
Step 3: Configure the App for production
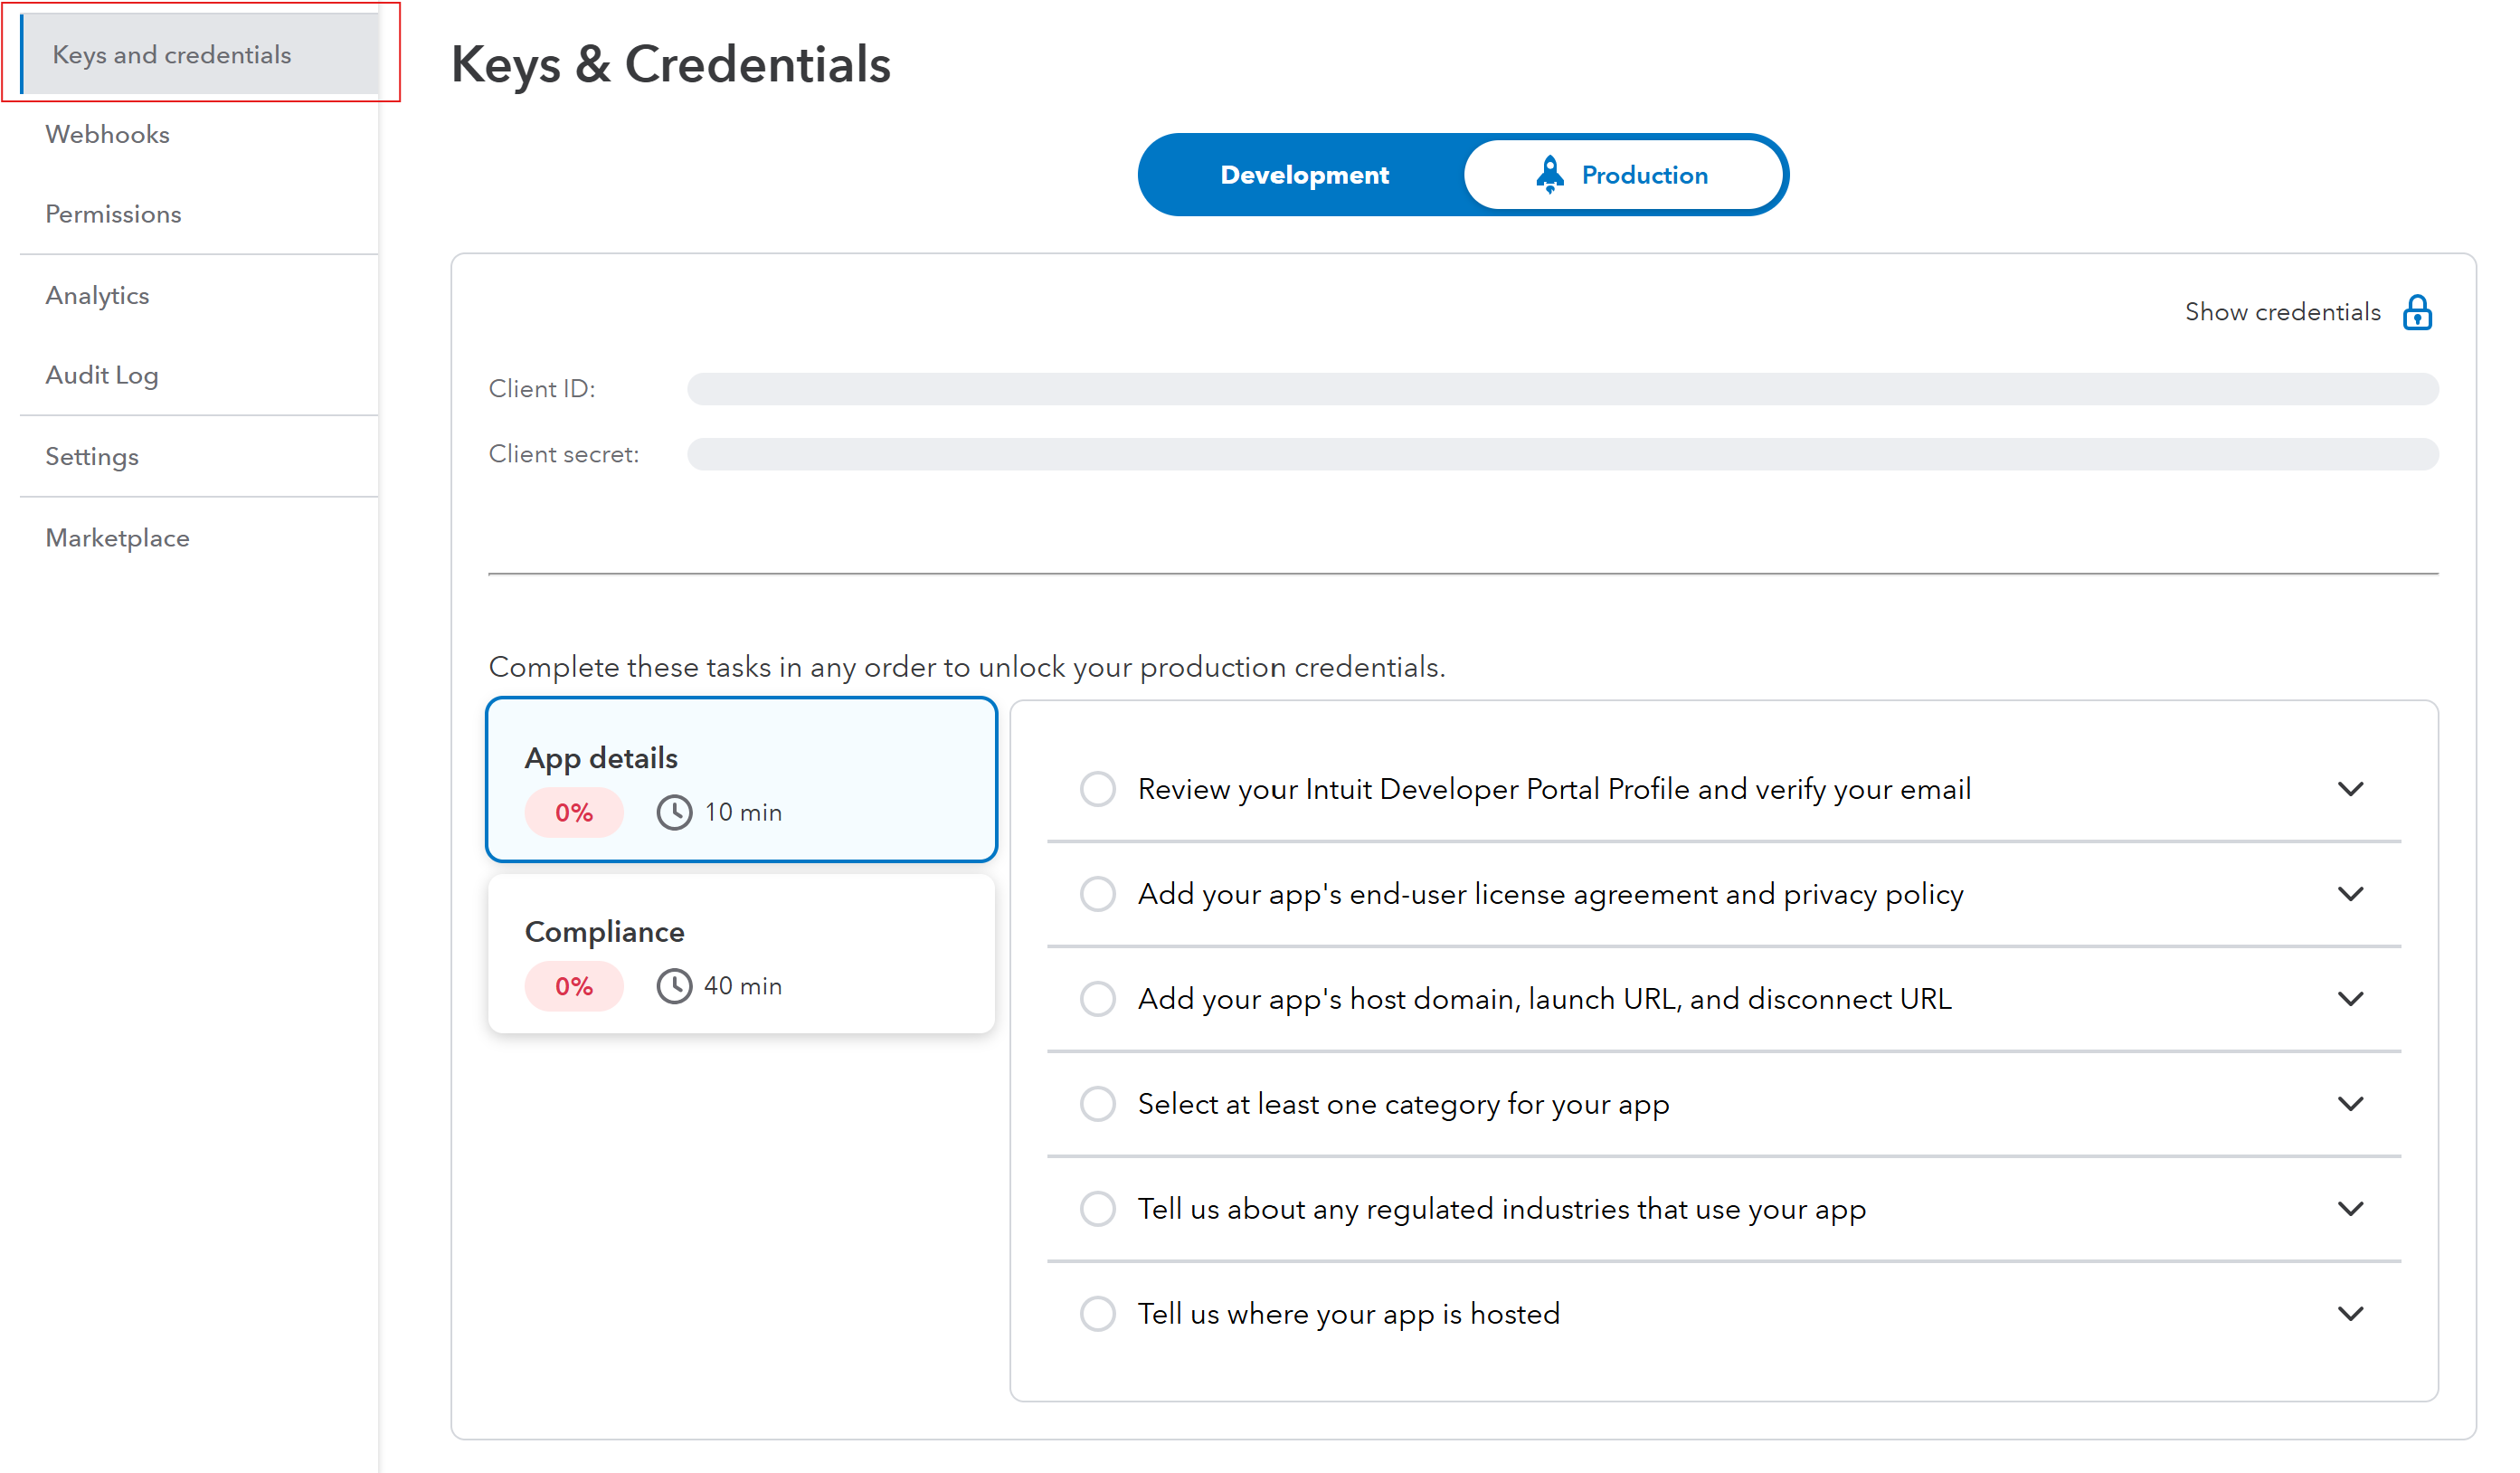
- Navigate to Keys and credentials > Production.
- QuickBooks should present you with a checklist of items that are required, in order to make the app available in production. You will need to go through each requirement, and follow the prompts to complete the necessary information. Please find sample data provided below.
Verify your email address
If your email address hasn't been confirmed yet, you will need to follow the QuickBooks prompts to verify your email.
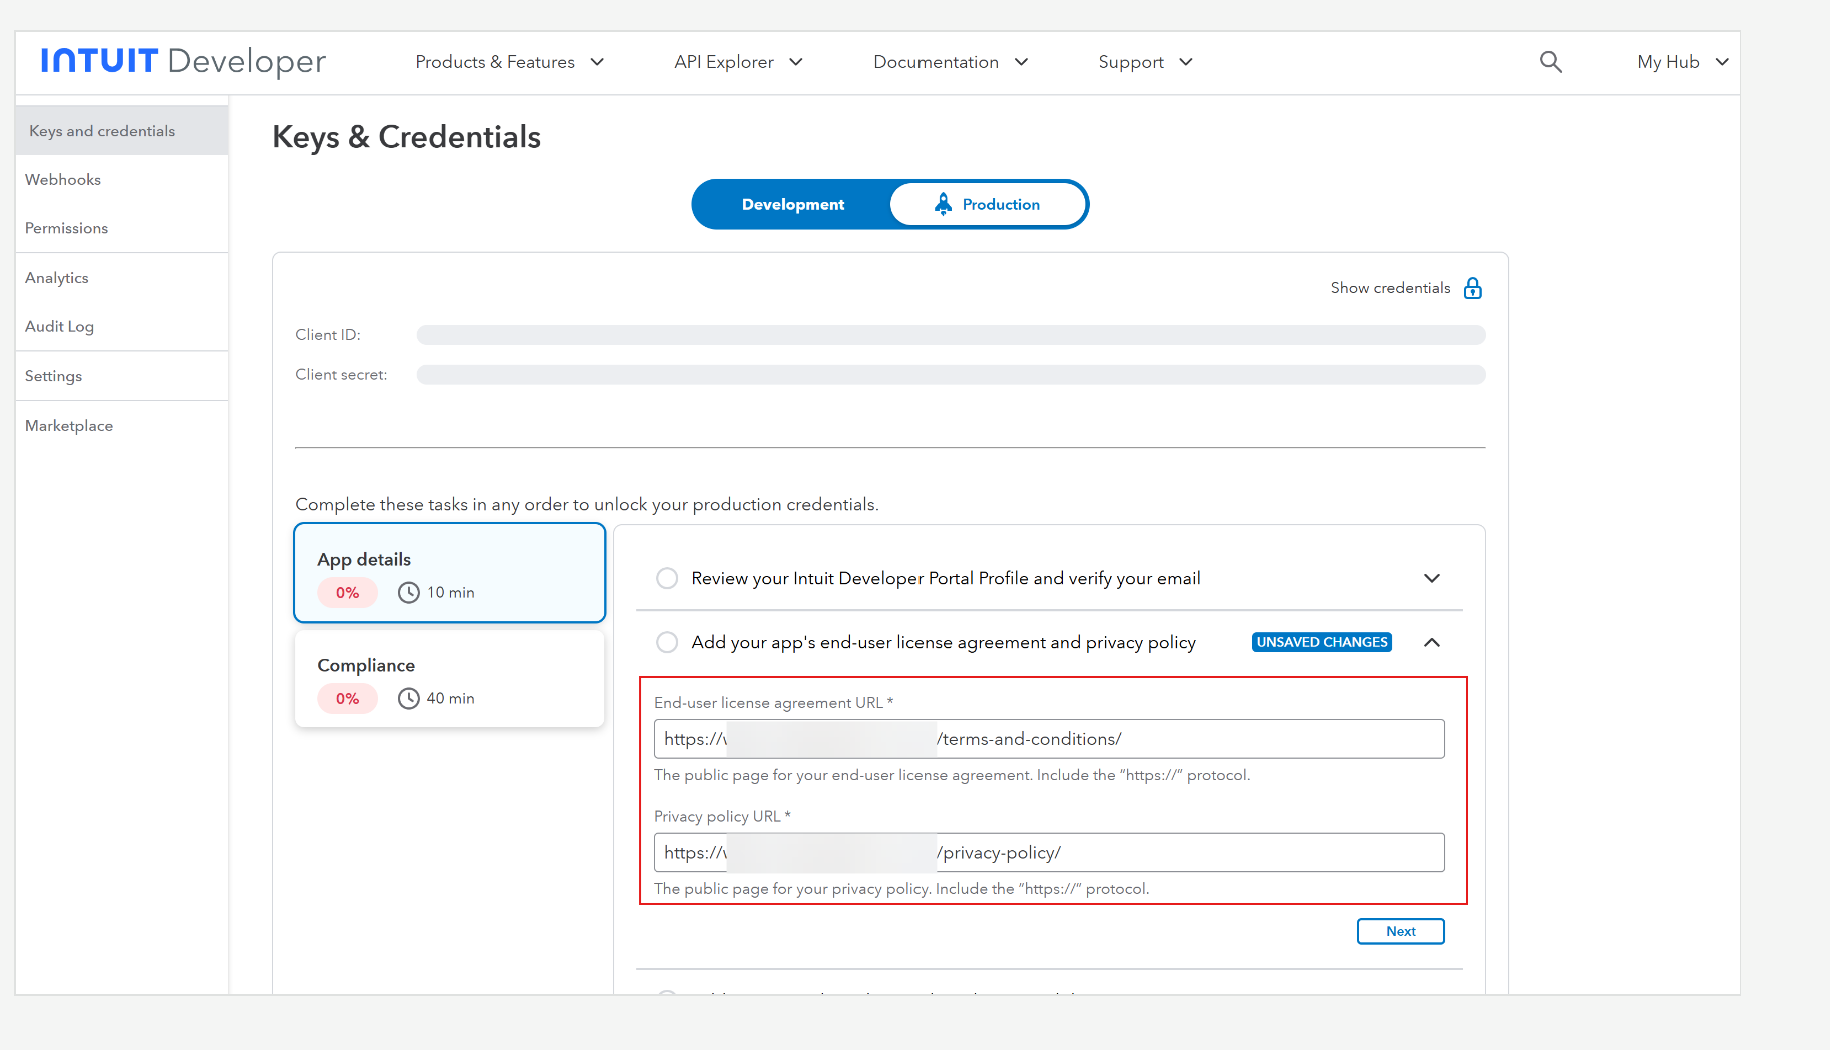
Add your app's end-user license agreement and privacy policy
- End User License Agreement Url: https://www.academyofmine.com/terms-and-conditions/
- Privacy Policy Url: https://www.academyofmine.com/privacy-policy/
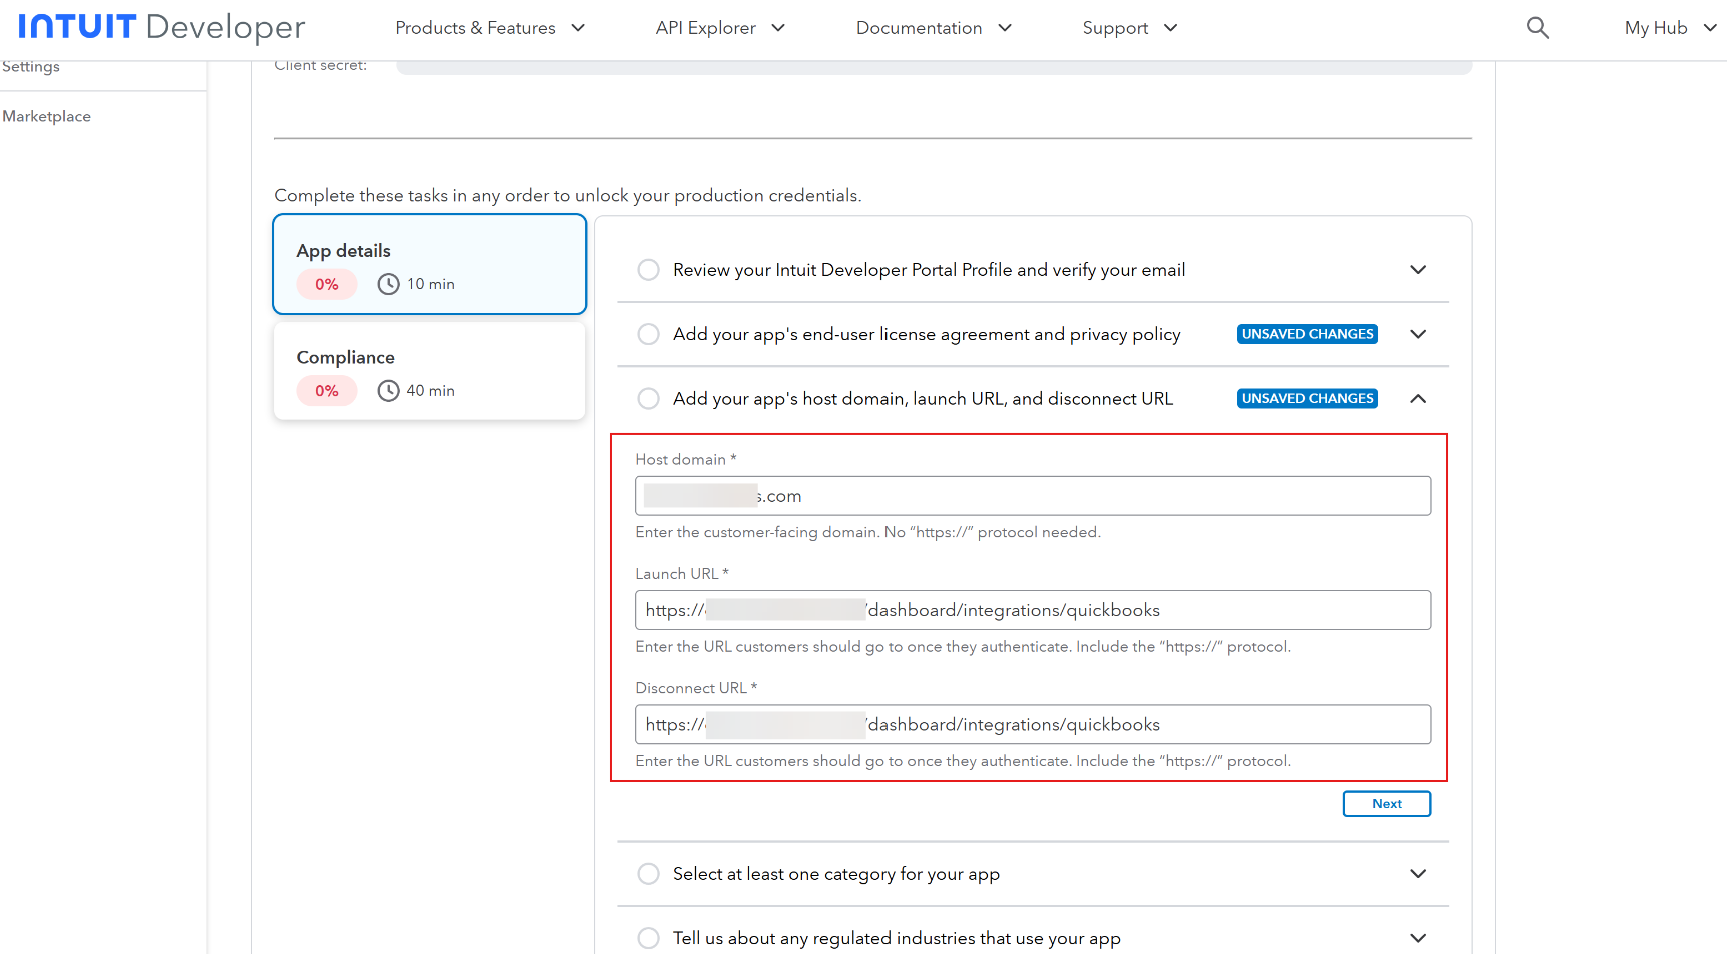
Add your app's host domain, launch URL, and disconnect URL
These URLs will be specific to your AOM platform.
- Host Domain: your AOM URL without "https://" at the front (e.g., domain.aomlms.com)
- Launch URL: your AOM URL when you are on the Integrations > QuickBooks management page (e.g., https://domain.aomlms.com/dashboard/integrations/quickbooks)
- Disconnect URL: same as the Launch URL.
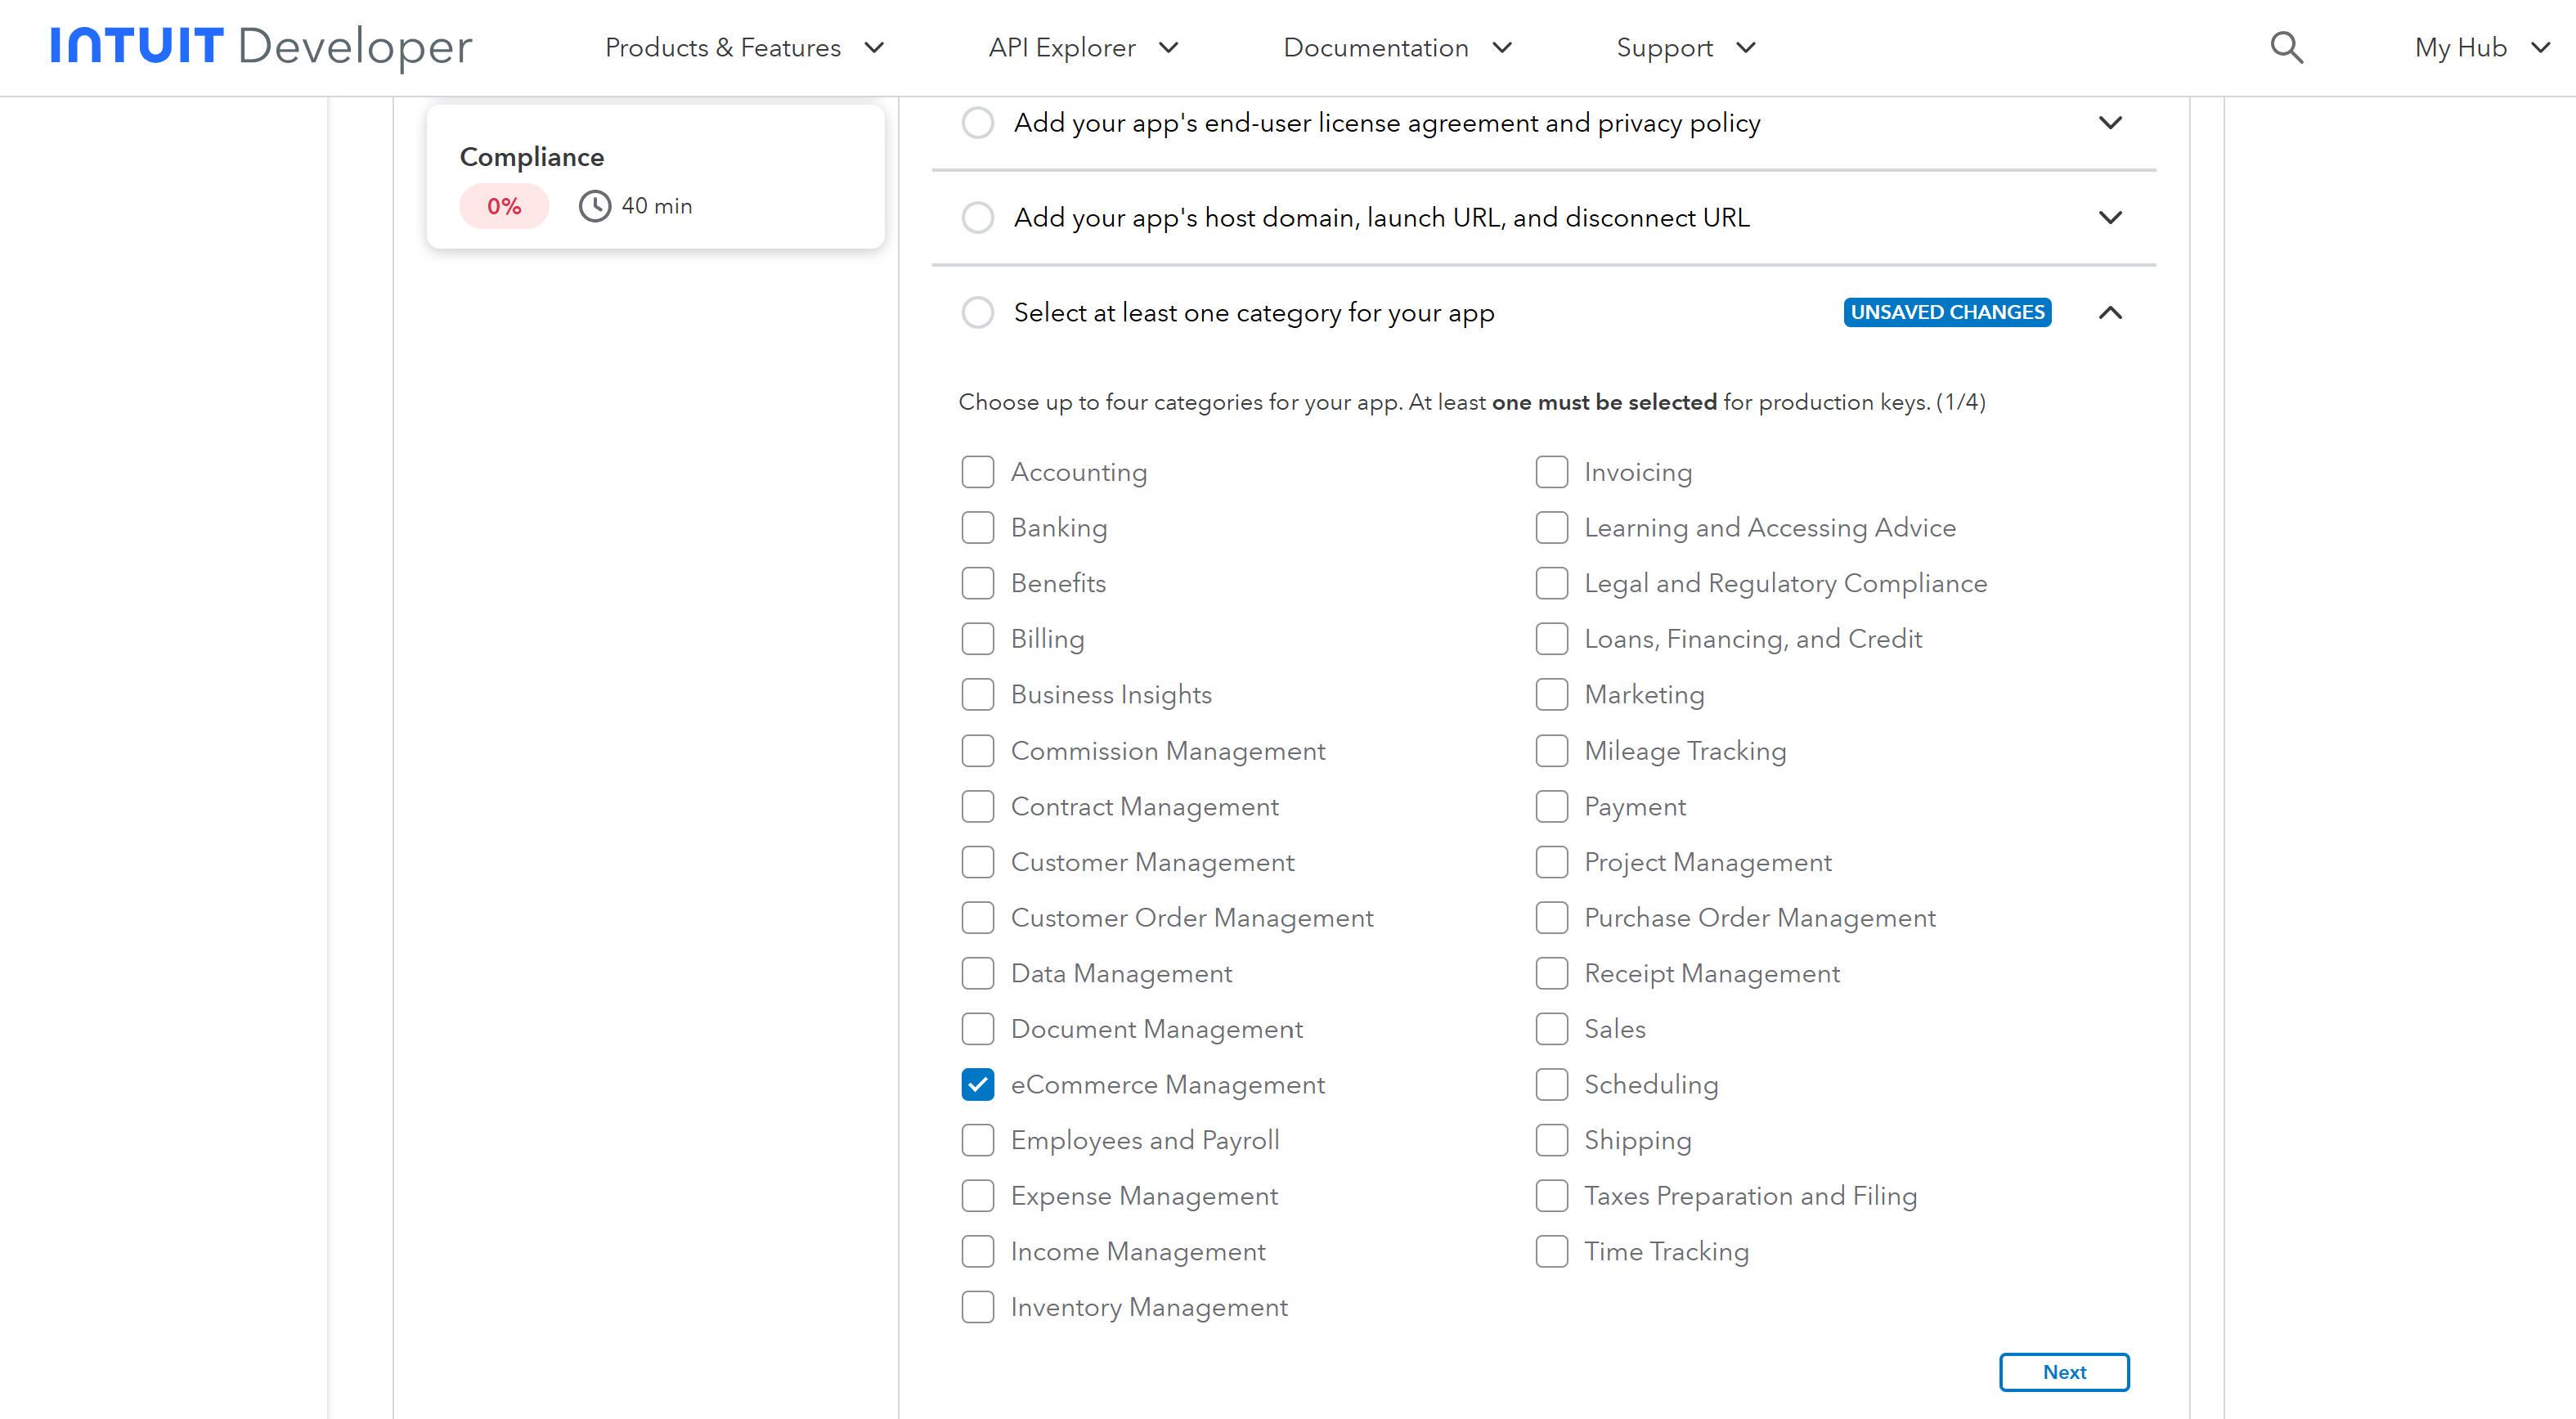
Select at least one category for your app
- Select eCommerce Management
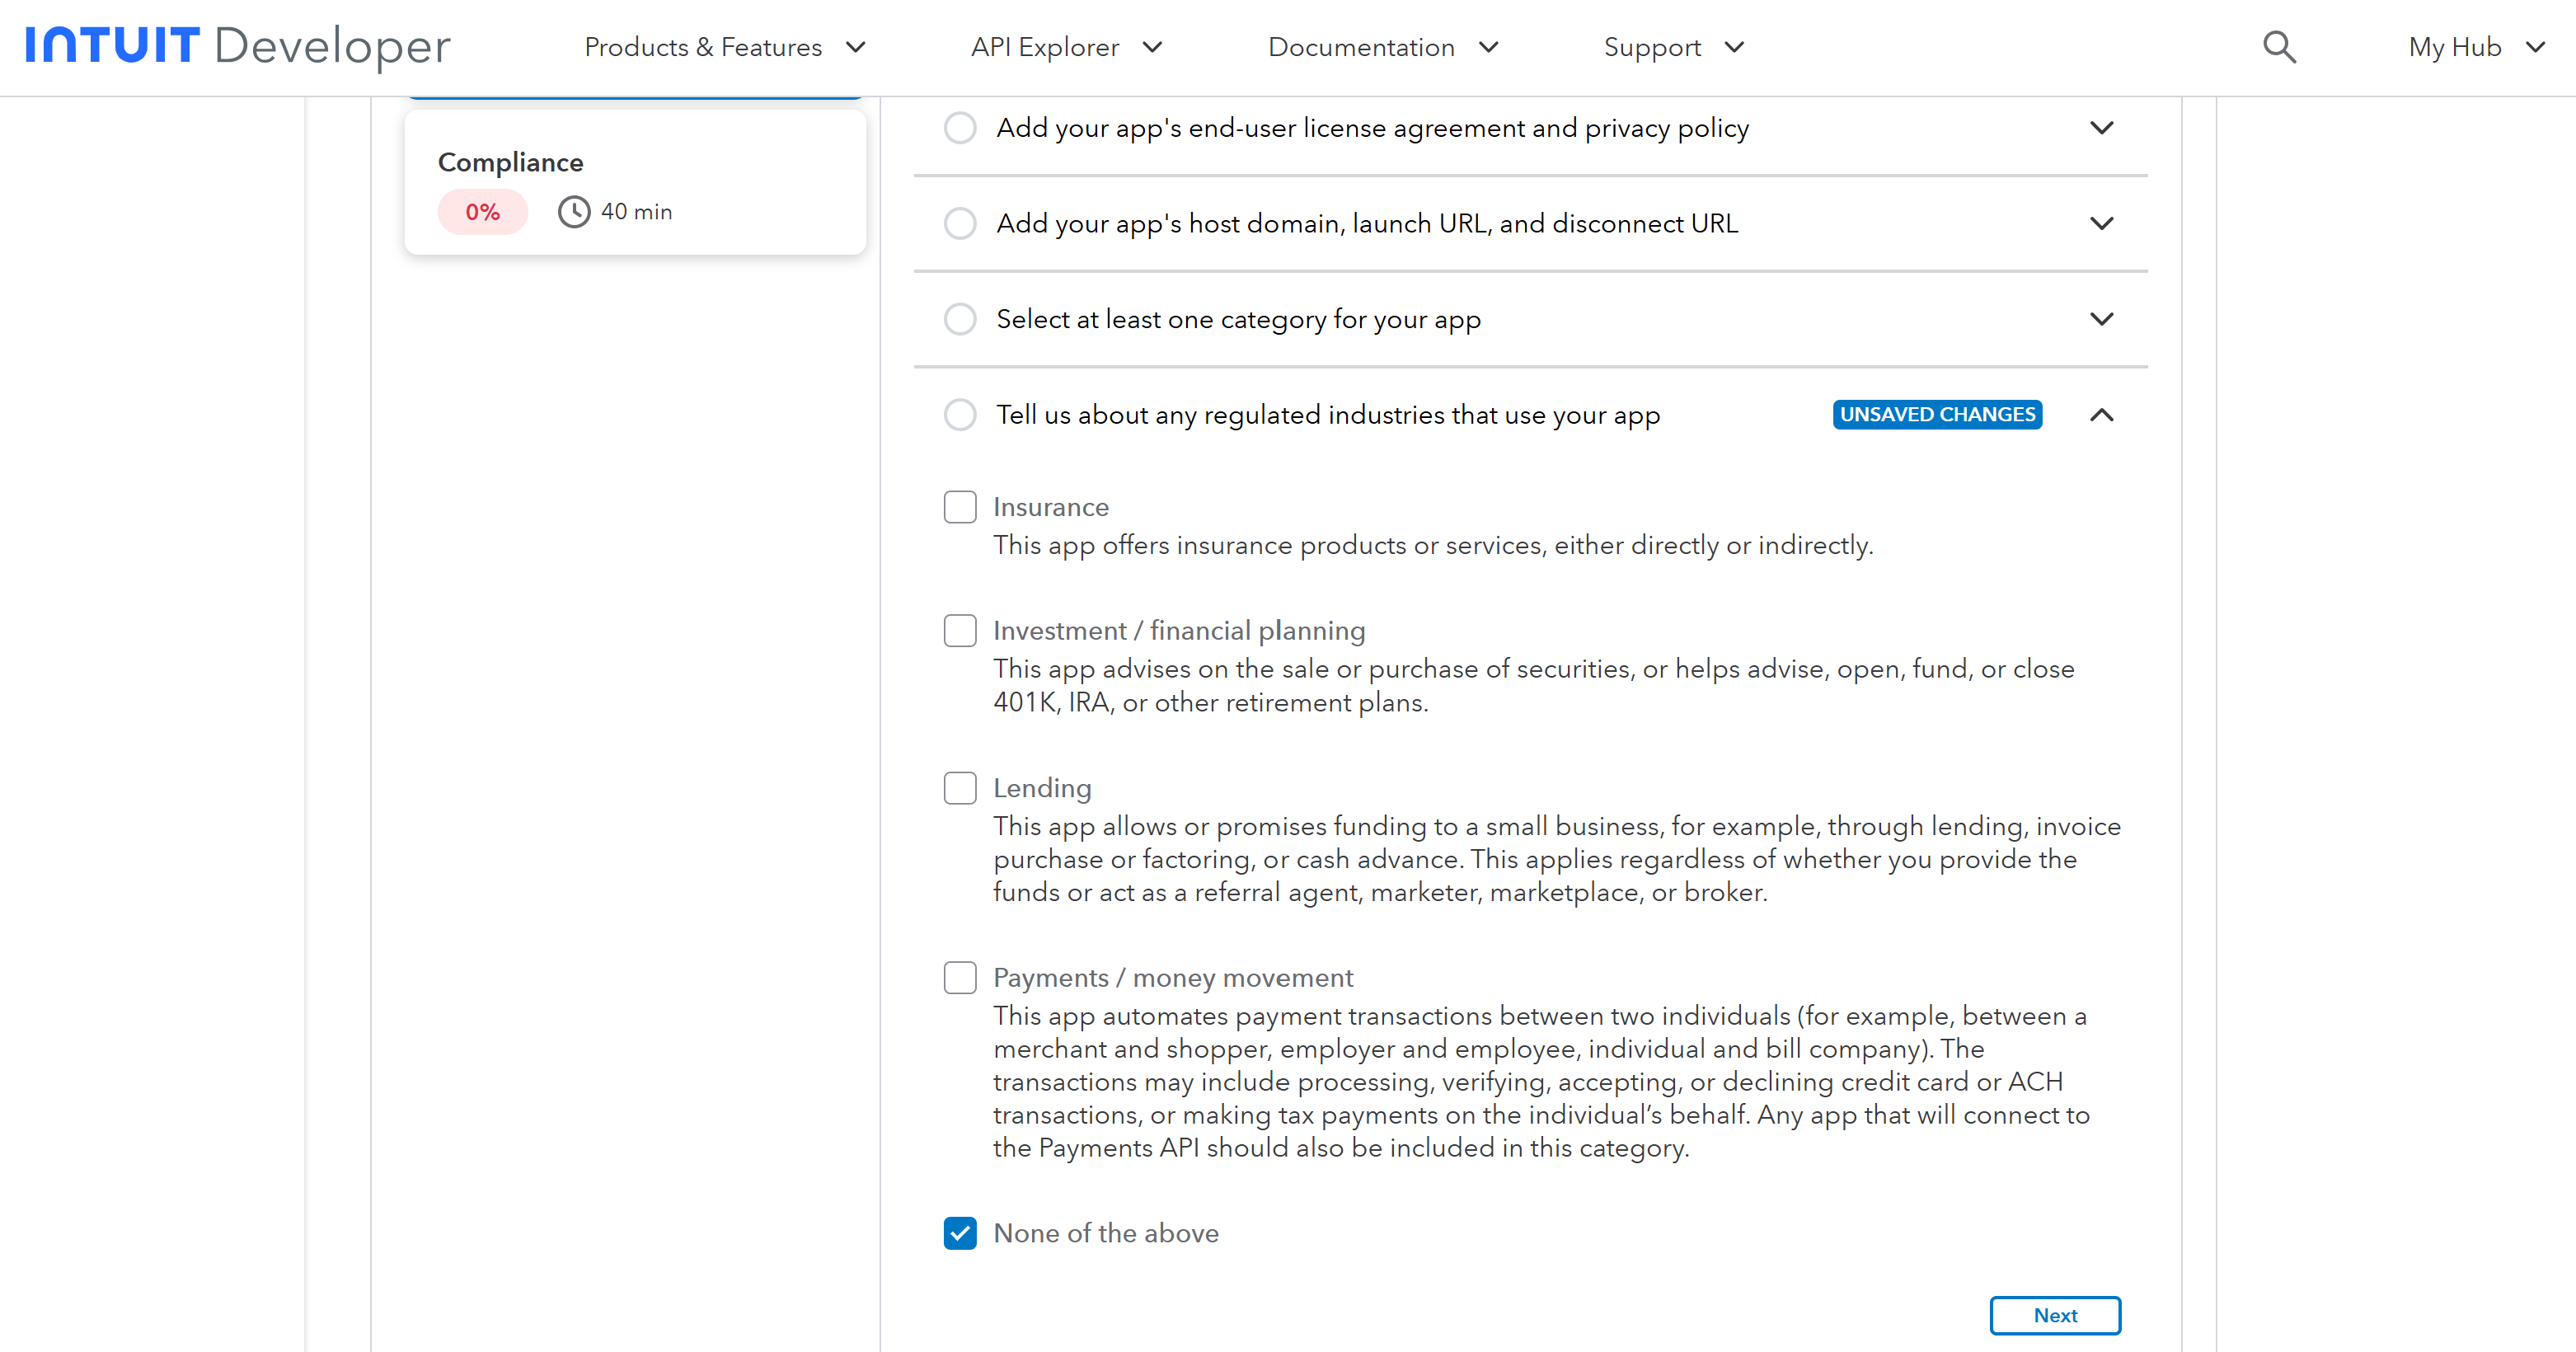
Tell us about regulated industries that use your app
- Select None of the above
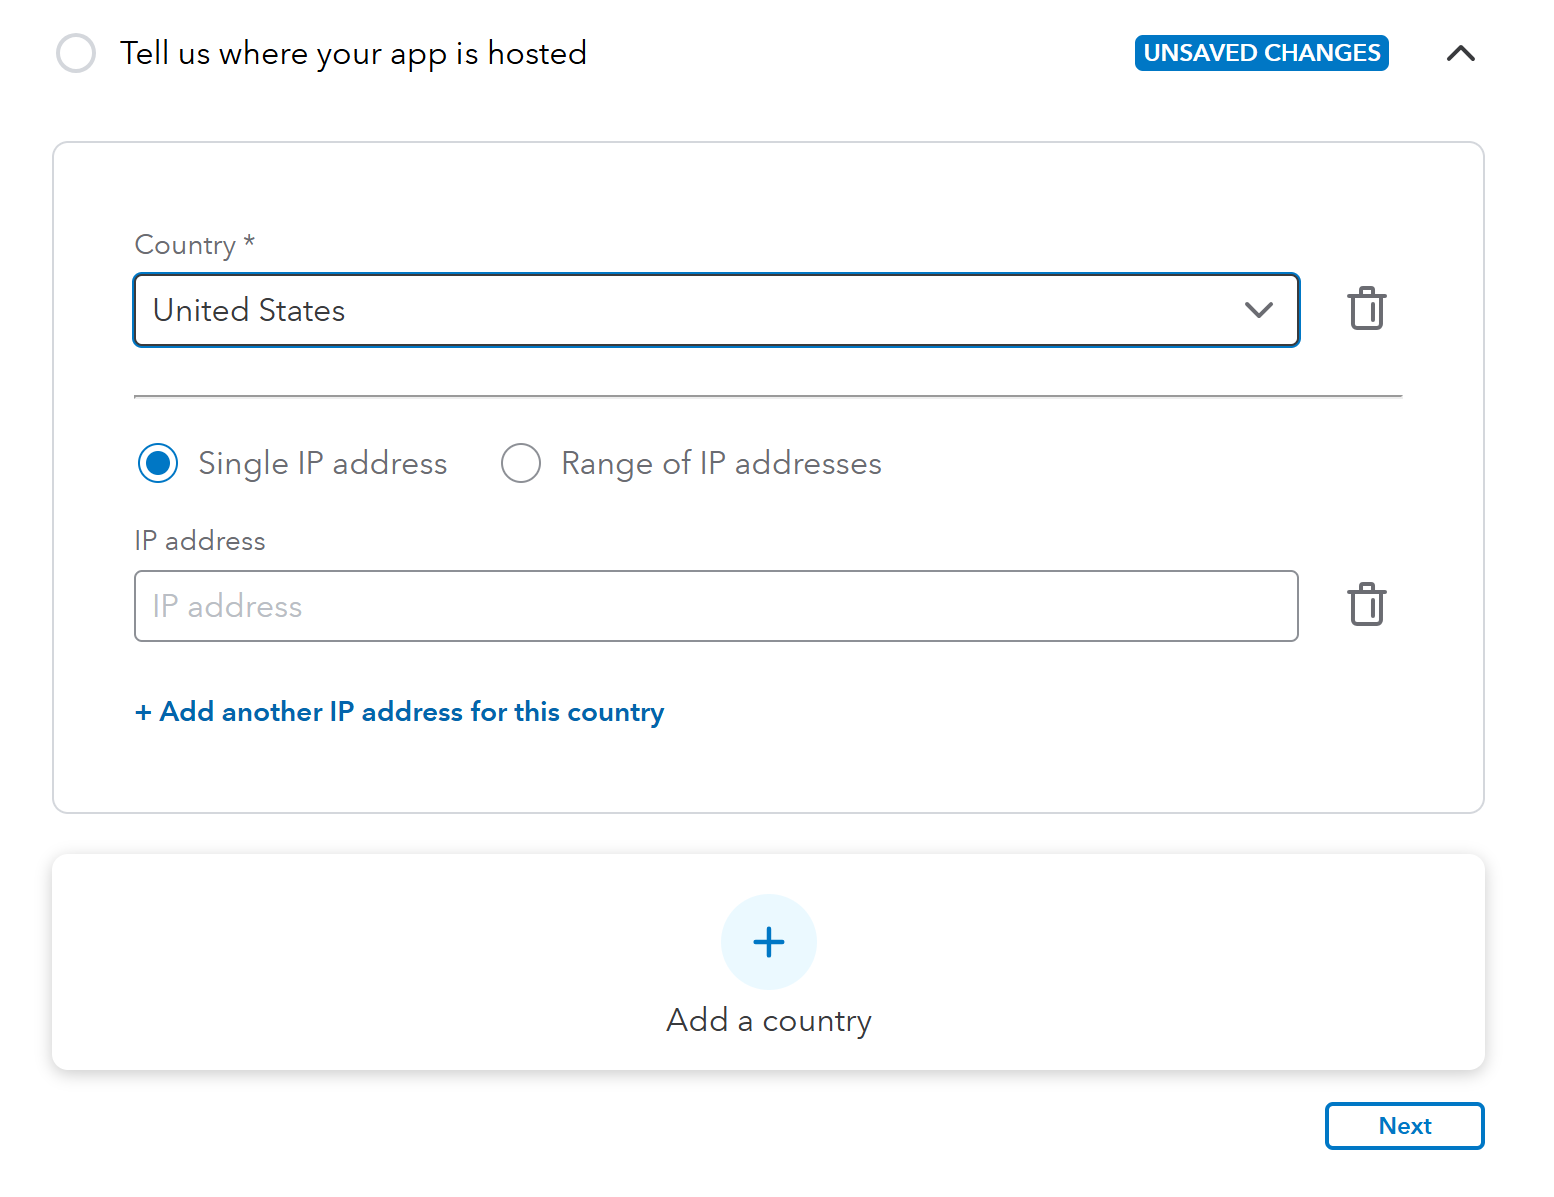
Tell us where your app is hosted
- Select United States of America
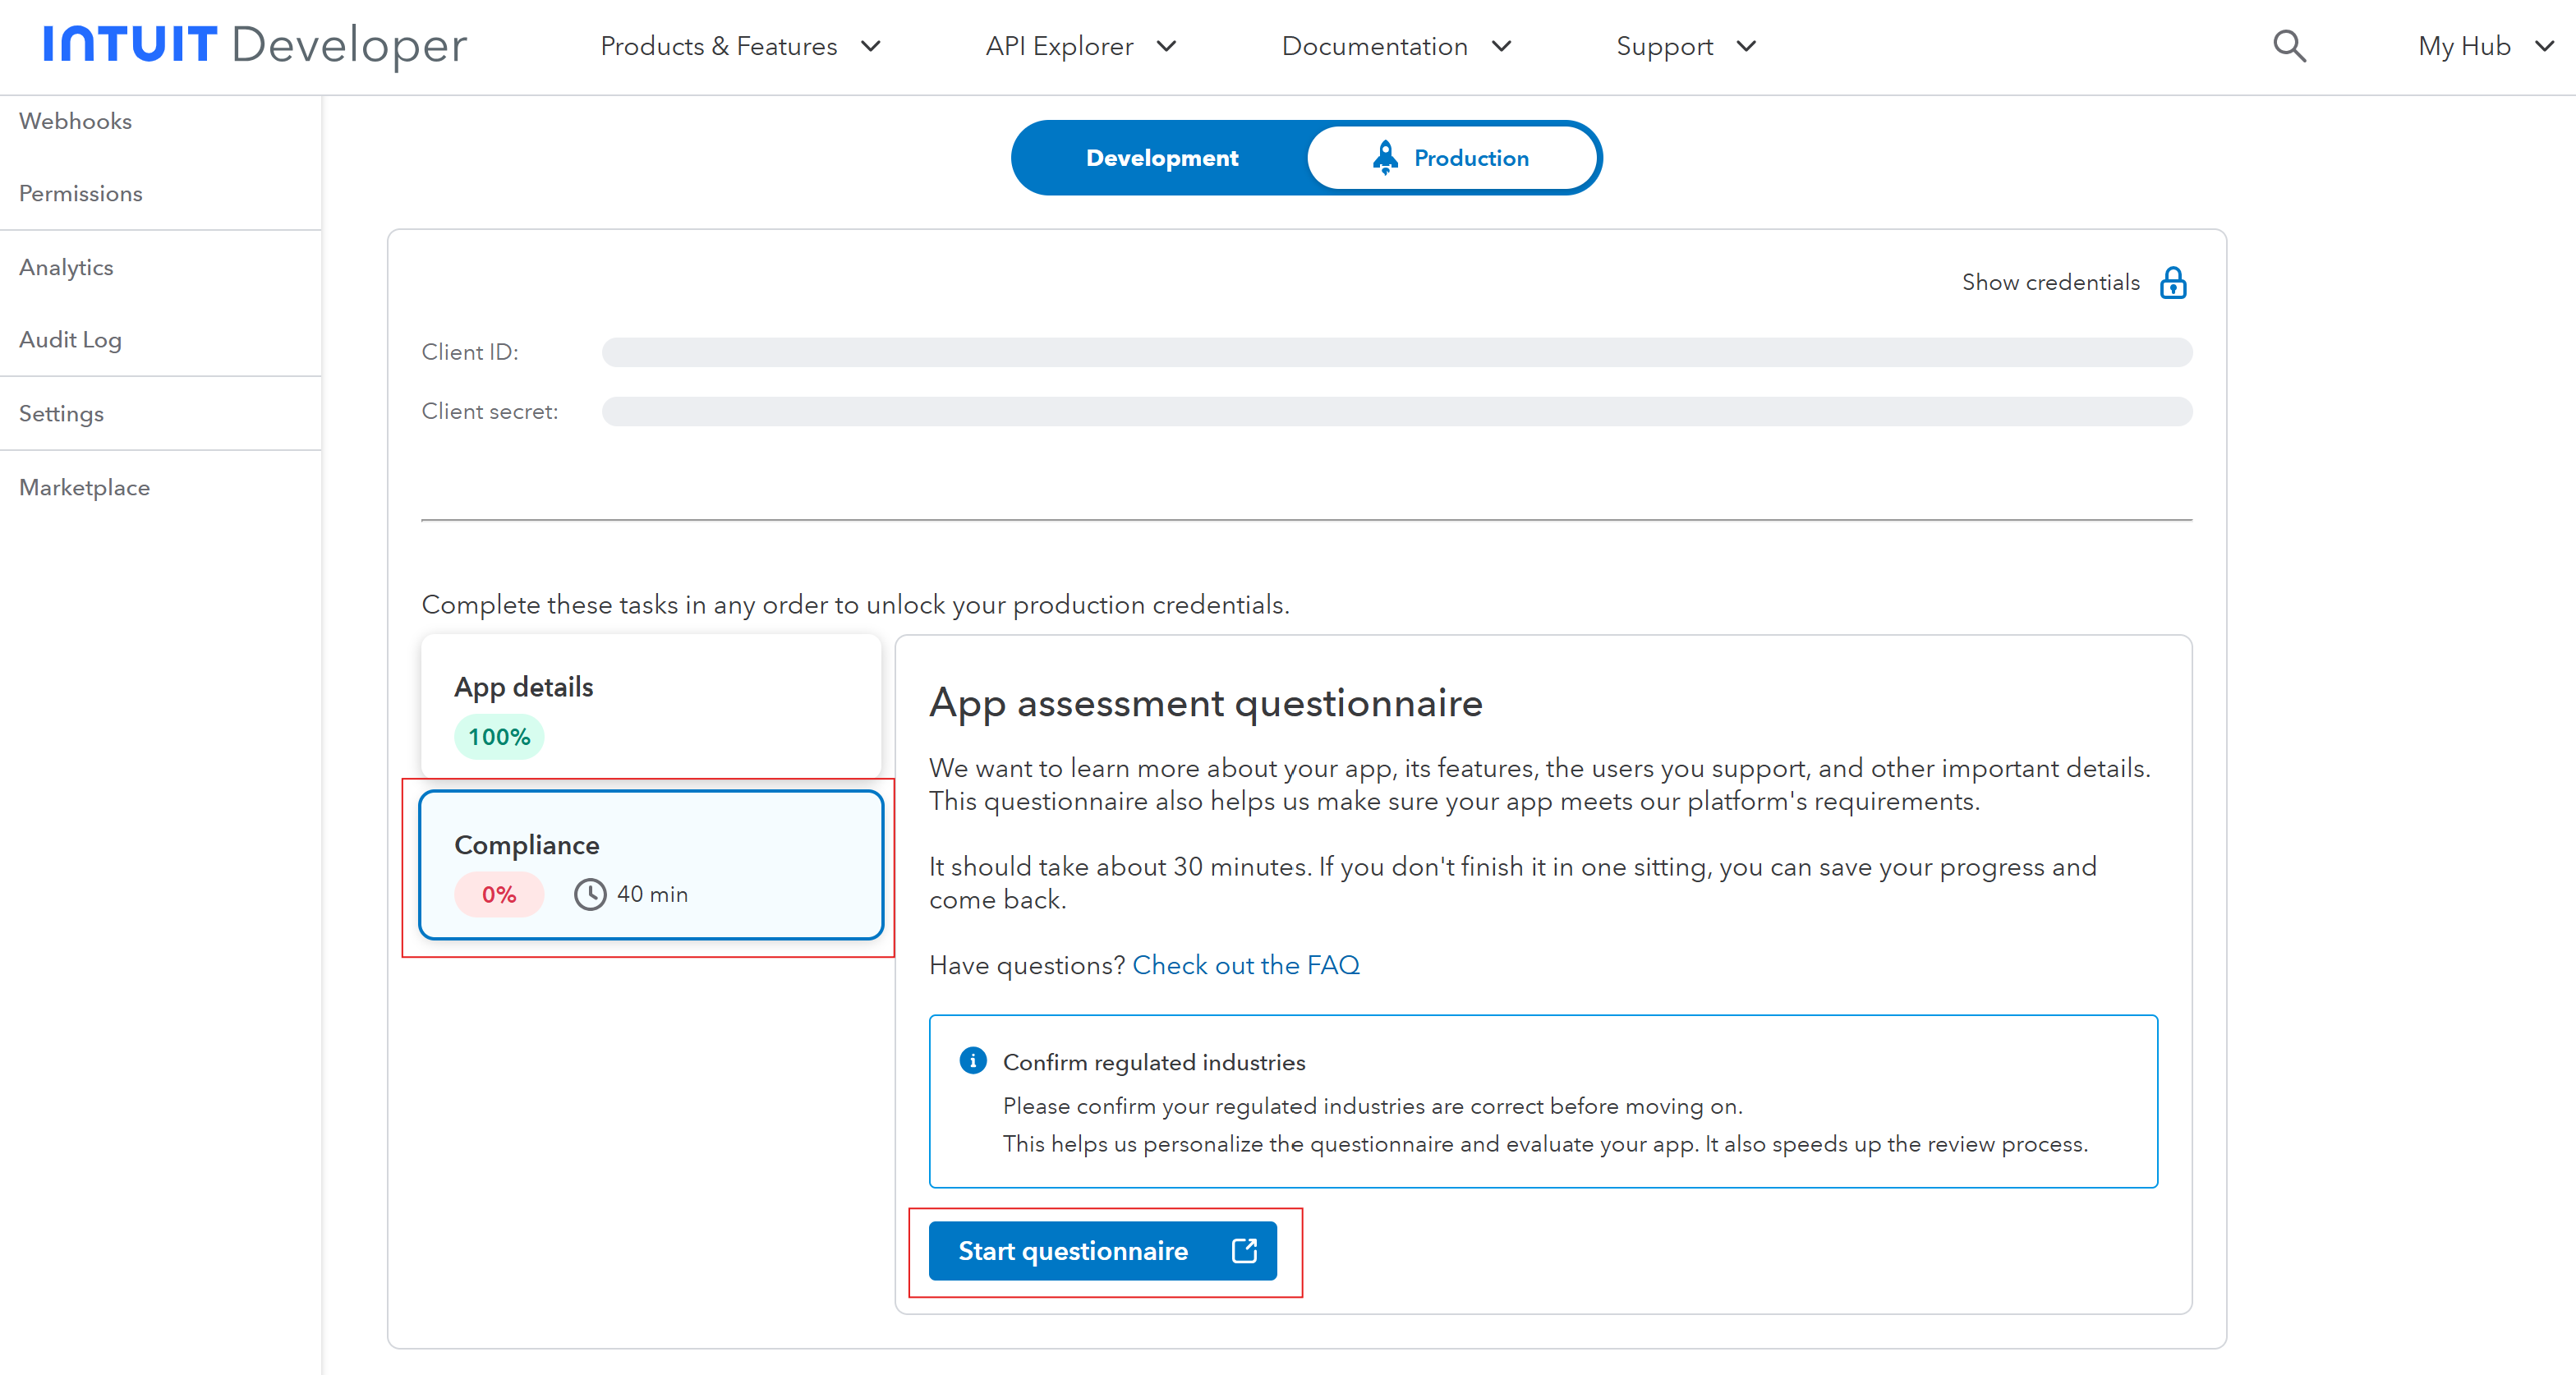
Go to the app assessment questionnaire
The questionnaire should take around 10 minutes to complete with the below information.
- Click on Compliance > Start questionnaire
General Questions
- Has your company ever received any complaints, lawsuits, or investigative requests from regulatory authorities or government agencies?
No
- Have you worked with legal counsel to understand any regulatory requirements or other considerations related to your business activities and use of user data?
Yes
- Have you reviewed and confirmed that you will comply with the security policies found here?
Yes, I confirm that my app will comply with the security policies found above.
- Have you reviewed and confirmed that you will comply with the Supplier Code of Conduct found here?
Yes, I confirm that my app will comply with the Supplier Code of Conduct found above.
- Apps that use Intuit APIs (whether public or private) need to be relevant and clearly related to QuickBooks, accounting, payments, workflows, finance, and other acceptable uses. Is your app designed for either of the following:
Yes
-
Are you or any of your representatives (including owners, affiliated parties, associated parties or any beneficiaries):
- (i) on any sanctions lists in the countries available in the app store or
- (ii) located or doing business in Russia, and/or any of the US embargoed countries (which includes the Crimea region, Donetsk People's Republic (DNR), Luhansk People's Republic (LNR) of Ukraine, North Korea, Iran, Cuba, and the Syrian Arab Republic)?
No
- Does your application involve any generative AI functionality, including but not limited to ChatGPT, GPT-3 or 4, Google’s BARD, conversational chatbots, etc.?
No
- Click Save
- Then, click Next Tab
App Information
-
Which of the following is true about your app (at least one option must be checked):
- You were asked to create this app in order to get credentials/keys to be used on another platform that integrates with QuickBooks
- https://docs.academyofmine.com/article/320-quickbooks-integration-with-your-lms
-
Have you added some form of Re-CAPTCHA to your site or app to prevent fraudulent transactions?
- No. My app does not process payments.
- Click Submit
- Once the questionnaire has been completed, you can close the questionnaire tab. You will typically receive an email within 5 minutes to confirm the status of the submission.
Step 4: Connect QuickBooks with your LMS
- Once your app has been created, you should be automatically redirected to the app details page. If not, click on My Hub, and then in the App Dashboard, click on your app's name.
- Navigate to Keys and credentials > Production.
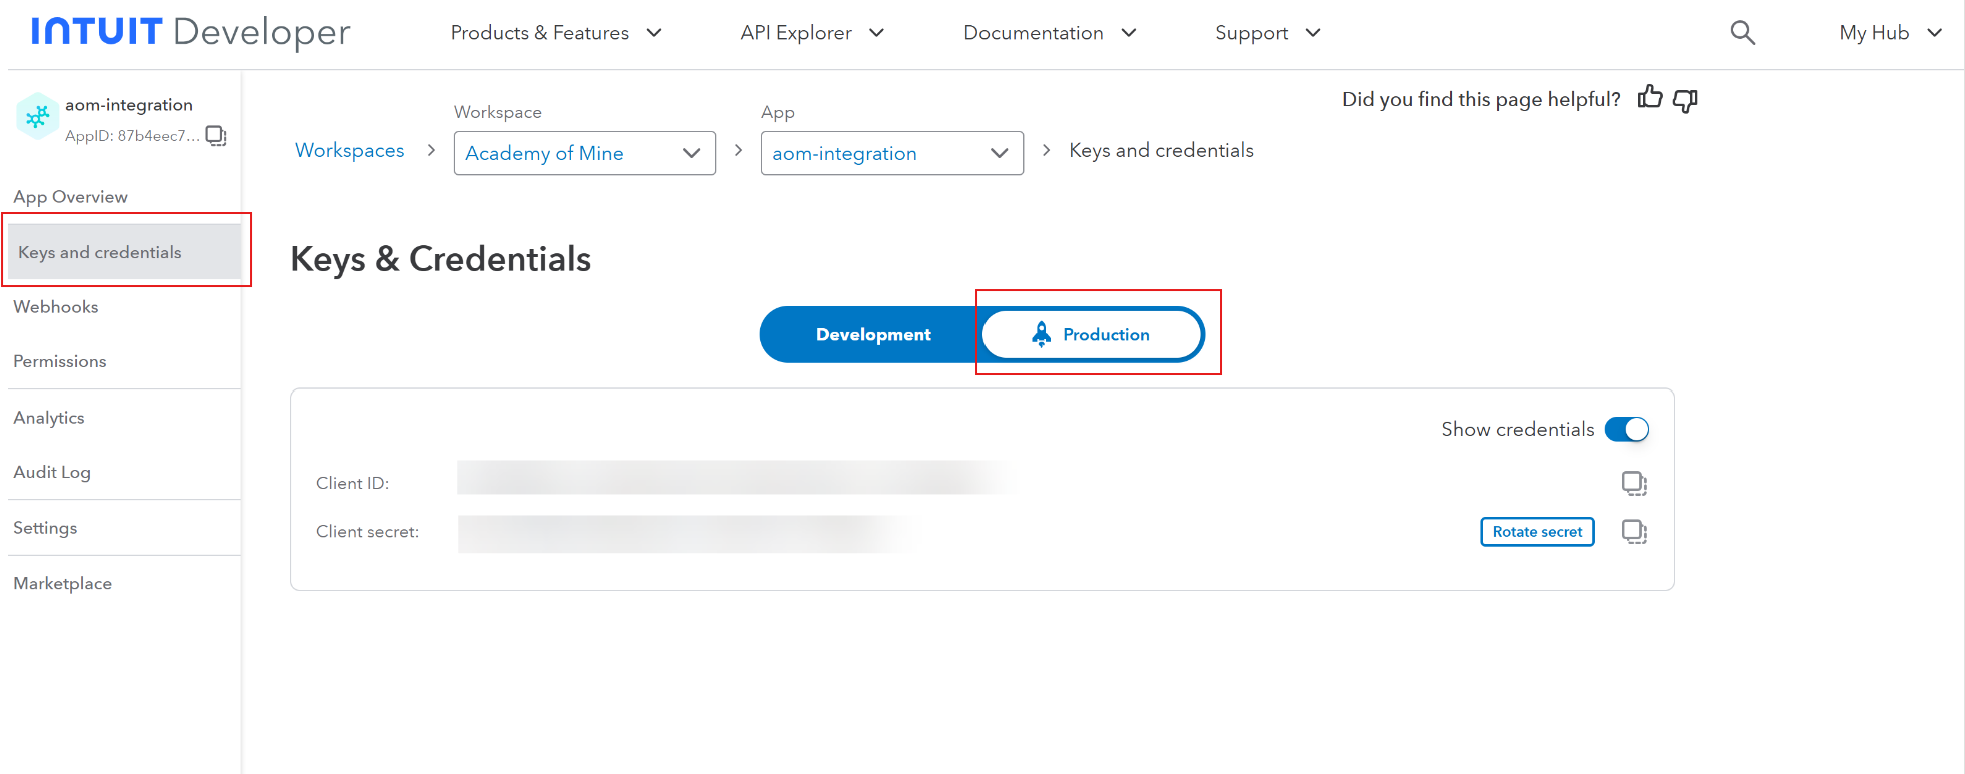
- In the Keys & credentials, note down your app's Client ID & Client Secret (these will be used later).
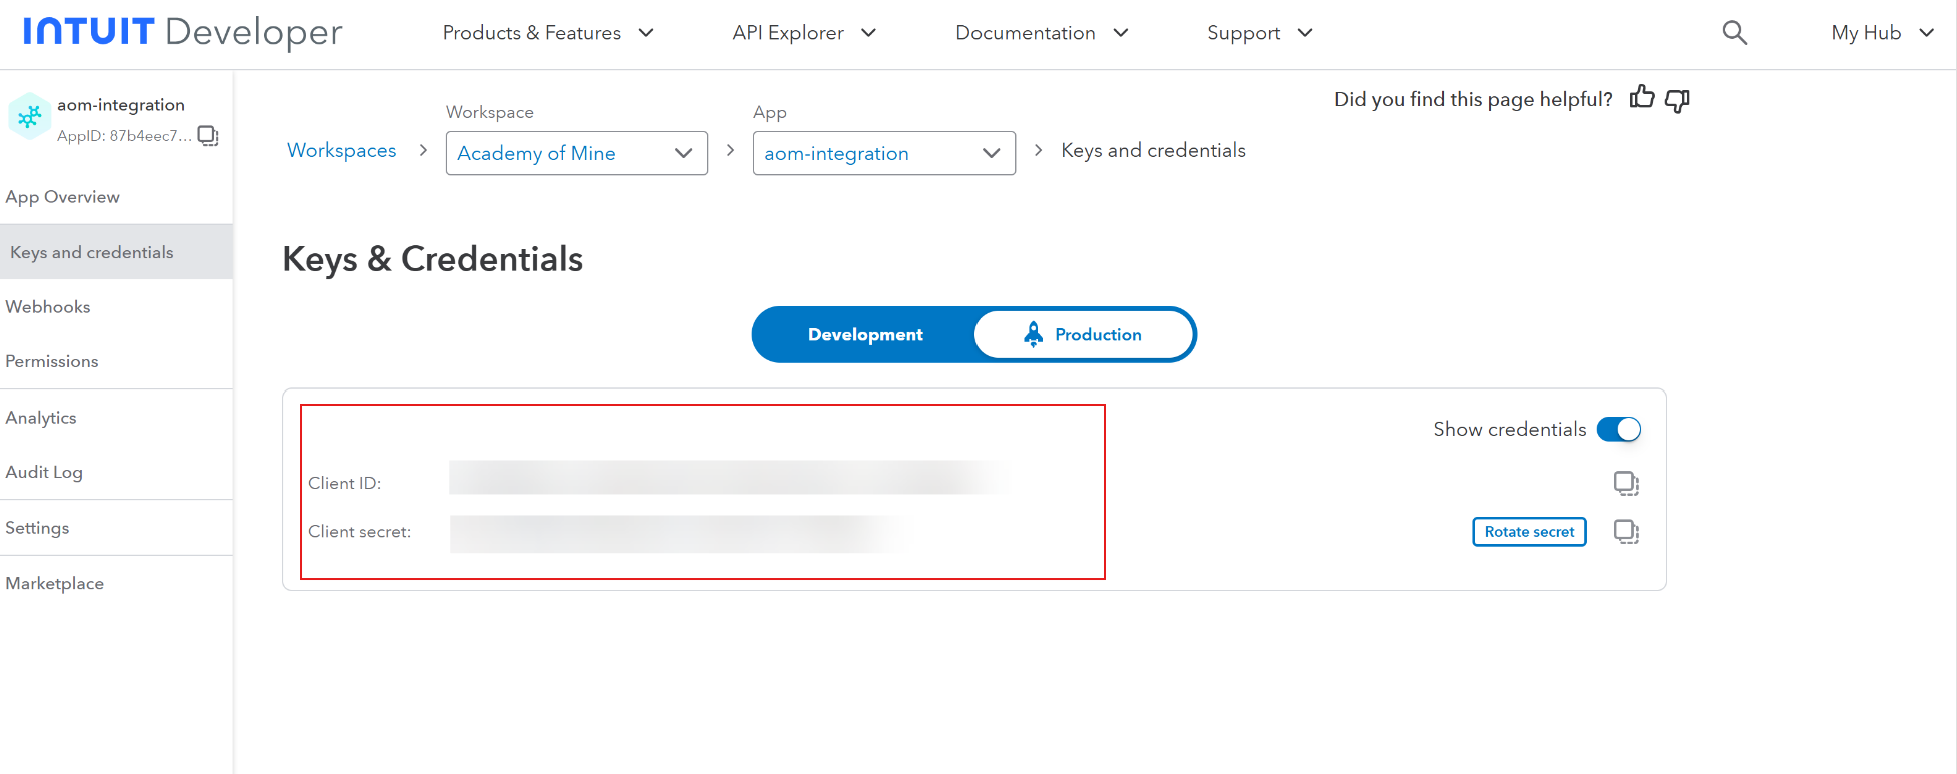
- Keep this page open, as we will be entering the Redirect URI later.
- Go to your AOM platform, and navigate to Integrations > QuickBooks > Manage.
- Click on the Enable Quickbooks? toggle to enable the integration.
- Ensure you are in PRODUCTION mode.
- Enter the Client ID, Client Secret, and Company ID that you noted down from previous steps.
- Note down or copy the Redirect URI from the bottom of the page.
- On the Keys & credentials page for your app on https://developer.intuit.com, click on Add URI.
- Enter the Redirect URI you noted down from your AOM platform.
- Click on Save.
- Now, go back to your AOM QuickBooks integration page, and click on Save & Authorize.
- You will be redirected to QuickBooks. Select your company, and click on Next.
- Your LMS is now connected to QuickBooks!