Offering Discount Codes/Coupons
Coupons allow you to offer a discount for a targeted audience, the general public, or even a single person or product. The users who have had the coupon code shared with them can apply the coupon code during checkout to receive the discount.
This guide will explain how to enable and create coupons, and how coupons are applied in the checkout process.
Be sure to review our overview of eCommerce Setup guides: Introduction to eCommerce
In this article
Enabling Coupons
To use coupons, you must first enable coupons in the eCommerce settings. Then, the Apply Coupon field will show to users on the Checkout screen.
- From the Admin Dashboard, select eCommerce, then Settings
- In General Settings, Enable Coupon must be turned on to allow the Apply Coupon section to appear on the Checkout page. Make sure this is toggled to on

- Click Save
Creating a Coupon
Now that coupons are enabled, you can move on to creating a coupon.
-
From the Admin Dashboard, select eCommerce, then Coupons
-
To create a new coupon, select the Add Coupon button to head to the Create Coupon page.
-
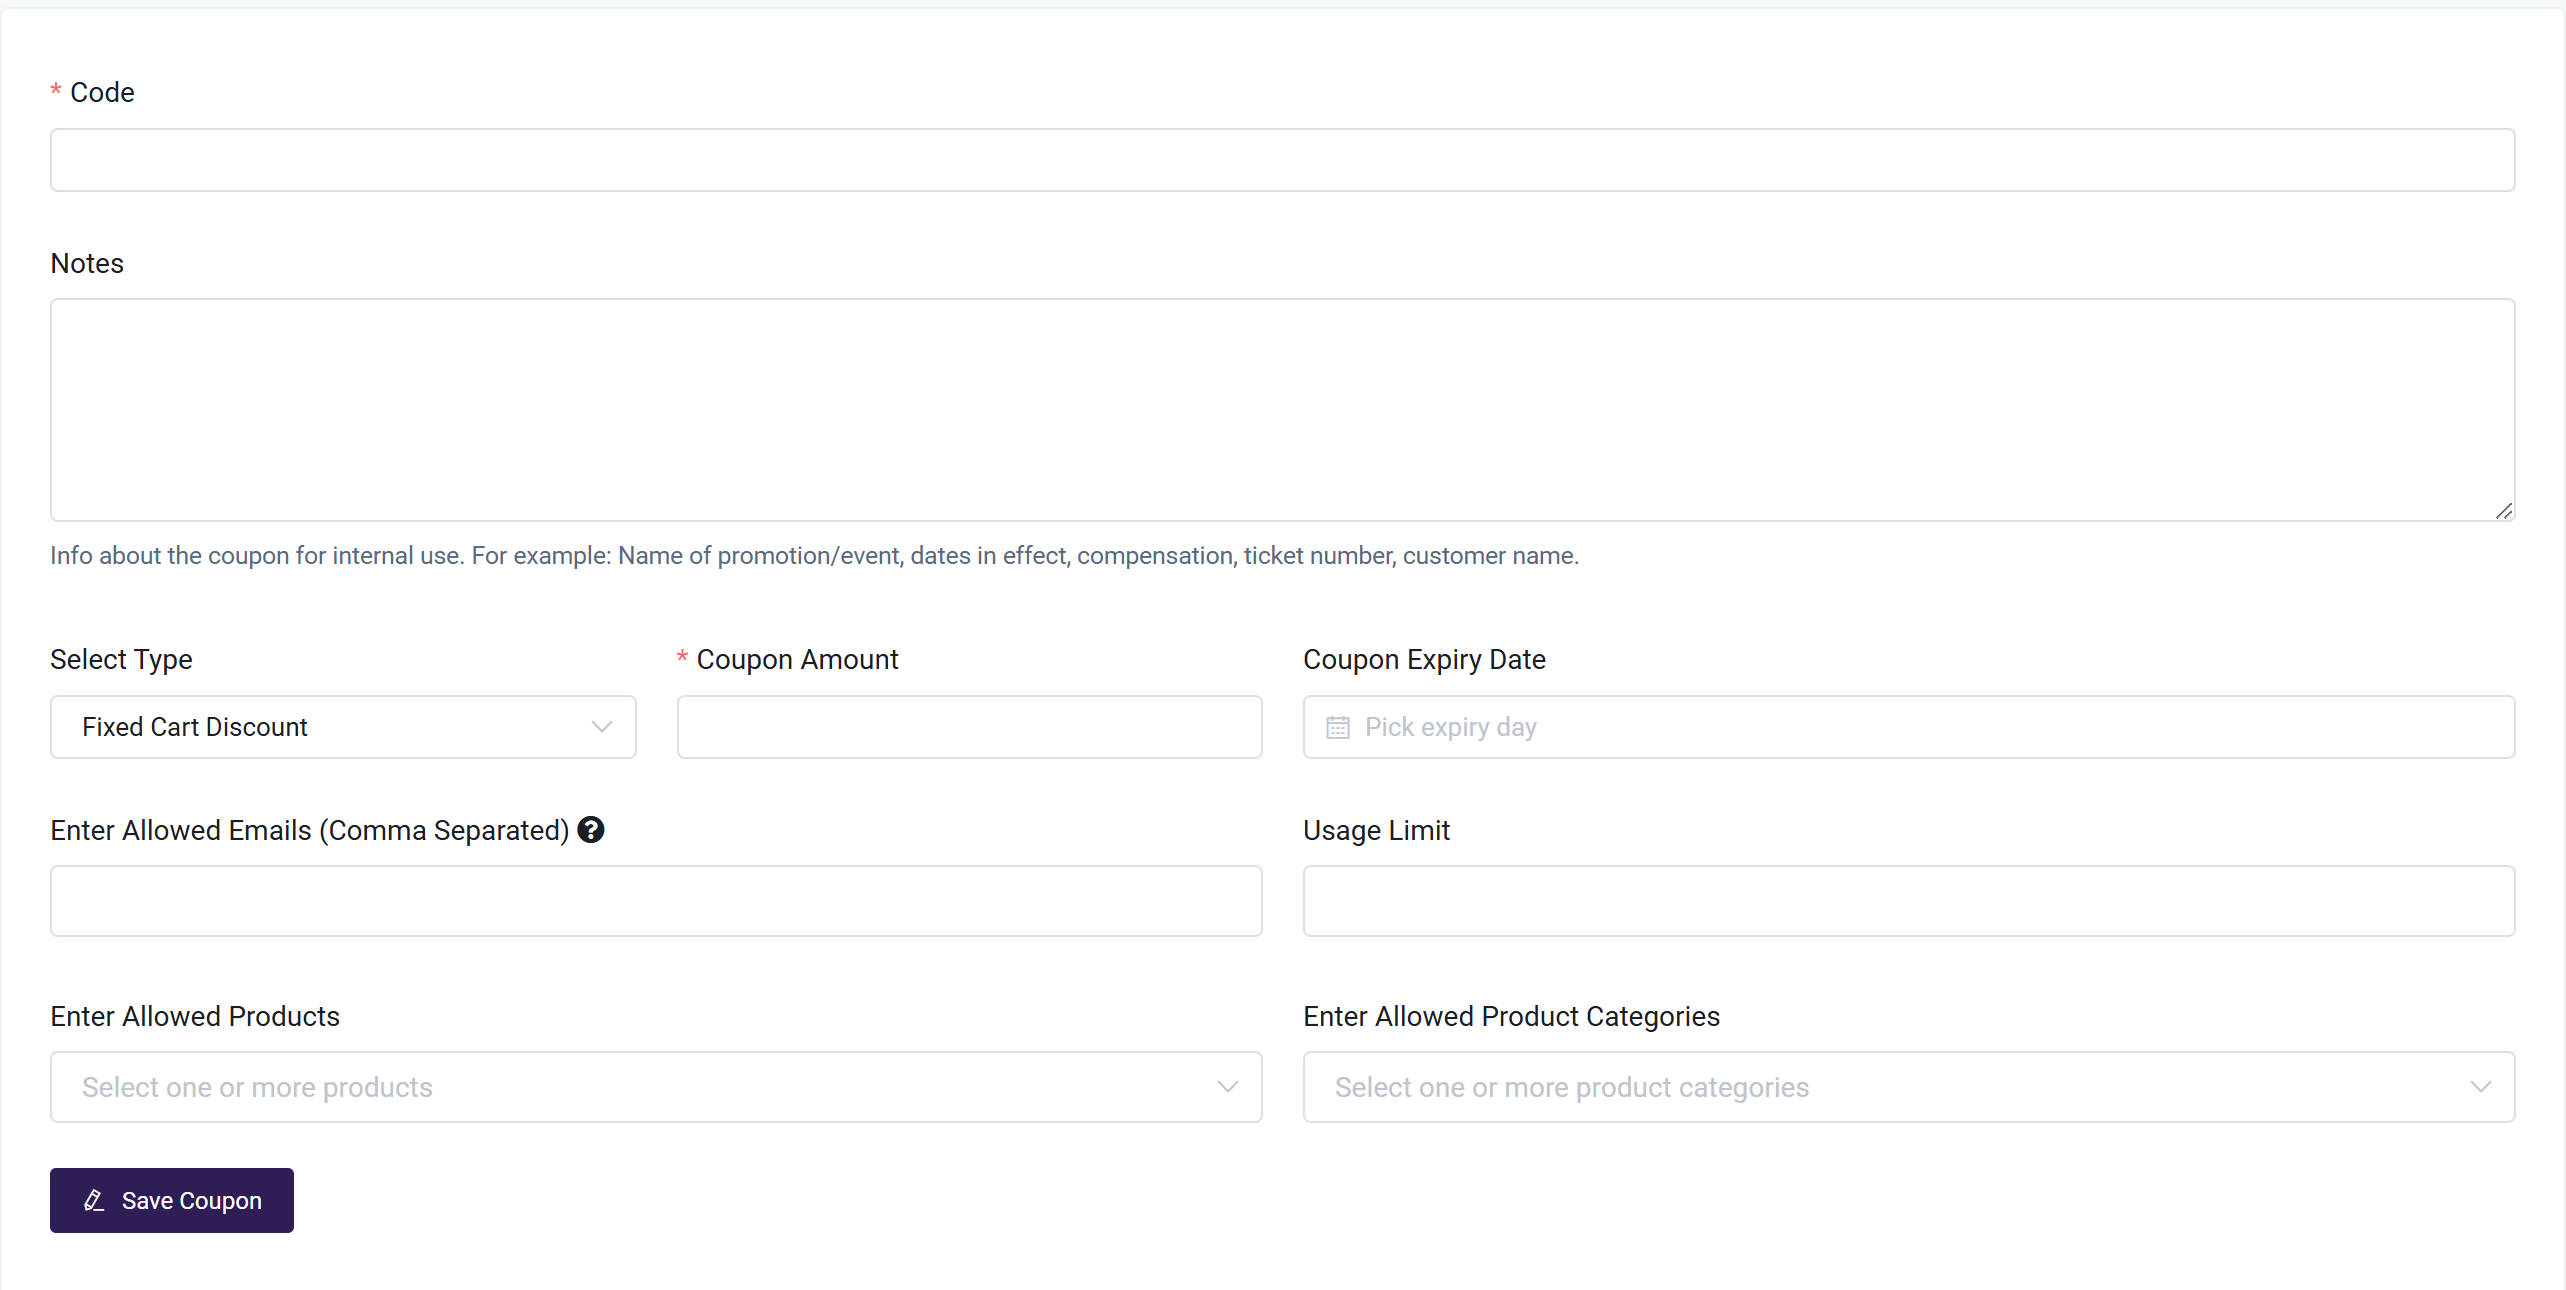
Now, you'll enter the coupon settings
-
Code: The code is what a user will enter on the Checkout page to apply the coupon. It is what you need to share with users to give them access to the discount. Choose a unique code that can be shared with your target audience of potential users.
-
Notes: Notes are a space to store internal information regarding why the coupon was created, and the audience the coupon is targeting.

-
Coupon Type: There are two types of coupons to choose from: a fixed cart discount or a percentage discount. Fixed Cart Discount is a set currency amount discount, i.e. $25 off the total purchase. Percentage Discount is a total purchase percentage discount, i.e. 20% off the total purchase.
-
Coupon Amount: Add the amount of the coupon you would like applied to checkout. This number can be applied to either a currency amount or a percentage, depending on the coupon type you selected.
-
Coupon Expiry Date: Add a date for the coupon to expire. Leaving this field blank will allow the coupon to be used indefinitely.
-
Allowed Emails: You can limit the coupon to a whitelisted group of email addresses. This is helpful when creating a coupon for an individual person or small group of users, separated by commas. It's also possible to limit the coupon to a specific domain. Using an asterisk, i.e. *@company.com will allow anyone with a company.com email address to use the coupon.

-
Usage Limit: Set the number of users allowed to apply this coupon before it expires. Leaving this field blank will allow an unlimited number of users to apply this coupon.
-
Allowed Products: Coupons will only be applied if the selected product is added to the cart. This is useful for providing discounts on selected products.
-
Allowed Product Categories: Instead of individual products a coupon can also be configured to be applied to a categories of products for ease.
-
Once you have entered the fields, click Save Coupon. Now, you can save that coupon code so that users can apply it!
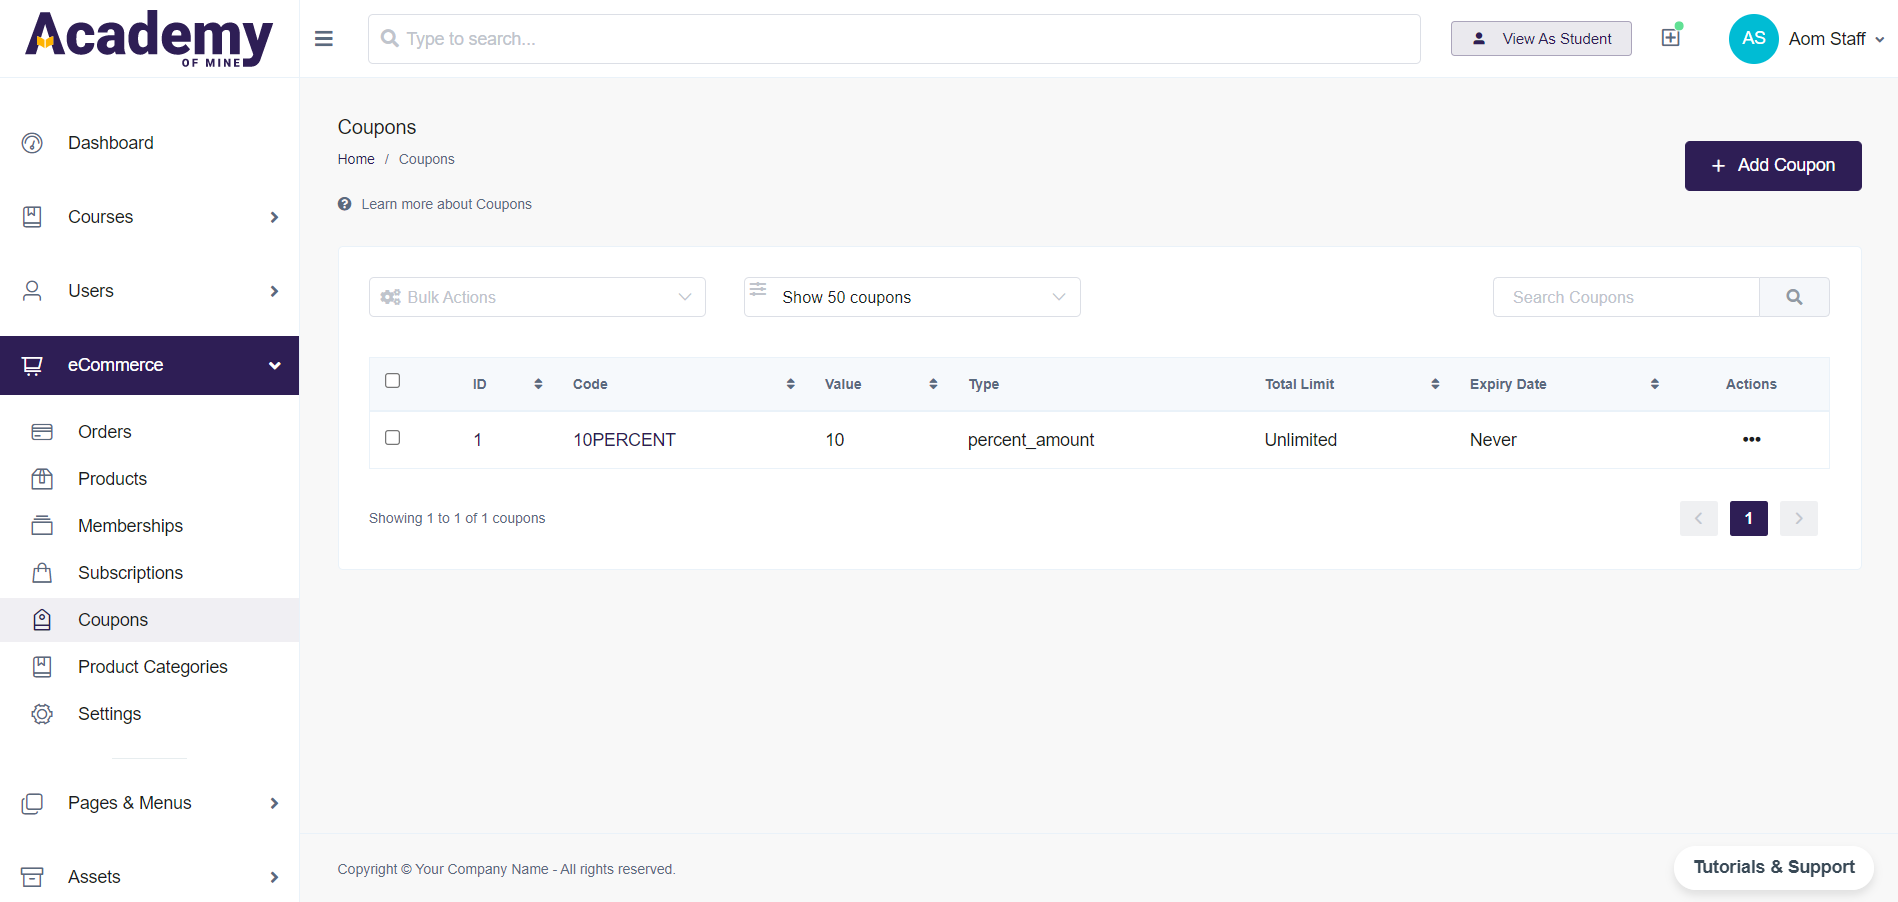
Managing Coupons
All coupons are found via the Admin Dashboard by selecting eCommerce>Coupons. This will show a list of all coupons. From there you'll be able to view, edit, and delete all your coupons by selecting the three-dot action menu to the right.
You may also bulk delete coupons by selecting the box to the left of the coupons you wish to delete, and then clicking Bulk Actions. Then opt to Delete and confirm.
Coupons and the Checkout Process
Now let's see what users see when going through checkout and applying a coupon.
- On the Checkout page, the coupon is entered in the Apply Coupon field.
- When accepted, it will appear in the shopping cart between the subtotal and the total.
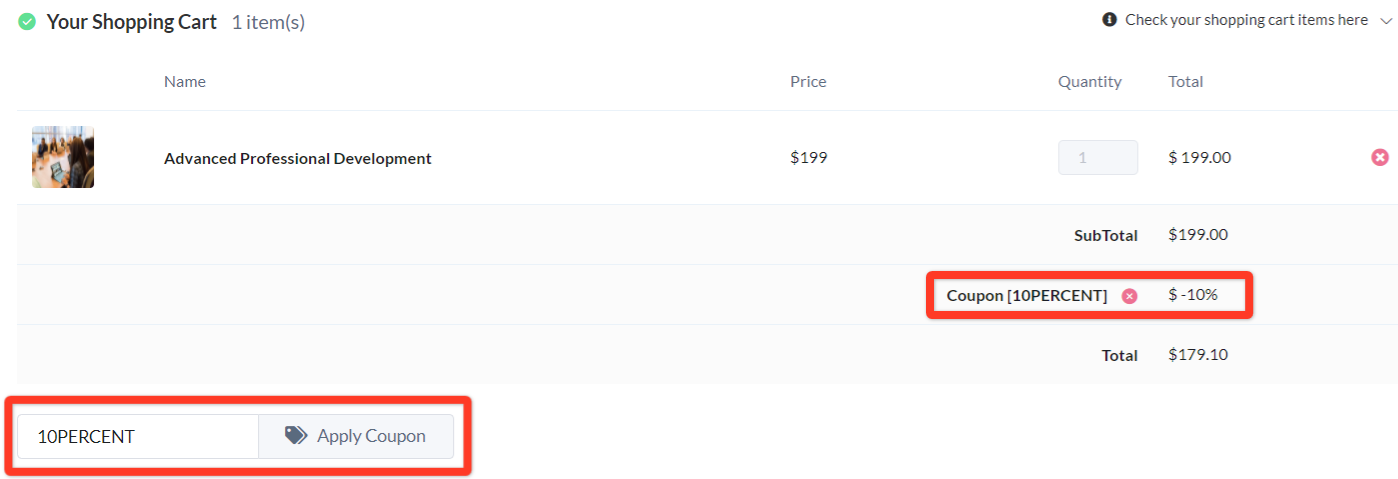
- If the wrong coupon code is used, an error will alert the user.

Next Steps
Up next, you'll want to review our guides on creating Products, building out your Course Catalog, and learning all the aspects of the checkout process: