Purchasing Course Seats in Bulk for a Group/Organization
If you are a representative from a team, group or organization, you'll be able to purchase course seats in bulk via eCommerce by walking through the Checkout process. Once the course and necessary seats have been purchased, you will automatically become the Group Admin for that group, and will then be able to enroll students in the course seats you purchased, as well as manage them and the purchased courses.
In this guide, we'll be walking you, the group representative, through the Checkout process step-by-step, as well as what it will look like once you've purchased the Course seats. From there, you can explore other tutorials about enrolling students and managing courses.
Checking Out as a Group/Bulk Purchasing
Essentially, as the group representative, you'll be able to select to purchase more than one quantity of a course, and will the be prompted to create an account--you'll enter the company name, and your personal user account purchasing the seats will become the Group Admin. Once the seats have been purchased, you'll be able to enroll students into those course. Here is the workflow for purchasing multiple seats:
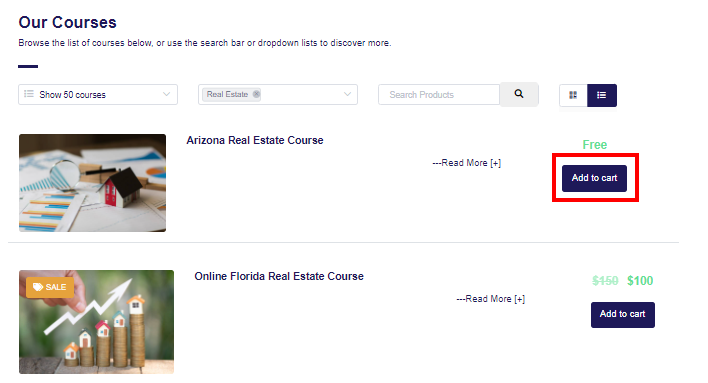
- From the Course Catalog page, select Add to Cart under the course you wish to purchase seats for:
If you are purchasing class seats for an Instructor Led course, you'll need to select the location and time/date of the class you'd like to purchase seats for before adding to your cart: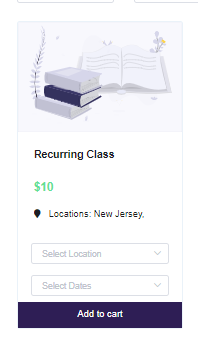
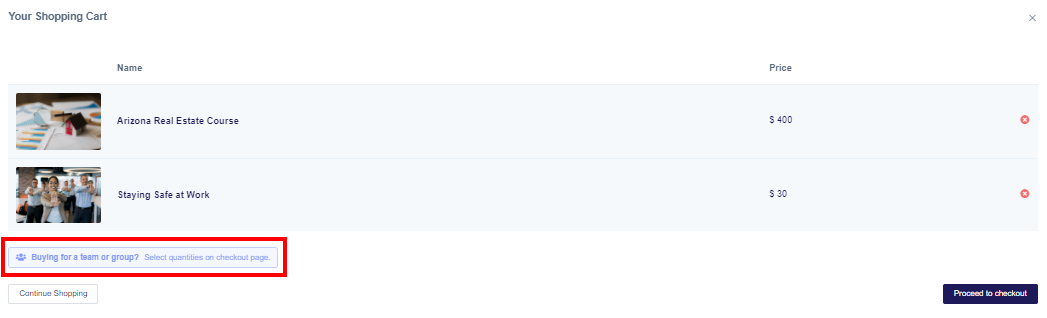
- After selecting a Course from the Course Catalog Page, you will see that they'll have the option to purchase for a Group once you get to the Checkout Page. Click Proceed to Checkout.
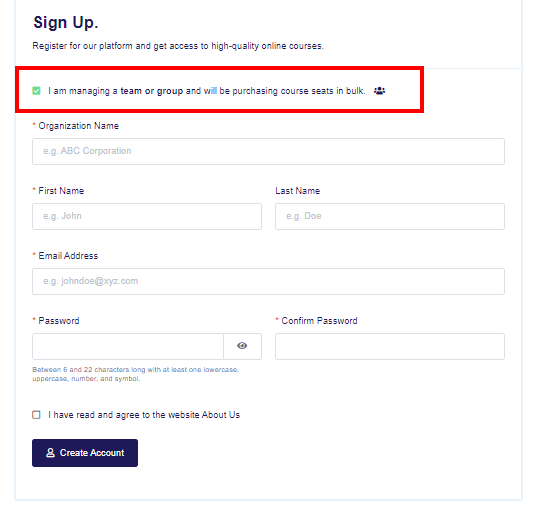
- You'll then prompted to Create an Account, or log in if you already have one. When creating an account, select the checkbox that you are purchasing for a Group, and enter the organization name, as well as your own information. This user account created at sign up will have Group Admin permissions and will be named as the Group Admin for the group of course seats being purchased.
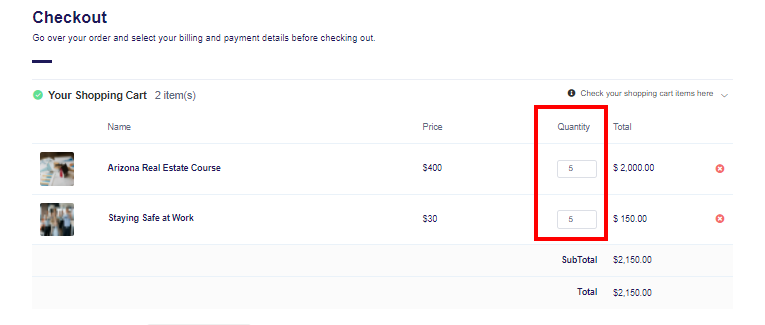
- Now, proceed through checkout, and as a Group Admin you will be able to change the quantity of Products on the Checkout page, corresponding to the number of students that will be taking that course:
- If you have been given a coupon code can be applied before the payment is made.
- In the case of a free Product, you can proceed to place your order.
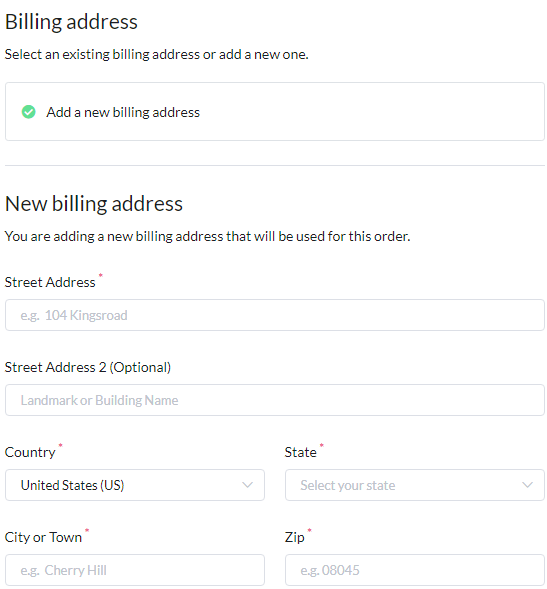
- For a paid Product, billing information must be entered. First, a billing address. After a first purchase has been made, this address will be saved in the your account settings and will auto-populate next time.
- Credit card information is entered next. If the Admin of the account has multiple payment options, you can choose their own checkout method at time of purchase (via Stripe, Authorize.net or Braintree)

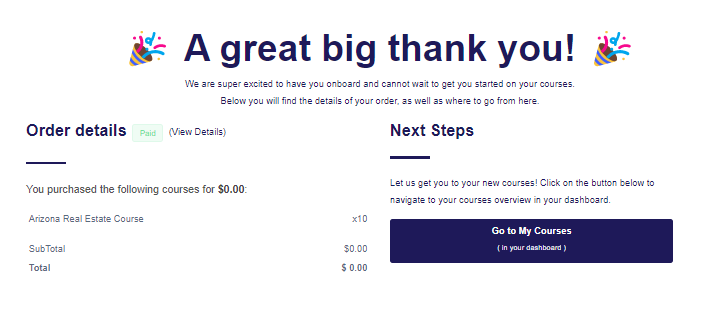
- Click Place Your Order to complete the order
- Once the order has been successfully placed, you'll see the success screen. Click "Go to My Courses" to start to explore your new Group Admin role Dashboard
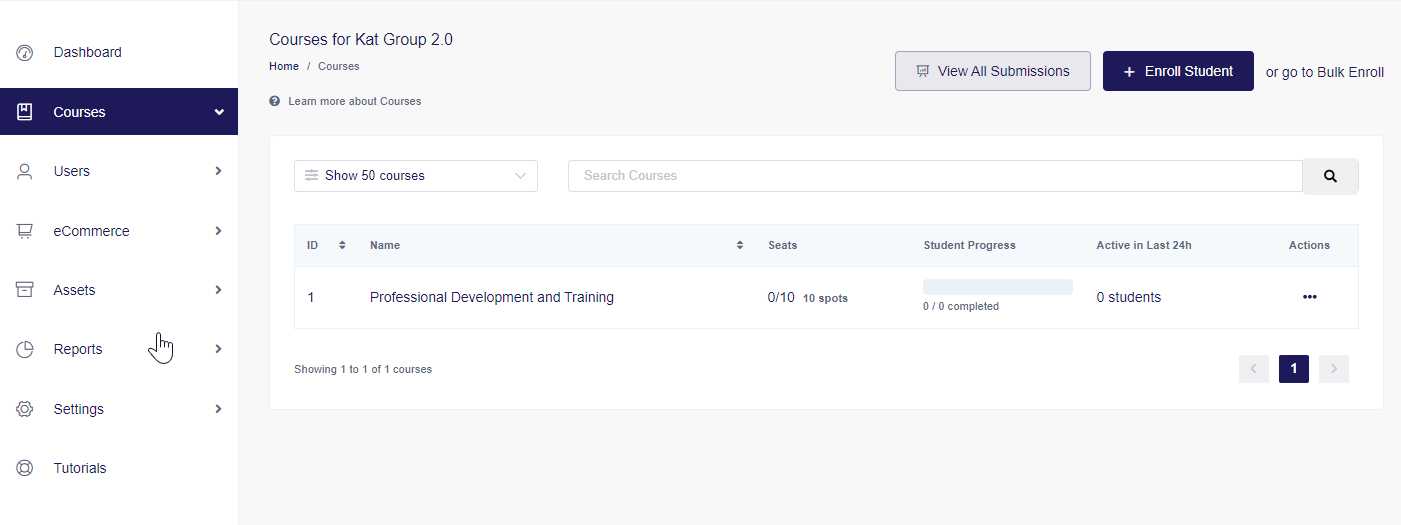
- Now, from your Dashboard you will then be able to manage the group and enroll Students in the purchased seats for the Courses, which is laid out here: Enrolling Students and Managing your Group (for Group Admins)
Next Steps
- Learn about how to add Students to your account--you can add them individually or even bulk upload them.
- Check out how to enroll Students into your newly purchased Course seats here.