Creating Custom User Fields
If you find that there are certain fields or pieces of information that you'd like to collect and store from learners on your platform (such as a license number or date of birth, or any other info you need) check out the Custom User Fields function. Using our Custom User Fields page, Admins will be provided with the option to add new fields on the Self Registration page and on the View Profile page. You'll also be able to select if you'd like these fields included in various exported reports.
In this article, we'll go over how to add custom user fields, the different types of fields, and where in the platform you'll be able to view this information.
About the Custom User Fields
Before we get into how to create the custom fields, let's first go over a few items to keep in mind:
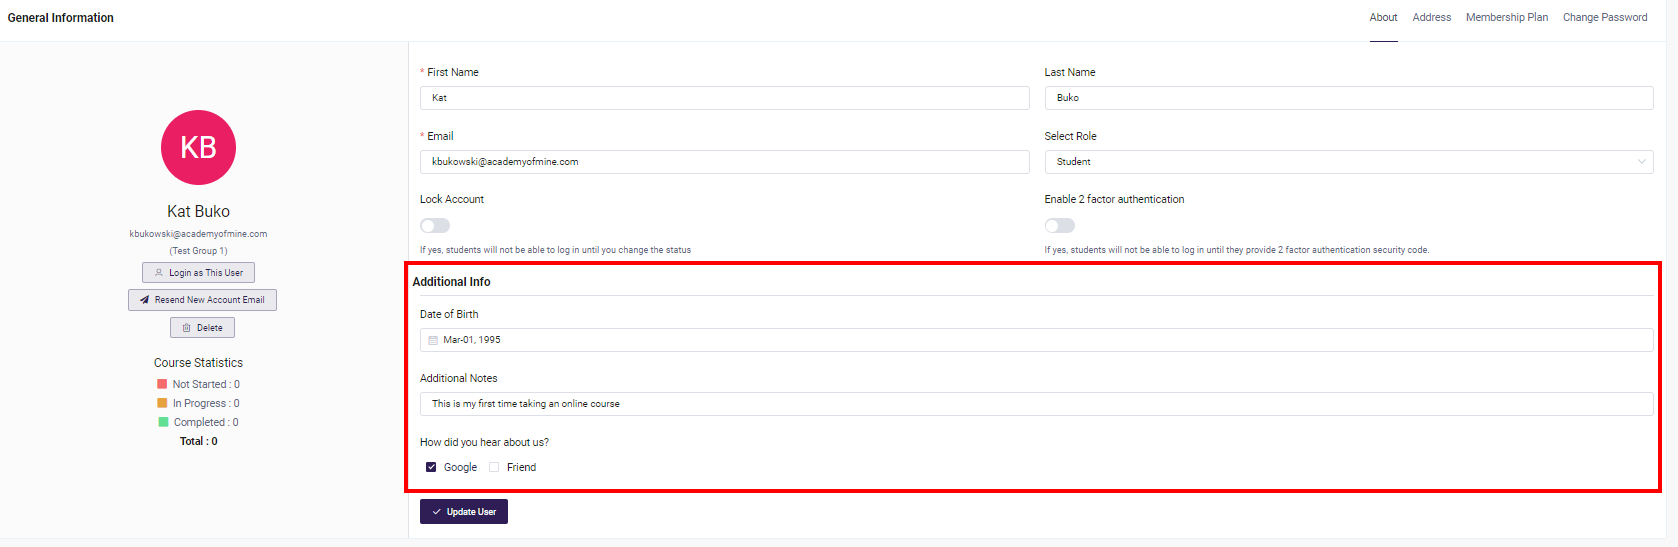
- By default, the custom fields will show on the Edit Profile page for a user, though you'll have the option to also have the fields show on the registration page for when users sign up. When added to the registration page, the fields on the registration page will show in the same format as the View Profile page (i.e. same dropdown values, same required/optional configuration, etc.). Here, you can see how the fields will appear on the user's profile from the admin view:
- All the custom user fields will also become new columns that can be filled during Bulk Upload of users, and will be optional to fill in on the spreadsheet. If you download the sample bulk upload sheet from your account, you'll see the fields populated as columns there:

- When following the “Add User” form on the admin view, the custom fields will not show on the pop up modal. However, once the user is created, on the Edit User page, these fields will be displayed for the Admin which they can fill out. All the fields that are set as required will still be optional for Admin on the View Profile page of Admin view.
Creating Custom User Fields
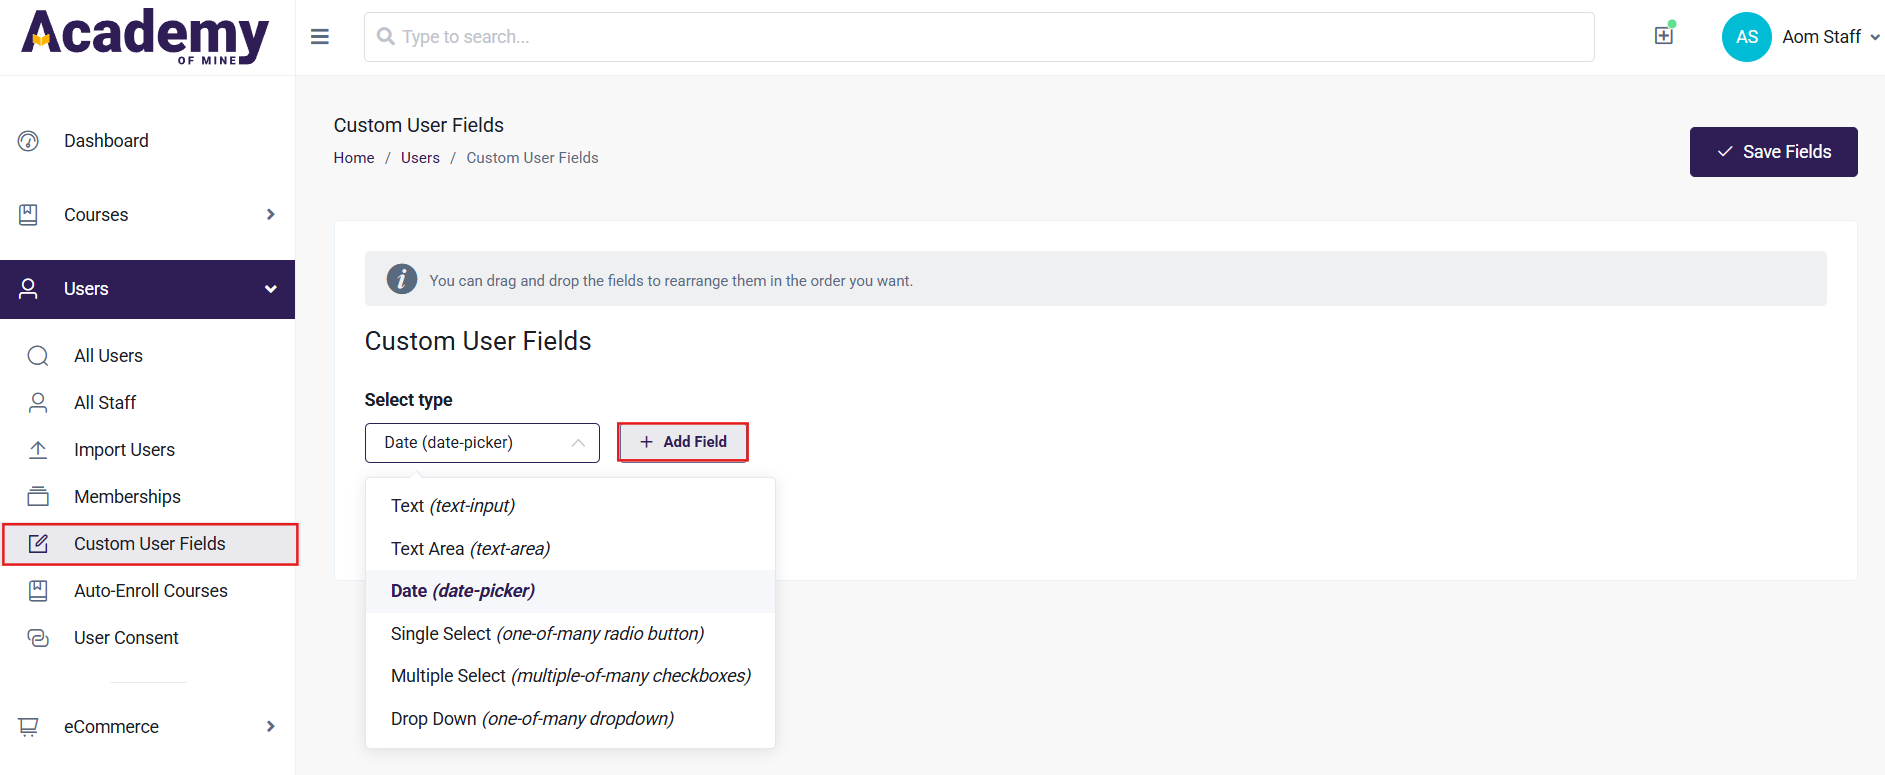
- From the Admin Dashboard, select Users and then Custom User Fields
- From the input dropdown menu, select what type of field you will be adding. You have the options of text, text area, date, single select, multiple select and dropdown. Then click Add Field.
-
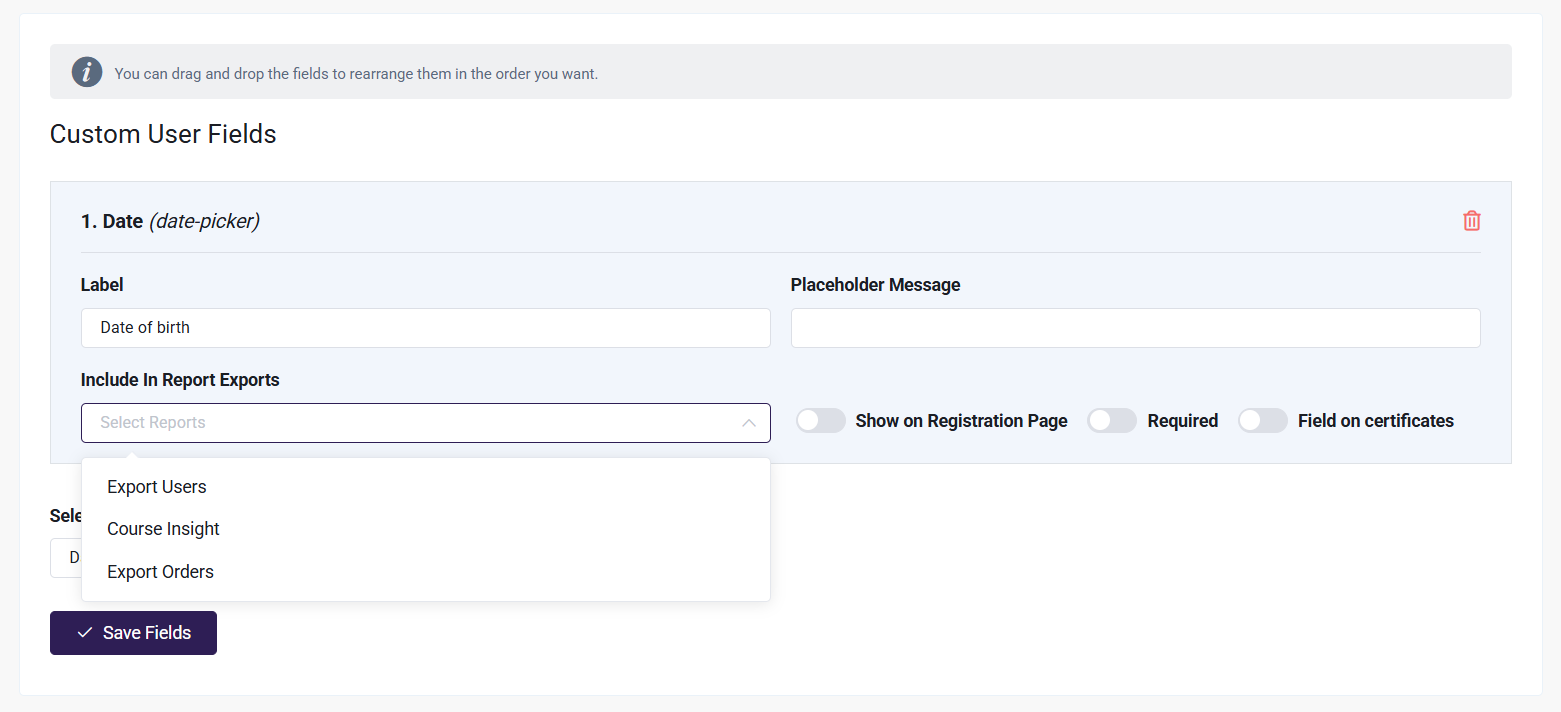
Once you have added the type of field, you'll fill in the information that you're wanting to collect. Add the Label (which will describe what you're wanting the user to enter).
- In some cases such as text and text area, you'll have the ability to add a placeholder message.
- For dropdown, single and multiple select, you'll be required to enter the various options that the user will choose from. Click +Add option to add various options until you're done
-
For each field added, you will have a few additional choices. By default, the added fields will display on the Edit Profile view on a user's profile. Both the users and the admin will be able to fill out the fields. The additional options are:
- If the field needs to show on the self-registration page (that users fill out when creating an account on your platform), If it will be a required field.
- If it will be a dynamic field on the Certificate Template creation page (and will then fill in the user's information when a certificate is generated for them)
- If it needs to be included as an additional column in the export of the Export Users report, Course Insight report or Export Orders Report. You can select more then one report.
- You can drag and drop the various fields to reorganize them. Click the trashcan icon to delete fields, though note that you won't be able to delete fields that already have user data entered. Please contact support at [email protected] if you need assistance removing a field that has user data.
- Once you have added all the necessary fields, click Save Fields to save your changes.
Where to View Custom User Fields
Once you have added the additional custom fields, you'll be able to view this information in a few different places in the platform:
- User profile: You will see the newly created custom fields below the ones already required to add a user. Please note that by default all fields will be visible in the View Profile Page.
- Exported reports: If you've selected to include these fields in certain reports when adding the Custom User Field by tagging the report under the "Include in Report Exports" field, then they will be added as an additional column to your exported report or exported user list. You will have the option to include these custom fields in the Export Users, Course Insight Report, and Export Orders Report. Learn more about reports here.
- Learner View: Learners will also be able to view and fill out these Custom User Fields when visiting their "My Account" page via the learner dashboard.
Learner Experience
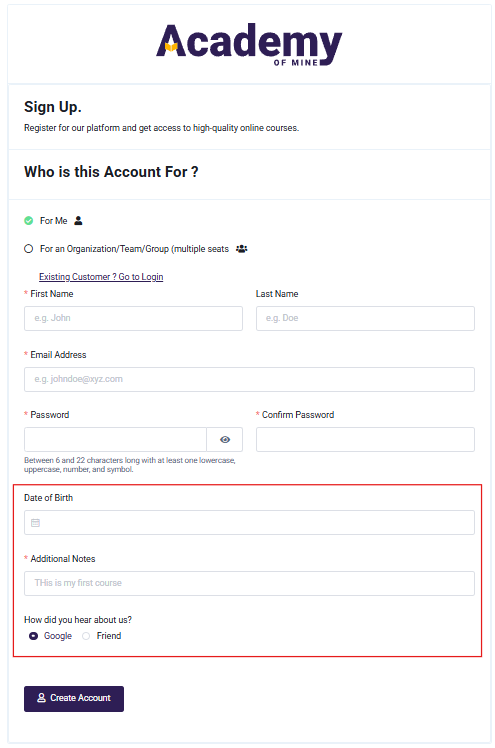
As mentioned above, the learner will see the custom user fields when they self-register (if the admin has opted to make the field(s) visible on the registration page in settings), like so:
They will also be able to view and edit these Custom User Fields when visiting their "My Account" page via the learner dashboard:
