Other Automated Emails
Automated Other emails notify users about important platform announcements they should review. Announcements are an efficient way to share updates with all users or a selected group. If a user doesn’t log in to view the announcement directly, the automated email acts as a helpful reminder. This document explains how to enable and customize these automated emails.
For more information on automated emails, please review our guide: Introduction to Automated Emails
For more information on announcements, please review our guide: Platform Announcements
Others Email Type
There is one type of automated email in the Others section, the announcement email. This email is triggered whenever a new announcement is made on the platform. The email will be sent only to the users who have been selected to view the announcement (when the announcement itself was created).
Enabling & Editing Other Emails
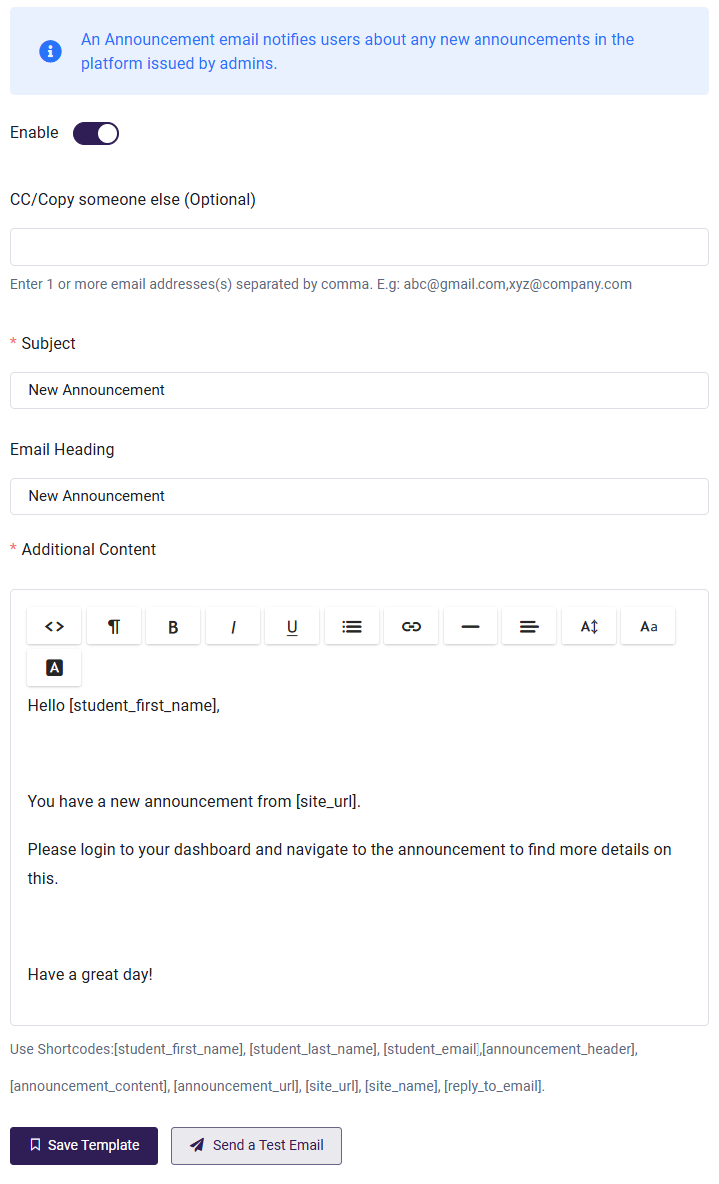
As with the other automated email, the Announcement Email must be enabled before it will be sent automatically. The enabled button must be toggled on for both Primary Recipient for these emails to be sent.
- From the Admin Dashboard, select Settings, then Email
- Choose the Others tab across the top
- The enabled button must be toggled on
- Now, let's look at recipients. There are two different types of recipients who can be named to an automated Account email: the Primary Recipient, and and CC'd Recipients.
- Primary Recipients: For this email, the primary recipients are the students/users on the platform.
- CC'd Recipients: You can also CC other email addresses to receive these messages if you wish. The addresses can be added to the CC field, separated by commas.
- Subject: You can edit the subject line to be what you'd like
- Heading: You can also adjust the email heading
- Additional Content: This is the main body of the email and you can change this template as well. As mentioned above, you will see shortcodes at the bottom, which are dynamic fields that will fill with the appropriate information. Simply copy them into your email body if you'd like to use them.
- Once you have made all necessary changes, click Save Template, or send yourself a test email
User Experience of Emails
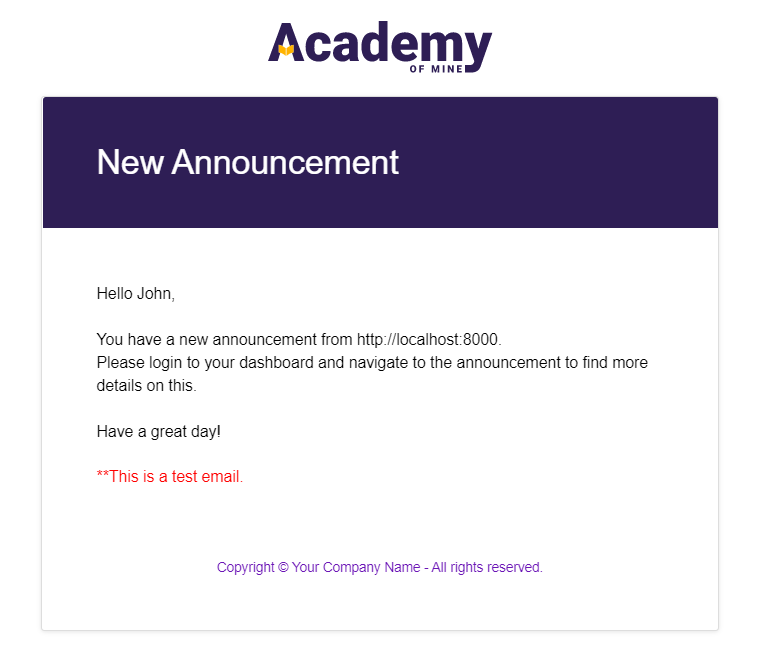
When editing the template of any of the emails above, you will of course see the template that you are typing into. You can send a test email to see what the email will look like to the end user receiving it, though here is an example of what the template looks like, and what the end email looks like. As you can see the template words are transferred over, and the shortcode (dynamic fields) are filled in with the correct information.
As mentioned above, you are free to customize this in any way you wish, including using shortcodes. The most relevant shortcodes for announcement emails that you may want to include are [announcement_header], [announcement_content] and [announcement_url].
Here is what a user will see in their inbox:
FAQ's
-
Who receives announcement emails?
Announcement emails are sent only to the users selected to view the announcement when it is created. Additional recipients can be CC'd using the CC field.
-
How can I customize announcement emails?
You can edit the subject, heading, and body of the email template. Shortcodes such as
[announcement_header],[announcement_content], and[announcement_url]can be included to dynamically populate the email with specific announcement details.