Using a Custom Font in Your LMS
Academy of Mine's front- and backend use the "Roboto,sans-serif" font by default. If you wish to use a custom font instead, you've come to the right place! This tutorial will walk you through the three steps to get everything set up. Keep that in mind that changing the font here will apply globally across the platform.
Note: To add a Custom Font in the platform, it must be stored on a URL that is available publicly, like Google Fonts for example.
Step 1: Add the Base CSS Code for Importing Fonts
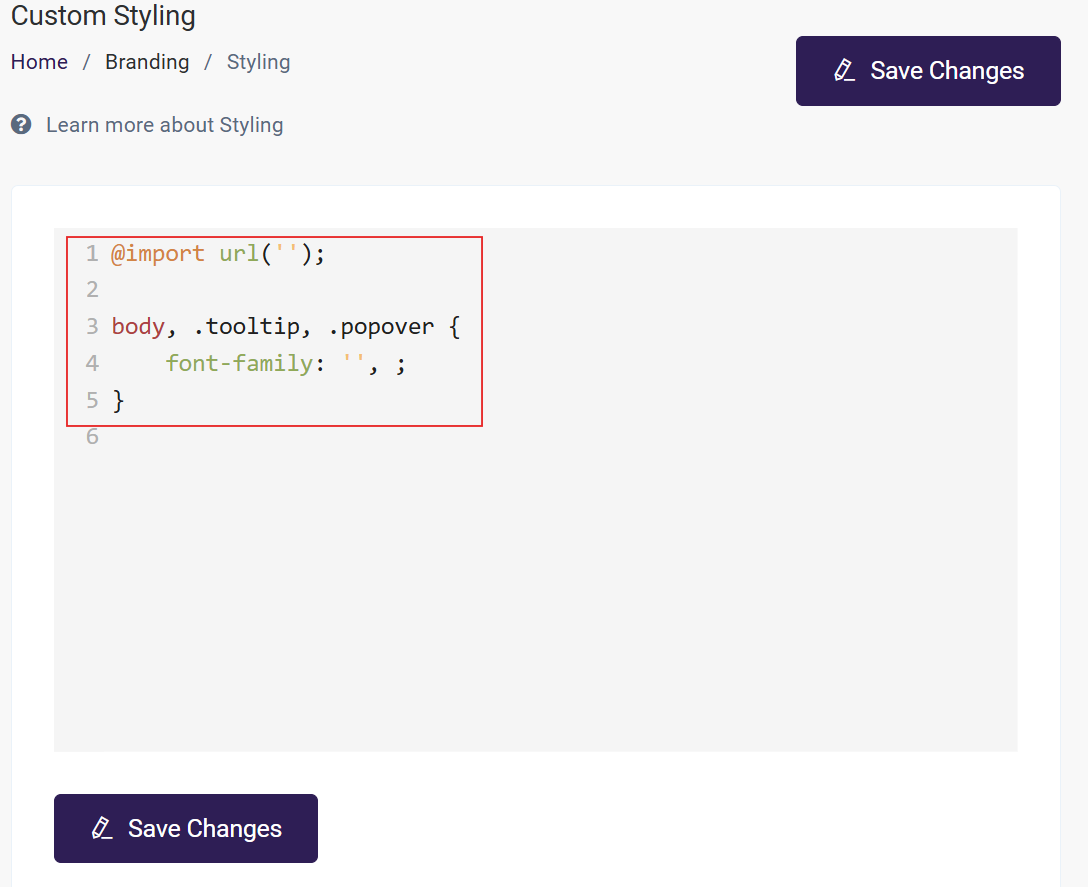
- From the Admin Dashboard, choose Branding, and then Custom Styling.
- Once on the Custom Styling page, add the following CSS Code in the textbox.
@import url('');

body, .tooltip, .popover {
	font-family: '', ;
}
The result should look something like this.
Step 2: Get the Custom Font URL
Now we're ready to add the font URL and then choose the font family from it. As noted above, to add a Custom Font in the platform, it must be stored on a URL that is available publicly. For example, Google Fonts are typically stored in a URL such as: https://fonts.googleapis.com/css2?family=Open+Sans
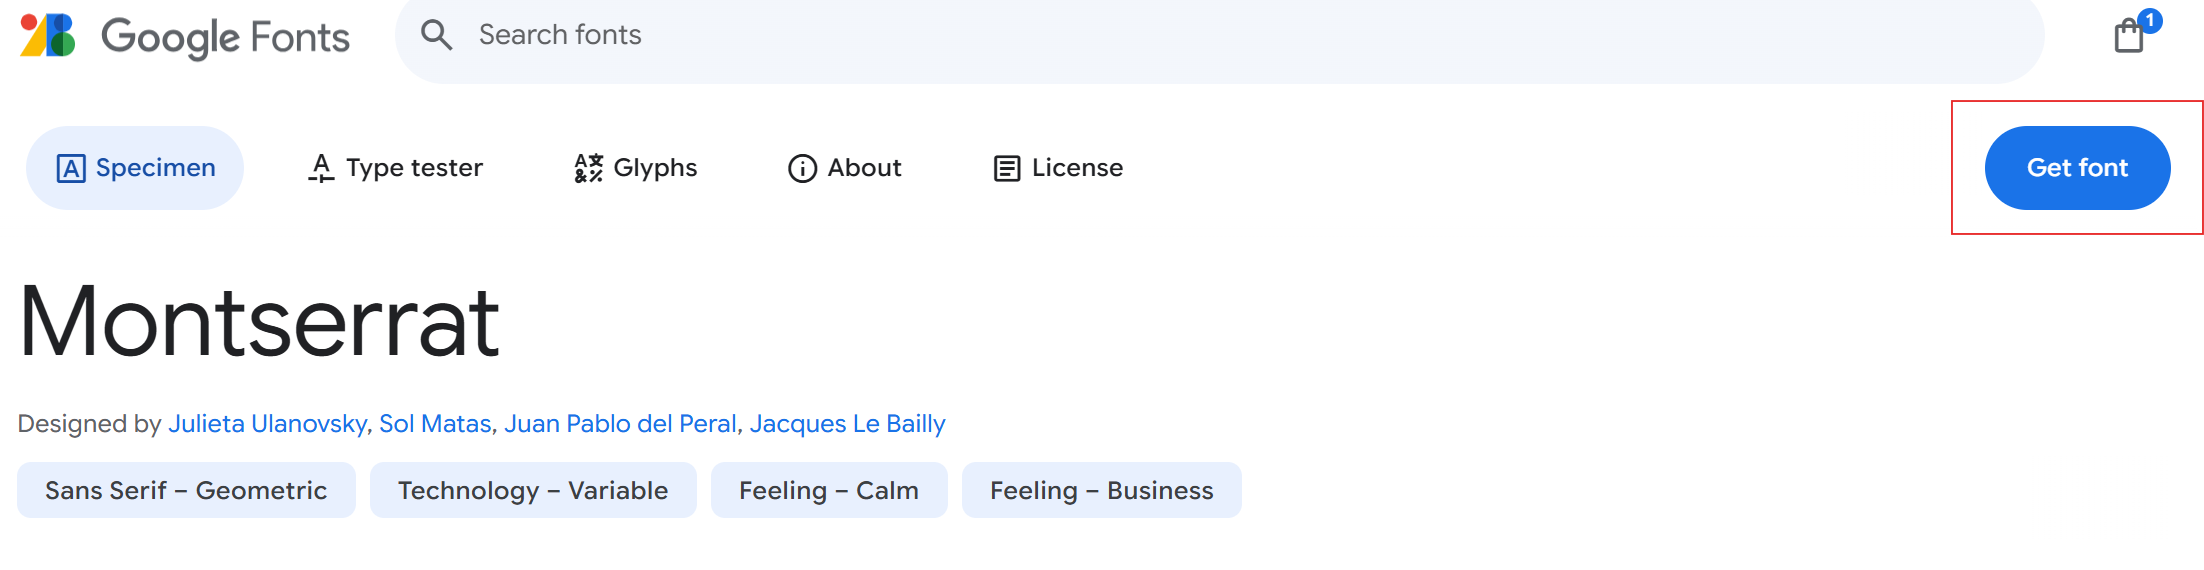
In this example, we will be using the "Montserrat" font hosted on Google Fonts, since that is a popular choice. This tutorial is applicable to any font hosted on the internet.
-
Choose a Font from Google Fonts
Visit Google Fonts.
Browse and select the font(s) you want to use.

Click on the font and customize styles (e.g., regular, bold, italic) if needed.
-
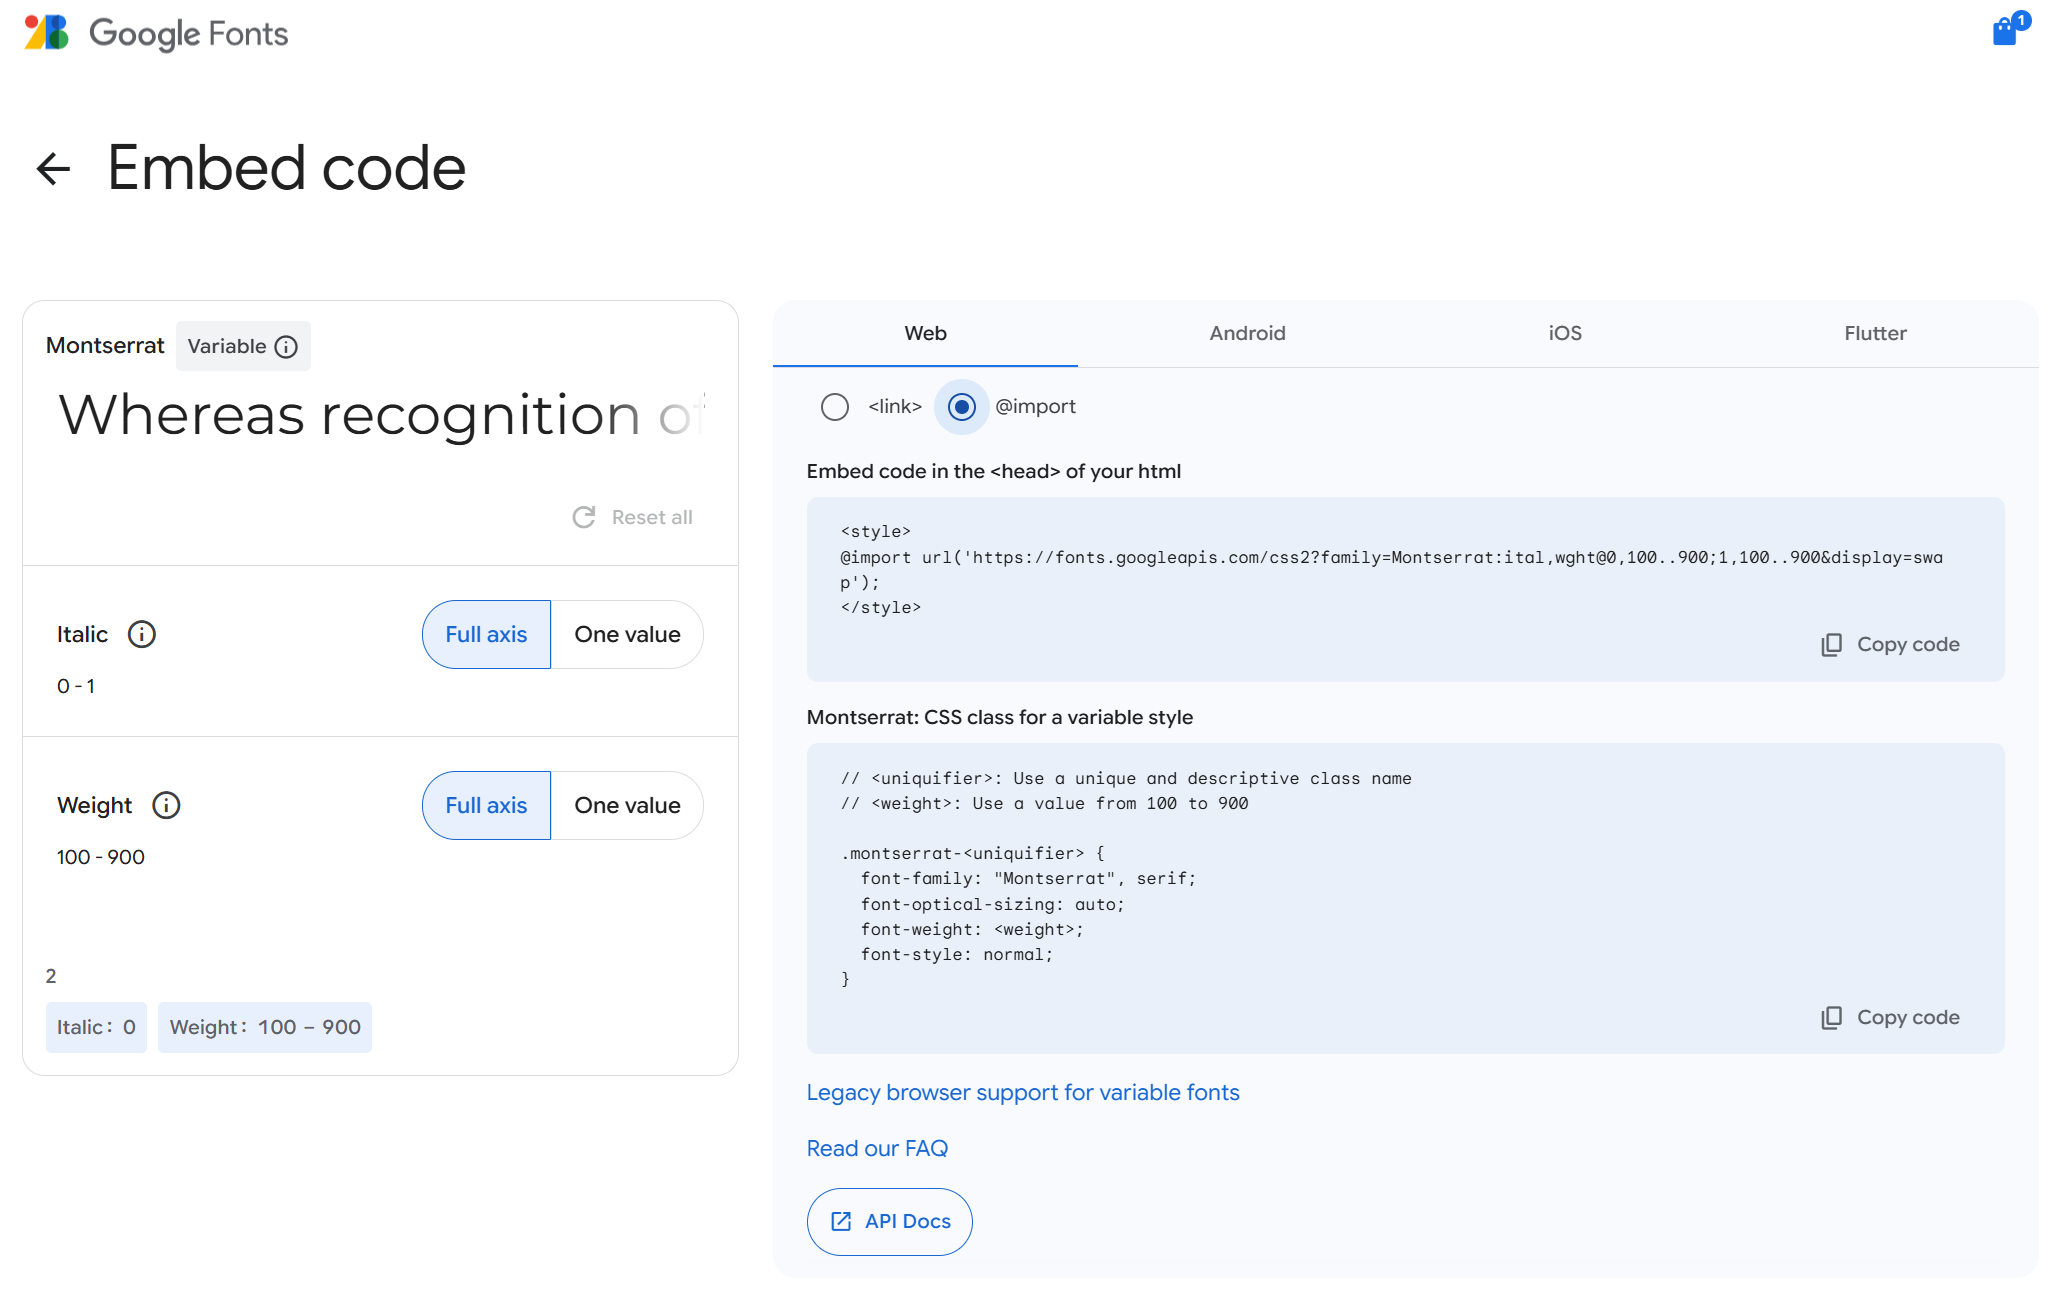
Get the Embed Code
After selecting a font, Google Fonts provides an embed link.
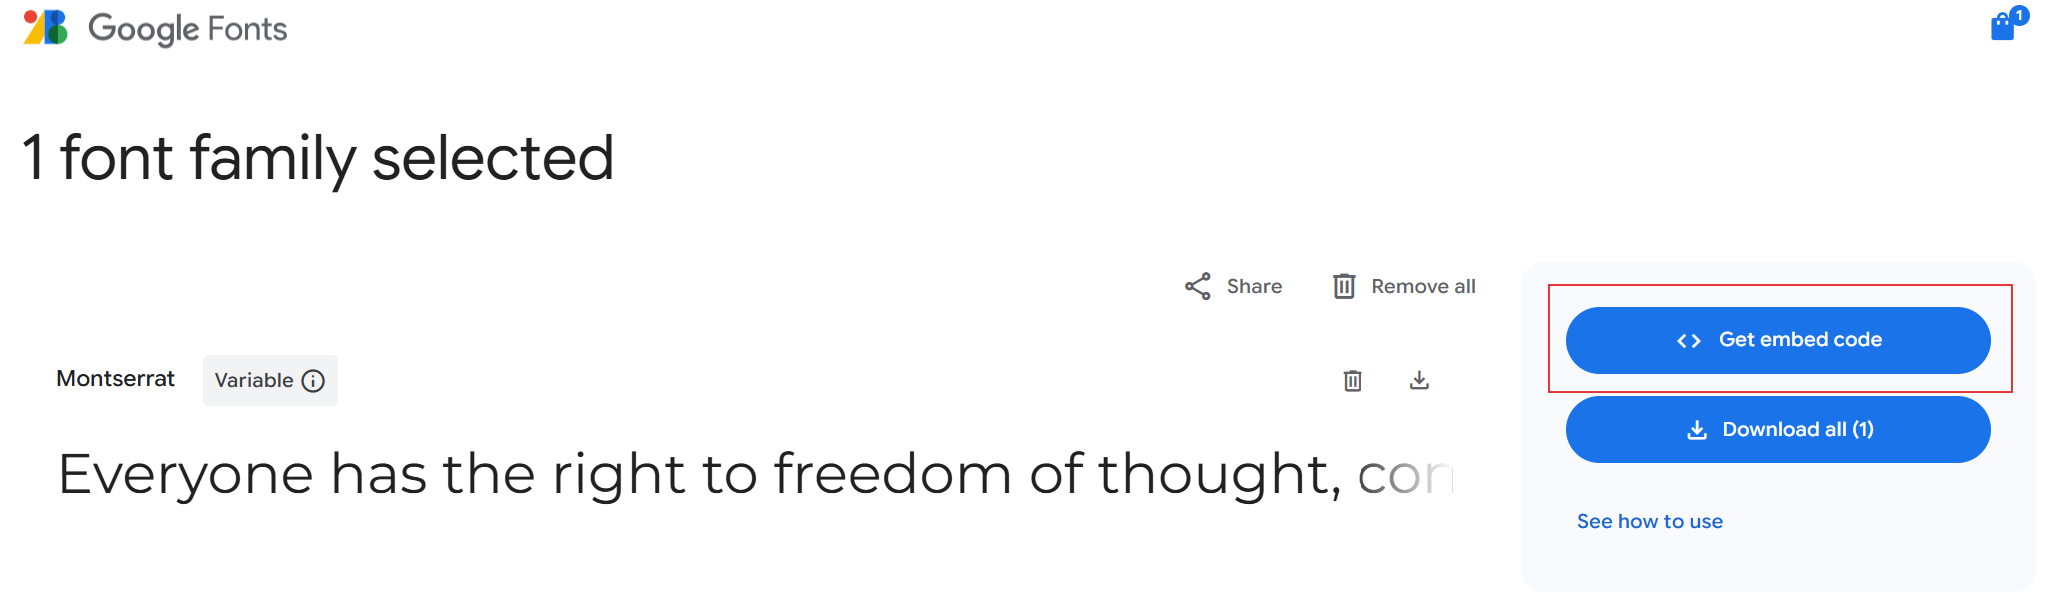
Make sure to select the import option and copy the content. Return to AOM and paste the content in the Custom Styling field.
Step 3: Saving Changes
-
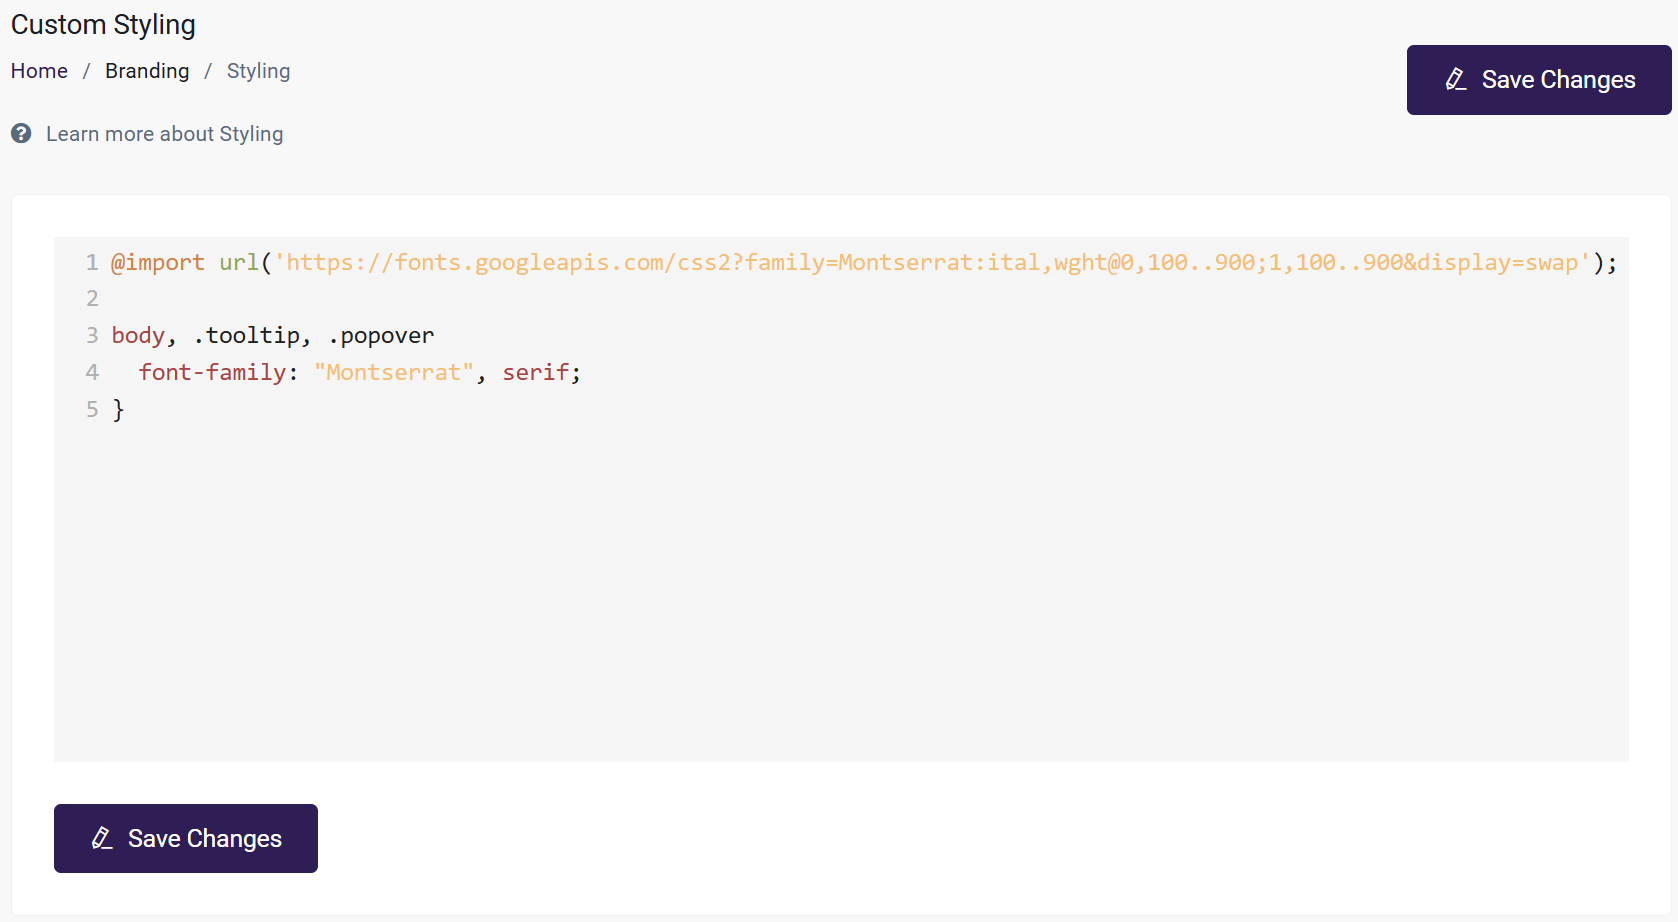
Your code should look similar to the following within AOM.
-
Be sure to click "Save Changes". Now refresh your page. The textbox should look like the following image.

-
Here is the text of the final code from this tutorial.
@import url('https://fonts.googleapis.com/css2?family=Montserrat:ital,wght@0,100..900;1,100..900&display=swap');

body, .tooltip, .popover
  font-family: "Montserrat", serif;
}
After saving changes, you should now see the new Font show up in the LMS. Note that the font change takes place globally!
Yay! We're done. If you run into any issues while performing this tutorial or have any questions, please contact our support team at [email protected].
FAQ's
- If we have .woff or .ttf files font files instead of Google Fonts, how to import that?
If you have .woff or .ttf files, they cannot be directly imported. We recommend providing the files to us, and we will make the necessary backend adjustments to complete the setup.